| | | |
 Uploading .... Uploading ....
Locations Creating A New Location - All trunking services and features get purchased against a Trunking Location in the Clearly IP trunking store. A Trunking Location is easiest defined as a PBX. Each Trunking Location gets a unique SIP Username and Password auto generated that you will use to connect your PBX with the Clearly IP Trunking service.
- Login to https://trunking.clearlyip.com . If you do not have an account with us yet see this wiki on how to setup an account.
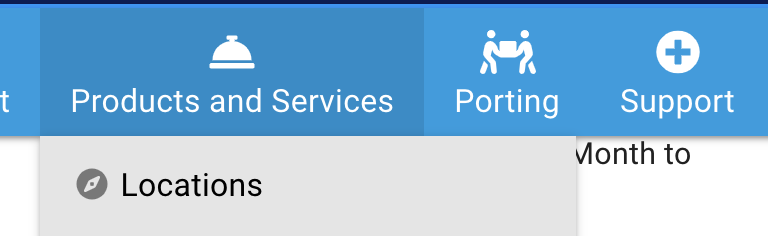
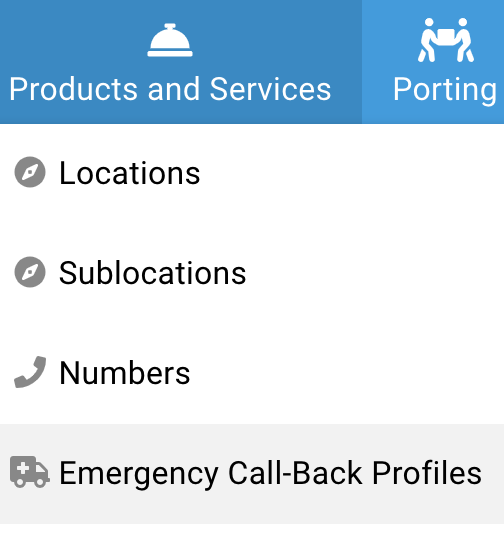
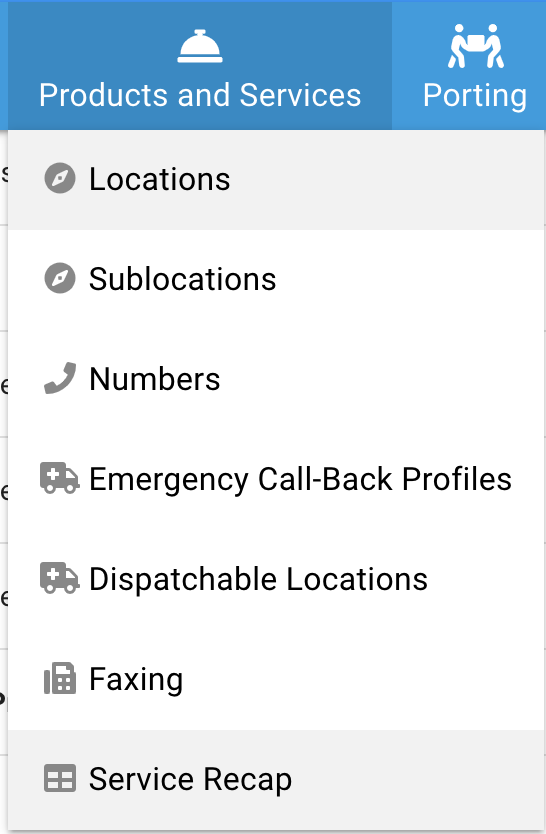
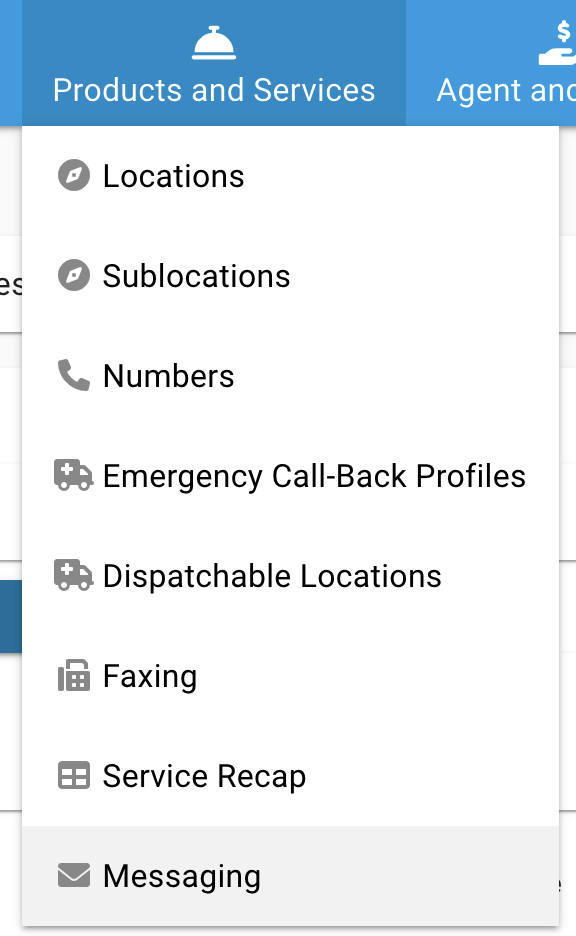
- To add a new Location and begin service on we will click on the "Product and Services" tab in the top menu and pick "Locations"
- From here we can click on the "Add A New Location" button to create a new Trunking Location
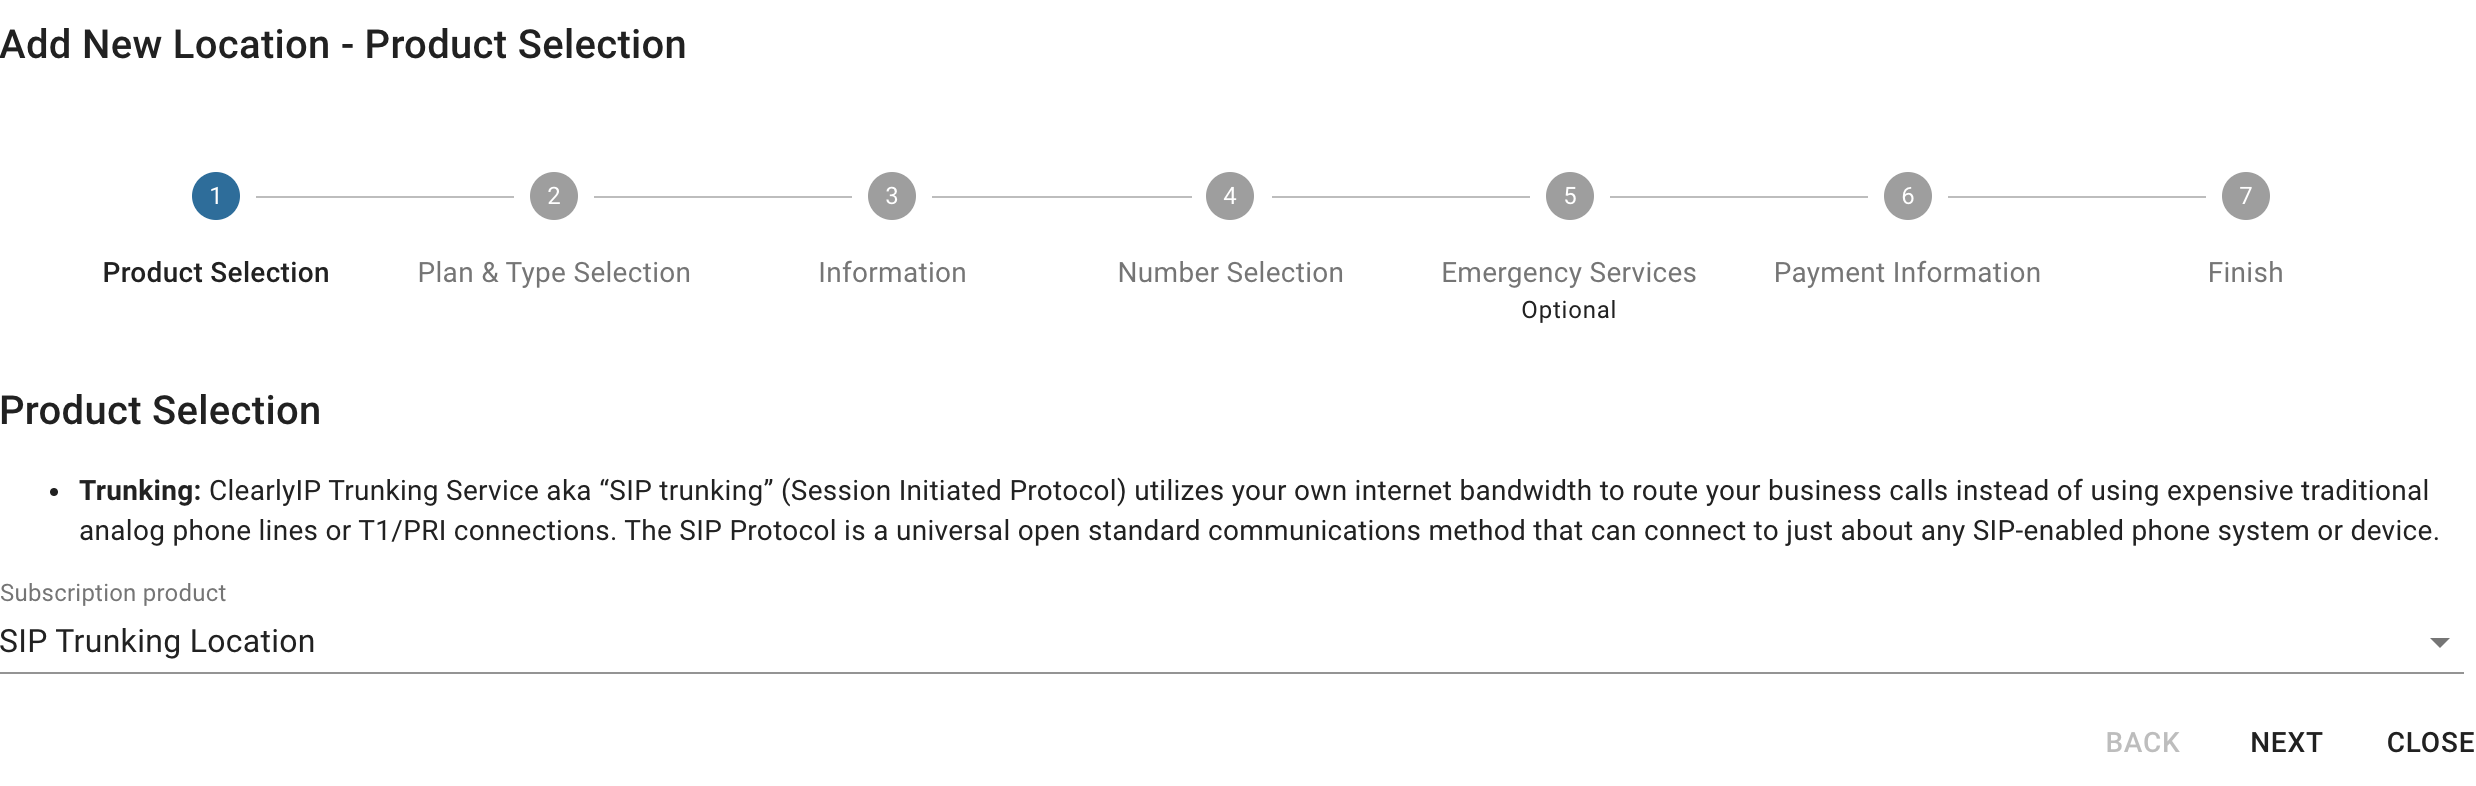
- Confirm you want to create a SIP Trunk style Location and not a Cloud PBX Location
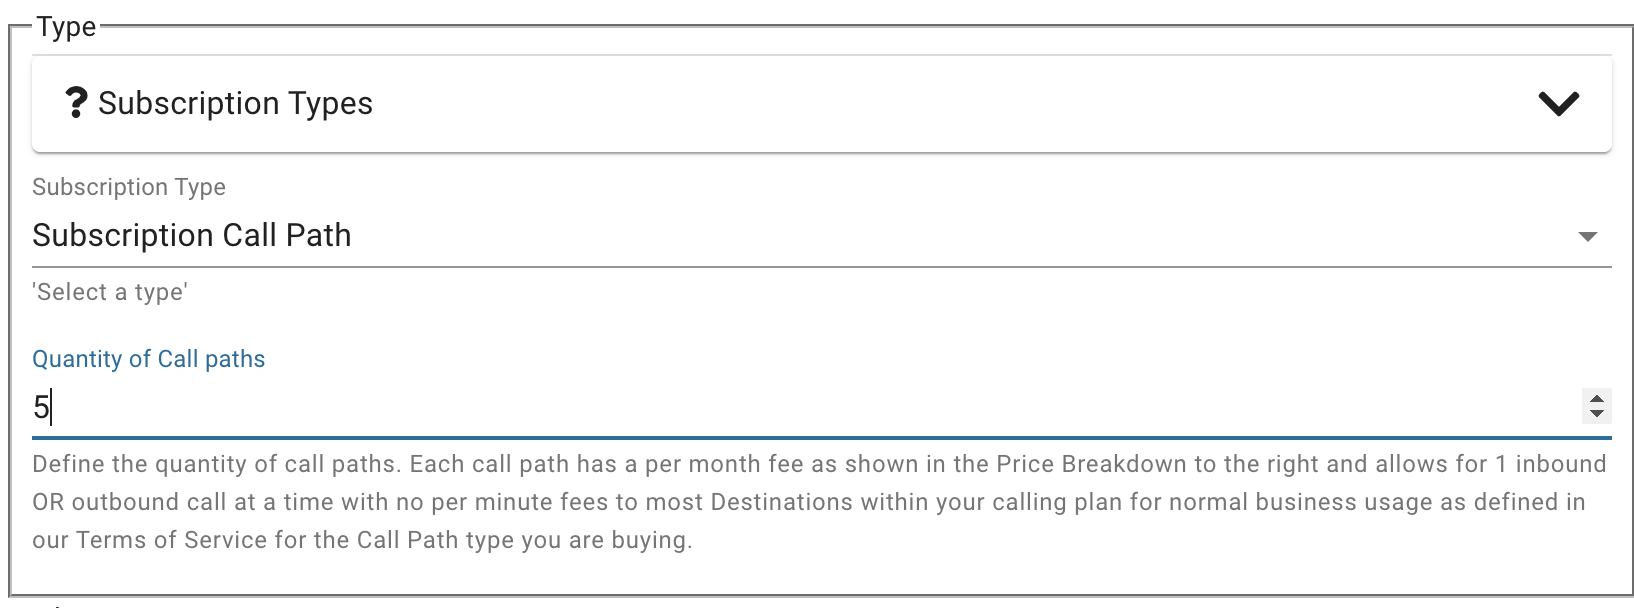
- Now we need to pick what type of Call Paths and the quantity we want to buy. We have 2 options for Call Paths. Each call path quantity you buy allows for a single inbound or outbound call.
- Call Path Subscription: Sized by the number number of simultaneous calls you need, add additional capacity as needed.
- Each call path subscription includes one concurrent inbound call to your local numbers or outbound call to the US48 and Canada with no Per Minute charges.
- Upgrade available call paths in real-time as needed
- Optional add Elastic Call Bursting to enable the automatic addition of additional call paths to burst to higher capacity when required at a per minute charge without the need to buy additional call path subscriptions for the few times you need to burst more calls than call paths you have purchased.
- One Free e911 Emergency Call-Back Profile and Dispatchable Location included with each Location with a Call Path Subscription.
- Pay Per Minute Subscription: No cost on the Call paths but you pay per minute starting at 9/10th .009 of penny per minute for inbound and outbound calls to US48 and Canada. Each Pay Per Minute Subscription call path allows for a single inbound or outbound call so add as many call paths as you want and only pay for your usage.
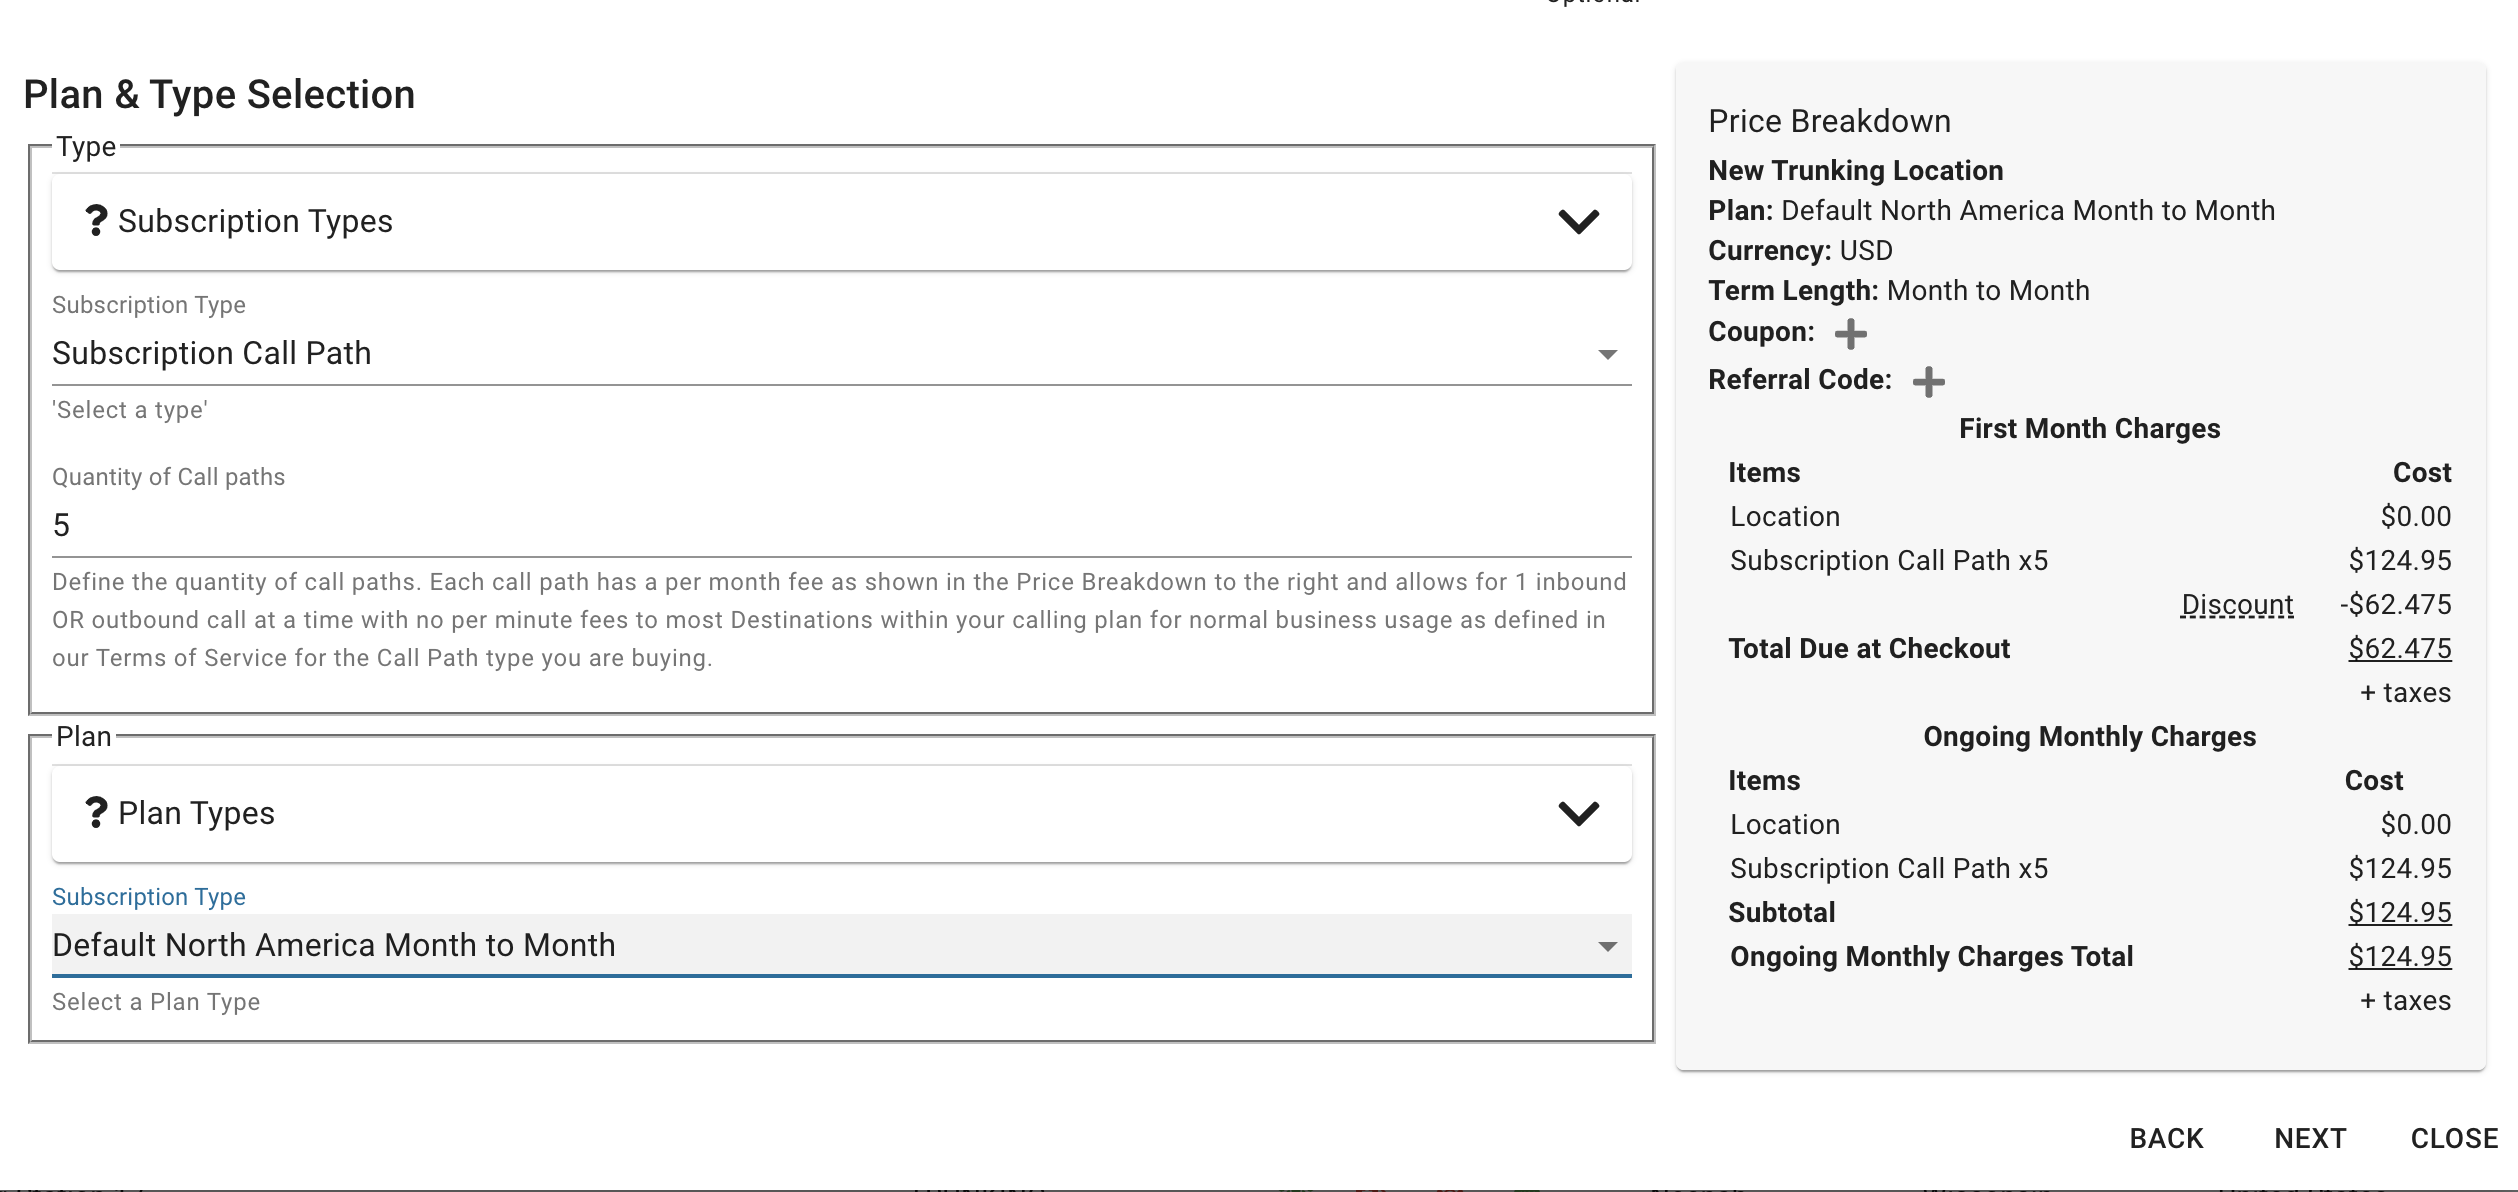
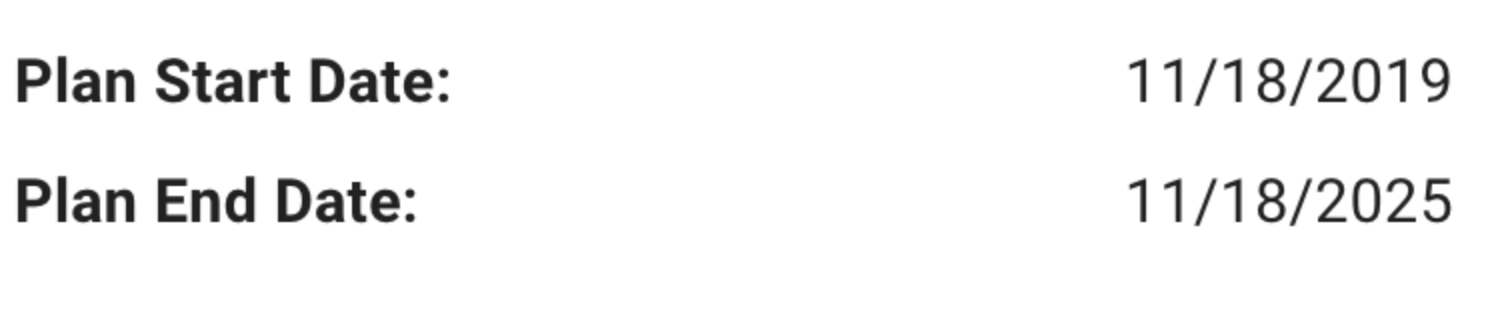
 - Next we need to "Select a Plan". A plan determines the pricing offered to you. A Month to Month plan allows you to cancel at anytime but whereas a 12 or 36 Month plan will offer you discounts and additional savings based on the commitment term selected. Once your plan is chosen, you can see (on the right) the price per Call path under each type of plan. Press the Next button to continue
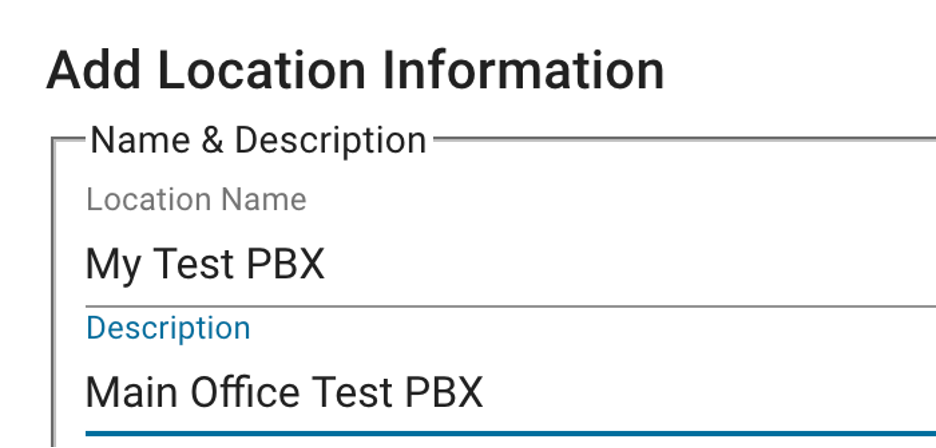
- We will now need to name this Location, and optionally provide a Description of the location
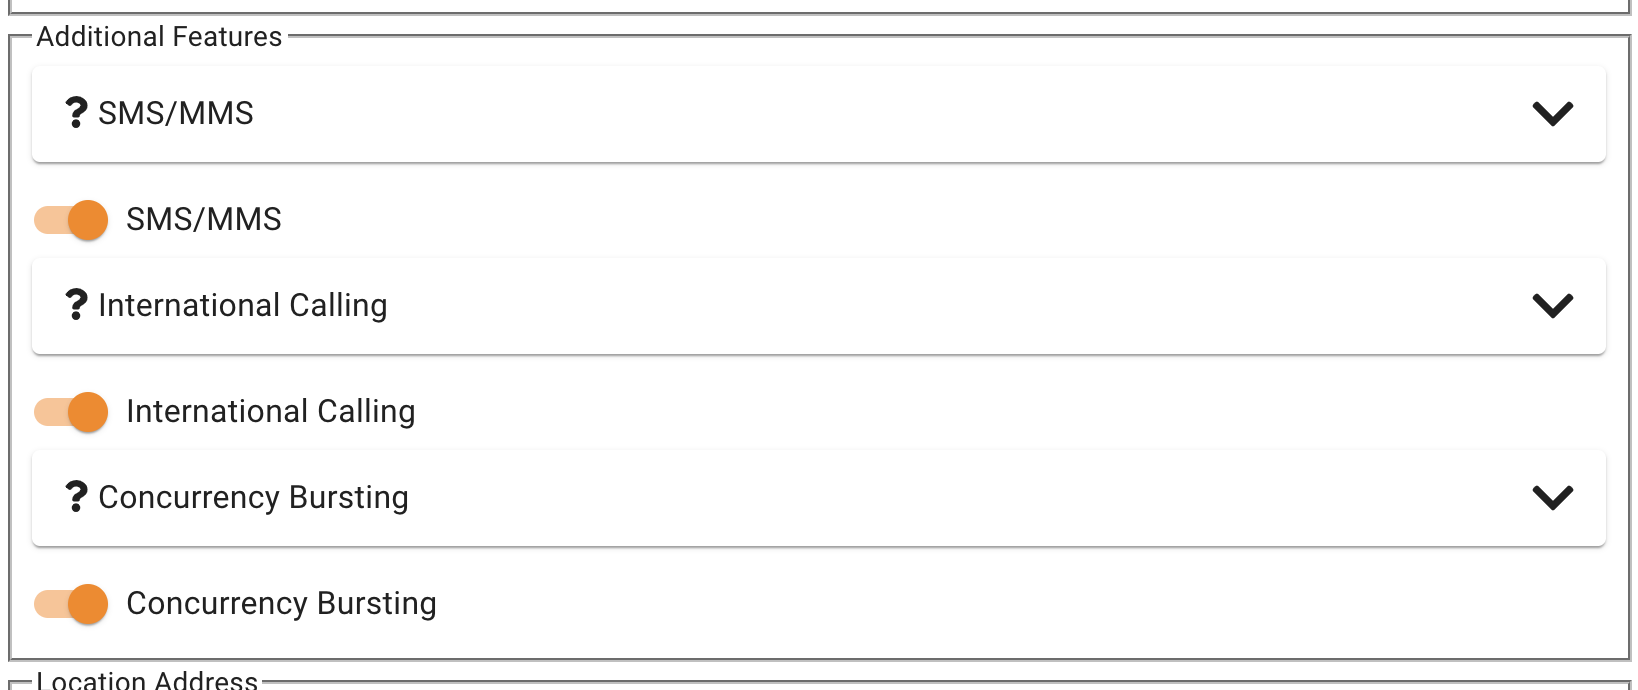
- We can now enable different Additional Features
- International Calling - Allows you to make outbound calls to non US or Canada numbers at a per minute charged as found here.
- Concurrency Bursting - Allows you to receive additional calls on DIDs purchased from Clearly IP or make outbound calls above and beyond the number of Call Paths that you purchased with Clearly IP at a per minute rate. The default per minute rate is .009 a minute as found here
- Lastly we need to provide a physical address that this PBX is servicing. This is mainly used for Taxation and Jurisdiction calculations.
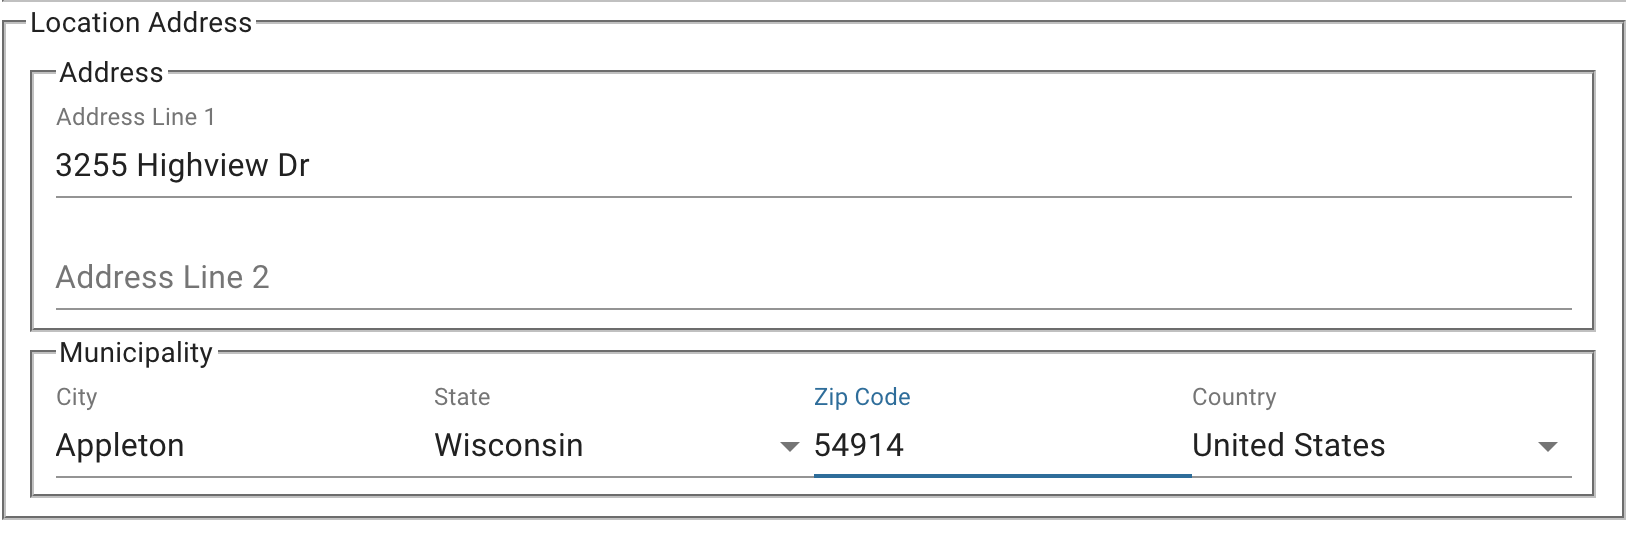
- Press the Next Button

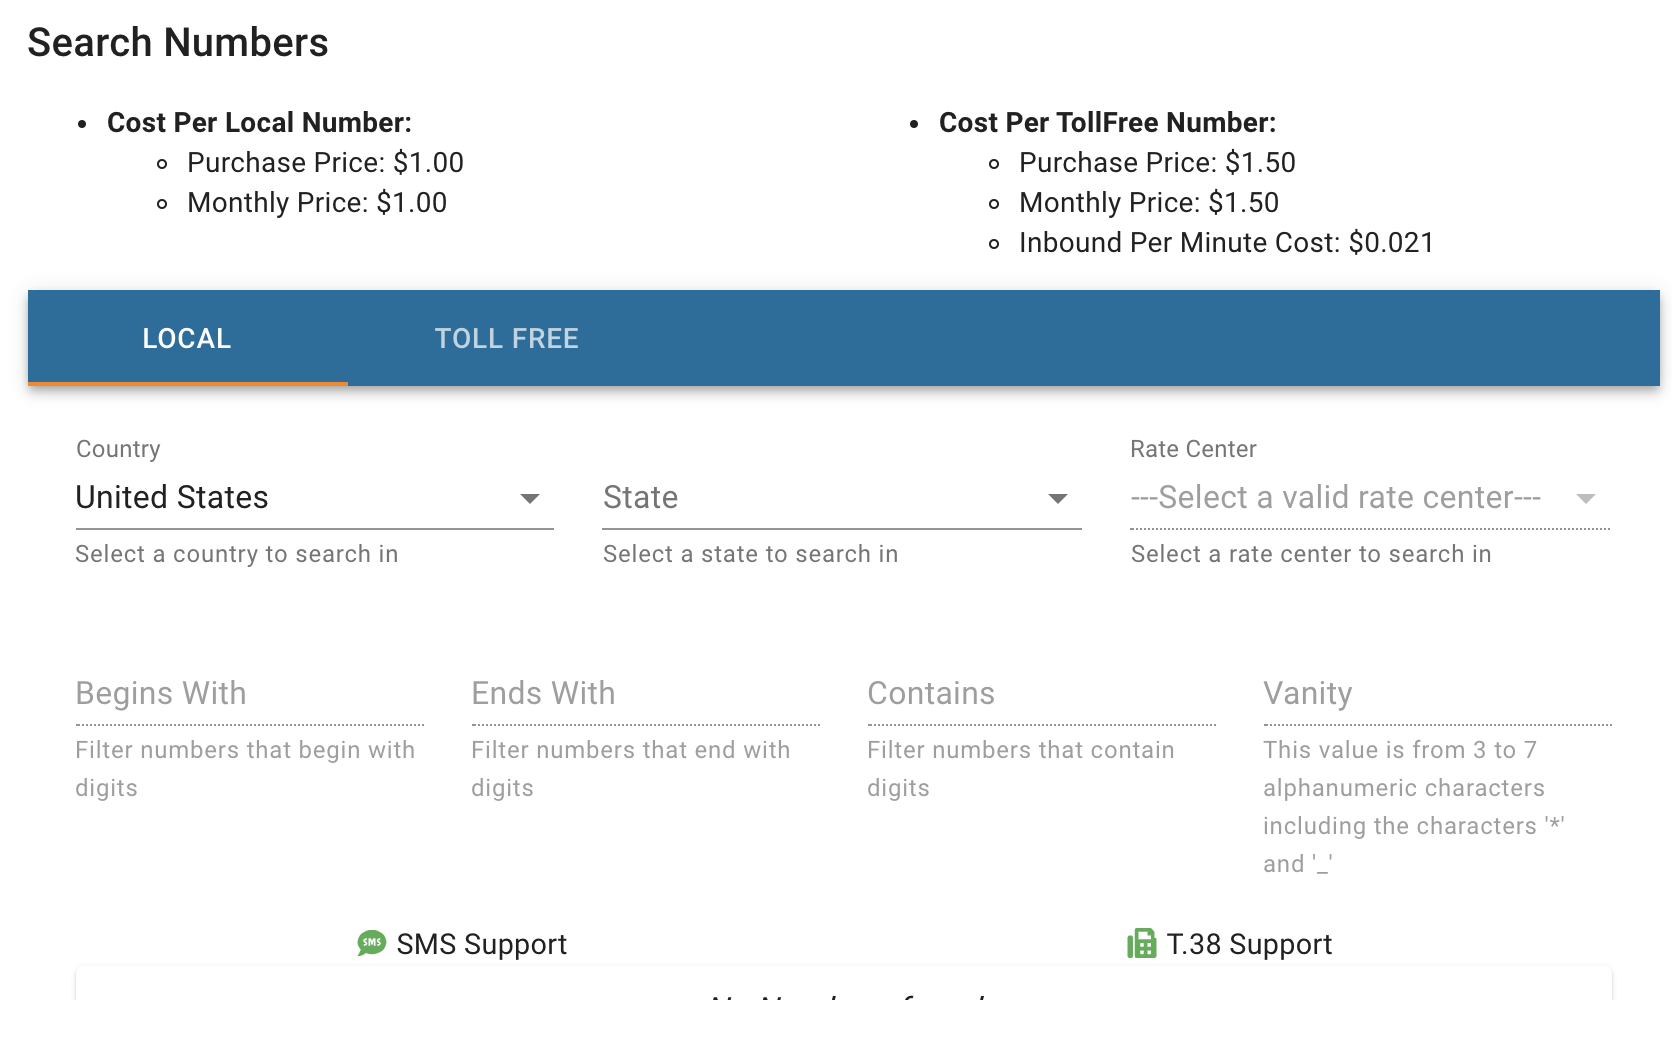
- From here we can buy North America and Toll Free Numbers (DIDs). At the top you will see what your per month rate is for the Local Numbers and for Toll Free Numbers, as well as what the per minute rate is for incoming calls received on the Toll Free Numbers you purchased.
edit the address along with the Location ID (Account Number) - Once you have picked 1 or more numbers they will be added to your cart. Click on the number will add it to your cart and grey out the number in the selector below as shown. You can then search for numbers in different rate centers and add them to your cart, and even add Toll Free Numbers.
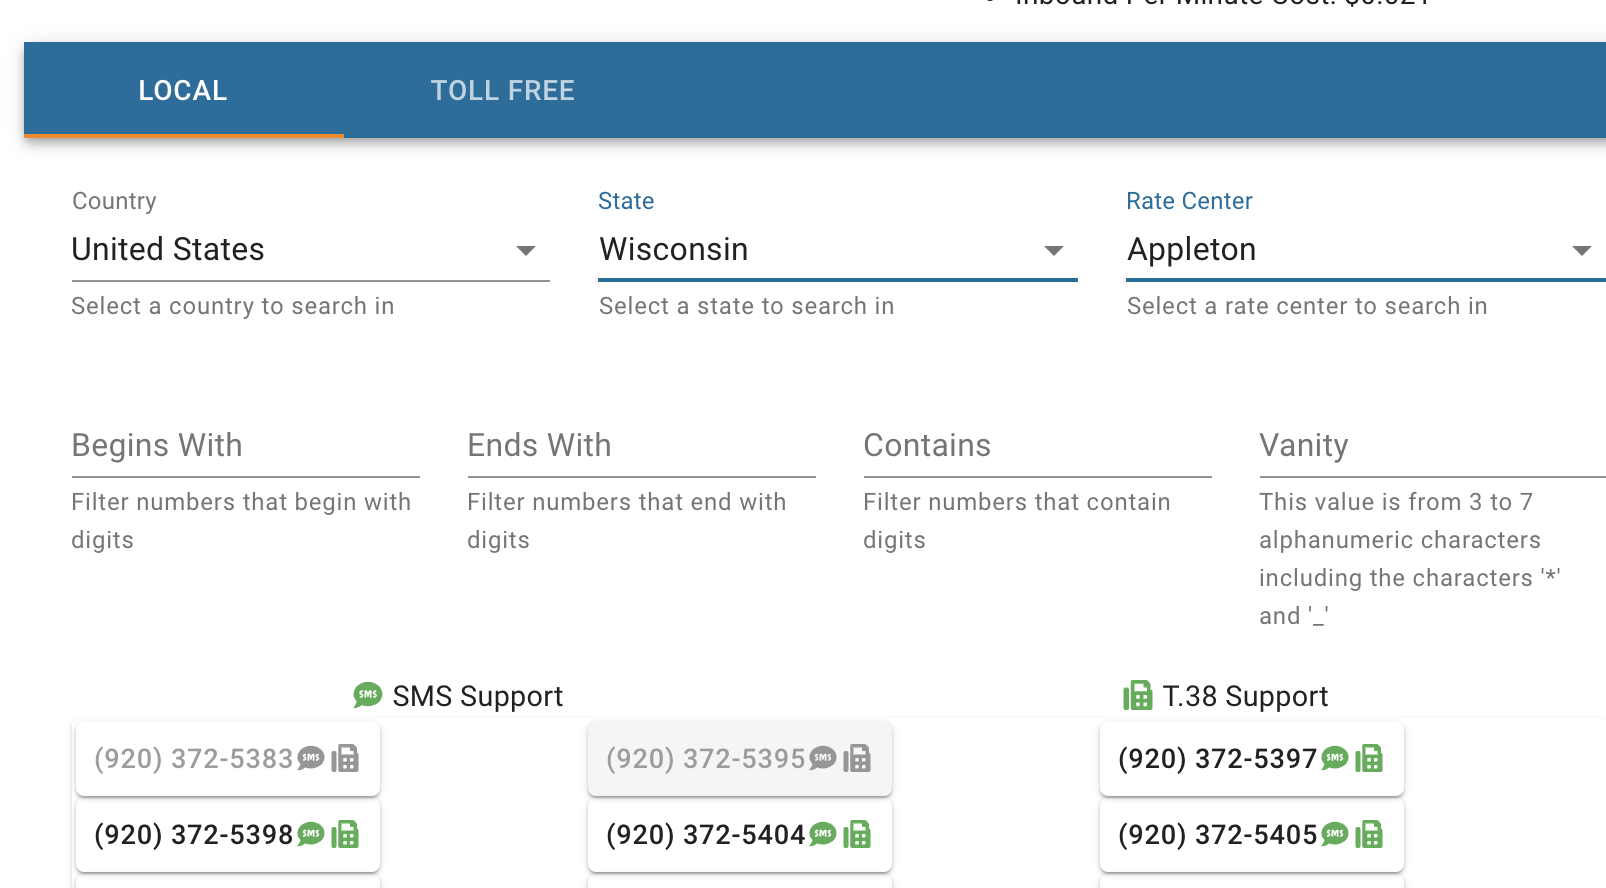
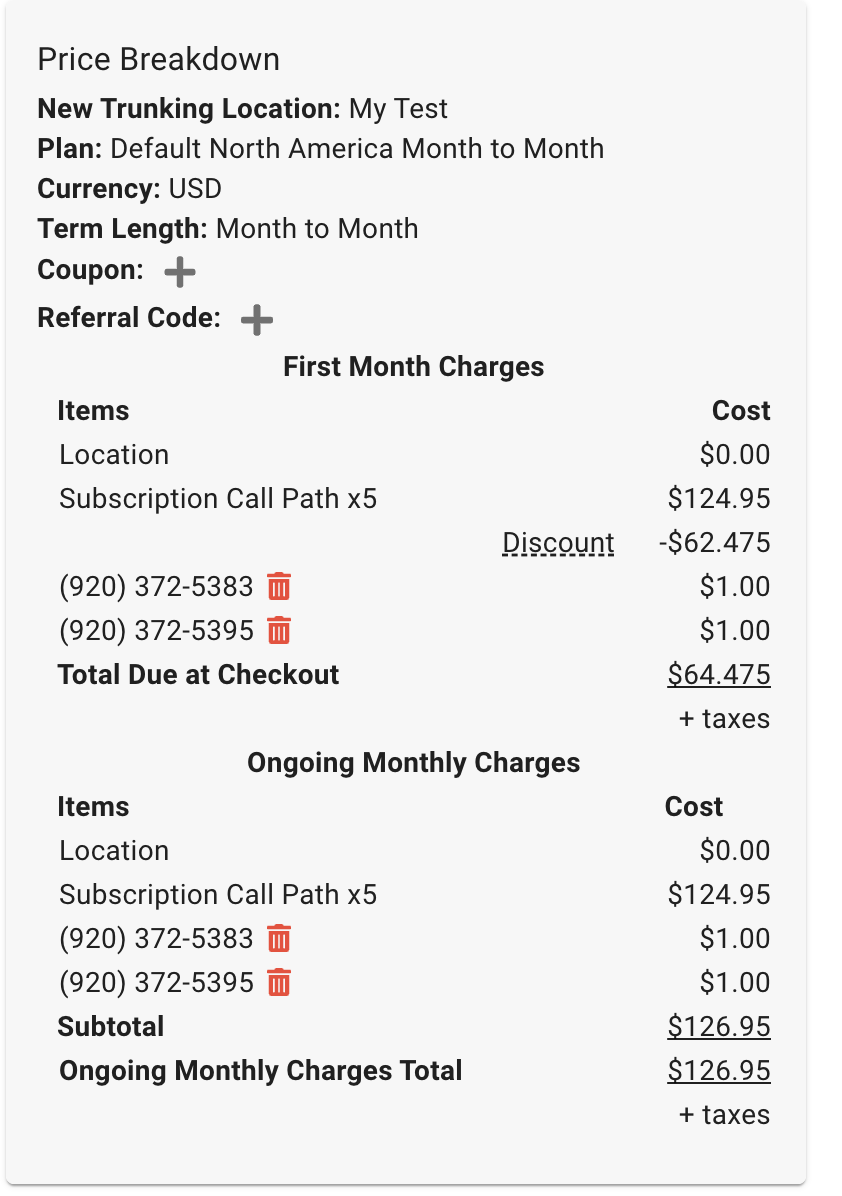
- All your numbers that you have picked will be shown in the cart on the right hand side along with what the per month price for each number is.
- Press the Next button
- You can now choose if you want to enable the ability to call 911 on your account.
- We include free of charge the ability to setup one of your DIDs with e911. Additional E911 Locations and Endpoints can be added on later for a per month fee and you can even add 911 service for DIDs not owned by Clearly IP and used on other services.

- If you do not want 911 service enabled on your account you can press the SKIP button at the bottom.

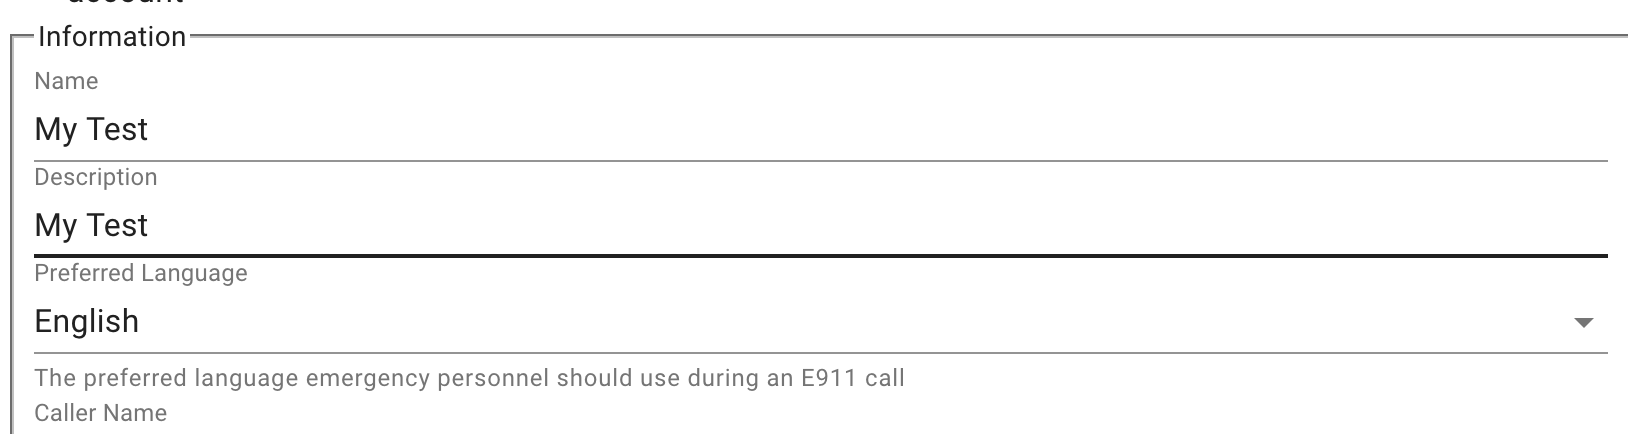
- If you want to enable Emergency Dialing service above we will need to provide and verify information on your Address for 911. We will need to provide a friendly name for your own reference on this 911 record along with what language you want to be connected to a 911 operator with.
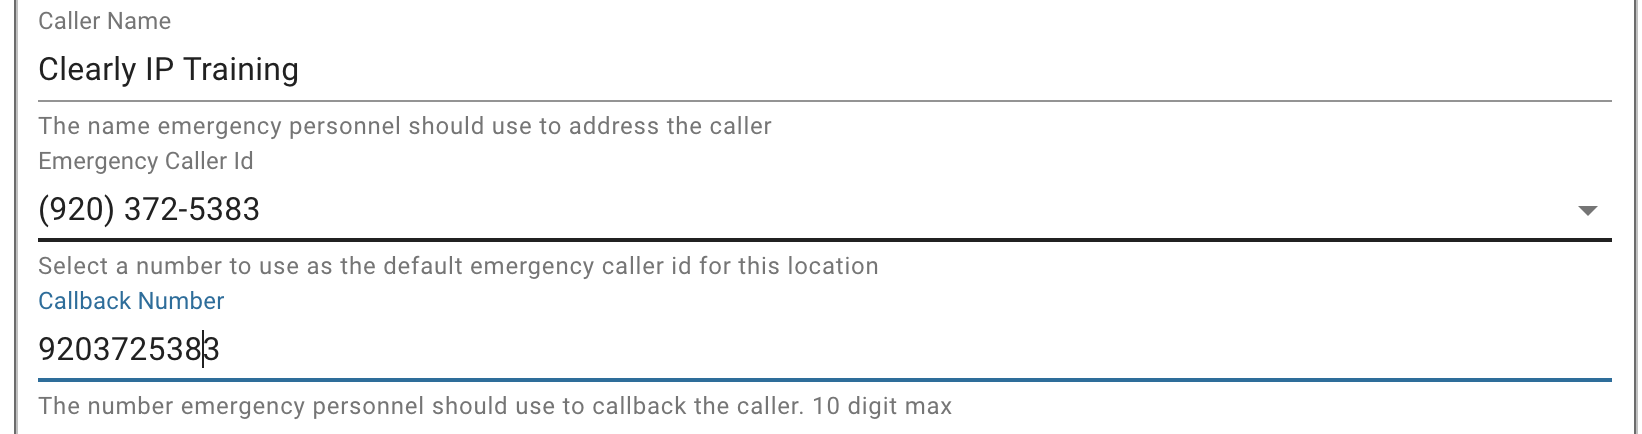
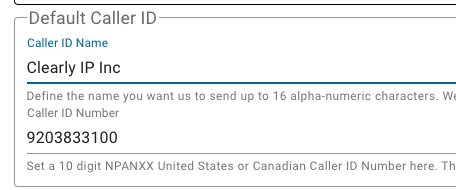
- Next section is what Caller ID Name, Call back Number and Caller ID you will use when sending a 911 call to us. The Caller ID Number you provide here is how we know to use this record for 911 versus another 911 record you may have in your account.
- Next fill in the address information for your location.
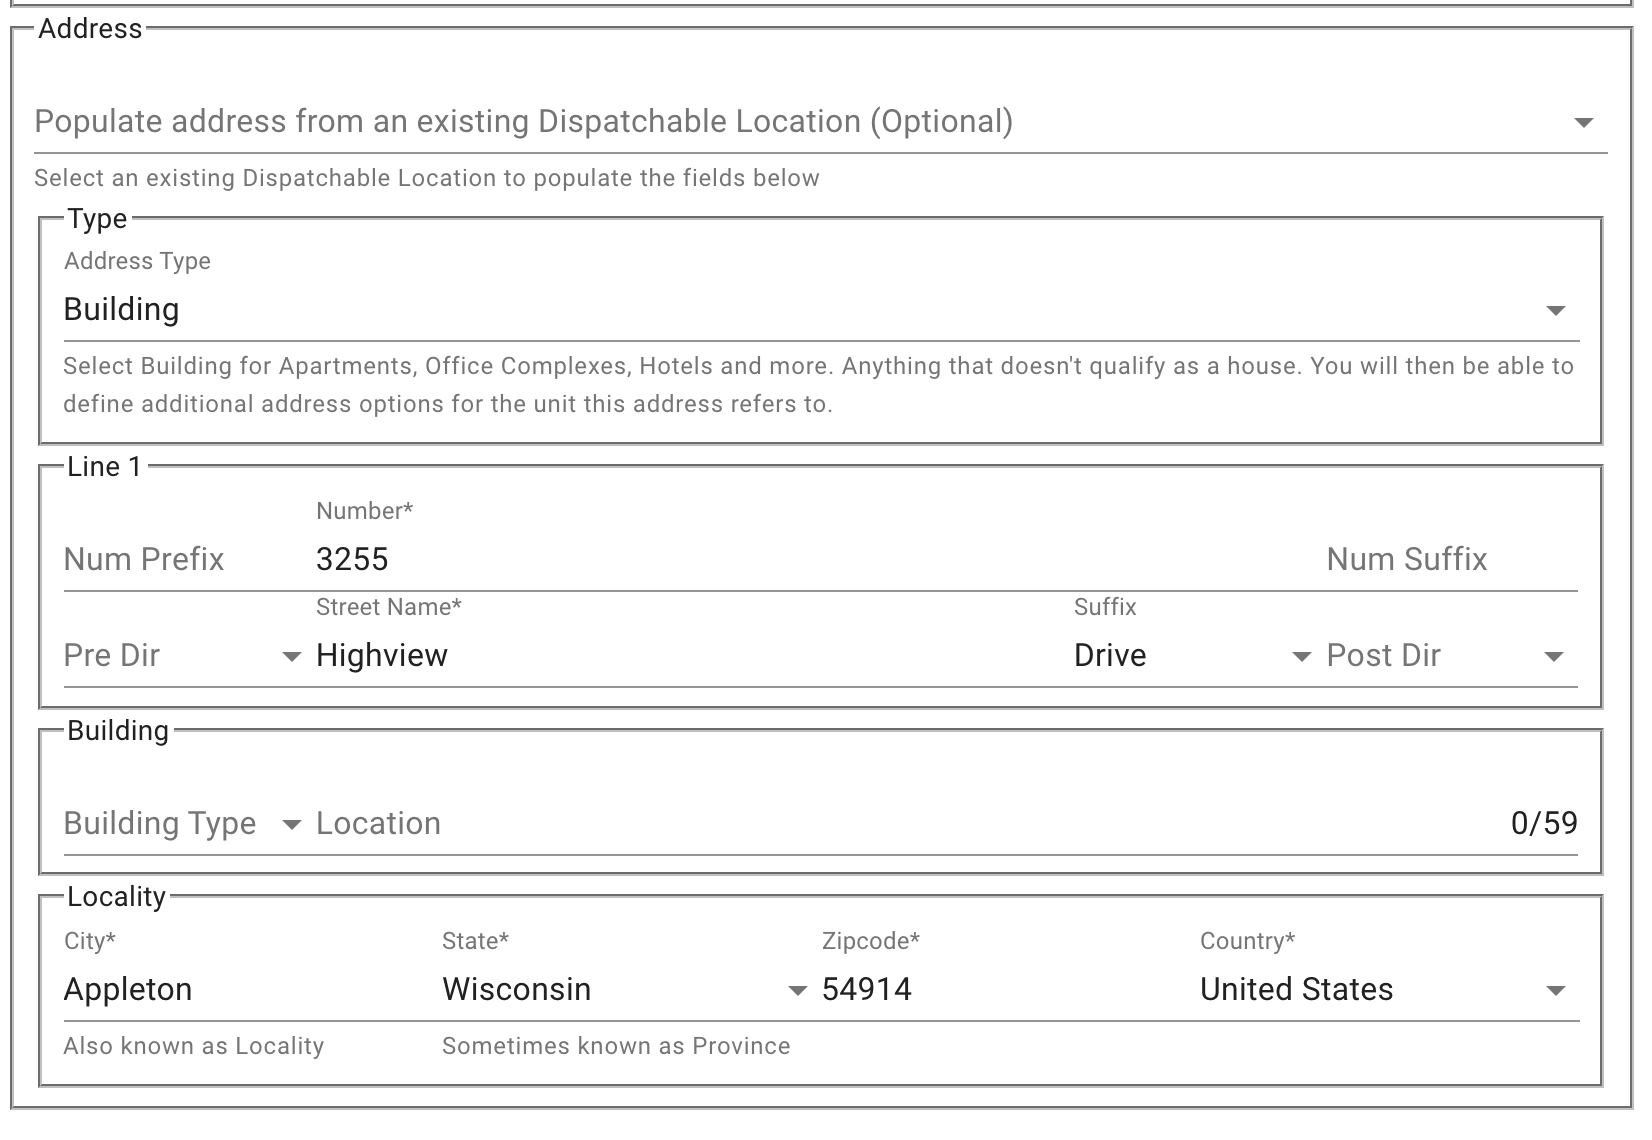
- Press the Verify button to have the system verify the information you provided matches what the local 911 center for your address has.

- If everything verifies you will get a Next button. If the verification fails you will need to fix the wrong info. If you are sure the information you have provided is correct you will need to press skip and to skip adding the 911 information at this time and open a support ticket with us to help resolve the issue and we can add the 911 information on after the fact.
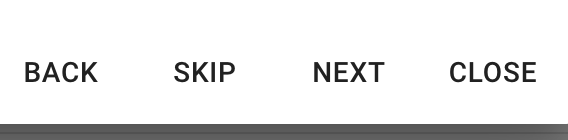
- You will now need to pick your payment method which for new customers is usually Credit Card or if setup with Free Credits from sales you will see the Credit Note here as a payment method you can use. To use a Credit Card press the "ADD NEW PAYMENT METHOD" button
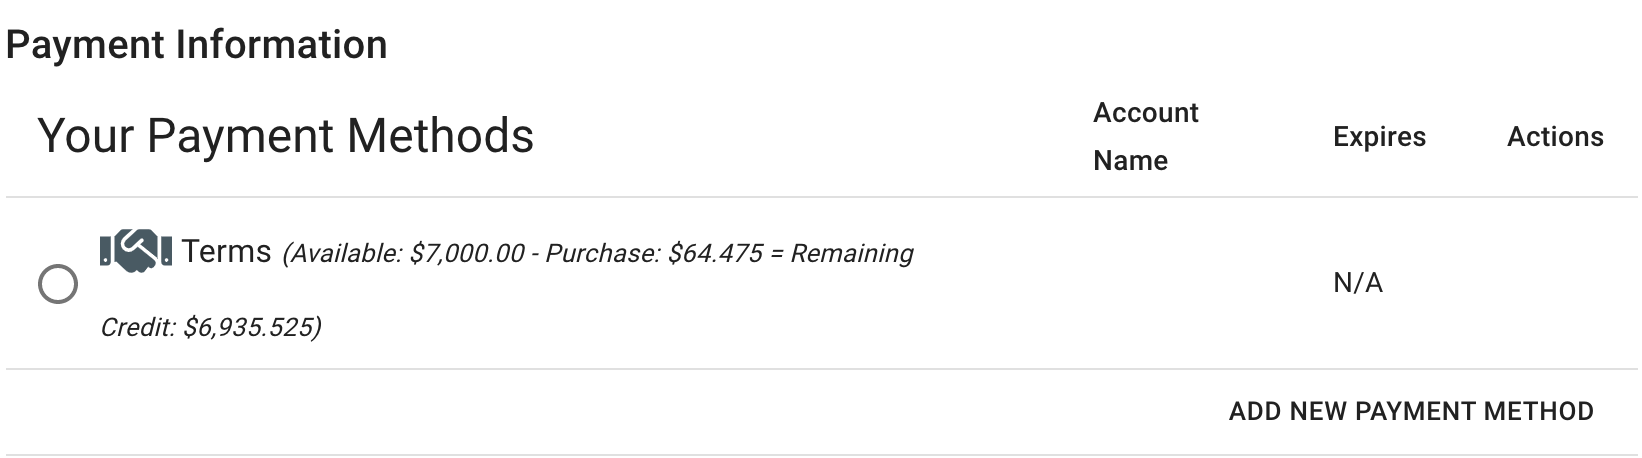
- Fill in all the Credit Card details and press Next.
- On checkout you will be prompted to Agree to the Terms of Service and press SAVE. Your order will now be submitted.
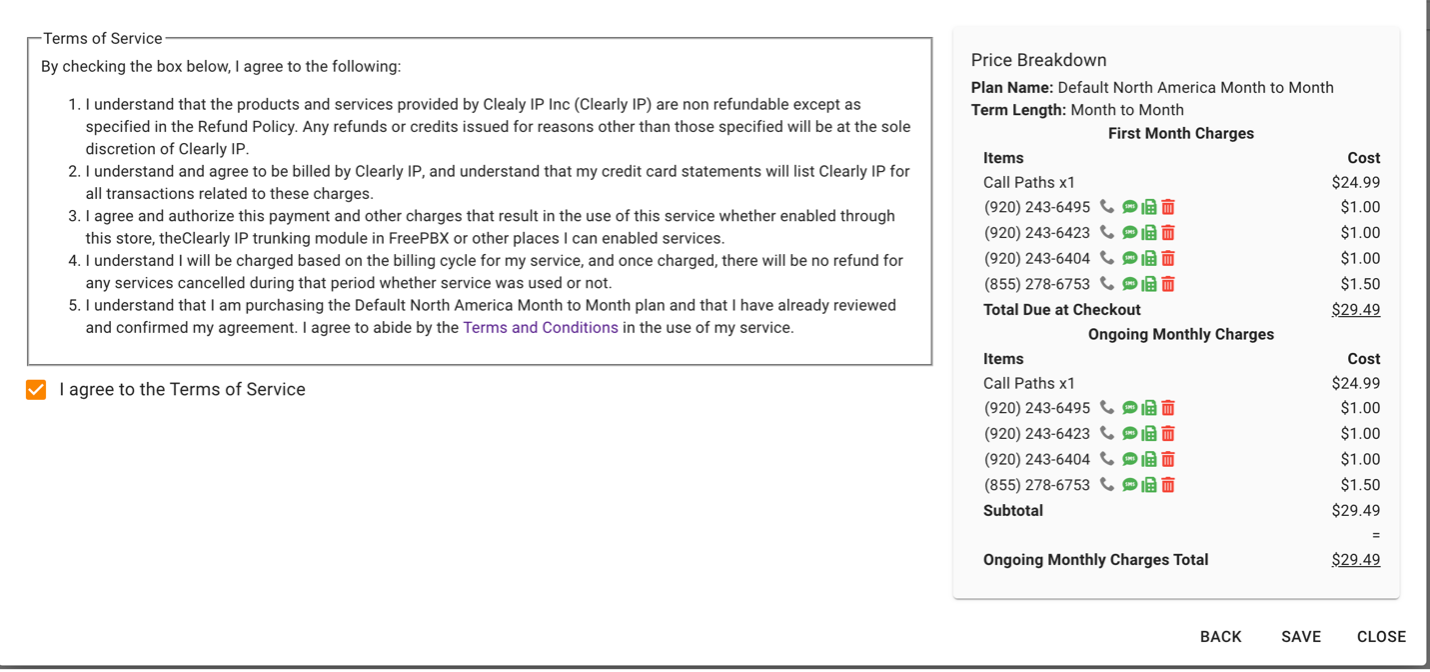
- You will now see a status log as the order is processed and everything is activated. Once the Report completes you will get a Close button at the bottom. Press that and your service is now ready to go!

- You will now see the new Location added to your list of Locations.
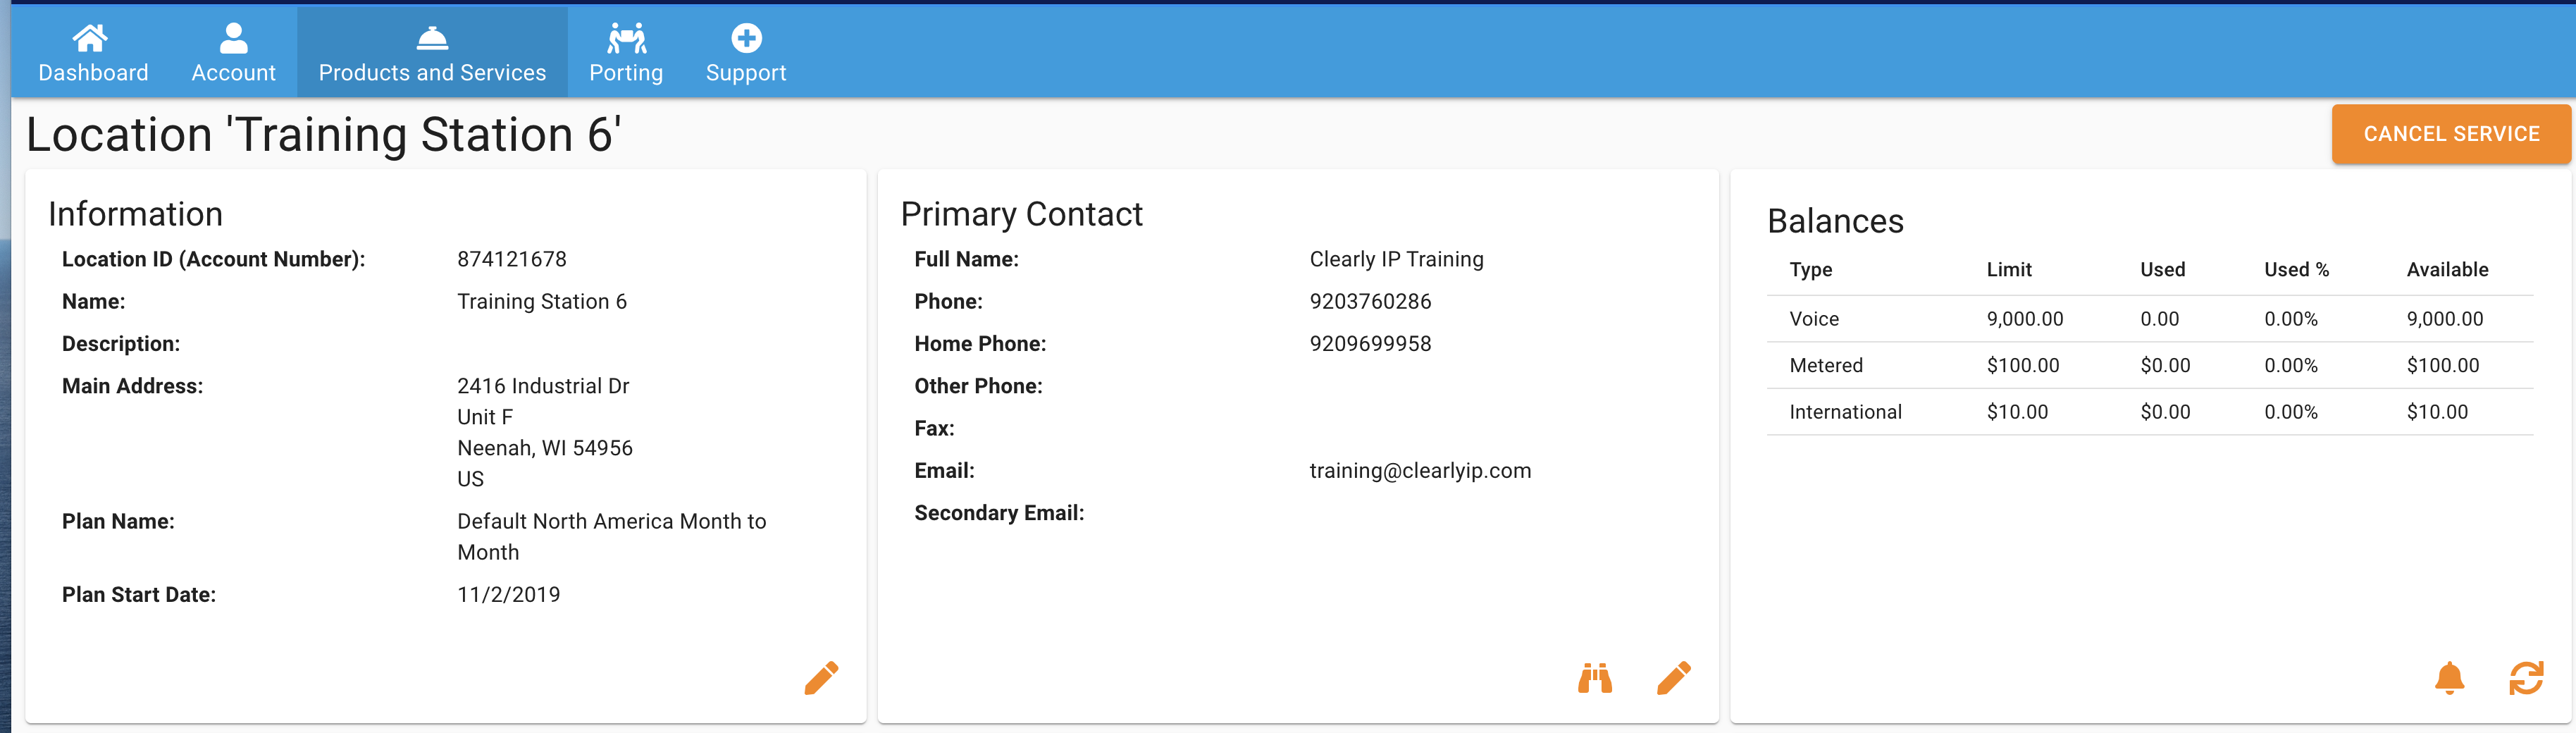
Viewing Location ID - Every Trunking, HostedPBX or Clearly Cloud system generates a unique Location ID. This Location ID is important when interacting with ClearlyIP to provide this unique identifer.
- To view the Location ID from the Portal click on Products and Services > Locations
- Under the Location ID column you can see the Location ID for the Location.
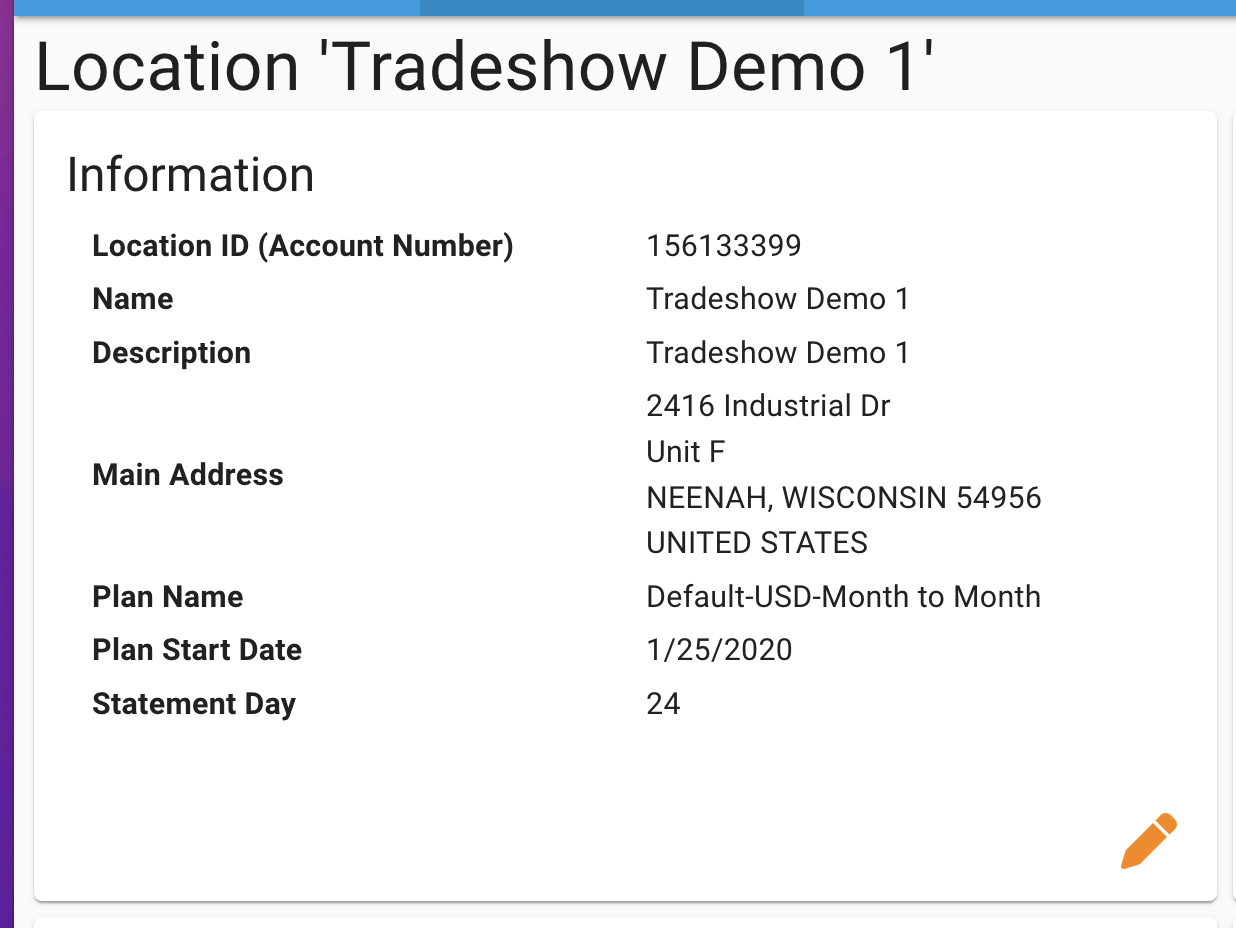
 - You can also view the Location ID by clicking on the binoculars icon to view the whole Location and under the Information widget you can see the Location ID (Account Number)
- The location level address is used to determine what jurisdiction we need to calculate any taxes or fees for all invoices generated for this Location.
- You can view the Location level address and change it by following these simple steps.
- From the Portal click on Products and Services > Locations
- Pick which location you want to edit and select the binoculars icon
- Under the Information widget you can view and edit the address along with the Location ID (Account Number)

Changing Call Path Subscription Quantity - From the Portal click on Products and Services > Locations
- Pick which location you want to edit and select the binoculars icon
- Once on the Locations Page, scroll down until you see the Voice Services Widget and hit the pencil icon to edit

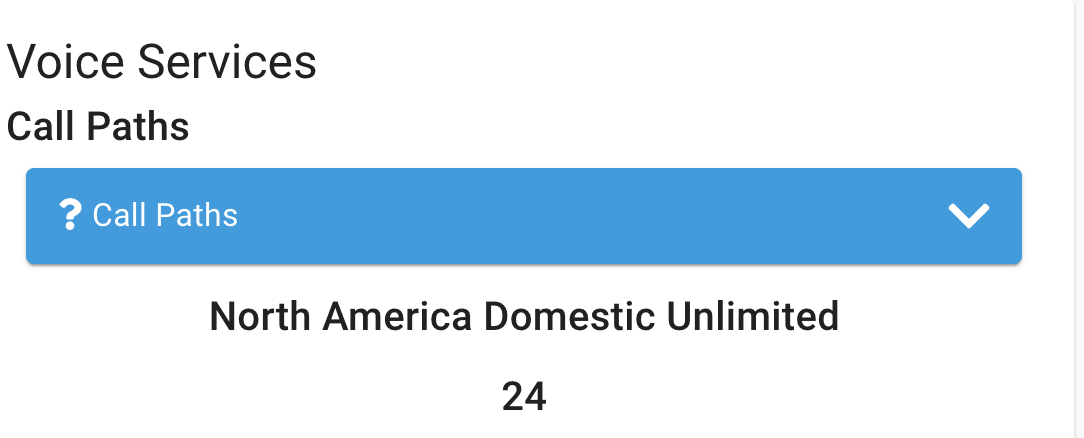
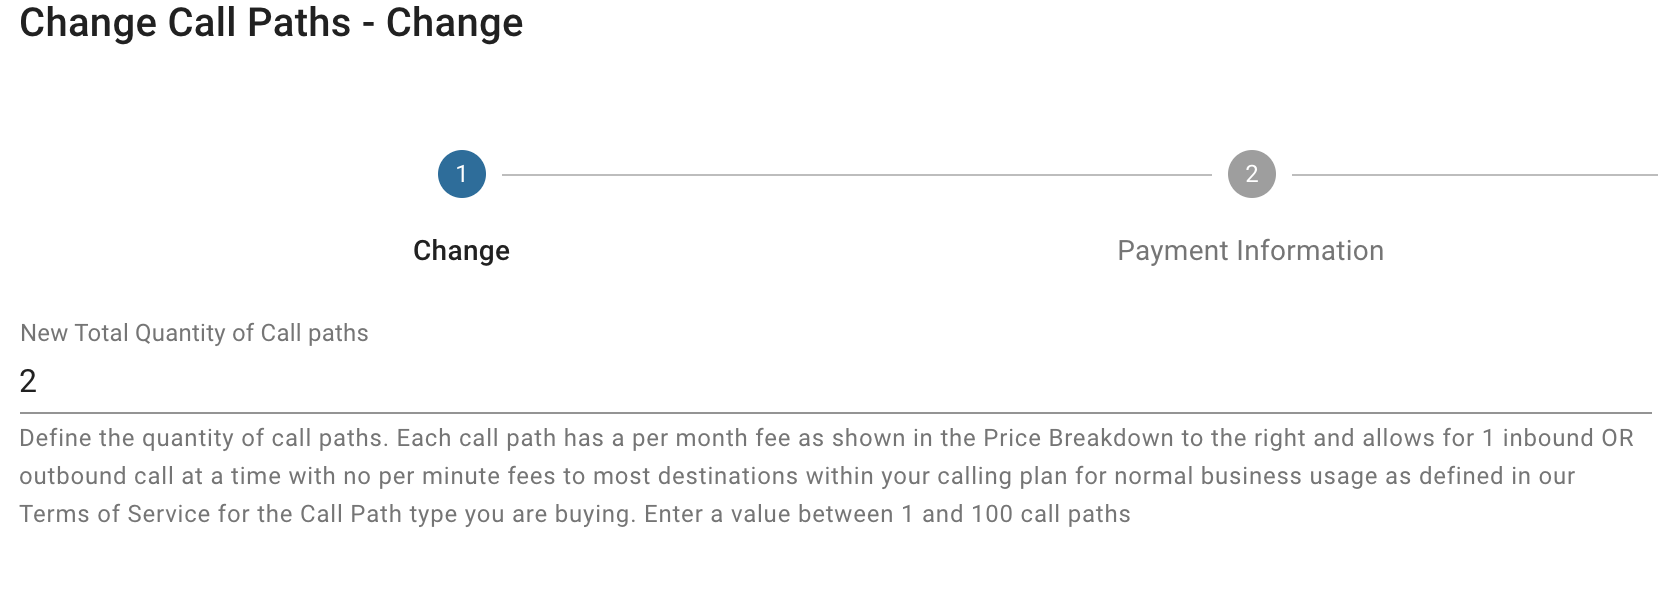
- This will open a new Pop up window where you will Increase or Decrease the number of Call Path Subscriptions you have for this location. Click on Change Quantity button below.

- From here you can set the number of call paths you would to change to.
- If adding call paths you will see the price per month on the right to add the call paths.
- If decreasing the quantity will be effective immediately and on your next billing period you will be charged at the reduced Call Path count.
- Press the Next button and go through the checkout process.

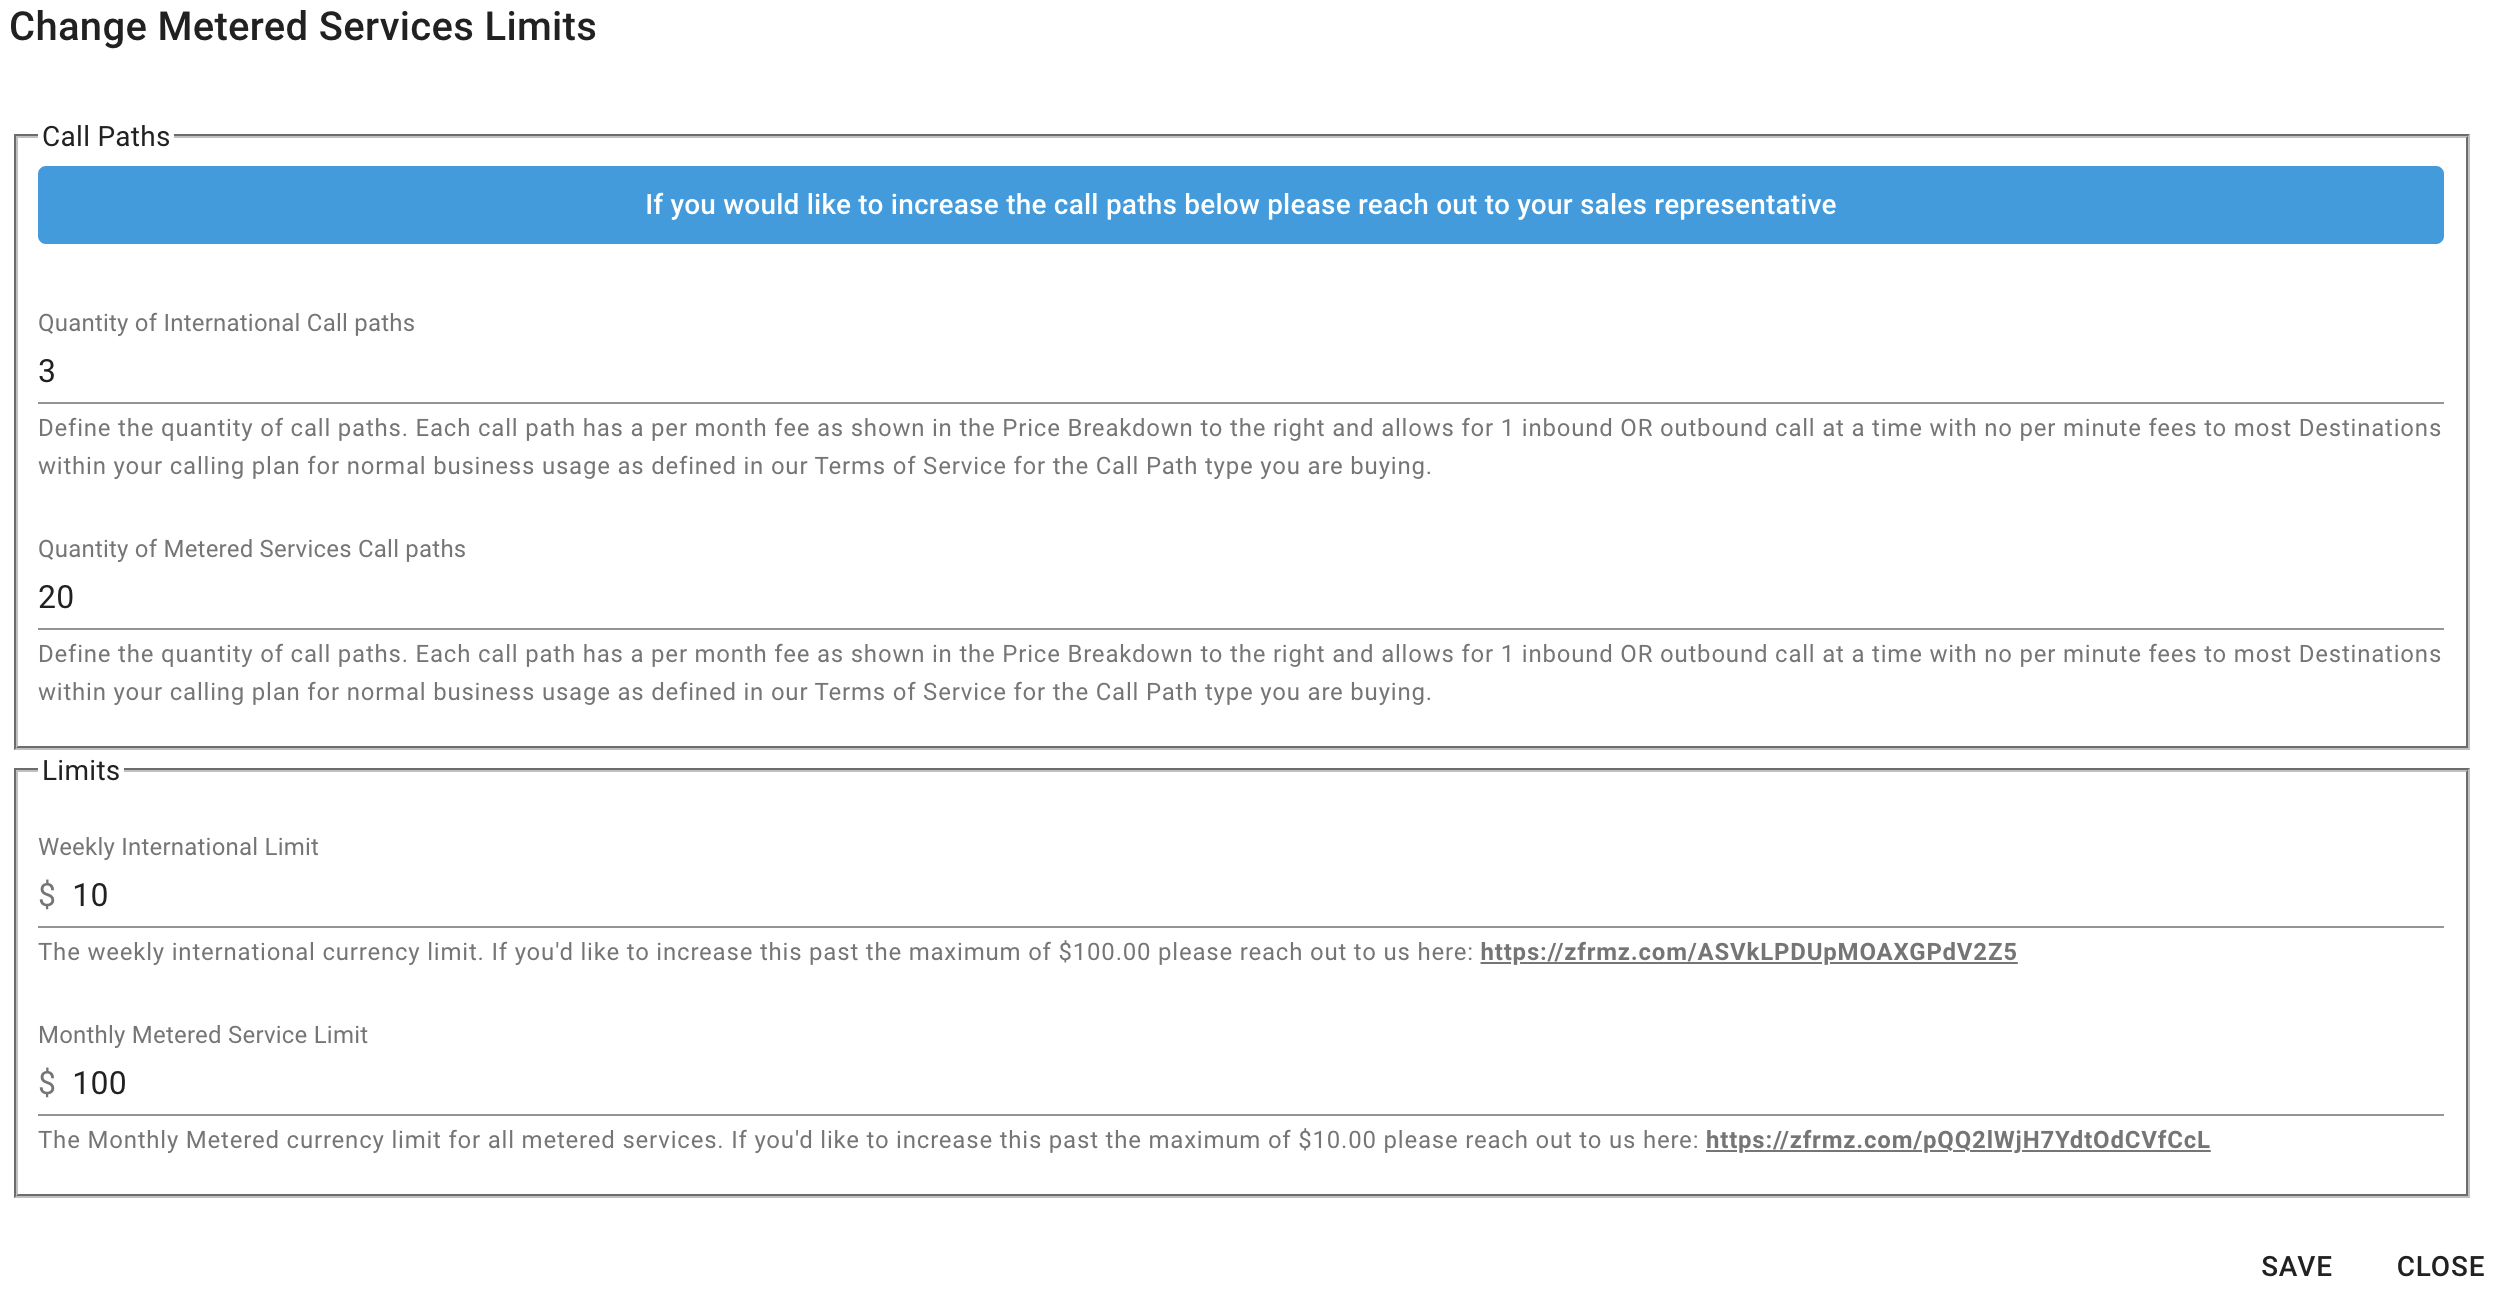
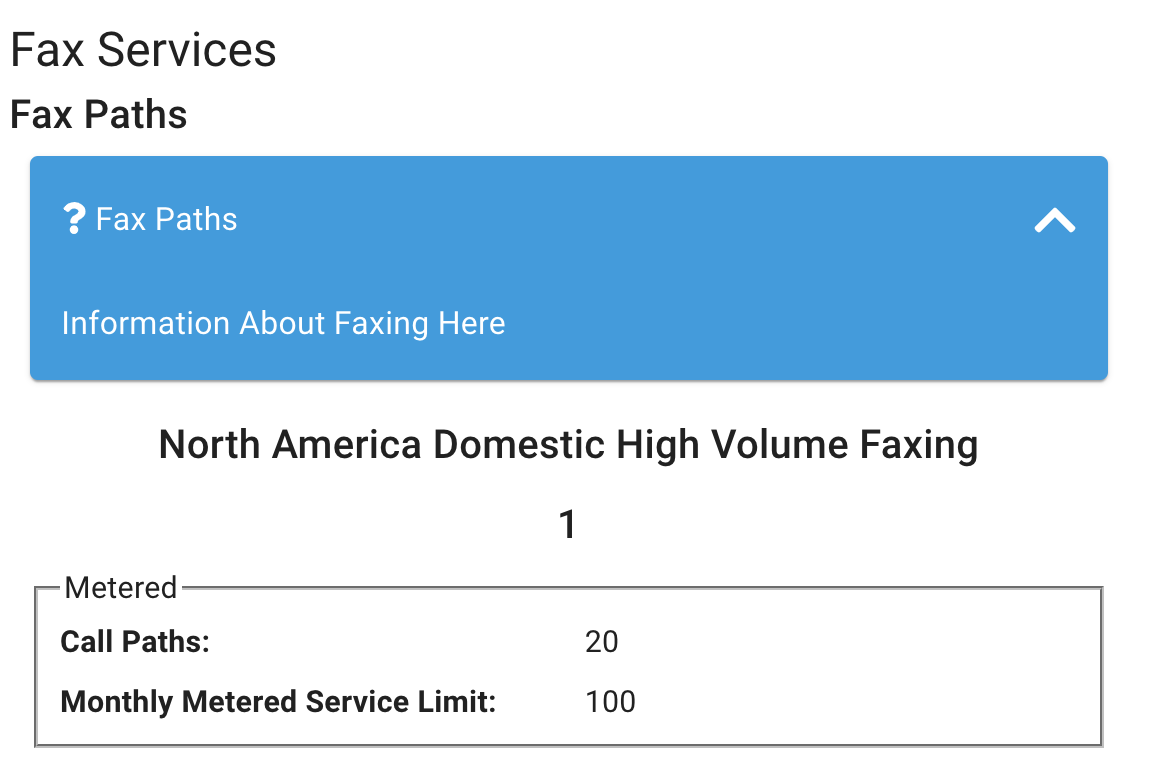
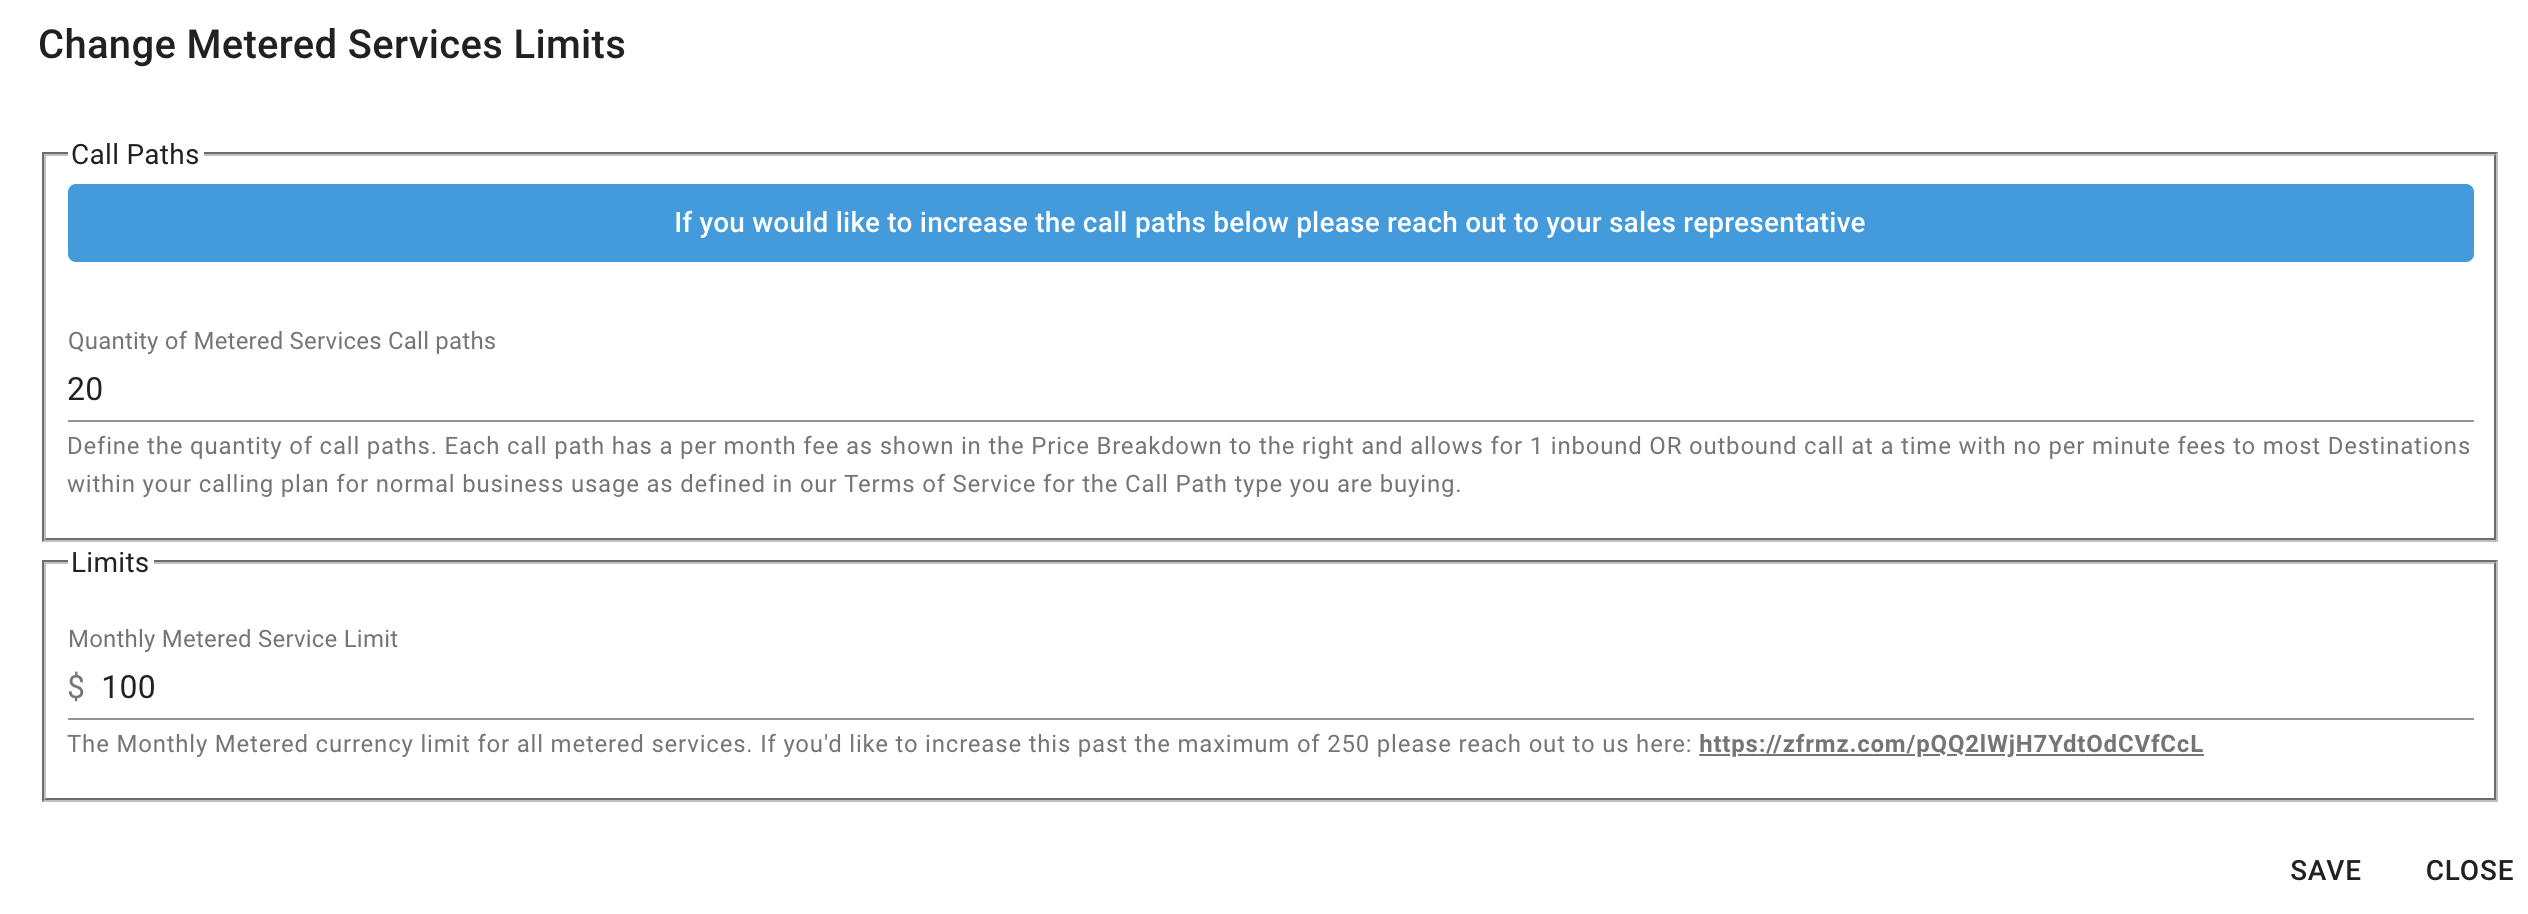
Enabling Metered Pay Per Minute Bursting for Call Path Subscription Plans - If you have Per Per Minute Subscription only Trunks or have added them on as Bursting for your Call Path Subscriptions plan here is where you can control what the monthly metered dollar amount limit you want to set and how many concurrent calls of metered calling you want to allow.
- From the Portal click on Products and Services > Locations
- Pick which location you want to edit and select the binoculars icon
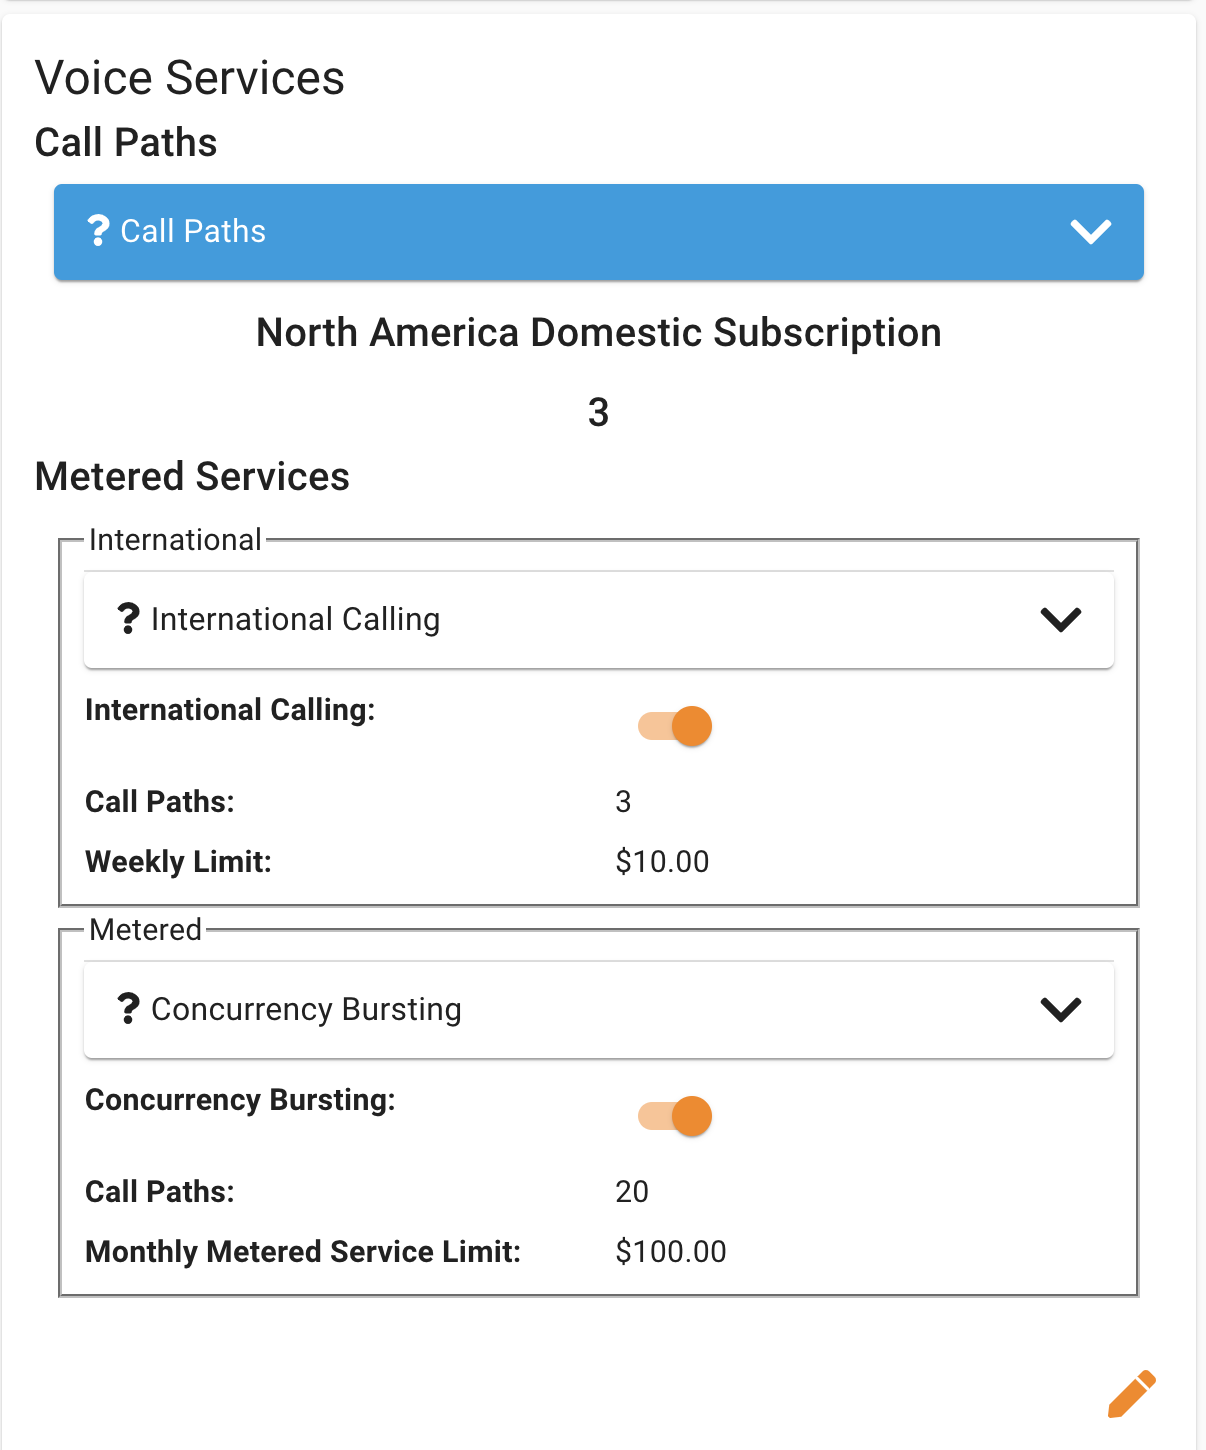
- Once on the Locations Page, scroll down until you see the Voice Services Widget. From here you can enable or disable Metered Concurrency Bursting calling. If Concurrency Bursting calling is enabled you will see the slide bar under Concurrency Bursting is orange. In our example below we have 20 call paths enabled for Concurrency Bursting and a 100.00 per Month limit set for this Location. The Monthly dollar limit resets each each month when your invoice is generated. All calls placed in the previous month will be invoiced at this time and the balance will be reset to your limit below.
 Enabling International Calling - From the Portal click on Products and Services > Locations
- Pick which location you want to edit and select the binoculars icon
- Once on the Locations Page, scroll down until you see the Voice Services Widget. From here you can enable or disable International calling. If International calling is enabled you will see the slide bar under International is orange. In our example below we have 3 call paths enabled for International Calling and a 10.00 per Week limit set for this Location. The weekly dollar limit resets each Sunday around 2:00 AM
- See below on how to adjust International Call Paths and Weekly spend limits in the section called Adjust Metered Services Call Paths and Thresholds.
Adjust Metered Services Call Paths and Thresholds - For both Metered Calling and International Calling you can adjust how many simultaneous calls you want to enable and also adjust the Monthly and Weekly spend limits in dollars.
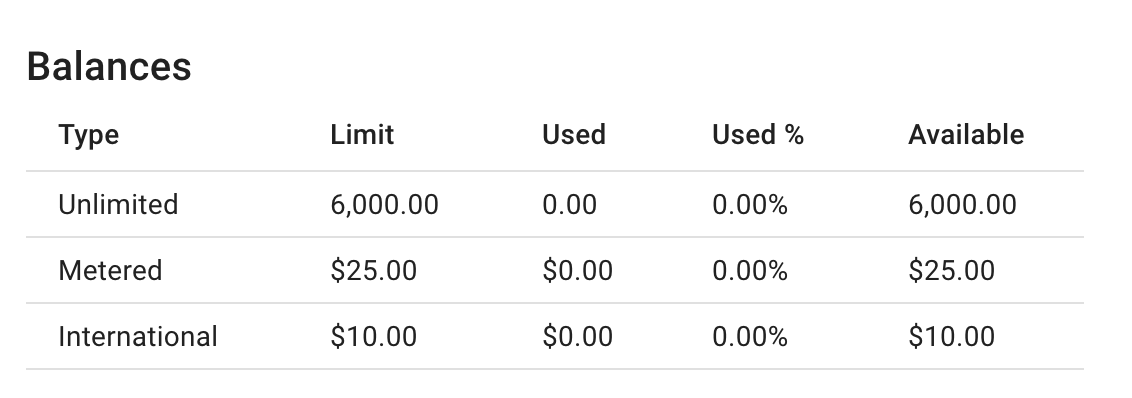
- Locate the Widget called "Balances". Here you can see the limit you have set for each Call Path type. The limit is shown based on 3000 minutes per Domestic Subscription Call Path for normal business usage times the number of subscription call paths you have. The Metered and International are shown based on what limits you have setup under the "Metered" widget in your Location.
Click on the "Notifications" bell icon at the bottom of the Balances Widget

From here you can set the Interval, Threshold of used minutes and Email addresses to send the notification to for each of the buckets above.
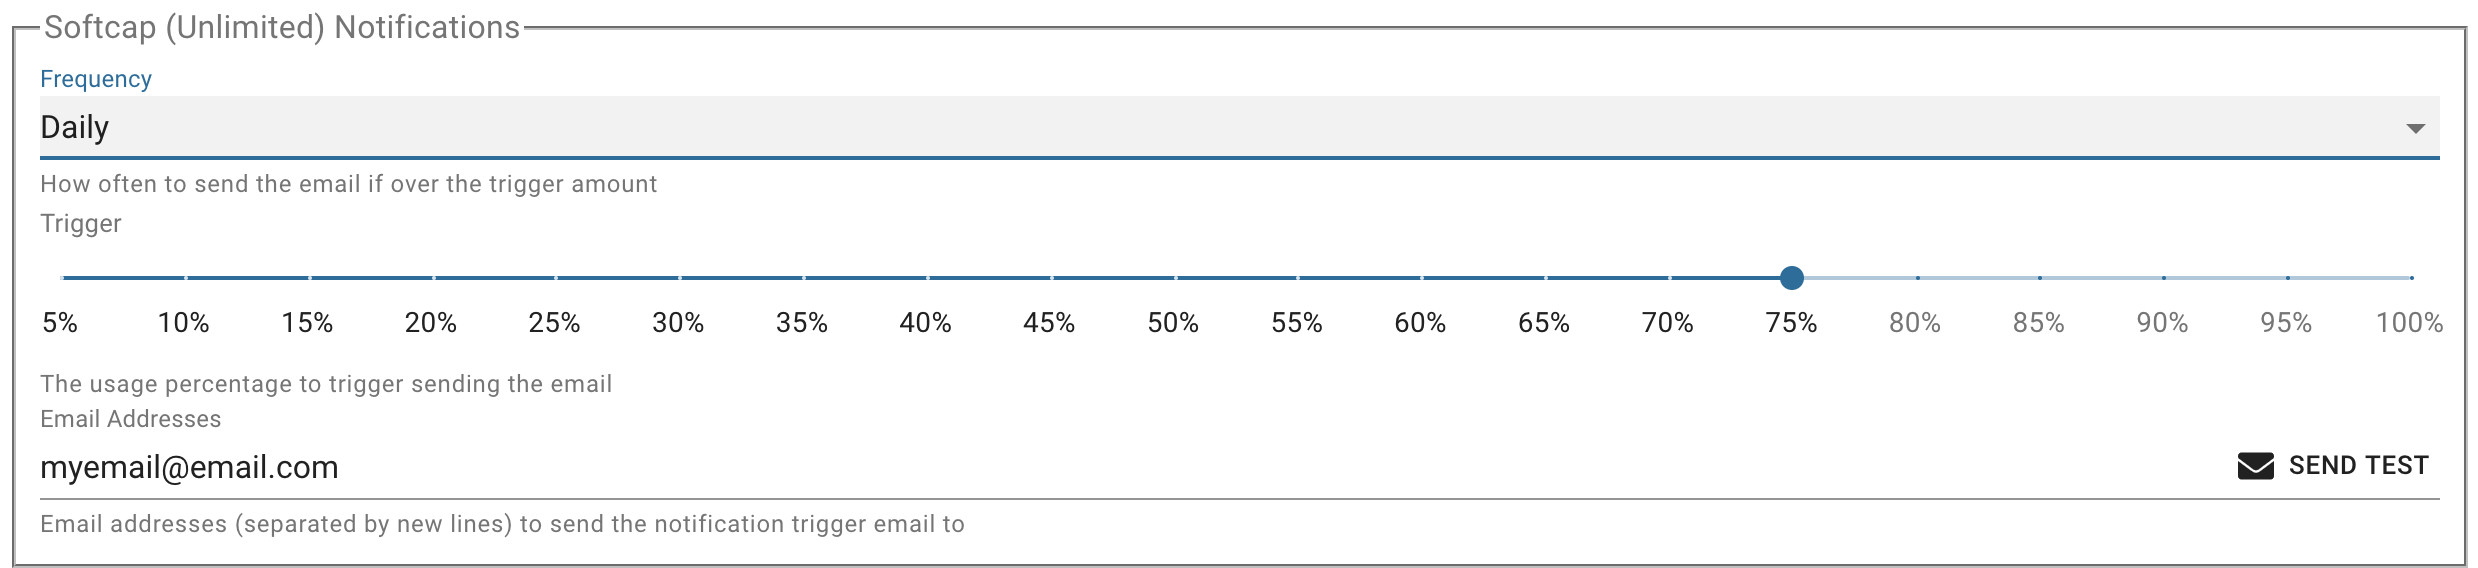
You can press the "Send Test" button to have it send you a test email to verify you are receiving the emails correct and not going to SPAM or being blocked for any reason.

Failover Options -
Failover's are settings that can reroute your calls if their normal destination is unable to be reached or if a different destination is needed -
This can be done on a Location level, where all numbers that are associated with that location will be rerouted, or on an individual Number level for specific numbers you own. If you have a Location level Failover set and a Phone Number level failover set the Phone Number failover setting will be honored. The Location level failover is only used if a sepcific number is not setup with its own Failover. Per Location Failover - To set a Failover for an entire location
- From the Portal click on Products and Services > Locations
- Pick which location you want to edit and select the binoculars icon
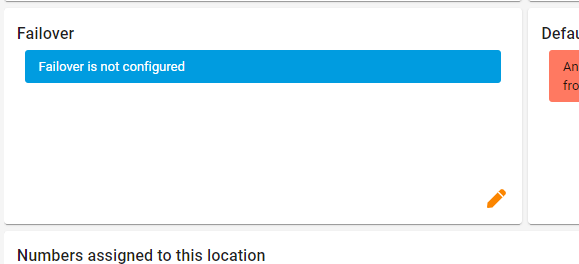
- Once on the Locations Page, scroll down until you see the Widget named Failover towards the bottom left and Click on the pencil to edit
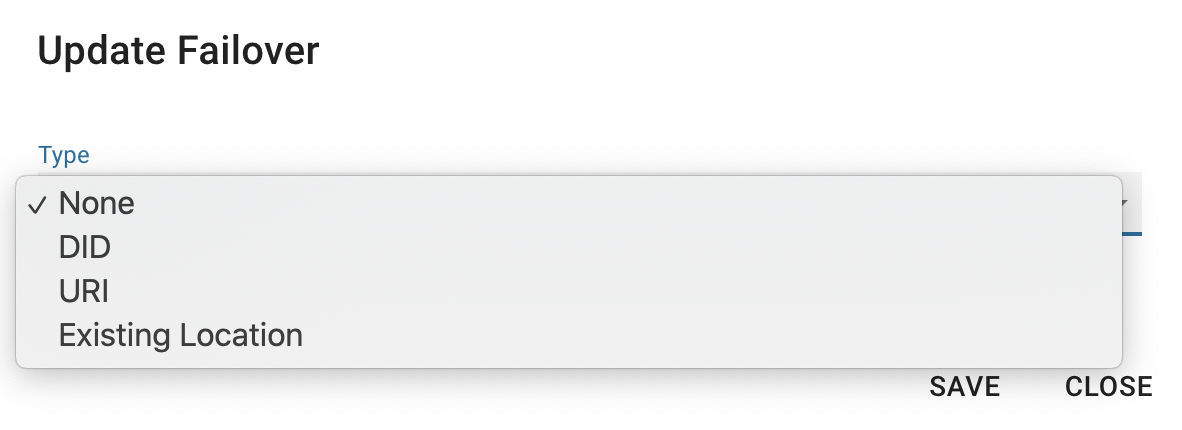
- This will pop up a window with a drop down for you to select what Type of failover you want. Your options are;
- DID - which is what you would pick too failover to another phone number that you have. This phone number does not need to be a number that you have with us, it just needs to be an active number with some carrier including your cell phone.
- URI which would be the IP address or FQDN of another PBX.
- Existing Location - Can be any other Location under your account which will just send the calls to that Location on failover.
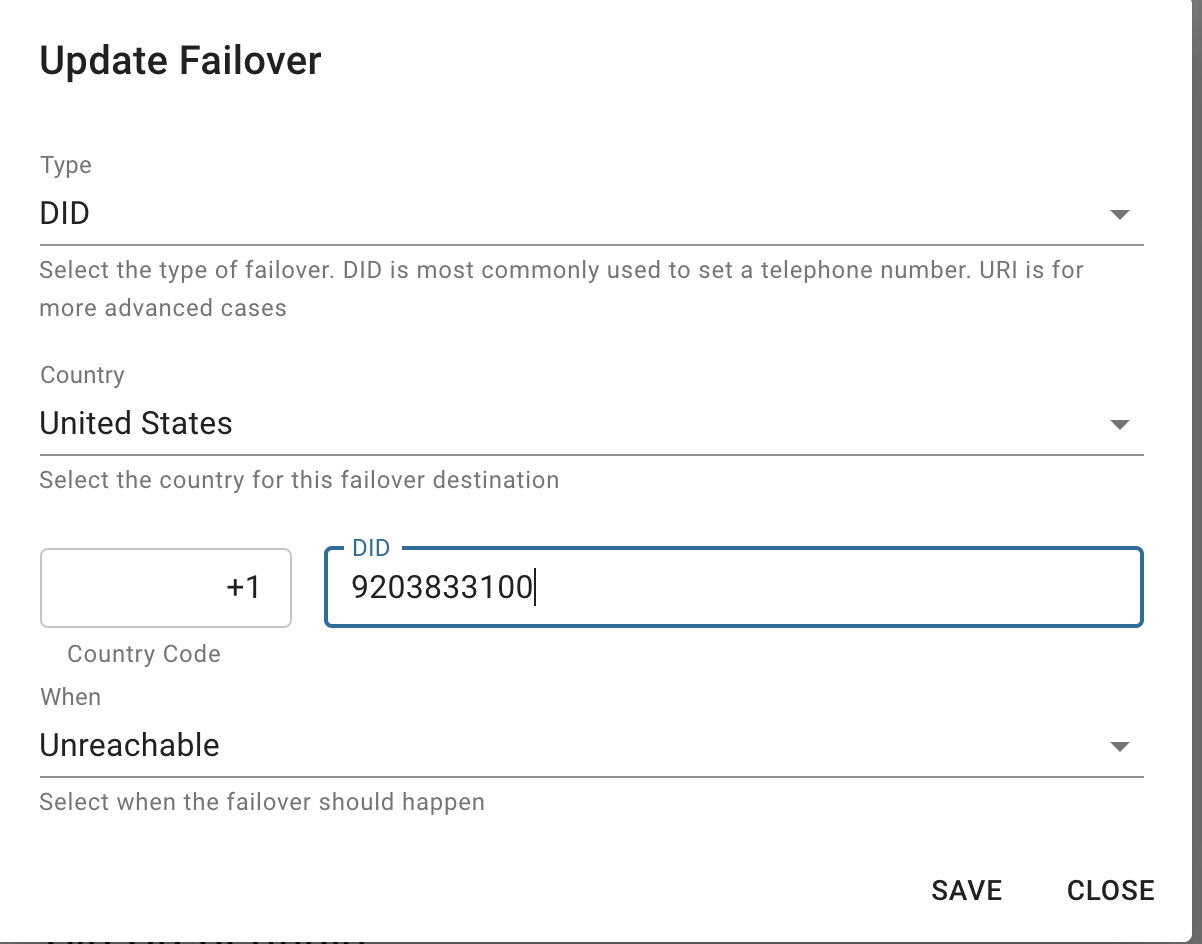
- Failing over to a phone number (DID) you will be presented with a form to provide the phone number you want to failover to and than pick if we failover when the PBX is unreachable or immediately fail all calls to this Location over and never try the PBX first.
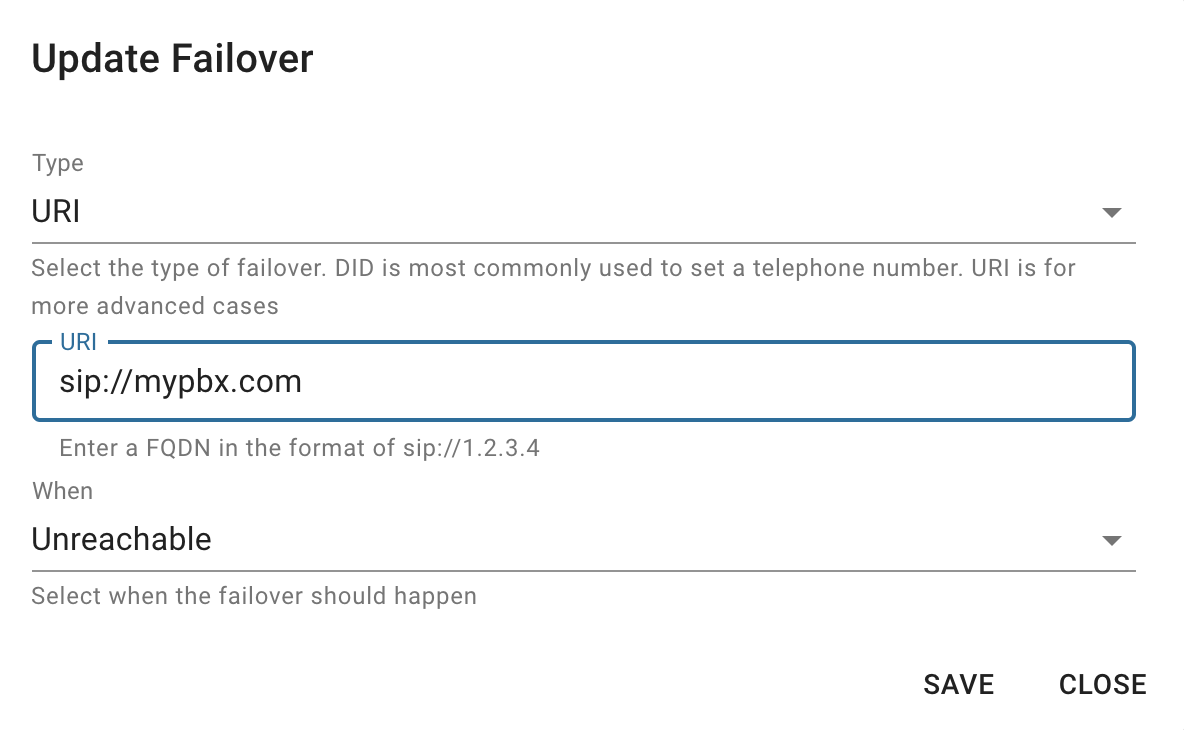
- Failing over to a IP Address or FQDN of another PBX (URI) you will be presented with a form to provide the IP Address or FQDN you want to failover to and than pick if we failover when the PBX is unreachable or immediately fail all calls to this Location over and never try the PBX first. Make sure to prefix your IP or FQDN with sip:// as shown below.
- If failover over to another Location you just pick from the drop down the Location you want to failover to and than pick if we failover when the PBX is unreachable or immediately fail all calls to this Location over and never try the PBX first
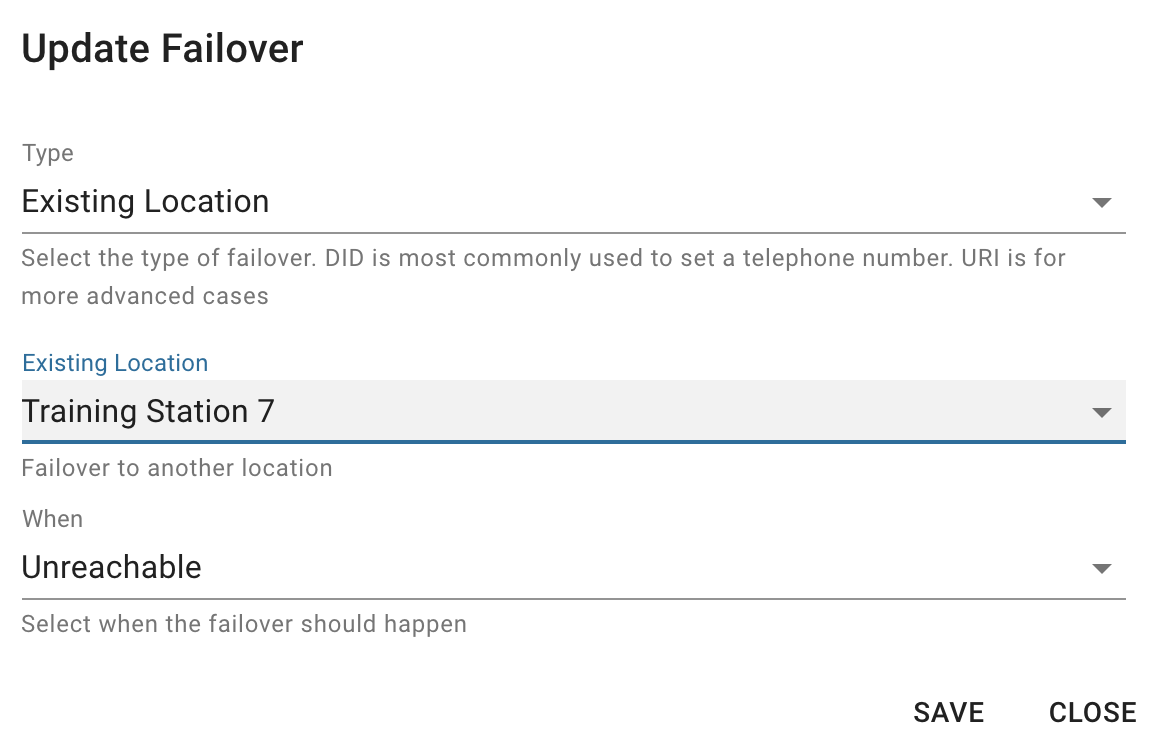
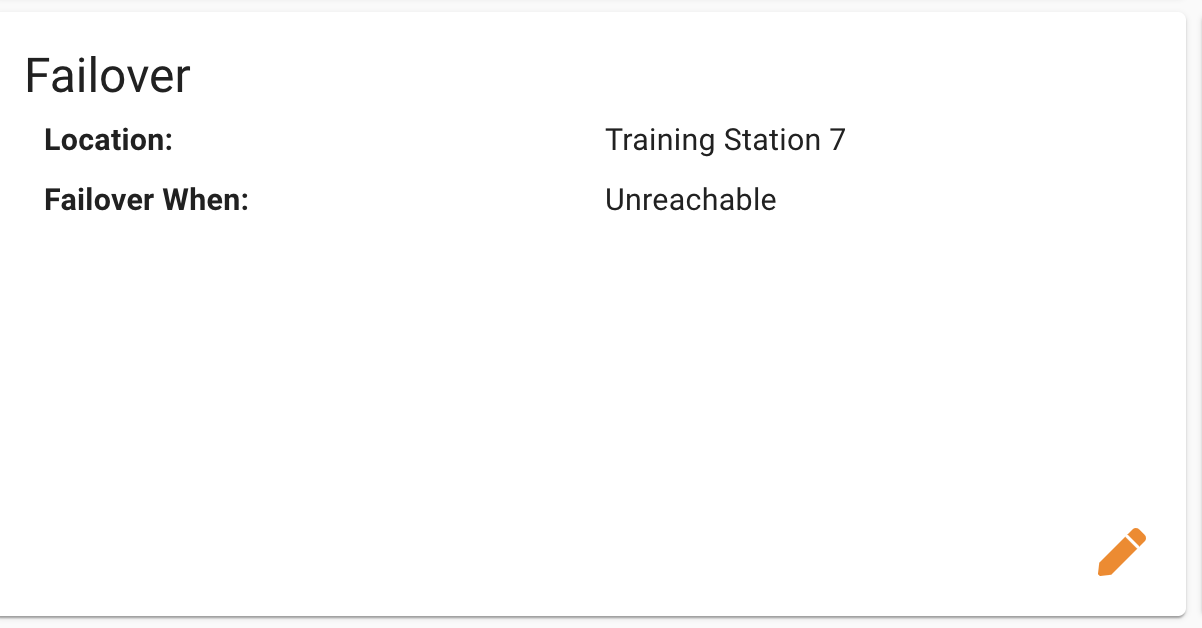
- Press the Save button when done and now you will see in the Widget your active failover settings
Per Number Failover Viewing Metered Rates -
If you have any metered services where we bill you per minute or usage including SMS or toll-free, you can view these services’ rates under the Metered Services Widget. For example, if you do not have SMS enabled on the location, you will not observe any SMS rates here. It will only show you rates for metered services you have enabled. - From the Portal click on Products and Services > Locations
- Pick which location you want to edit and select the binoculars icon
-
Locate the Widget called "Metered Pricing" From here you can see the different rates you will be paying for metered services. 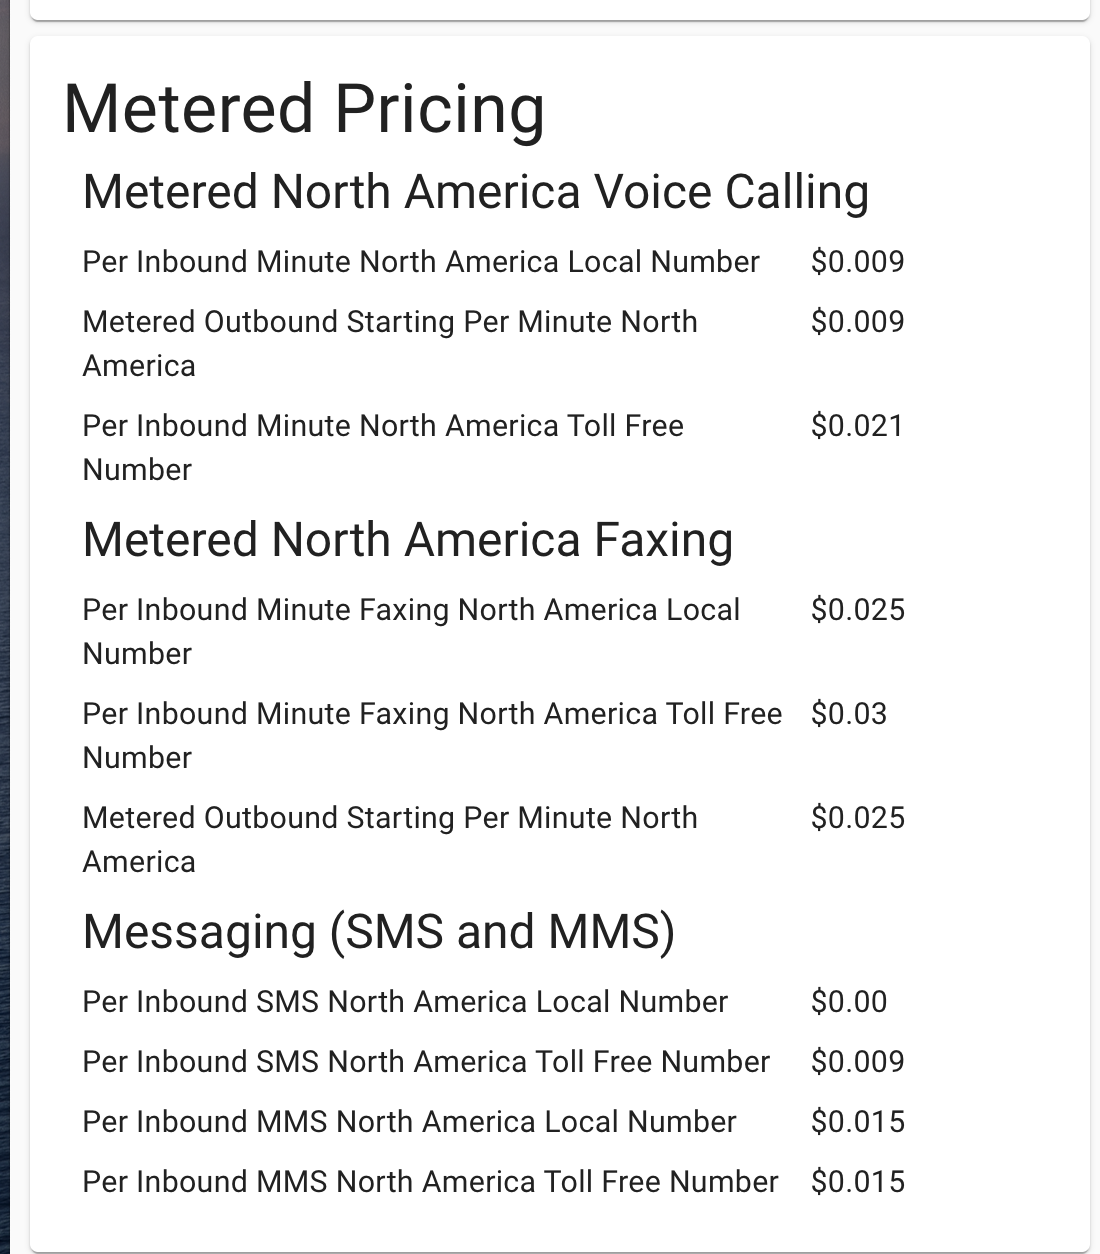
Location Level Port Out Pins -
Port Out Pins allow you to create an alpha-numeric code (pin) that must be provided when a carrier tries to port any phone numbers you have with ClearlyIP. If you submit a port out of any numbers you have with ClearlyIP, make sure you include your pin to the carrier you are porting to. Otherwise, the port out request will be denied. We recommend that all users enable port out pins due to the increase in unauthorized ports and port slamming. -
Once you enable a Port Out Pin on a location, all the telephone numbers (DIDs) that are linked to this Location will be enabled for Port out Pins, You can opt-out on a per Number basis if need be, from the Numbers page as outlined below. Lastly, most DIDs purchased from Clearly IP support Port Out Pins. Some rural or off-net DIDs may not support this feature, and when viewing, a Phone Number will display if it does not support Port Out Pins.
- From the Portal click on Products and Services > Locations
- Pick which location you want to edit and select the binoculars icon
- Locate the Widget called "Port Out Settings". From here we can see that Port Out Pin is NOT enabled
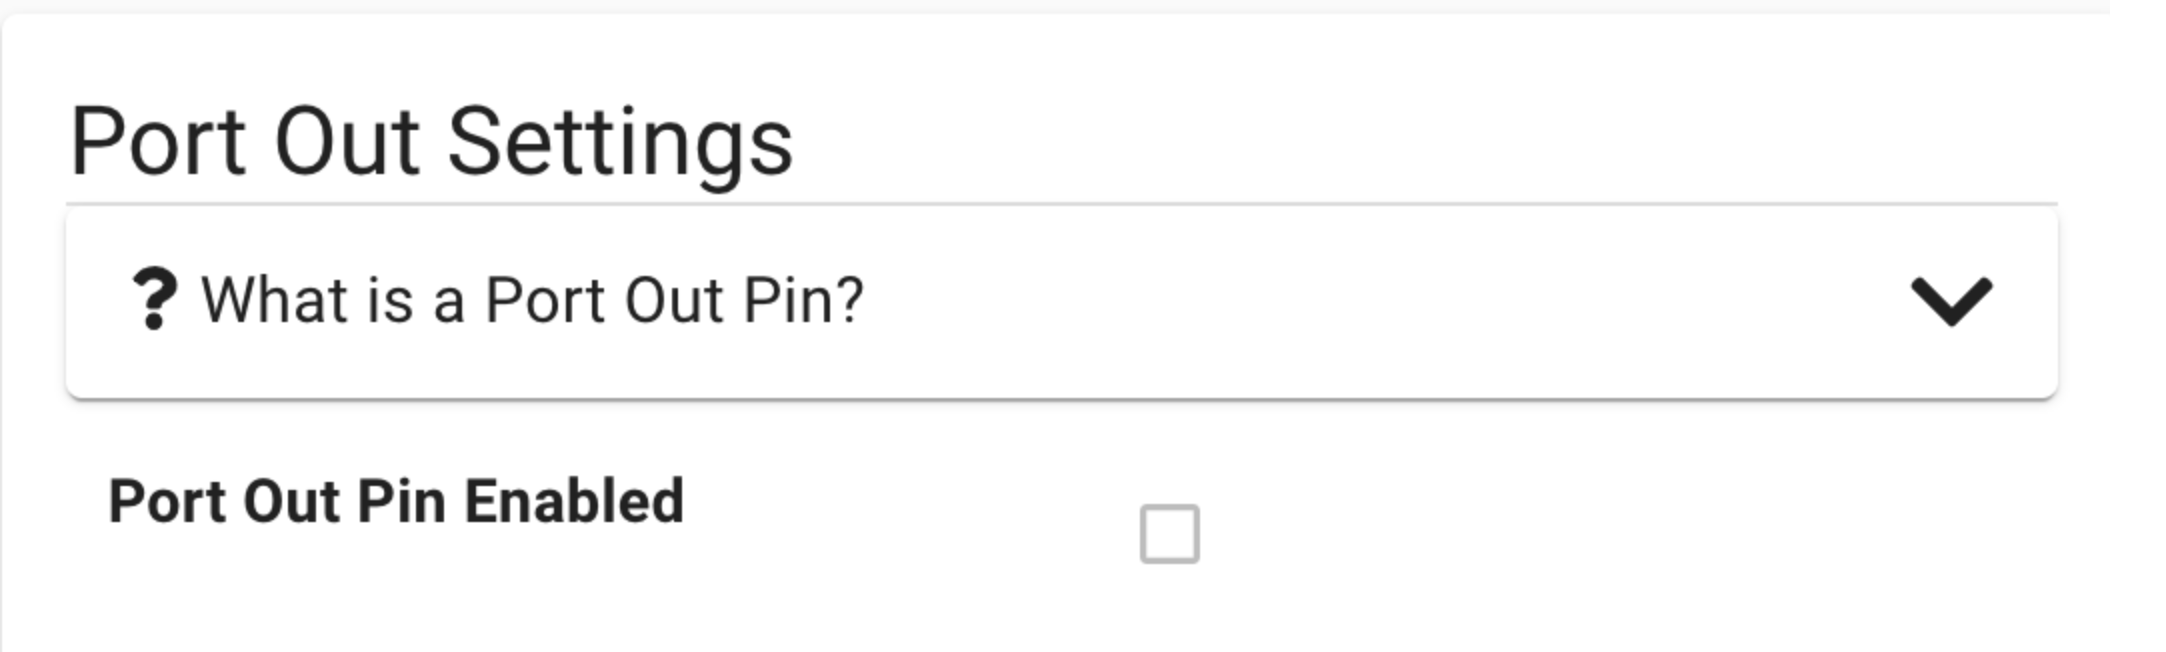
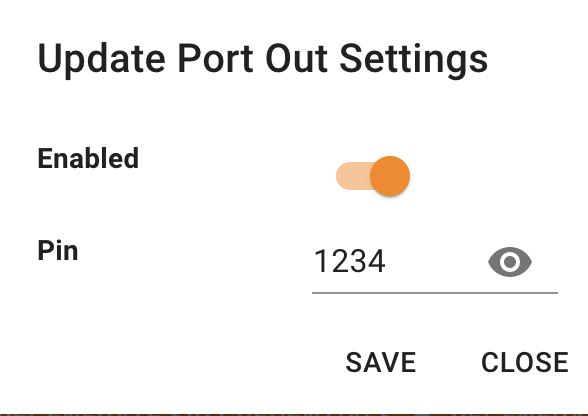
- Clicking on the Orange "pencil" icon will let you edit the Port Out Pin settings for this Location.

- Enable the Port Out Pin setting and Set the PIN you want to use and all the DIDs that support Port Out Pins will automatically be enabled with this Pin. Press the Save button
- To enable or disable the opt in of using this Port Out Pin on a per Number basis see the wiki below here on how to Enable or Disable this on a Per Number basis.
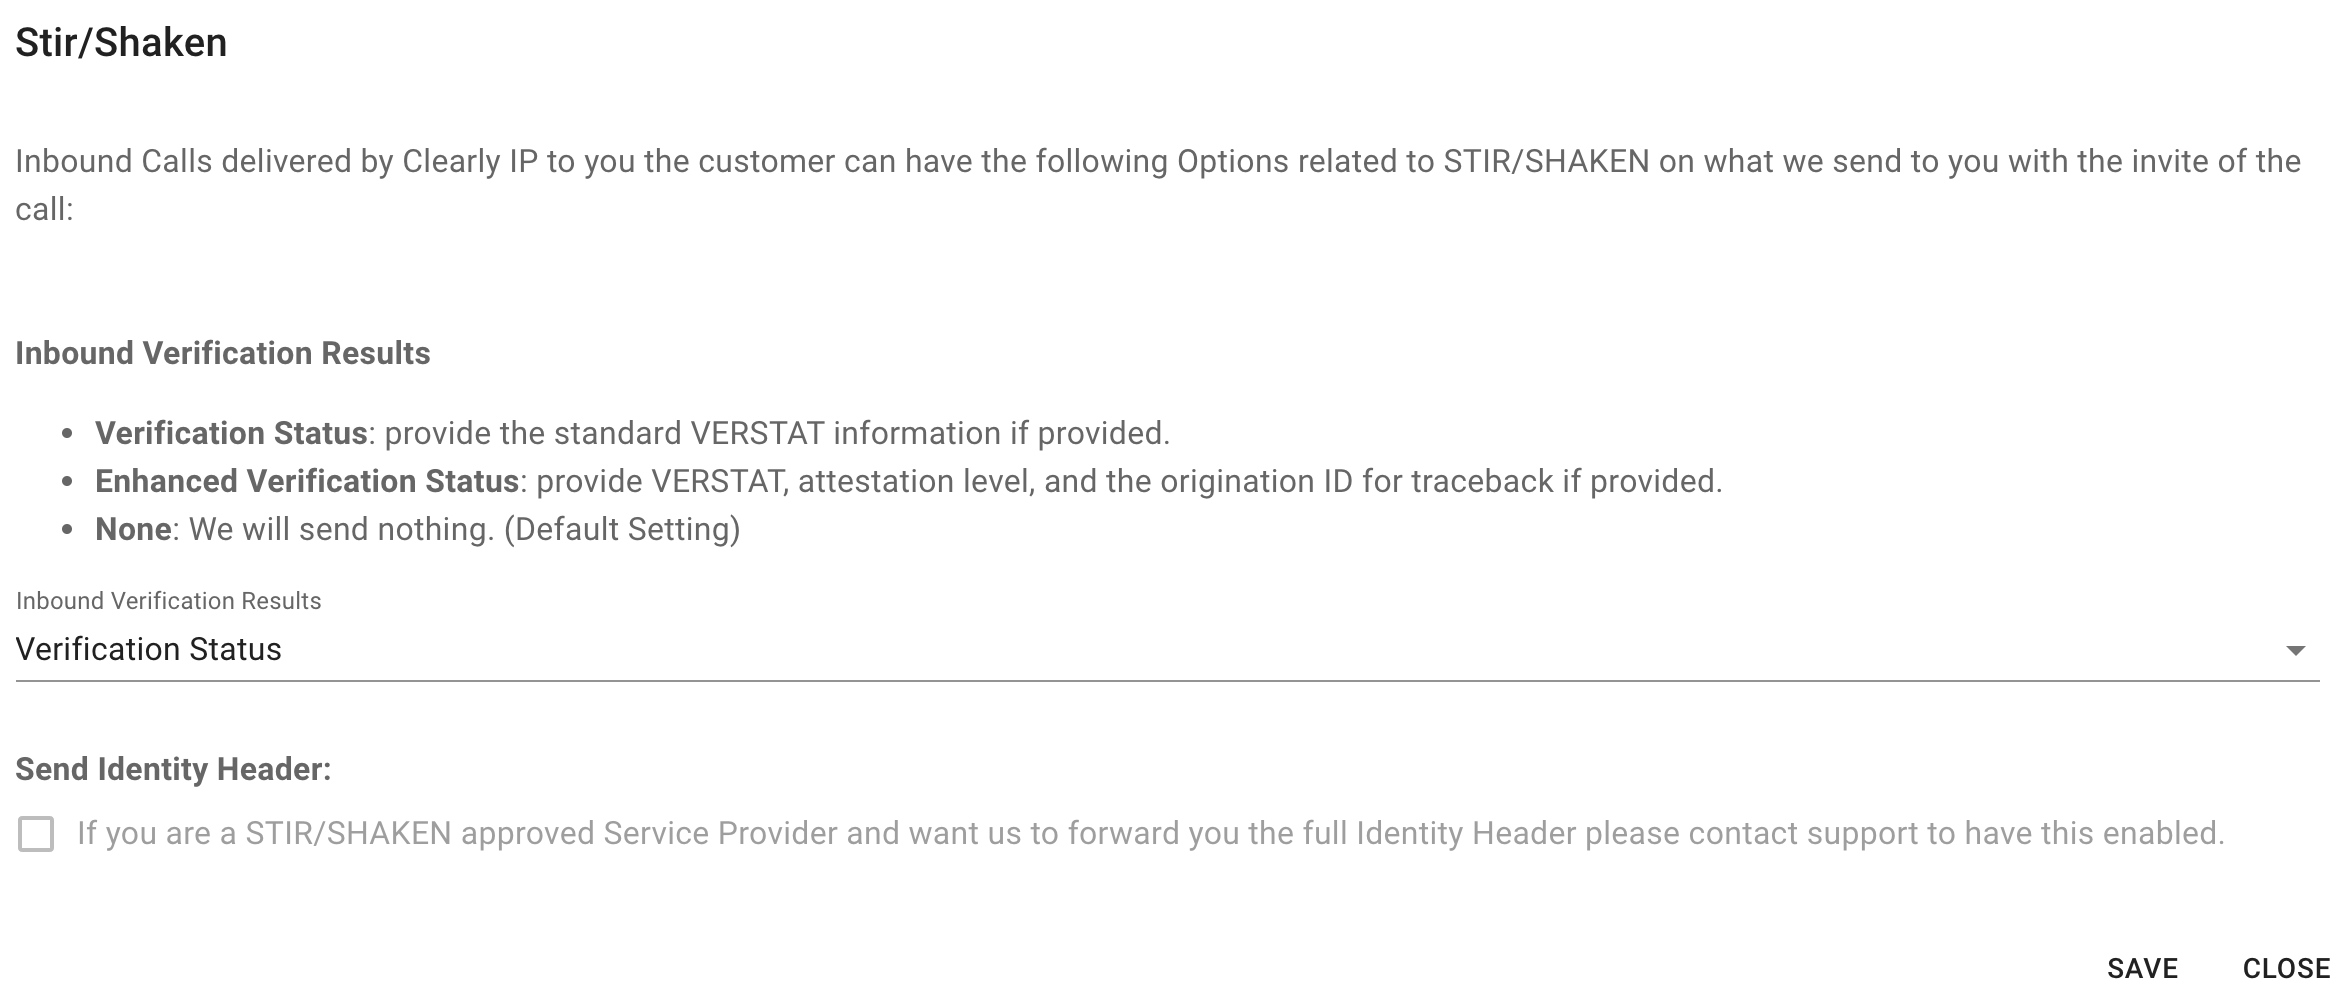
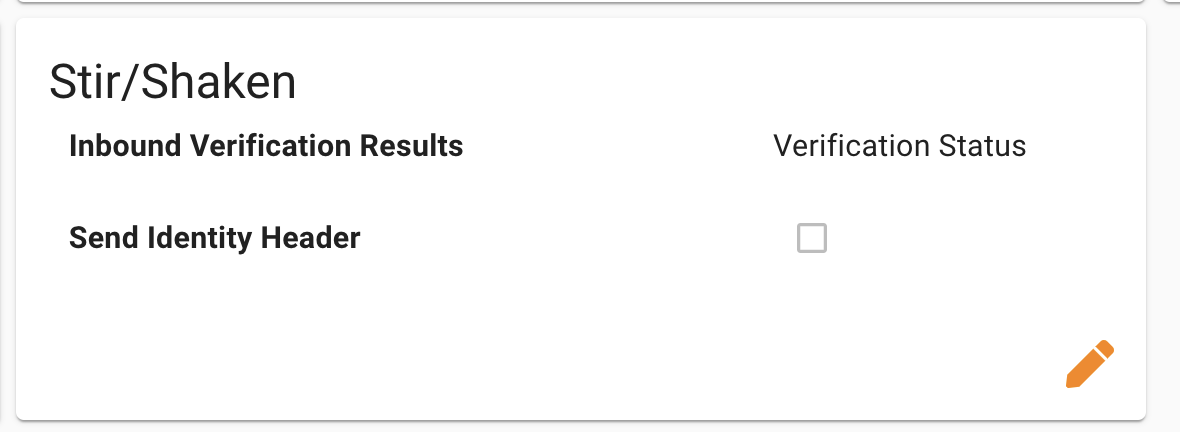
Stir/Shaken Inbound Call Handling - Inbound Verification Results
- By default we will not forward you any of the the STIR/SHAKEN information on a inbound call. You can choose per Location from the following 3 options on what you want us sending you in the Invite for inbound calls related to STIR/SHAKEN. In all 3 modes below you will never receive the full Identity Header that is passed to us.
- Verification Status - provide the standard VERSTAT information if provided.
- Enhanced Verification Status - provide VERSTAT, attestation level, and the origination ID for traceback if provided.
- None - We will not send you any information about the Attestation level of the call.
- Send Identity Header - If you are a Service Provider who has been setup with your own Token we are able to pass you through the full Identity Header. Please contact support to have us enable this for you on your Location. You will need to provide proof of your Token before we can enable this.
3rd Party Messaging - 3rd Party Messaging allows you to add to any existing Trunking Location the ability to import other phone carrier numbers into your Location for Messaging only and leave the voice portion of the phone number with the existing voice carrier.
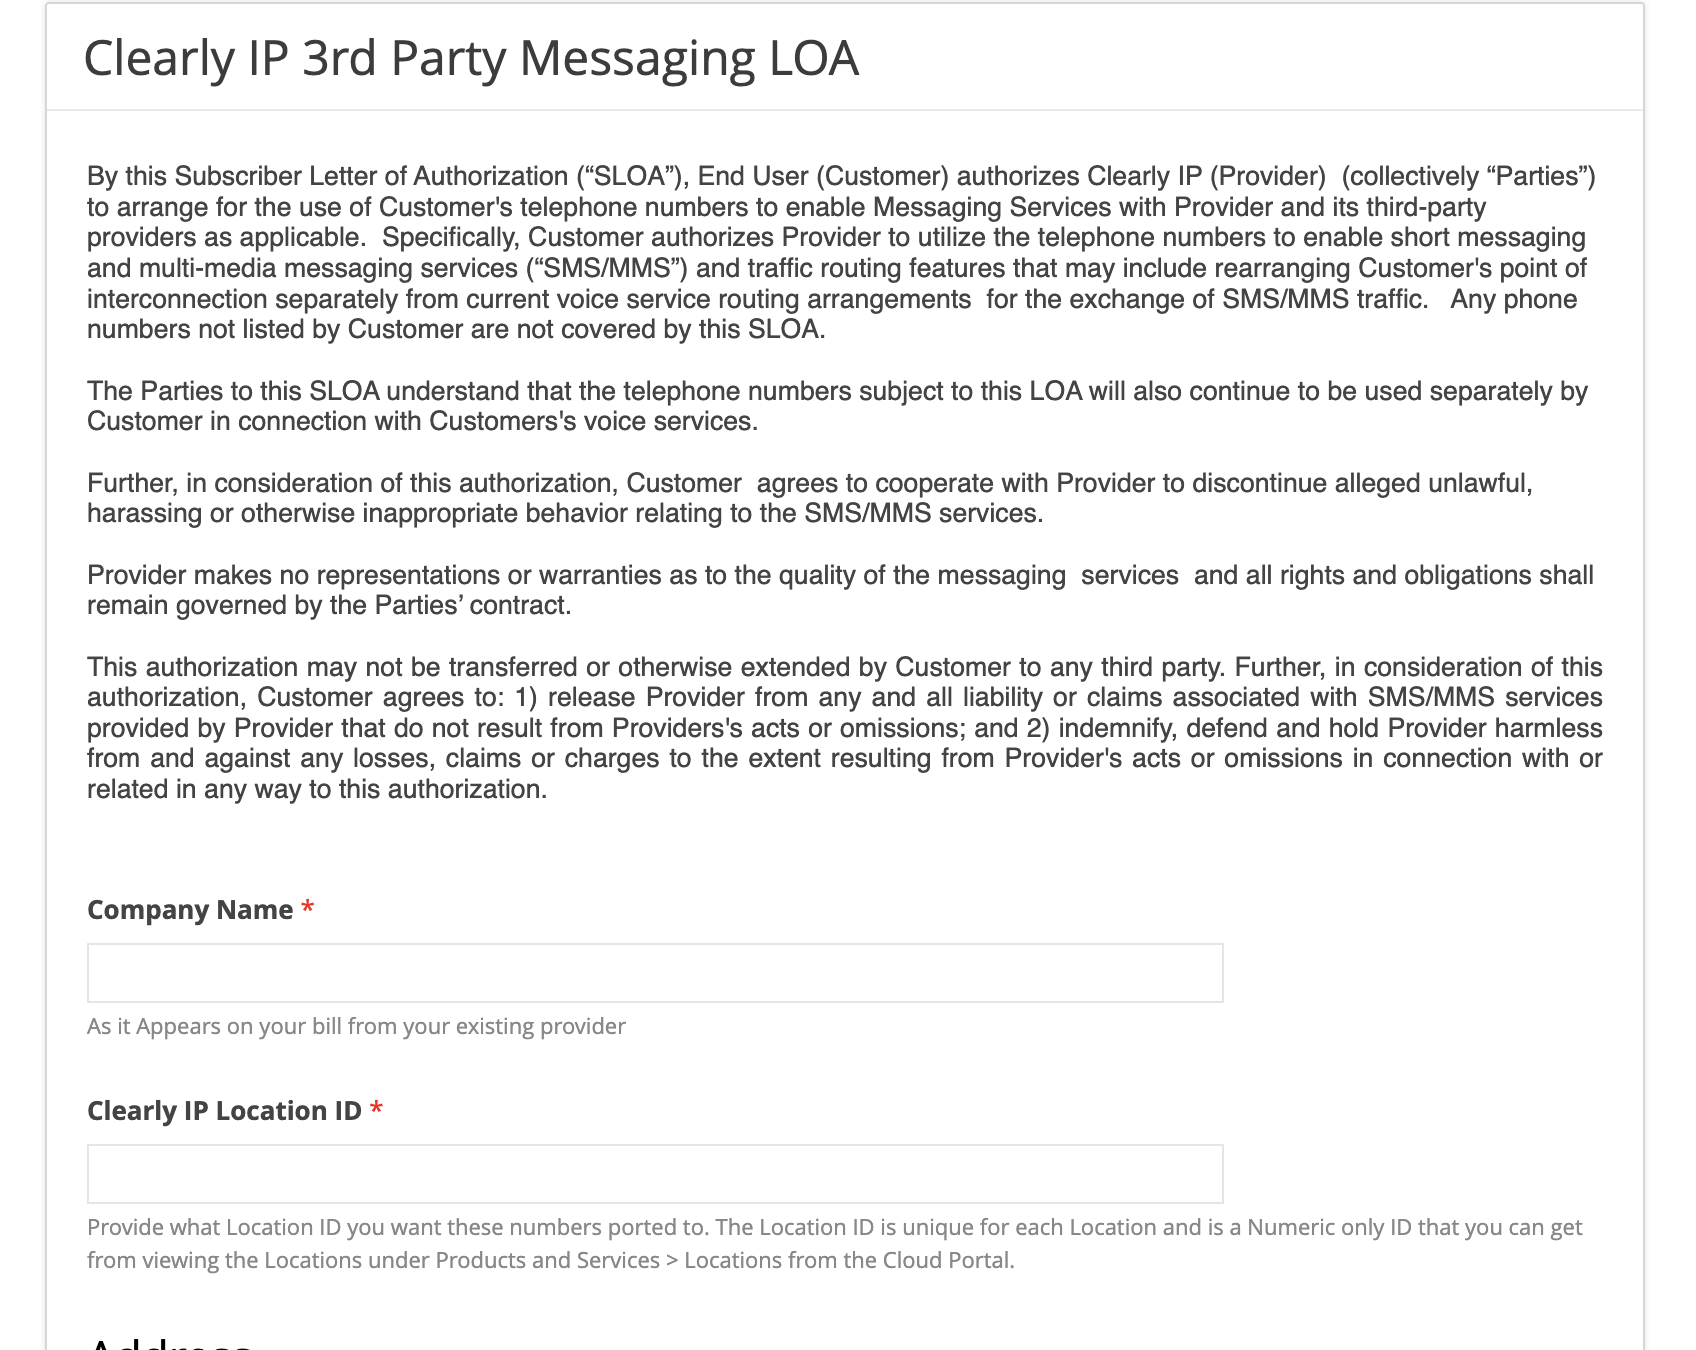
- You will need to submit a special Messaging LOA by clicking on the "Click here to add third party messaging" from within the widget
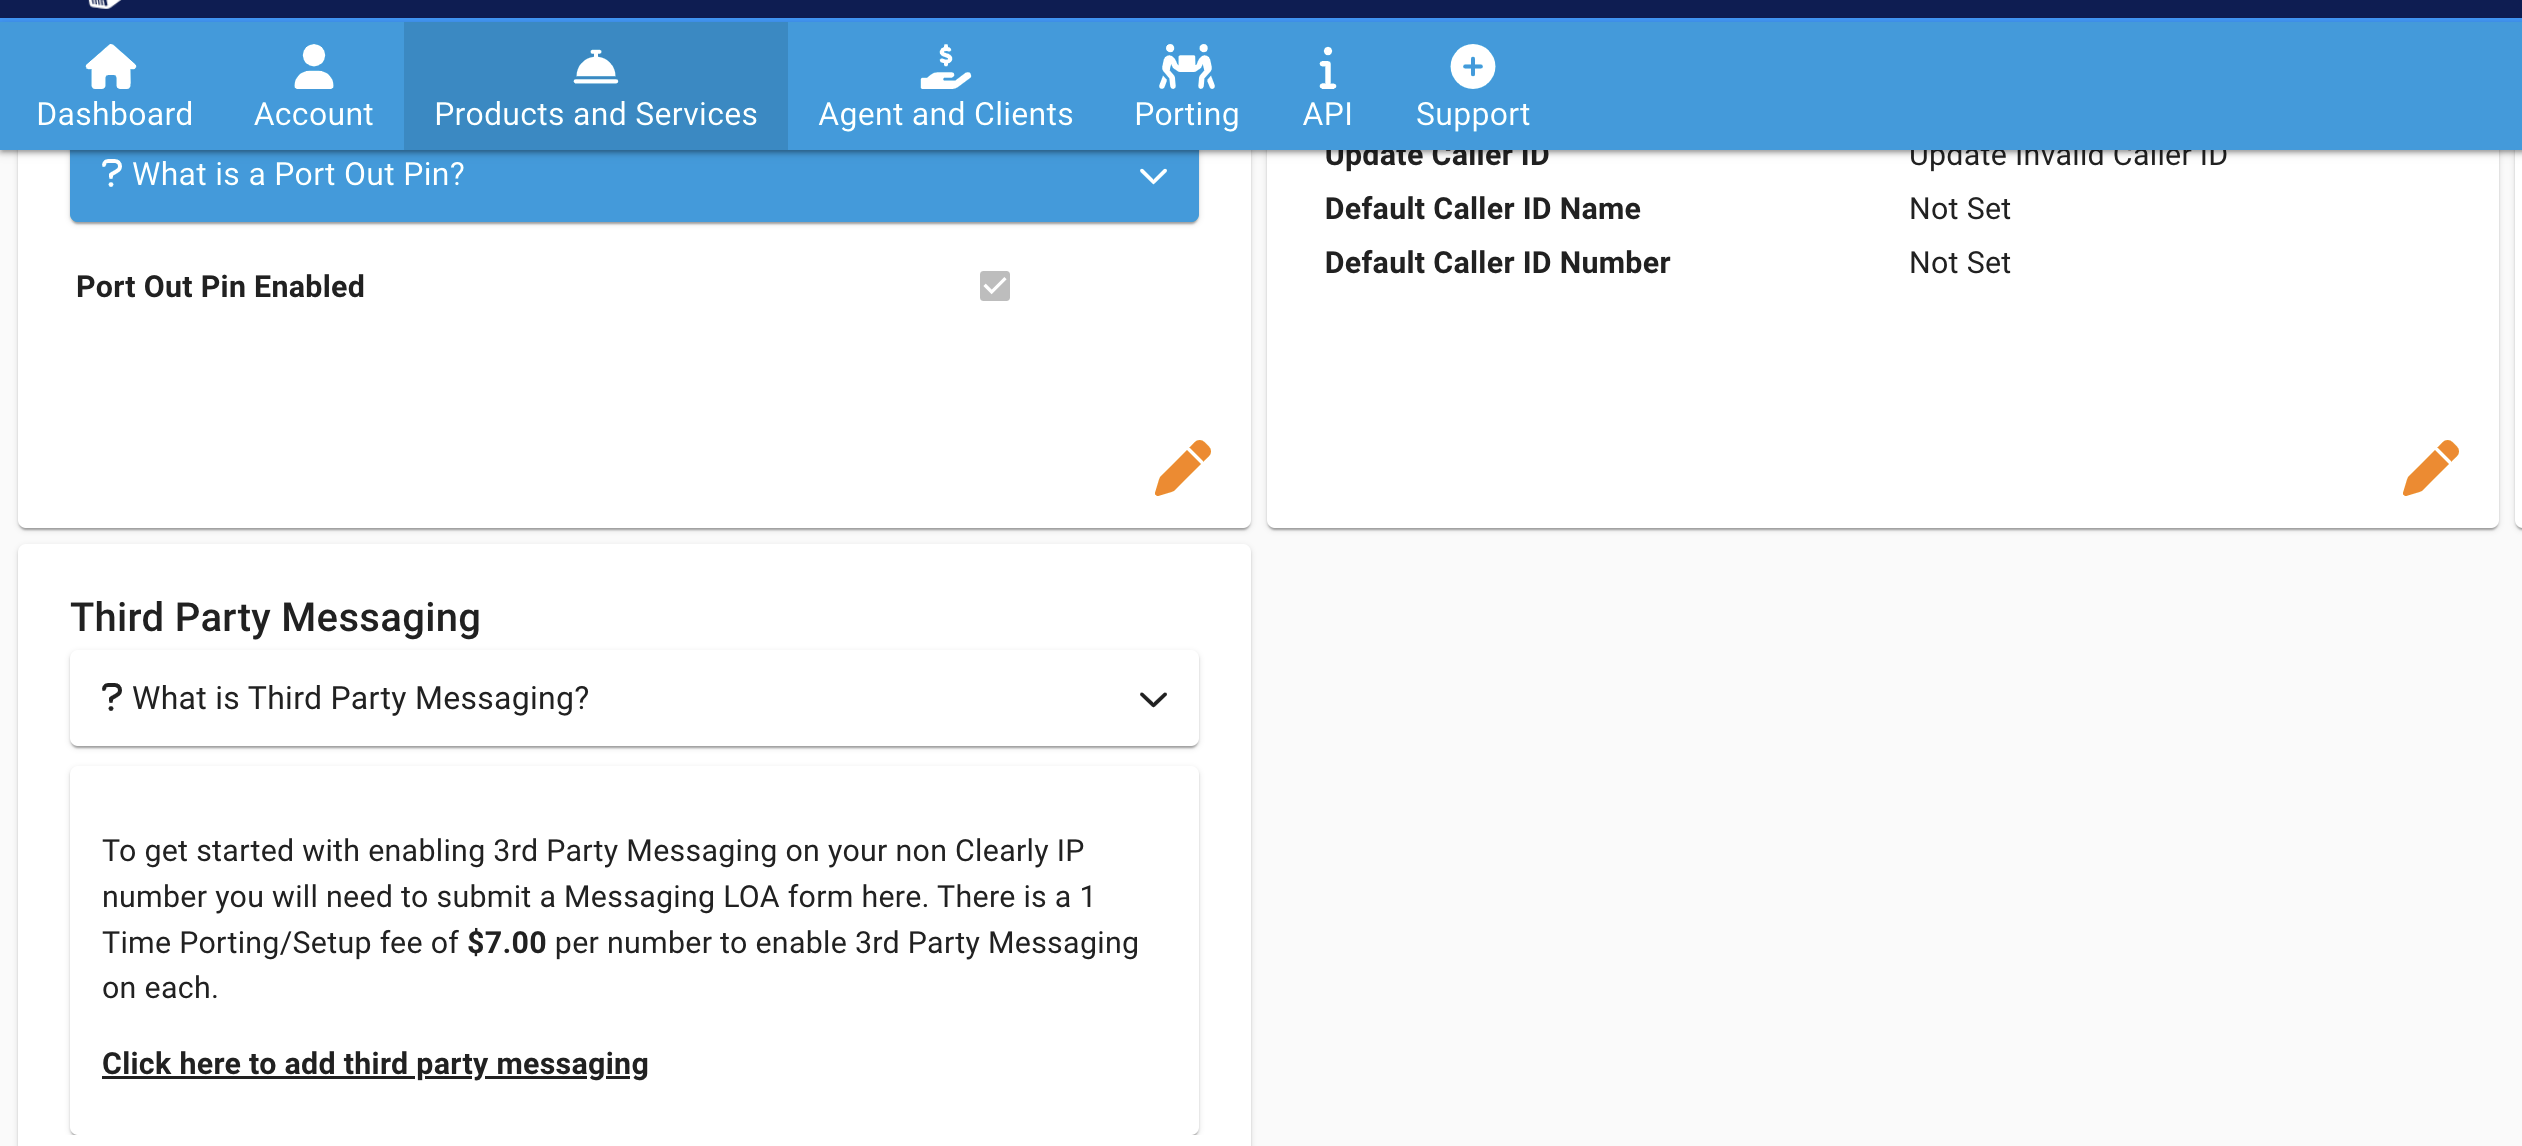
- Fill in the LOA and our porting team will keep you updated to the progress on updating your number for Clearly IP to take over the messaging. The process can take anywhere from 1-5 Business Days.
- Once the messaging portion of the number has been moved to us you will manage them like any number you buy from Clearly IP. The only difference is they will show as SMS only and not voice capable.
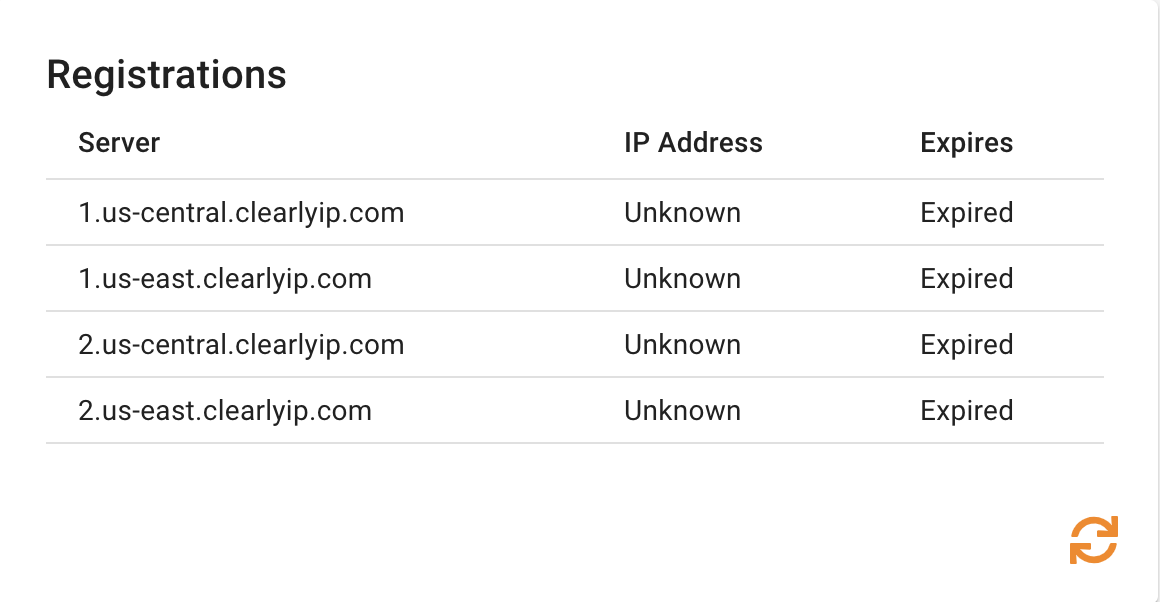
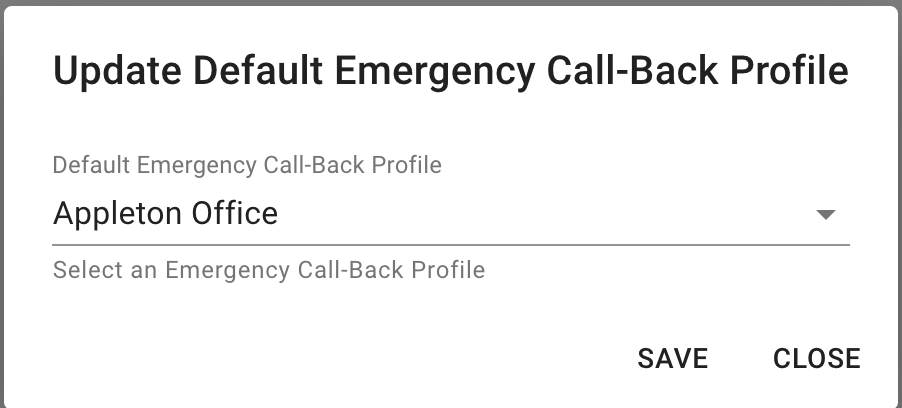
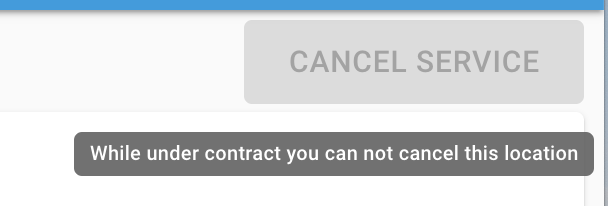
Setting or Changing Default 911 Information Closing a Location SubLocations A SubLocation is a location that falls under an existing Primary location. It uses the Call Paths and Phone Numbers of the Primary Location. It allows for a separate PBX to register with its own SIP Username and Password and be part of the Primary Location. A SubLocation does not receive an Invoice since the Phone Numbers and Call Paths are part of the Primary Location, but Phone Numbers can be routed to a SubLocation or Primary Location. Important notes about Primary Locations and SubLocations. - When using SubLocations, please ensure that both the Primary Location and its associated SubLocations are registered to the same ClearlyIP Trunking Server. For example, you cannot register a SubLocation to 1.us-east.clearlyip.com while the Primary Location is registered to 1.us-central.clearlyip.com. All locations must register to the same Trunking Server to function correctly. You should not use SRV addresses if setting up this way.
- RECOMMENDED: If you need to register the Primary Location and a SubLocation to different Trunking Servers, or will be using SRV addresses, you must create an additional SubLocation to replace the use of the Primary Location, and NOT have any device/PBX registered to the Primary location in this scenario.
- For instance, suppose you need a ClearlyIP E1/T1 Gateway to register to 1.us-central.clearlyip.com, and a ClearlyIP 8FXS Gateway to register to 1.us-east.clearlyip.com. To make Smart Routing work in this case, you must create a dedicated SubLocation for each gateway—one for the E1/T1 Gateway and another for the 8FXS Gateway. This setup ensures full compatibility with Smart Routing and allows you to take full advantage of its capabilities.
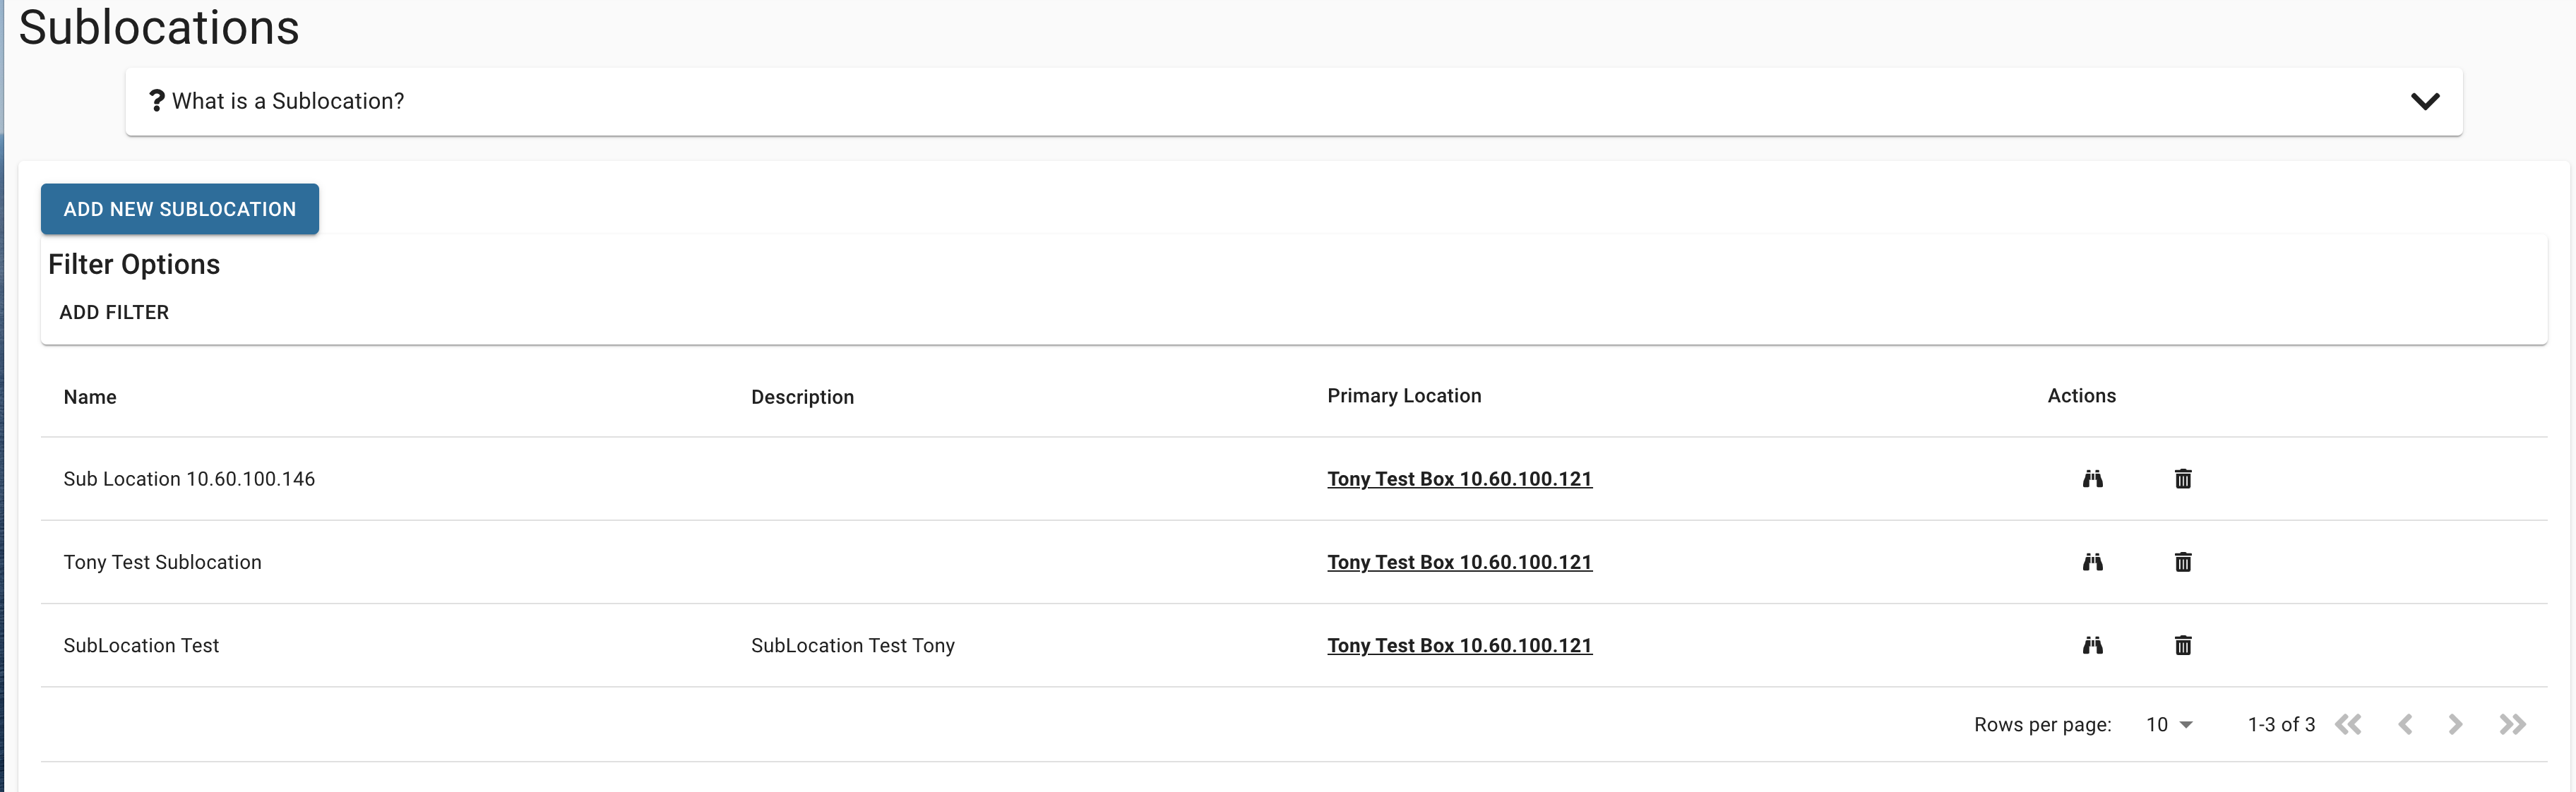
- From the Portal click on Products and Services > SubLocations to see the list of the current SubLocations of your account.
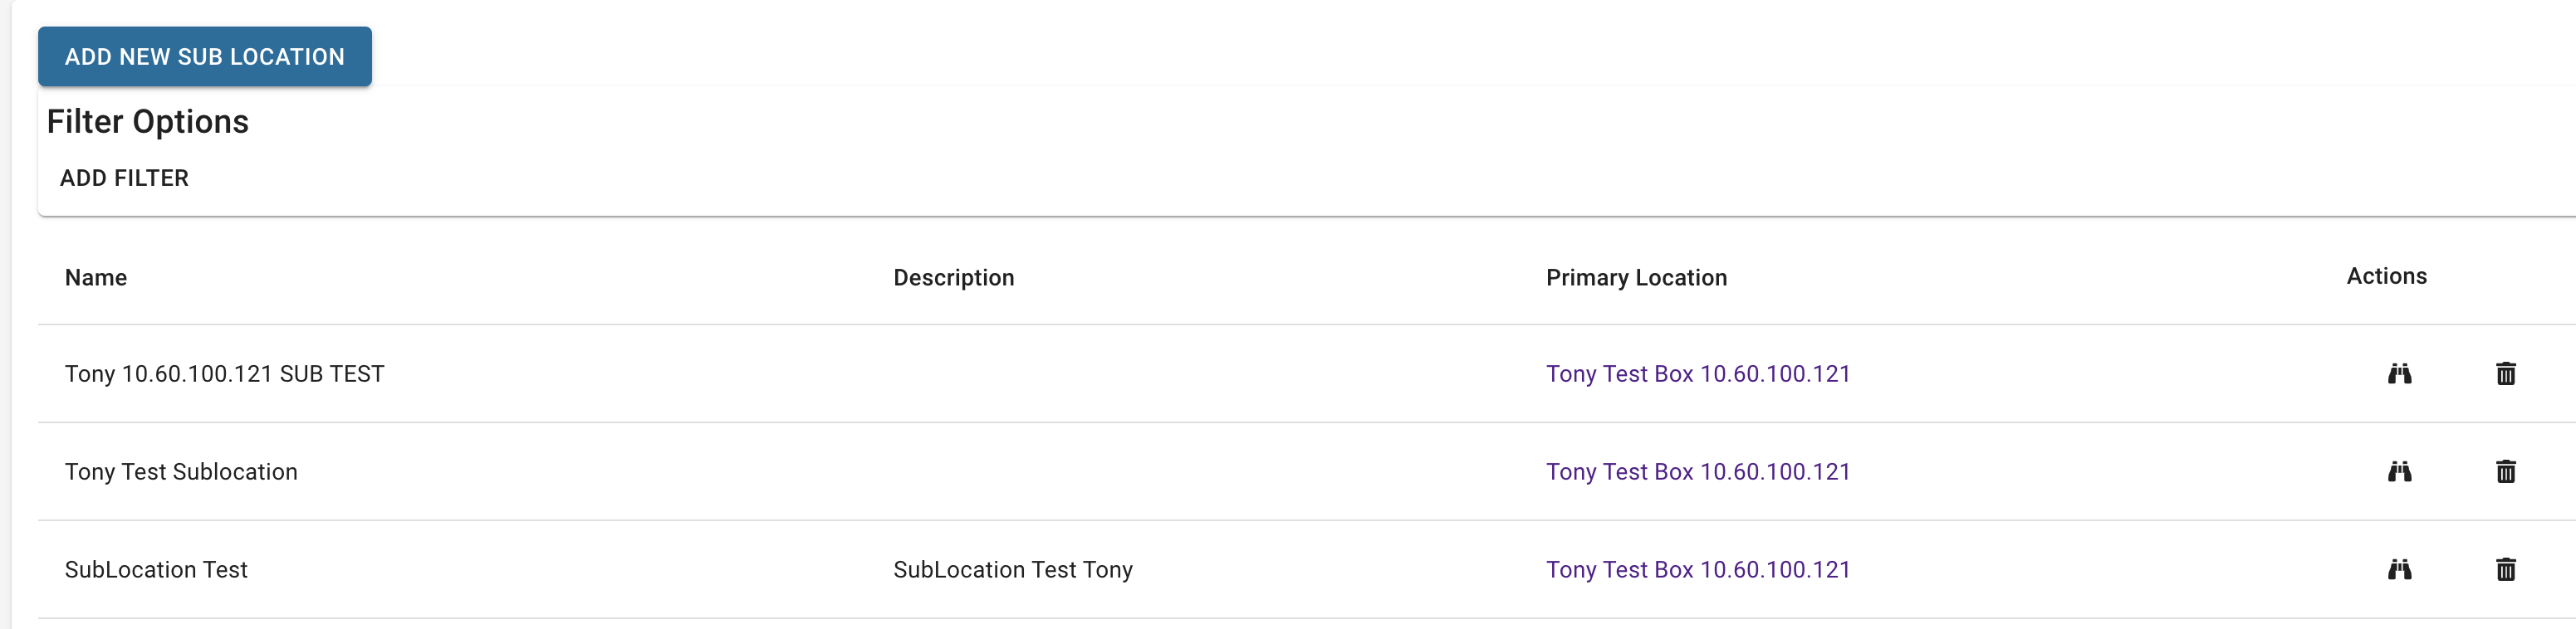
- From here you can see a list of all existing Sublocation's and create a new Sublocation.
 Creating a New Sublocation - From here we can click on the "Add A New Sub Location" button to create a new SubLocation

- First thing we need to do is select which Primary Location this new SubLocation will belong to and press the "Next" button

- Now you can click on the button"Add a New SubLocation For XXXX" to add your first new SubLocation to this Primary Location

- Provide a Name and Description for this SubLocation and press the "Add to List" button

- You will now see the new SubLocation that you want to create and can either press the "Save" button to have it create your SubLocation, or the "Add a New SubLocation For XXXX" if you want to add additional SubLocations before saving this one.

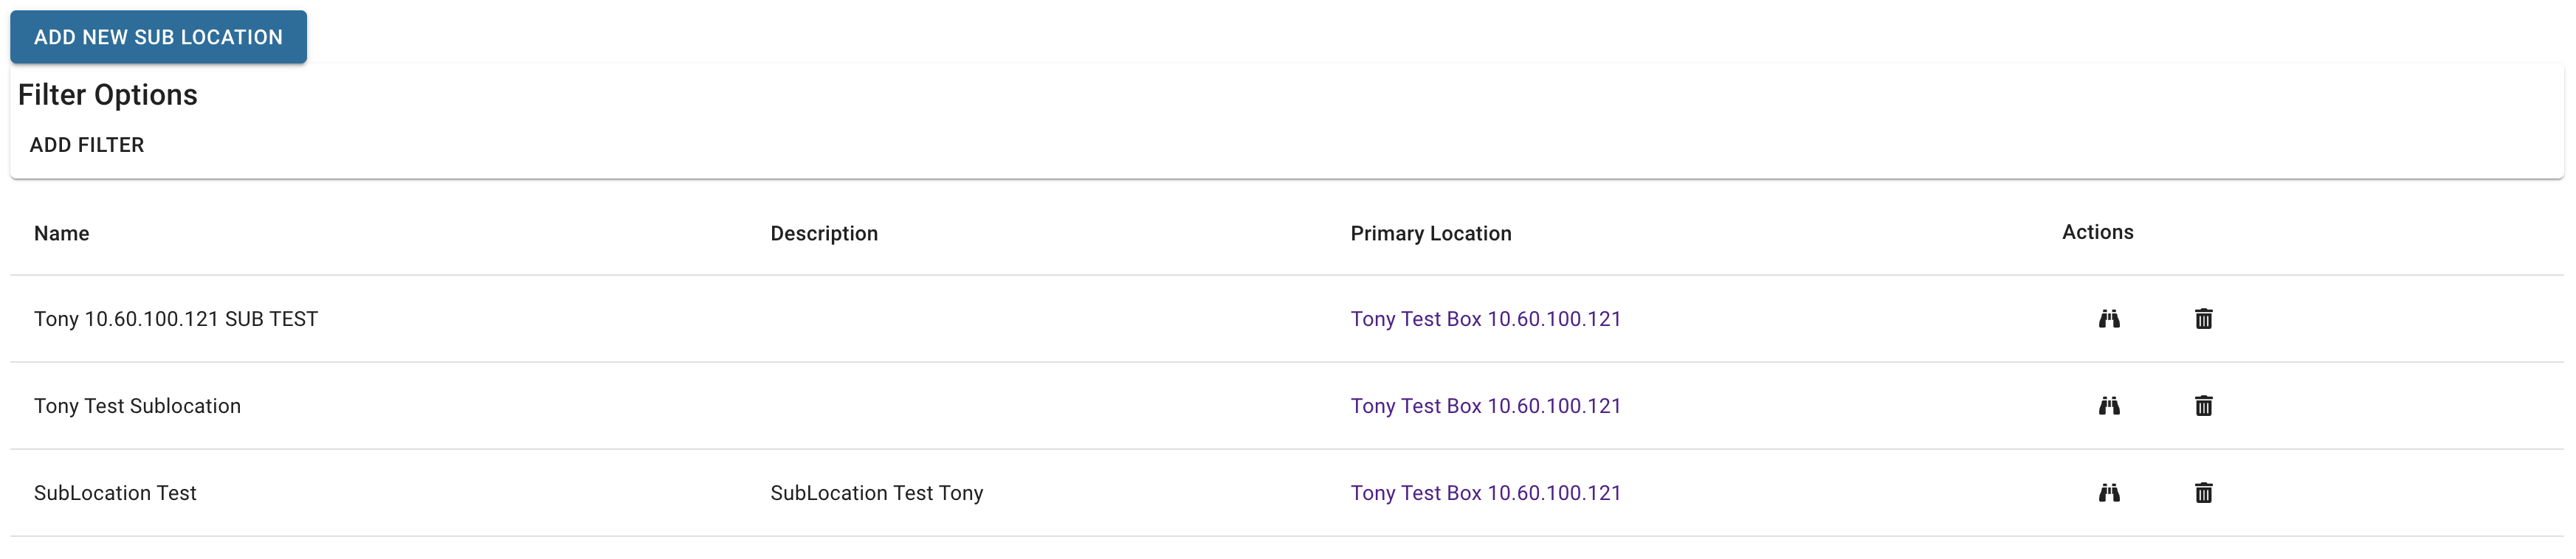
- You will now be redirected back to the main SubLocation page and your new SubLocation(s) will be shown that you have created and saved
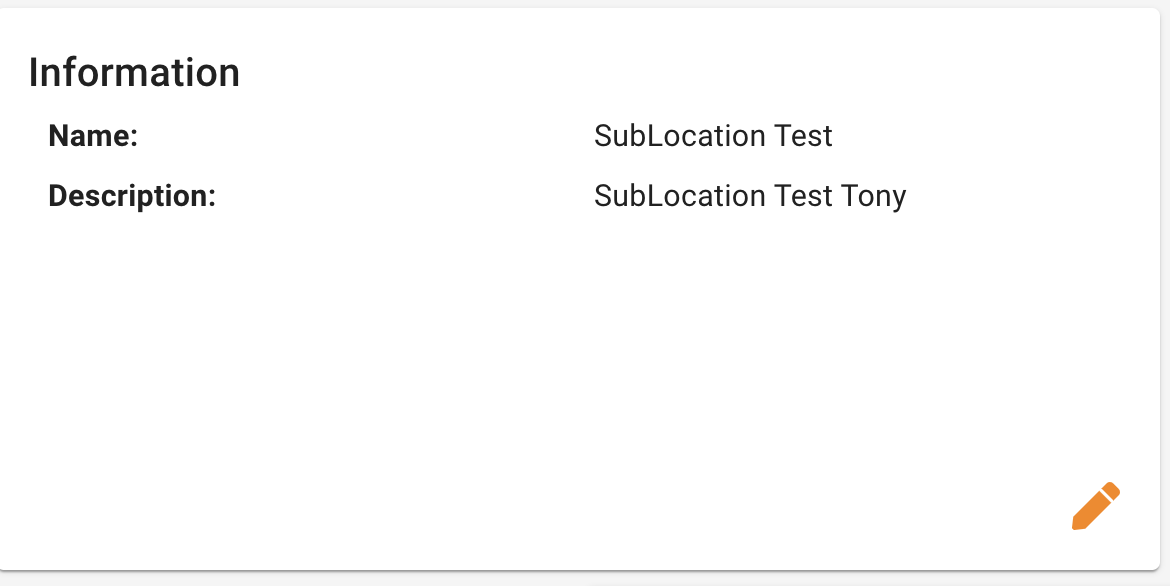
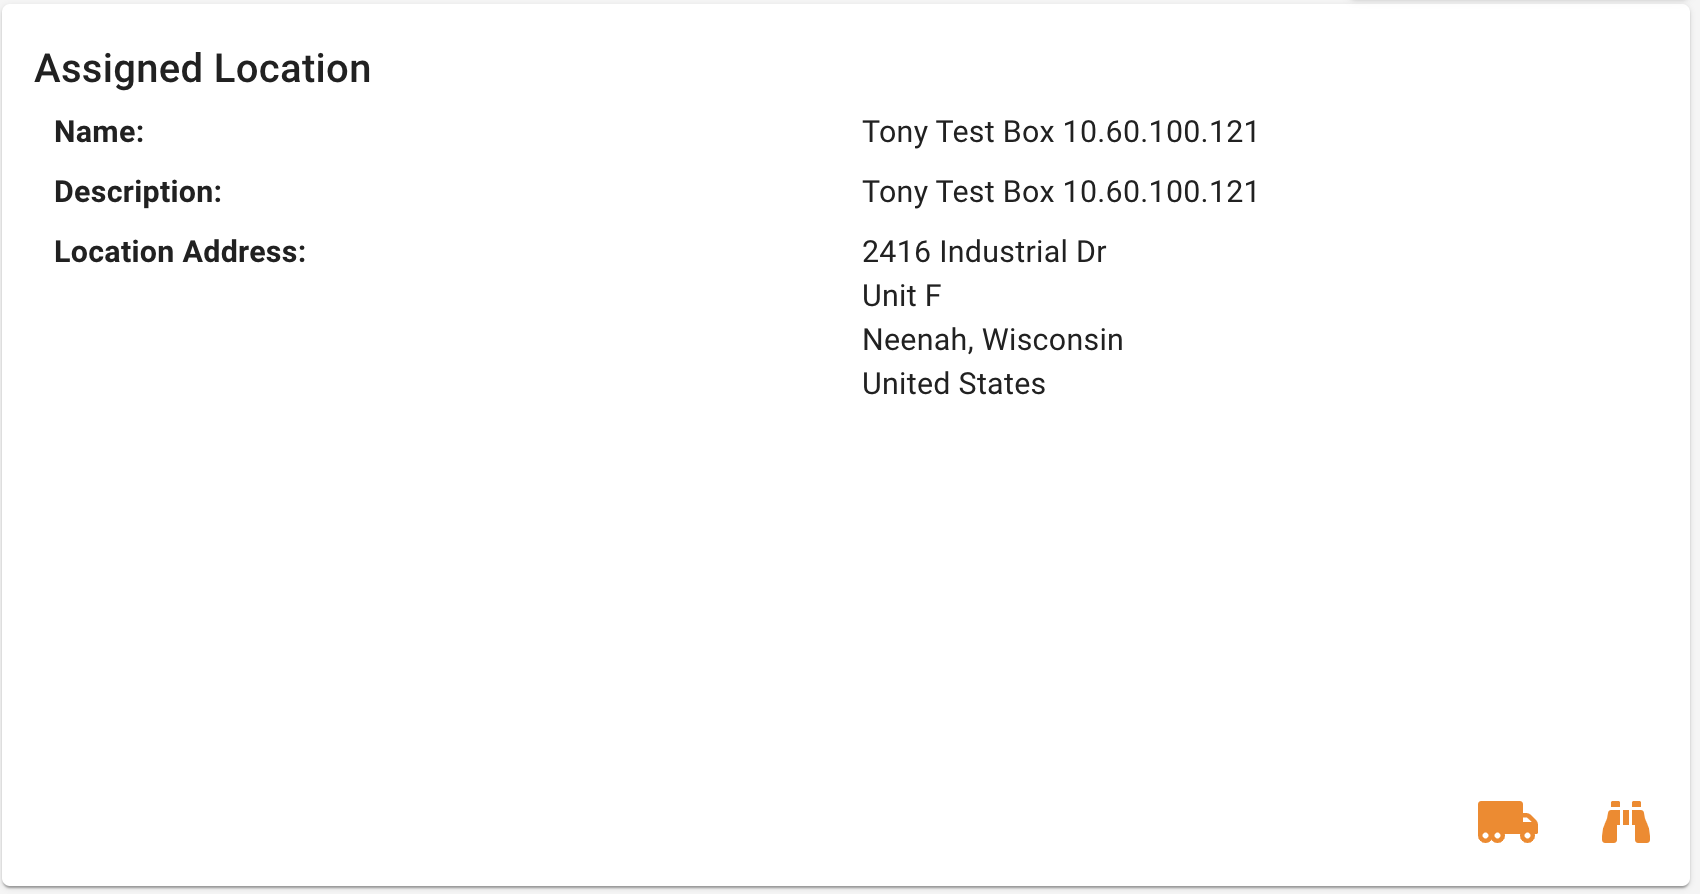
Viewing and Editing a Sublocation - Click on the View icon under the Action column for the SubLocation you want to manage
- You can change the name and description for the SubLocation here
- Current Registration Status can be seen here
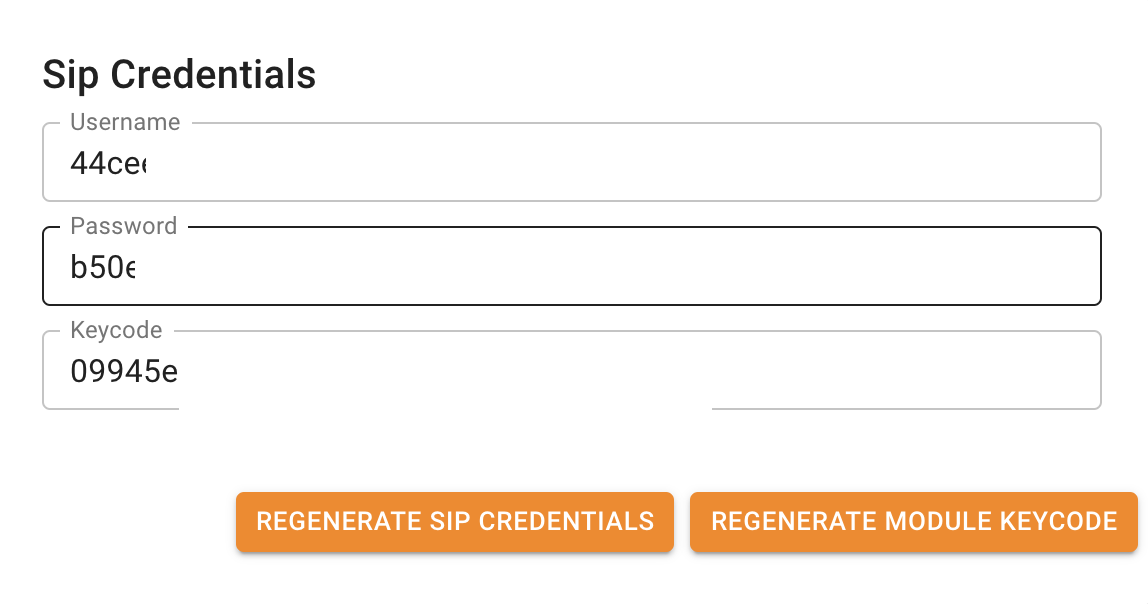
- Your SIP Username, Password and FreePBX Module Key Code can be seen here, and reset should you need to have it generate new ones
Numbers
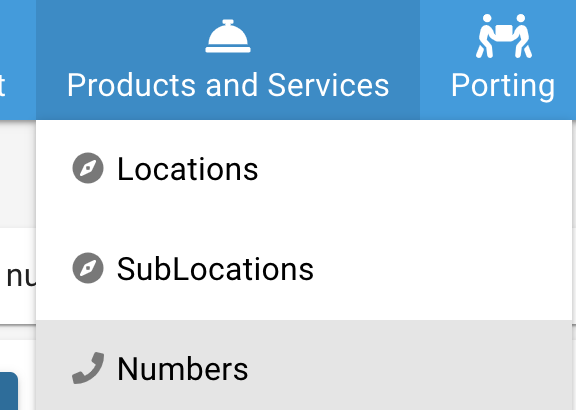
Buying Additional Numbers for a Location - Click on Products and Services > Numbers
- Click on the Add New Numbers button
- Pick what Trunking Location you want to purchase the new numbers for

- From here we can buy North America and Toll Free Numbers (DIDs). At the top you will see what your per month rate is for the Local Numbers and for Toll Free Numbers, as well as what the per minute rate is for incoming calls received on the Toll Free Numbers you purchased.
- Once you have picked 1 or more numbers they will be added to your cart. Click on the number will add it to your cart and grey out the number in the selector below as shown. You can then search for numbers in different rate centers and add them to your cart, and even add Toll Free Numbers.
- All your numbers that you have picked will be shown in the cart on the right hand side along with what the per month price for each number is.
- Press the Next button and complete the checkout process and your new numbers will be active and ready to be used now.
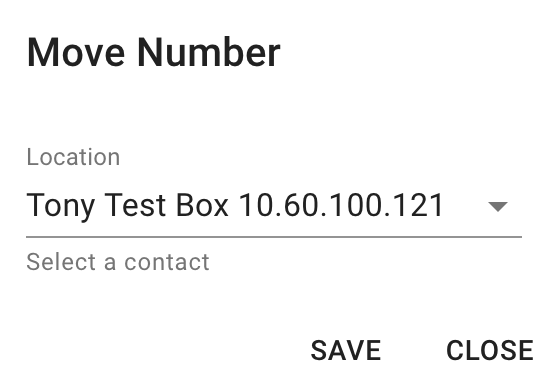
Moving Numbers between Locations CNAM Updating (Caller ID Name) Per Phone Number Failover - To set a Failover for a specific Number (DID)
- From the Portal click on Products and Services > Phone Numbers
- Find the Number you want and click on the binoculars icon to go to the Numbers page

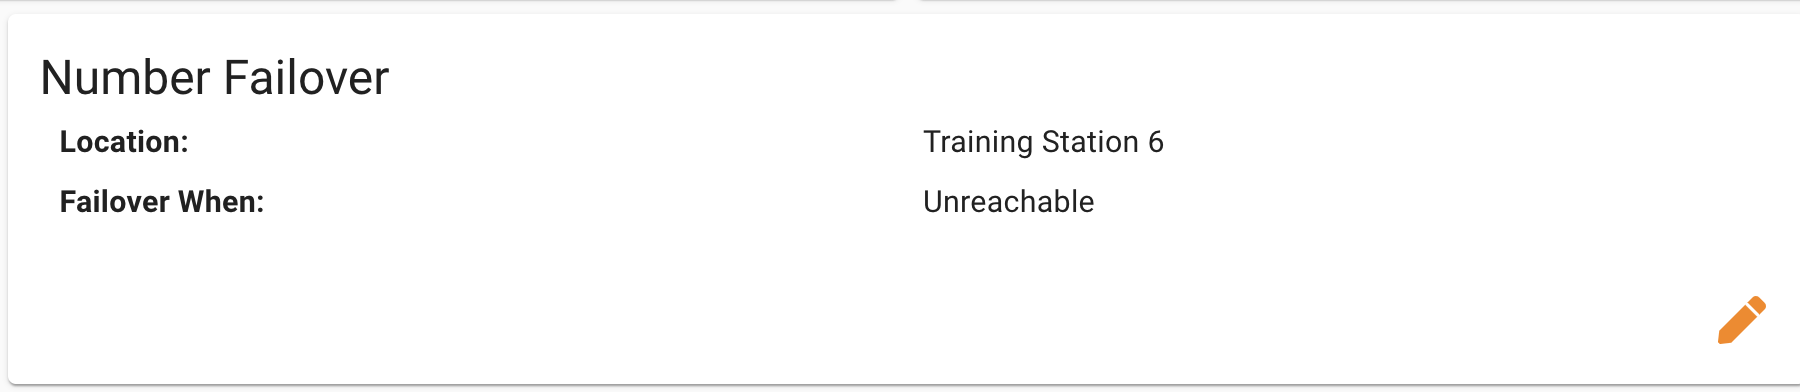
- Scroll down the to the section called Number Failover and click on the edit Orange Pencil icon

- This will pop up a window with a drop down for you to select what Type of failover you want. Your options are;
- DID - which is what you would pick too failover to another phone number that you have. This phone number does not need to be a number that you have with us, it just needs to be an active number with some carrier including your cell phone.
- URI which would be the IP address or FQDN of another PBX.
- Existing Location - Can be any other Location under your account which will just send the calls to that Location on failover.
- Failing over to a phone number (DID) you will be presented with a form to provide the phone number you want to failover to and than pick if we failover when the PBX is unreachable or immediately fail all calls to this Number over and never try the PBX first.
- Failing over to a IP Address or FQDN of another PBX (URI) you will be presented with a form to provide the IP Address or FQDN you want to failover to and than pick if we failover when the PBX is unreachable or immediately fail all calls to this Number over and never try the PBX first. Make sure to prefix your IP or FQDN with sip:// as shown below.
- If failover over to another Location you just pick from the drop down the Location you want to failover to and than pick if we failover when the PBX is unreachable or immediately fail all calls to this Location over and never try the PBX first.
- Press the Save button when done and now you will see in the Widget your active failover setting for this Phone Number
 - You can also review the Batch Updating guide on how to Bulk Update more than 1 number at a time here.
Number Routing Logic - A phone number can be setup to route to the Primary Location the number belongs to or can be enabled for our "Smart Routing" which will allow you to route a number either in a Linear or Random logic to the Primary Location it belongs to along with and SubLocation that are under the Primary Location.
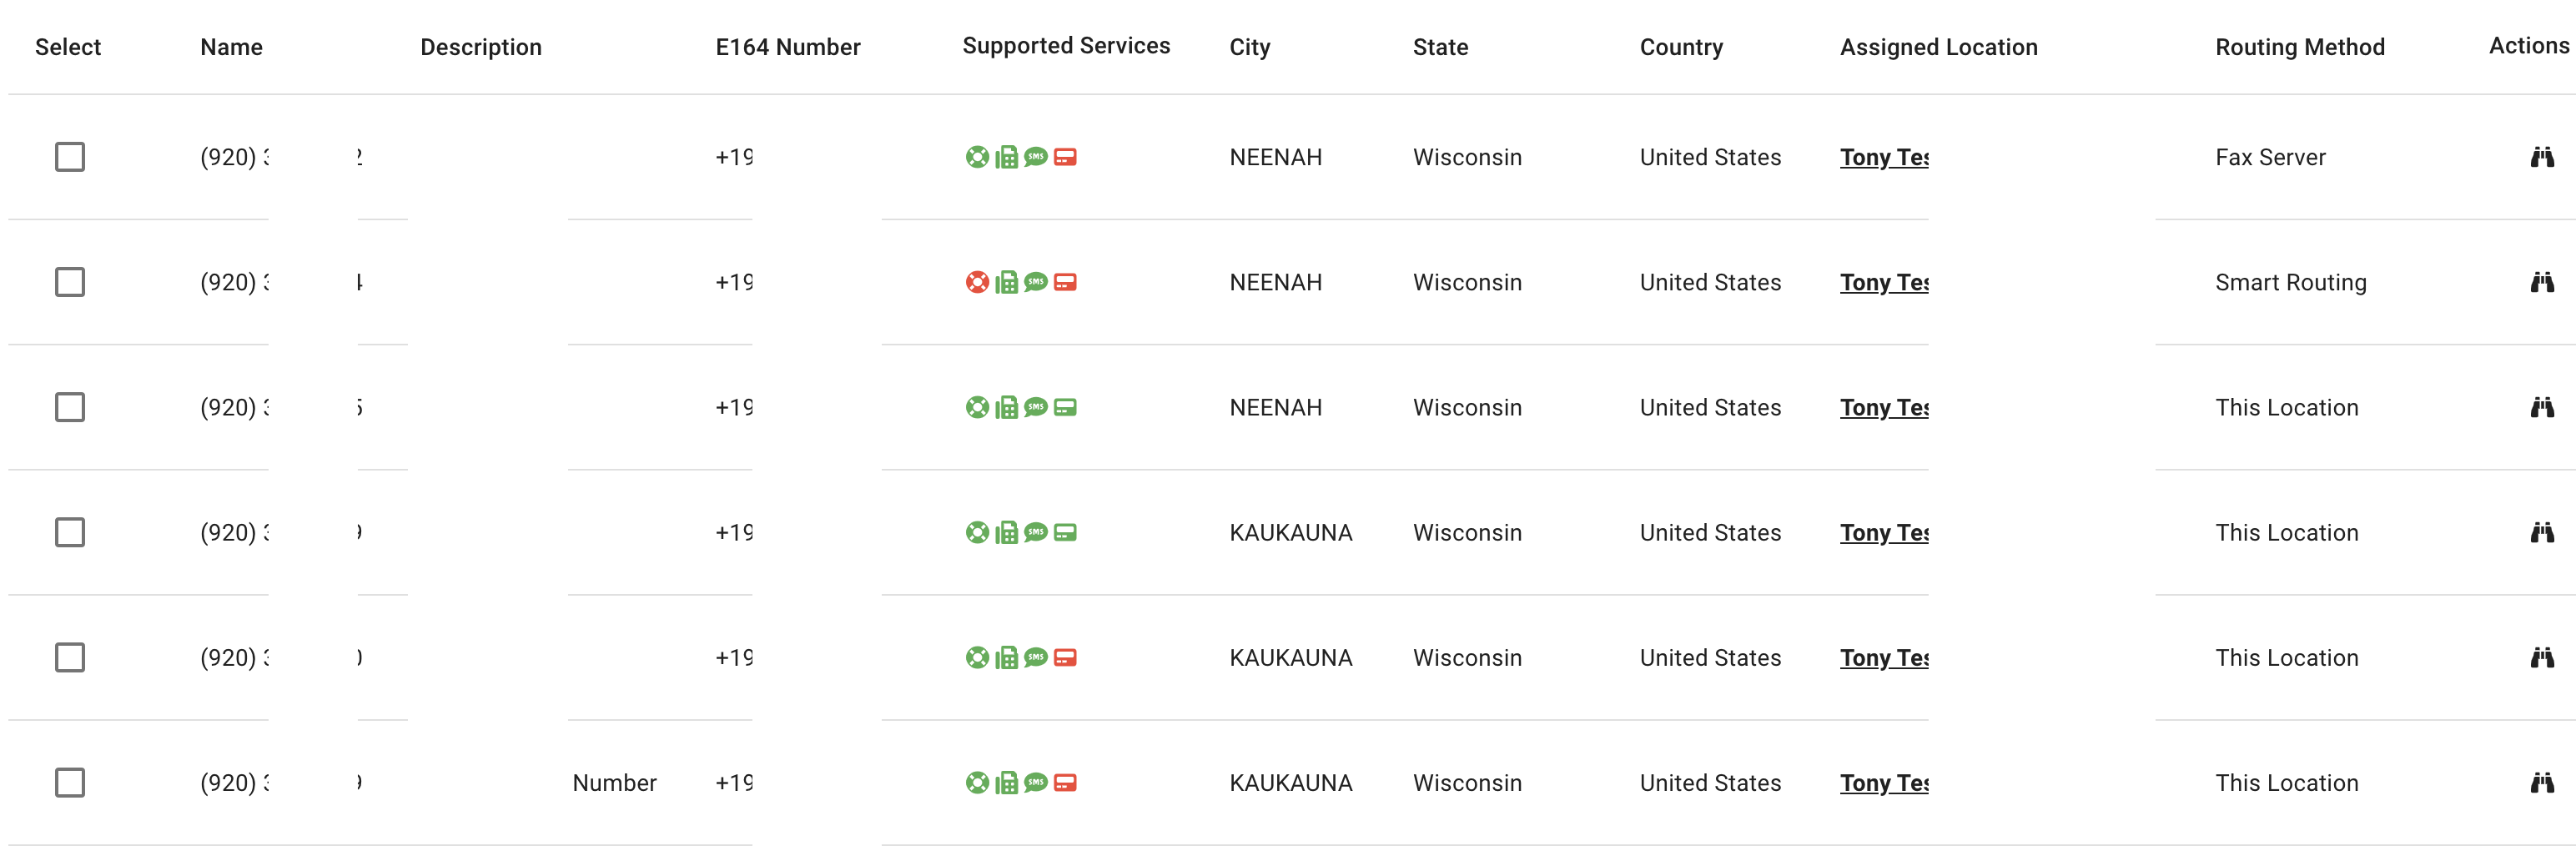
- By default when purchasing a new number it will be setup to route to the Primary Location that the number belongs to. To see what mode a Number is routing to you will want to go locate the Number from the Numbers section in the menu.
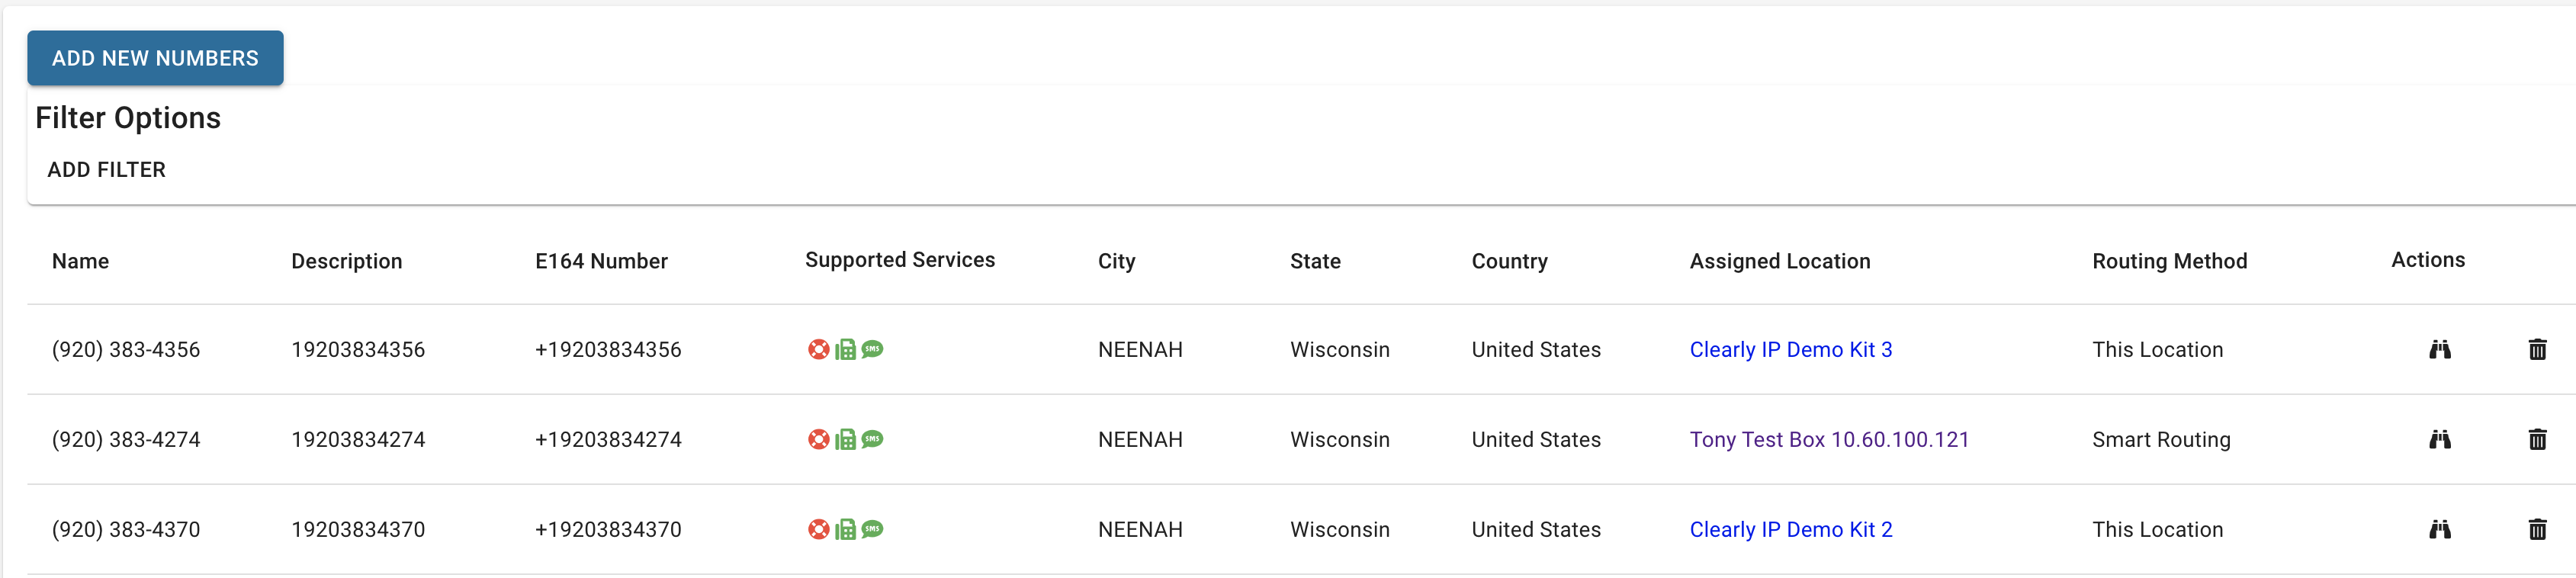
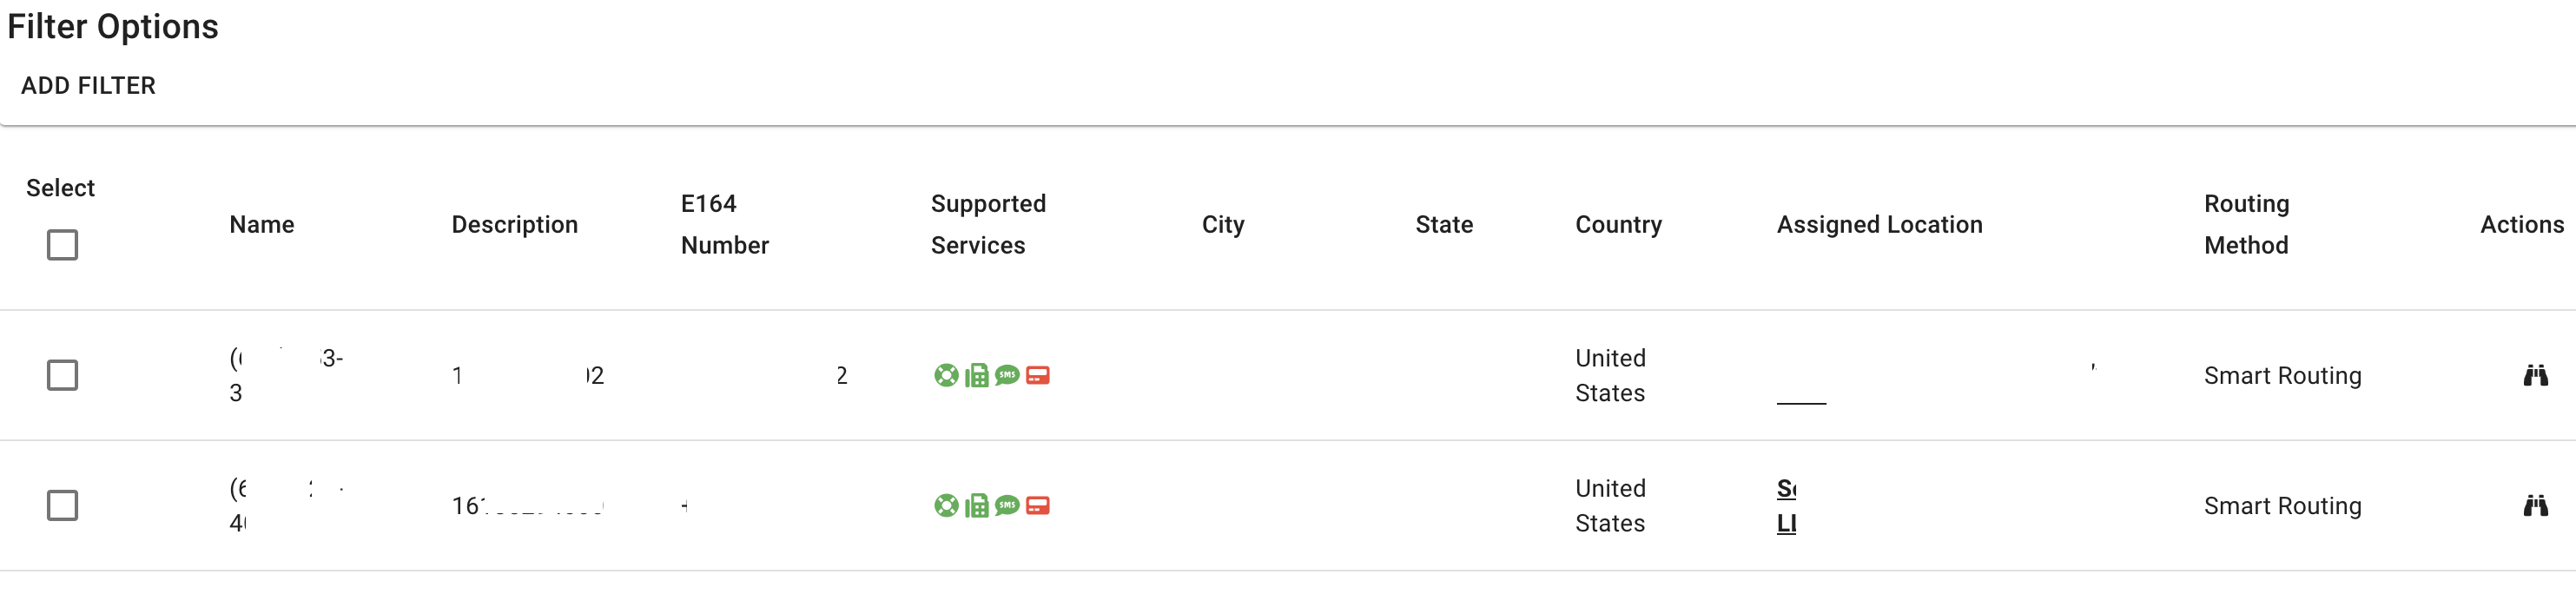
- Click on Products and Services > Numbers
- You will see a list of Numbers and can see if they are setup to Route to the Location or using Smart Routing
Primary Location Routing - By default when purchasing a new number it will be setup to route to the Primary Location that the number belongs to.
- If you have Smart Routing enabled and want to move the Number back to just plain routing to the Primary Location you would locate the Number and click on the Binocular icon under the action column.

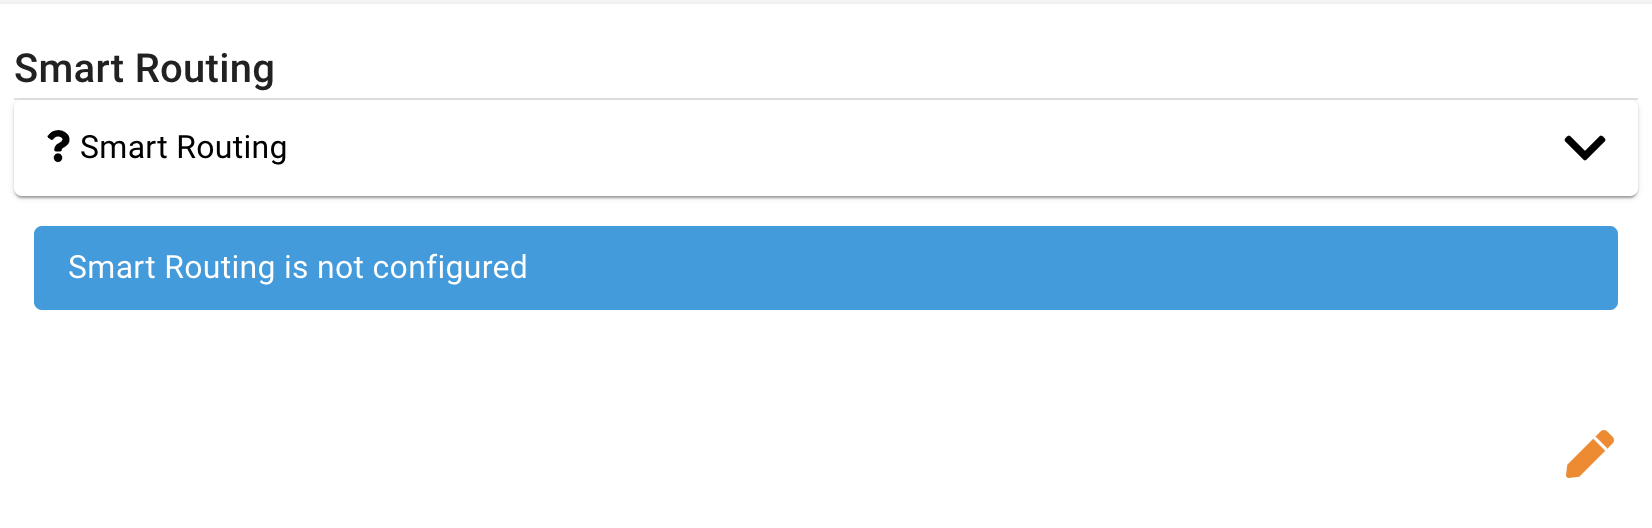
- Under the Smart Routing card you would click on the Edit Icon
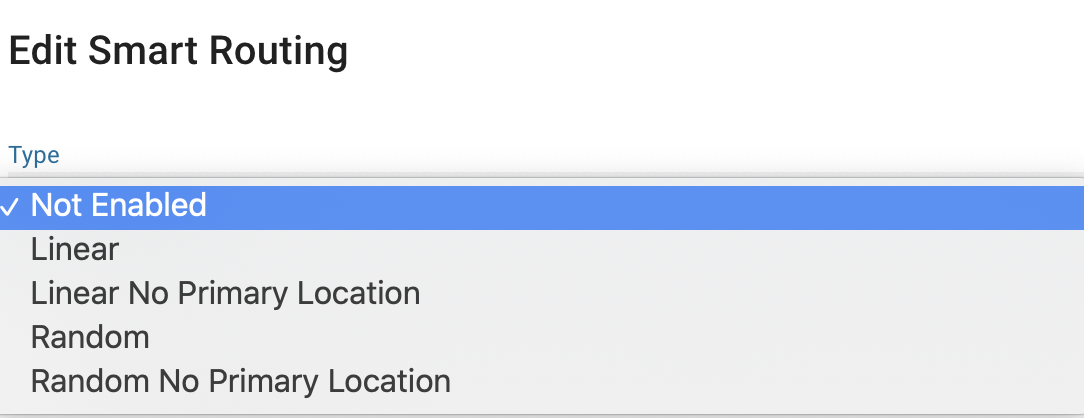
- Under the Type pick "Not Enabled" and save your changes
- You can now see Smart Routing has been disabled so it will now route calls to the Primary Location.
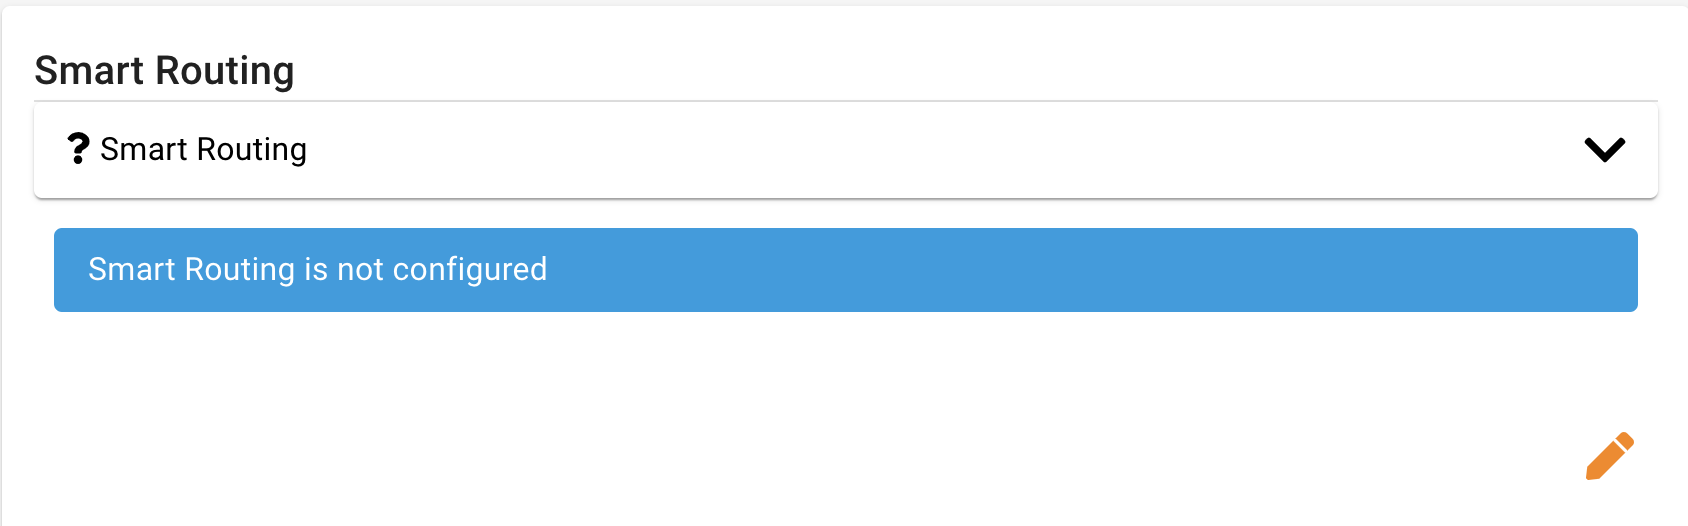
Smart Routing - If you want to enable Smart Routing on a Number you would locate the Number and click on the Binocular icon under the action column.
- Under the Smart Routing card you would click on the Edit Icon
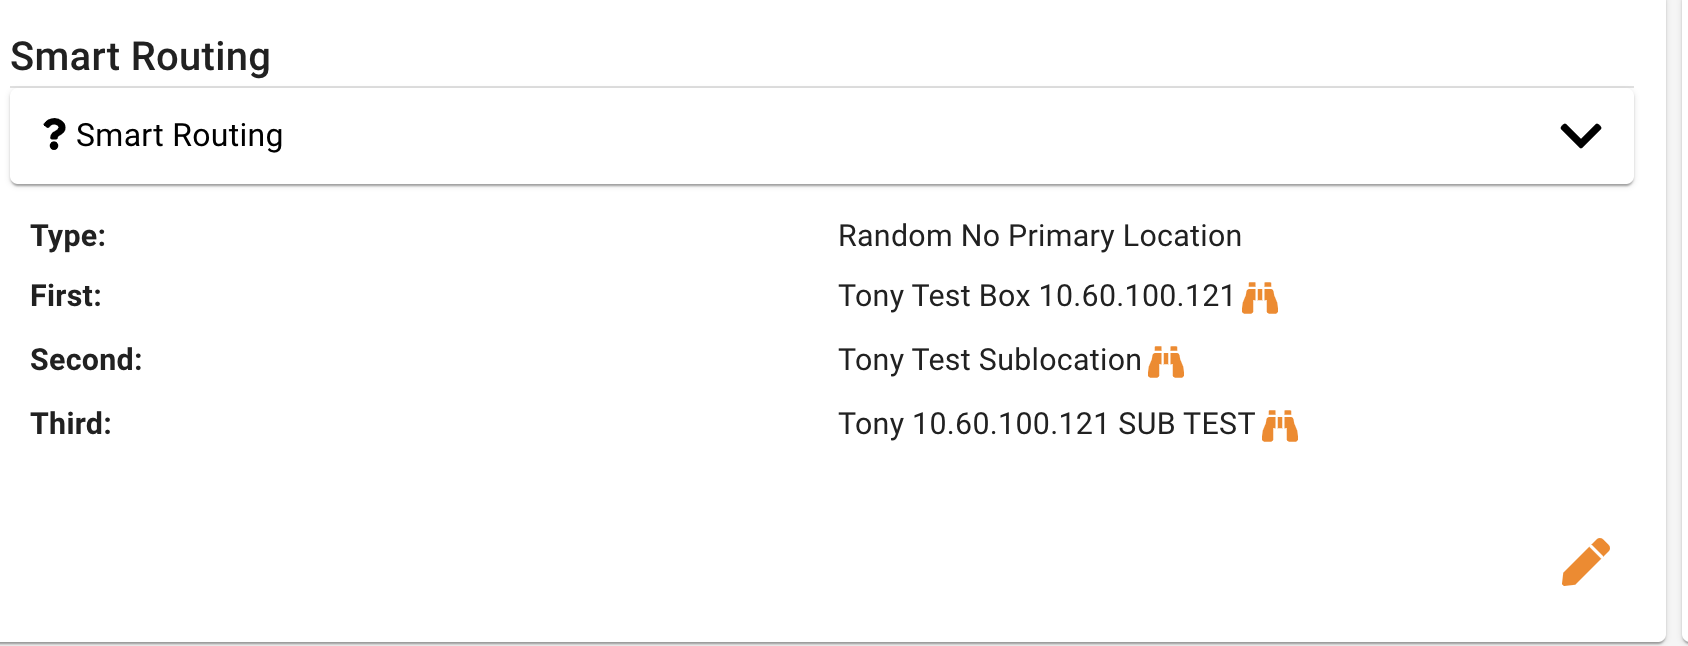
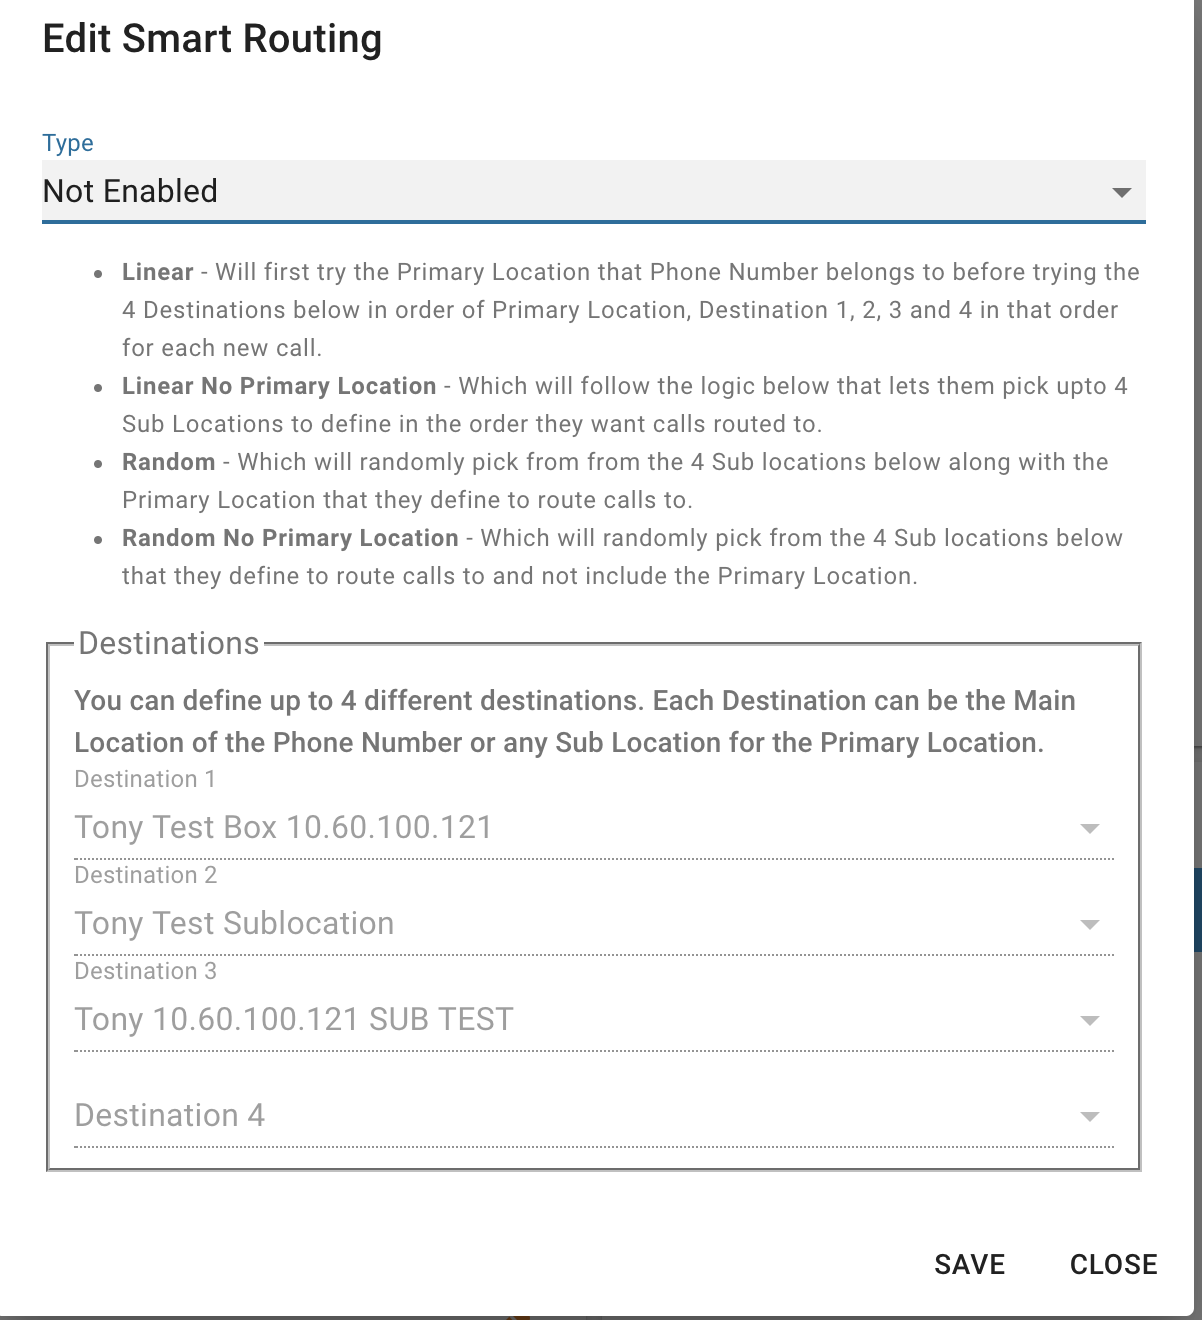
- Pick which Type you want to use for routing logic.
- Linear - Will first try the Primary Location that Phone Number belongs to before trying the 4 Destinations below in order of Primary Location, Destination 1, 2, 3 and 4 in that order for each new call.
- Linear No Primary Location - Which will follow the logic below that lets them pick upto 4 Sub Locations to define in the order they want calls routed to.
- Random - Which will randomly pick from from the 4 Sub locations below along with the Primary Location that they define to route calls to.
- Random No Primary Location - Which will randomly pick from the 4 Sub locations below that they define to route calls to and not include the Primary Location.
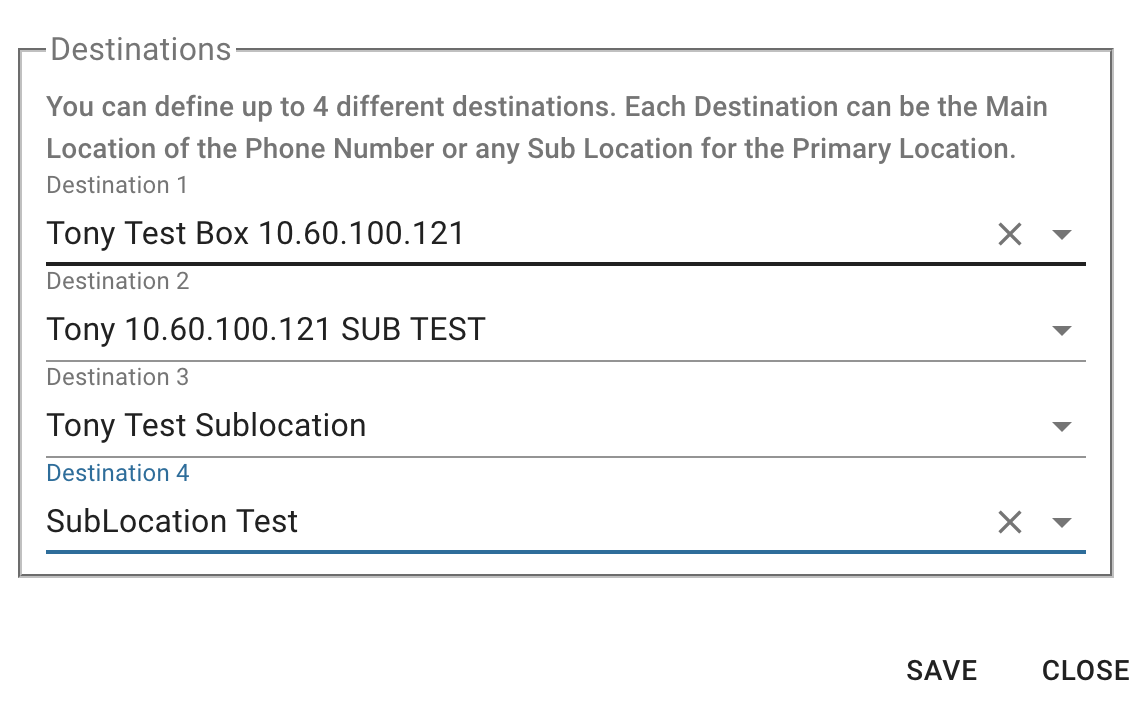
- Define up to 4 Destinations to be included in the Smart Routing logic. A Destination can be the Primary Location of the Number or any SubLocation that belongs to the Primary Location and click on save
- If you need to bulk update more than 1 number at a time you can use our Batch Update tool for Numbers as outlined in the Batch Updating documentation here.
Number Length Routing (ANI) - By default all North America Numbers are routed to your PBX as the 10 digit NPANXX number. You can change this on a per Number basis and pick between the following 3 options
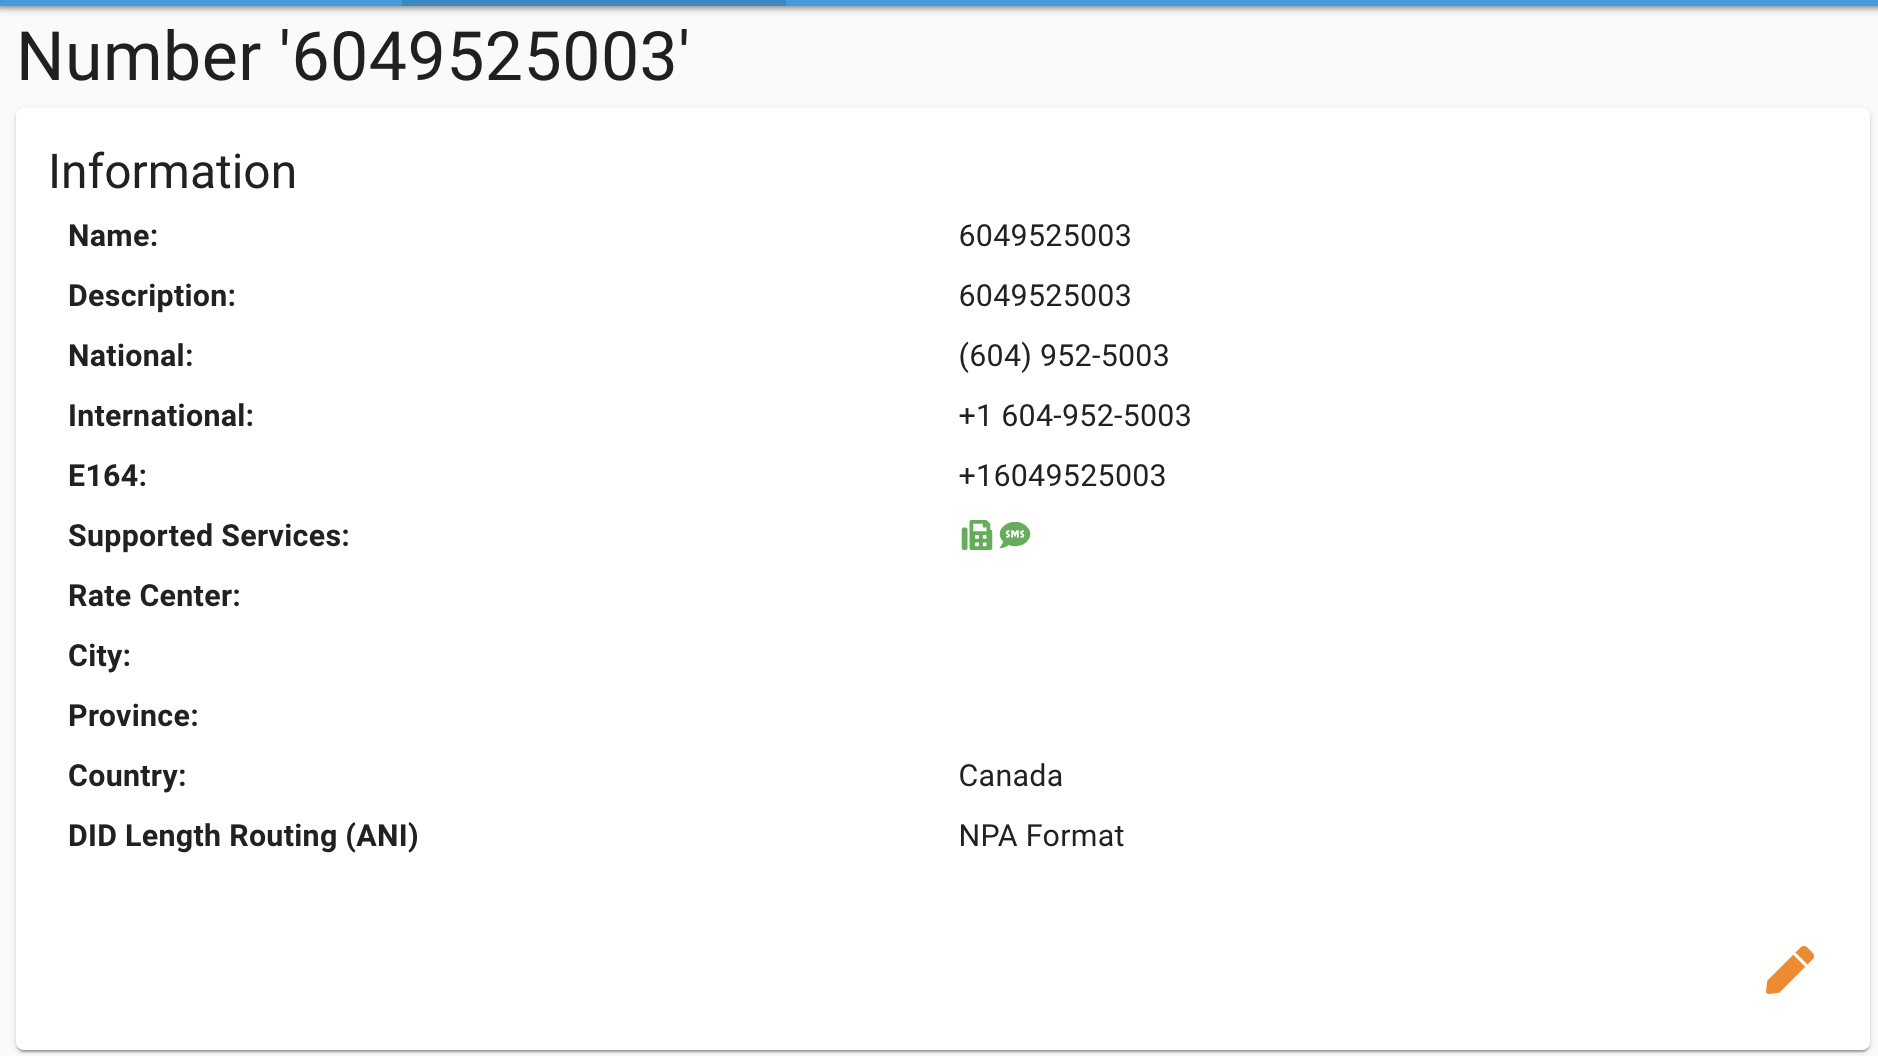
- NPA Format - North America Number will be routed as 10 digit number and International Numbers without the country code. So US Number 1-604-952-5003 will be routed as 6049525003
- E164 Format - North America Number will be routed as 11 digit number and International Numbers with the country code. So US Number 1-604-952-5003 will be routed as 16049525003
- Trunk ID - Call will be routed as the SIP Username and not the number. Used mainly for some ATAs and Gateways.

- Click on Products and Services > Numbers
- You will see a list of Numbers that you have setup. Click on the Binoculars next to the number you want to edit the Number Length routing for.
- From here under the Information widget you will see a field called "DID Length Routing (ANI)" and what it is set to. Press the Pencil icon to change the Routing.
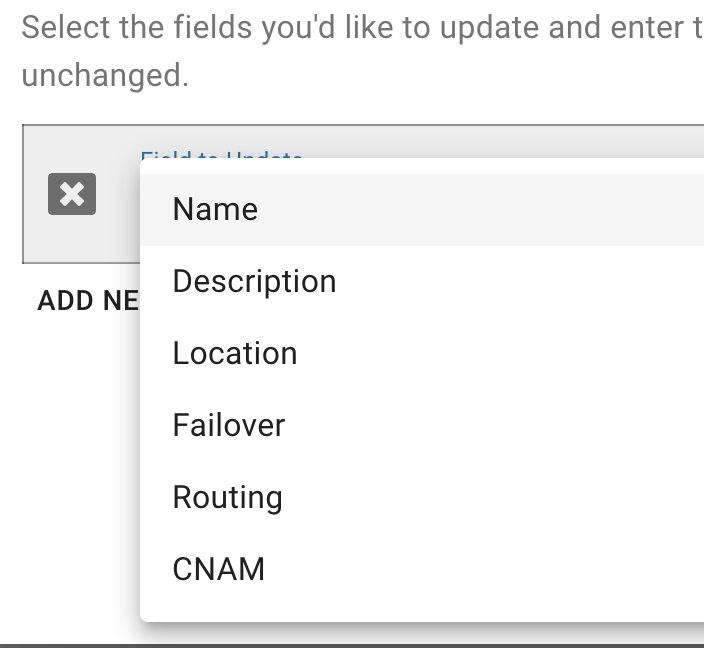
Batch Updating - The Batch Updating tool for Numbers allow you to batch or bulk update the following options for 1 or more Phone Numbers within the same Trunking Location
- Name - Change the Name associated with these numbers. This is by default set to the Phone Number.
- Description - Long description related to the numbers for your own notes and reference purpose.
- Location - Which Location the numbers belongs to and lets you move the numbers to a new location
- Failover - Set or change Failover options for all the numbers
- Routing - Set routing logic for the numbers such as routing to the location they belong to or enabling smart routing for the numbers
- CNAM - Set or change the CNAM Caller ID Name record associated with these numbers
- Port Out Pins - Enable or disable Port Out Pin on these numbers
- DID Length Routing (ANI) - Change the ANI we send to your PBX from NPANXX to E164 or the SIP Username.
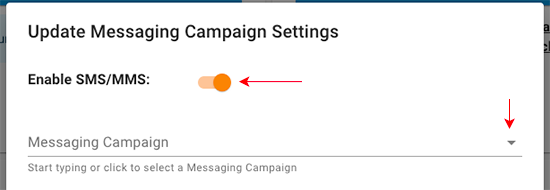
- Messagings - Enable and Disable messagings and linking numbers to a Campaign.
- Click on Products and Services > Numbers
- From here we can see a list of all our Numbers
- Pick 1 or more numbers from the list by clicking the check box on the left of the list

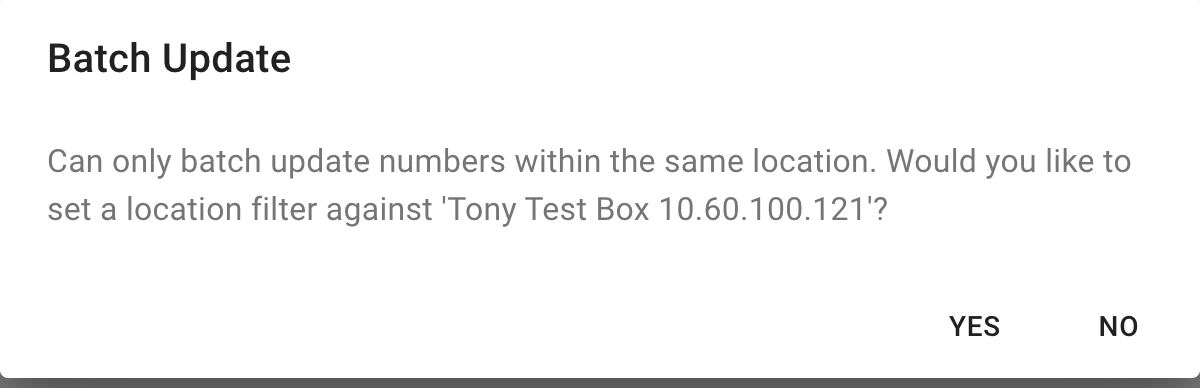
- When using the Bulk Update tool you can only pick numbers from the same Trunking Location so if you pick numbers from more than 1 Trunking Location it will pop up and inform you that you need to restrict to a single Location and it will ask you if you want it to auto filter the numbers by location based on the first number you picked in the list.
- Click on the Batch Update button at the top of the list.
- Click on the Add New Field button after verifying the list of numbers that will be batch updated.
- Pick from the following items that you want to Batch Update and press Next once done and continue to the confirmation process.
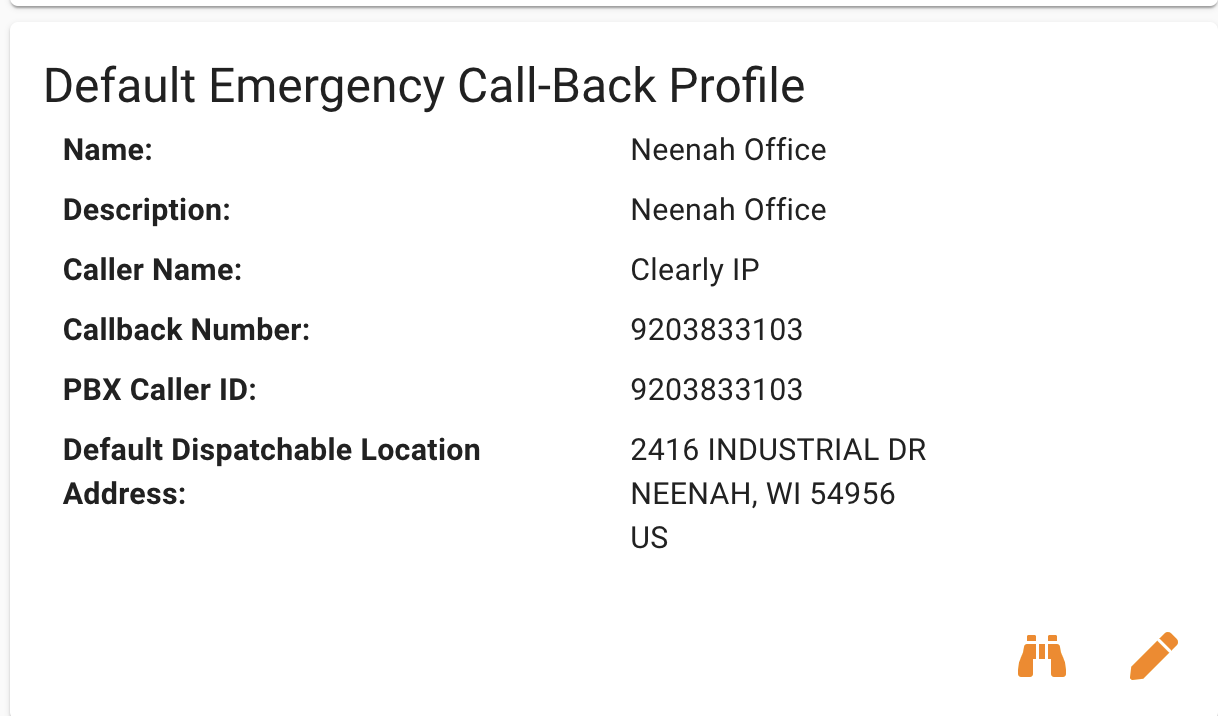
Emergency Call-Back Profiles - Clearly IP breaks E911 into 2 sections as a way to help bring down the cost on traditional e911 and provide the requirements under Kari's Law and Ray Baum's act . We have Emergency Call Back Profiles and Dispatchable Locations,
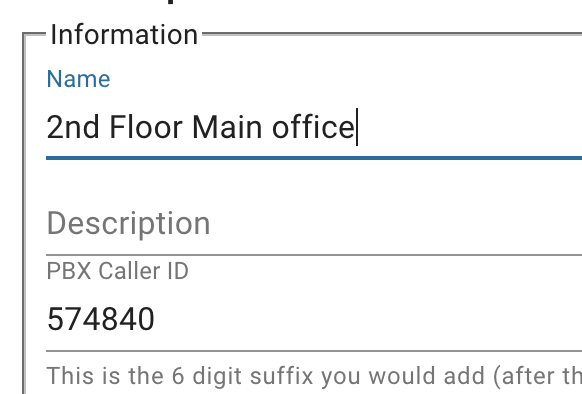
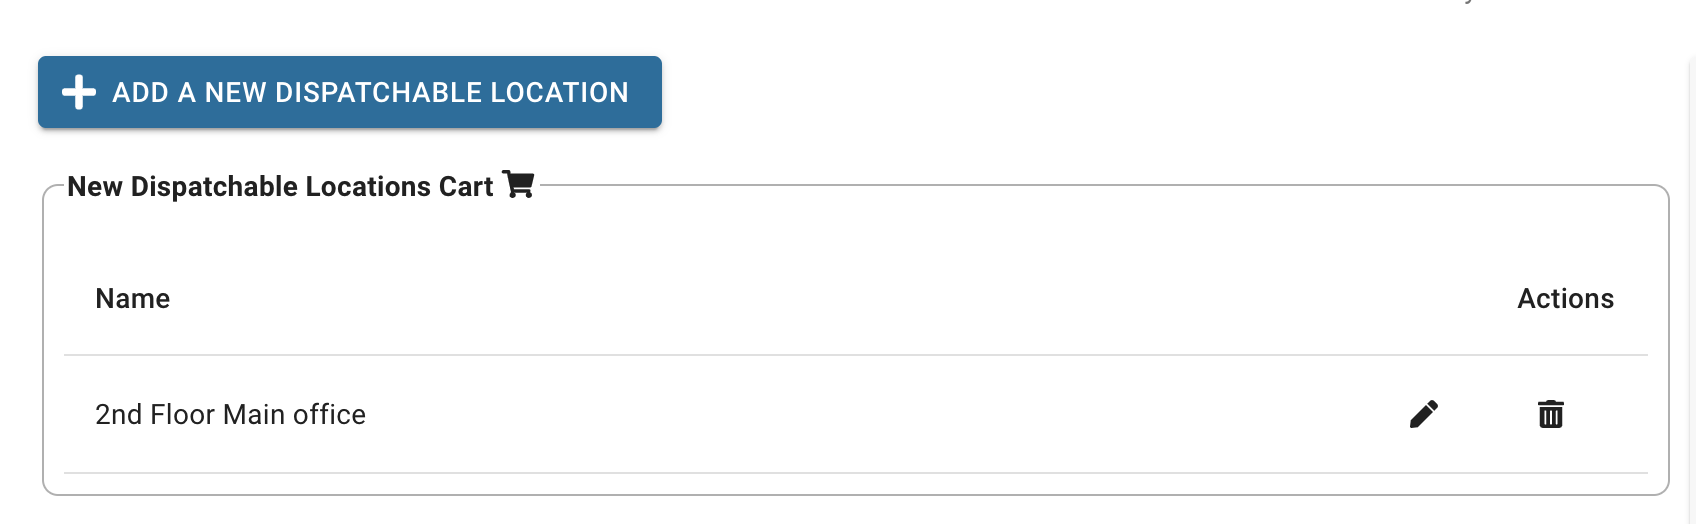
- Dispatchable Location: Is a unique Physical Address. When calling 911 we send the Emergency Call Back Profile and the Emergency Dispatchable Location to the PSAP. You can have a single Call Back Profile as defined below and 5 Dispatchable Locations for example and each Location would be a different identifier or address such as "Northeast Corner" or "Suite 5" or "2nd Floor West Wing"; but all part of the same main address/building with the same Call Back Number that is in the Call Back Profile below. A single Emergency Dispatchable Location is included with each Trunking Location that has Subscription Call Paths you create with us, Free of Charge, and you can buy additional Emergency Dispatchable Location if and as needed.
- Call Back Profiles: Has a Call Back Phone Number and Company Name. When calling 911 your PBX tells us which Emergency Call Back Profile and which Emergency Dispatchable Location we send to the 911 center for each call. A single Call Back Profile can have 1 or more Dispatchable Locations associated with it. The Call Back Profile is how the 911 center is able to know the Caller ID of who is calling them and where they can call back if need be and the Emergency Dispatchable Location tells the 911 center where you are physically located. A single Emergency Call Back Profile is included with each Trunking Location that has Subscription Call Paths you create with us Free or Charge and you can buy additional Emergency Call Back Profiles.
Adding Call-Back Profiles - Click on Products and Services > Emergency Call-Back Profiles
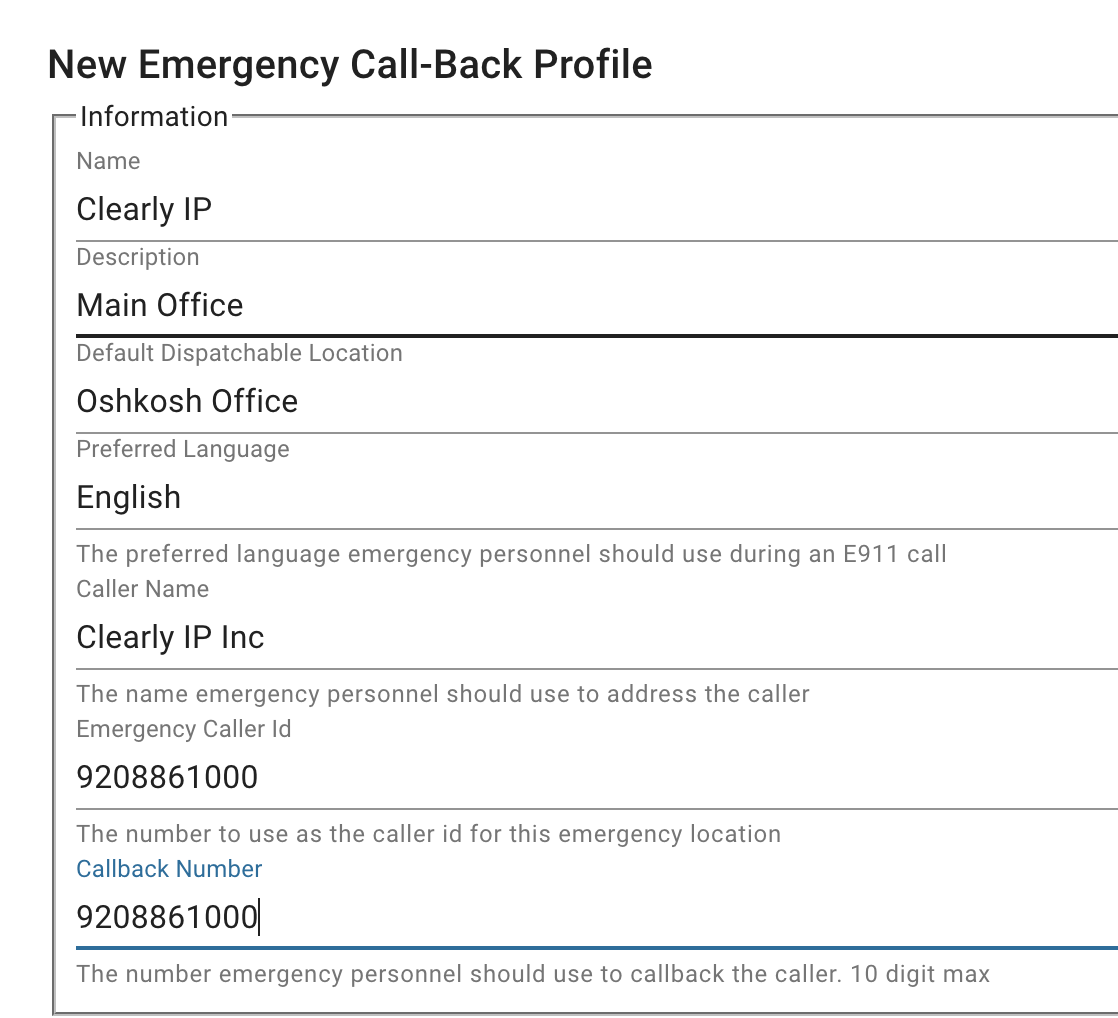
- Select Add A New Emergency Call-Back Profile button

- Pick which Trunking Location we are adding the Call-Back Profile(s) for and press the Next button

- Select Add A New Emergency Call-Back Profile button

- Set the Name, Description, Default E911 Location, Caller Name, Callback Number, and PBX CallerID for this Emergency Endpoint, Click Verify
- You will now see the Call-Back Profile has been added and you can press the Add A New Call-Back Profile button to add more.

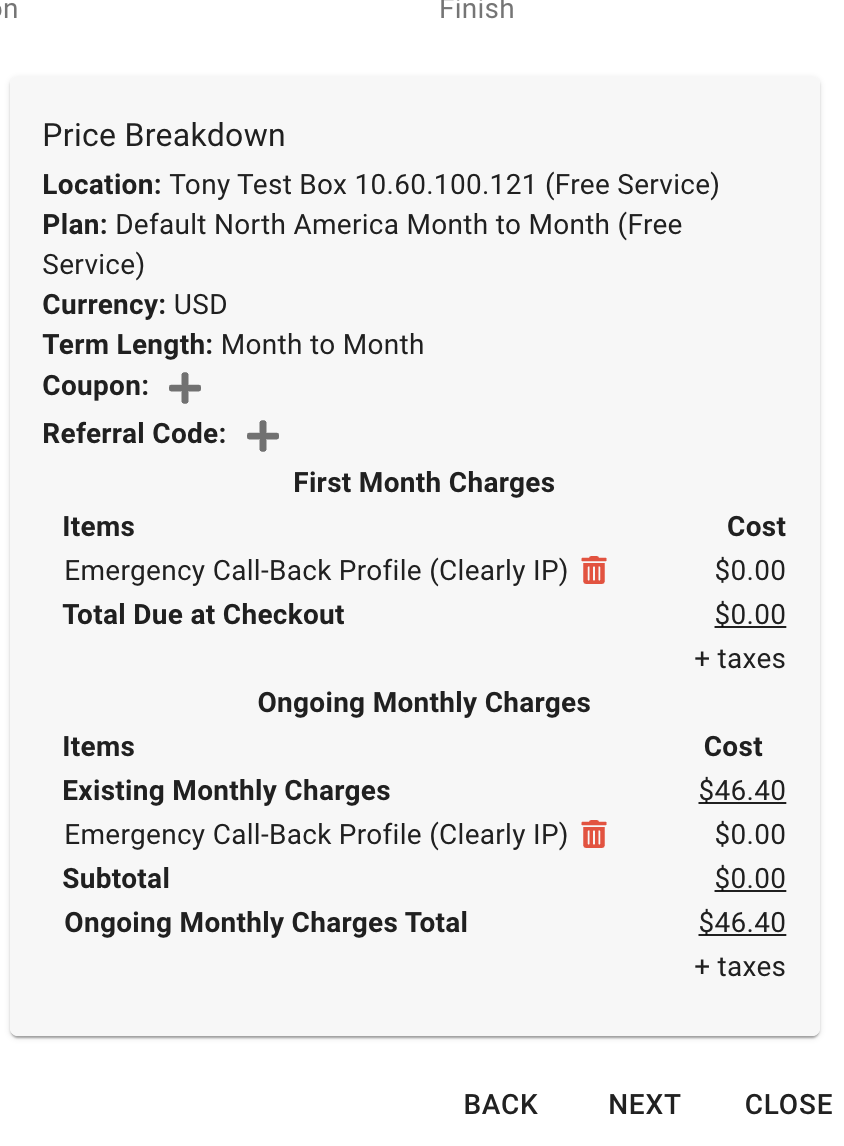
- Once you have added all the Call-Back Profiles you need press the Next button and continue through the checkout process to complete your order.
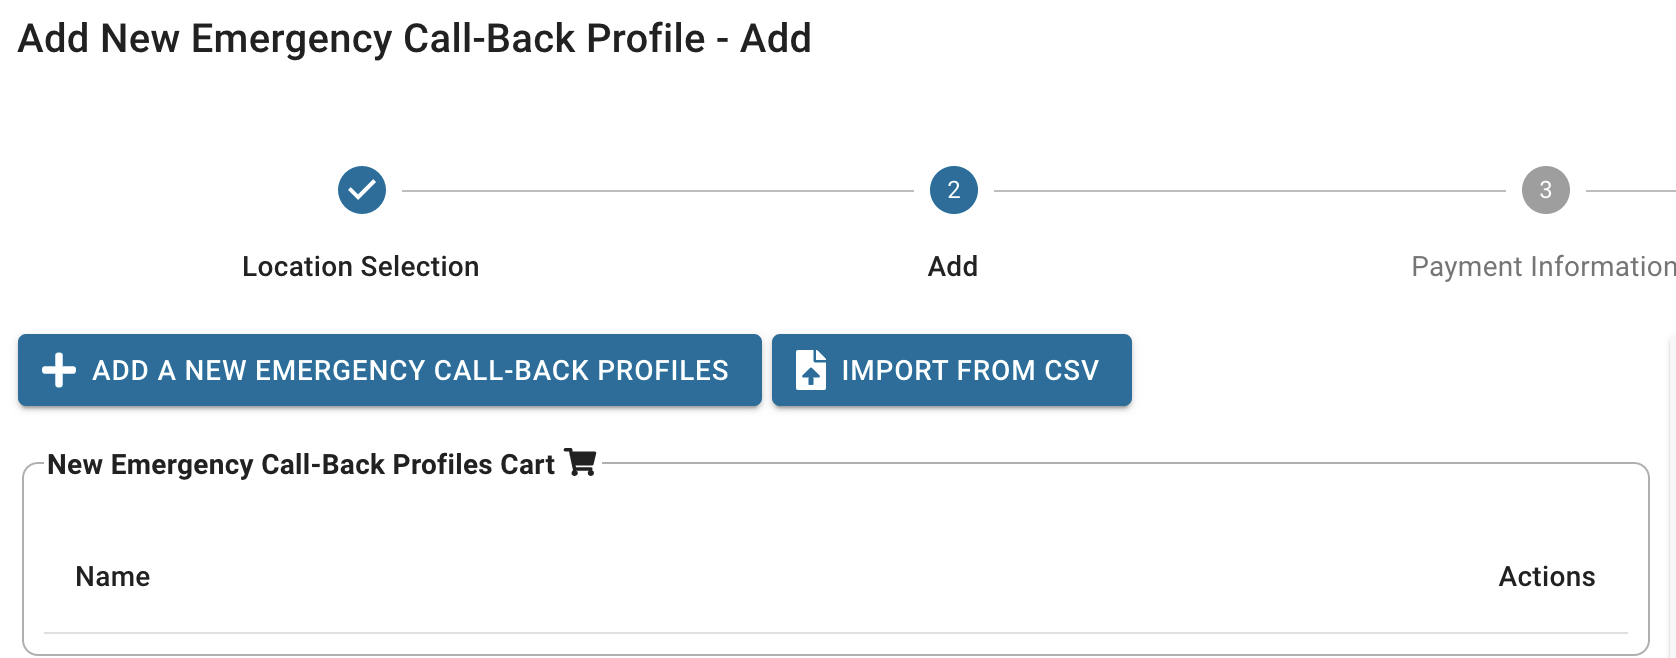
Adding Call-Back Profiles In Bulk - If you need to add new Call-Back Profiles in bulk you can use our CSV import wizard tool to add in bulk your new Call-Back Profiles.
- Click on Products and Services > Emergency Call-Back Profiles
- Select Add A New Emergency Call-Back Profile button
- Pick which Trunking Location we are adding the Call-Back Profile(s) for and press the Next button
- Select Import From CSV button
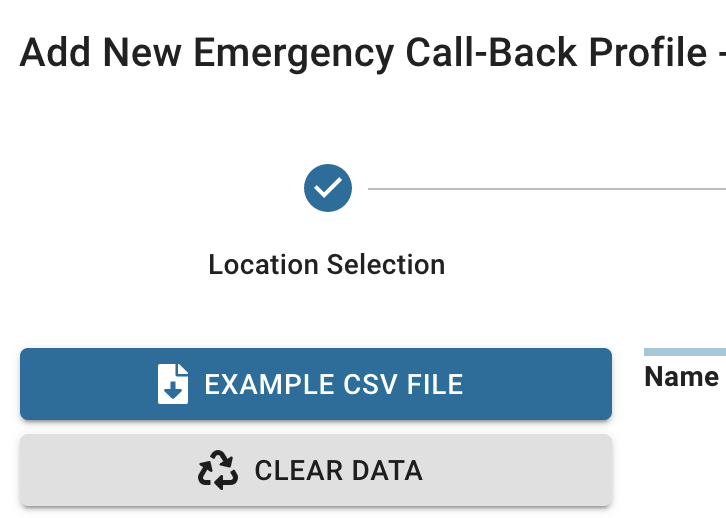
- Export an Example CSV if you do not have one already.
- When creating your CSV you need to link each Call Back Profile to a default Dispatchable Location. You can use the same Dispatchable Location for more than 1 Call-Back Profile and you will need to reference the Dispatchable Location by the 6 digit Caller ID that each Dispatchable Location is assigned.
- Once you have your CSV ready drag the file to the Import box
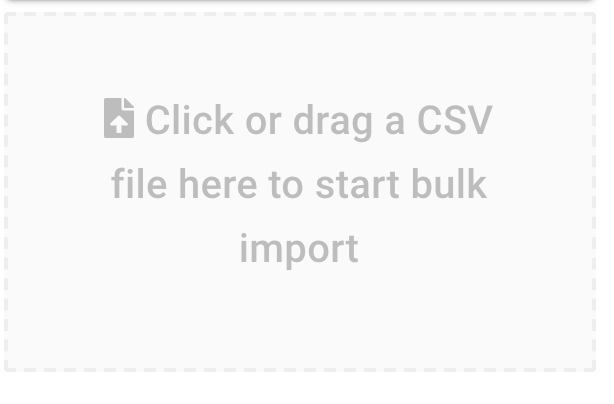 - Your valid Call-Back Profiles will now be imported and you can complete the rest of the checkout process.
Dispatchable Locations - Clearly IP breaks E911 into 2 sections as a way to help bring down the cost on traditional e911 and provide the requirements under Kari's Law and Ray Baum's act . We have Emergency Call Back Profiles and Dispatchable Locations,
- Dispatchable Location: Is a unique Physical Address. When calling 911 we send the Emergency Call Back Profile and the Emergency Dispatchable Location to the PSAP. You can have a single Call Back Profile as defined below and 5 Dispatchable Locations for example and each Location would be a different identifier or address such as "Northeast Corner" or "Suite 5" or "2nd Floor West Wing"; but all part of the same main address/building with the same Call Back Number that is in the Call Back Profile below. A single Emergency Dispatchable Location is included with each Trunking Location that has Subscription Call Paths you create with us Free of Charge and you can buy additional Emergency Dispatchable Location.
- Call Back Profiles: Has a Call Back Phone Number and Company Name. When calling 911 your PBX tells us which Emergency Call Back Profile and which Emergency Dispatchable Location we send to the 911 center for each call. A single Call Back Profile can have 1 or more Dispatchable Locations associated with it. The Call Back Profile is how the 911 center is able to know the Caller ID of who is calling them and where they can call back if need be and the Emergency Dispatchable Location tells the 911 center where you are physically located. A single Emergency Call Back Profile is included with each Trunking Location that has Subscription Call Paths you create with us Free or Charge and you can buy additional Emergency Call Back Profiles.
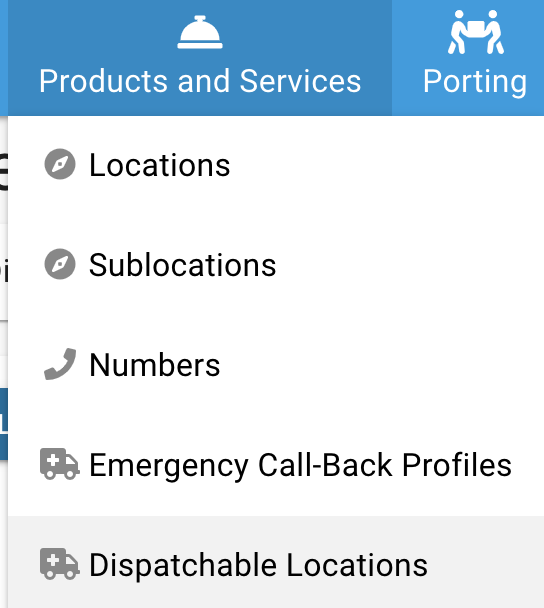
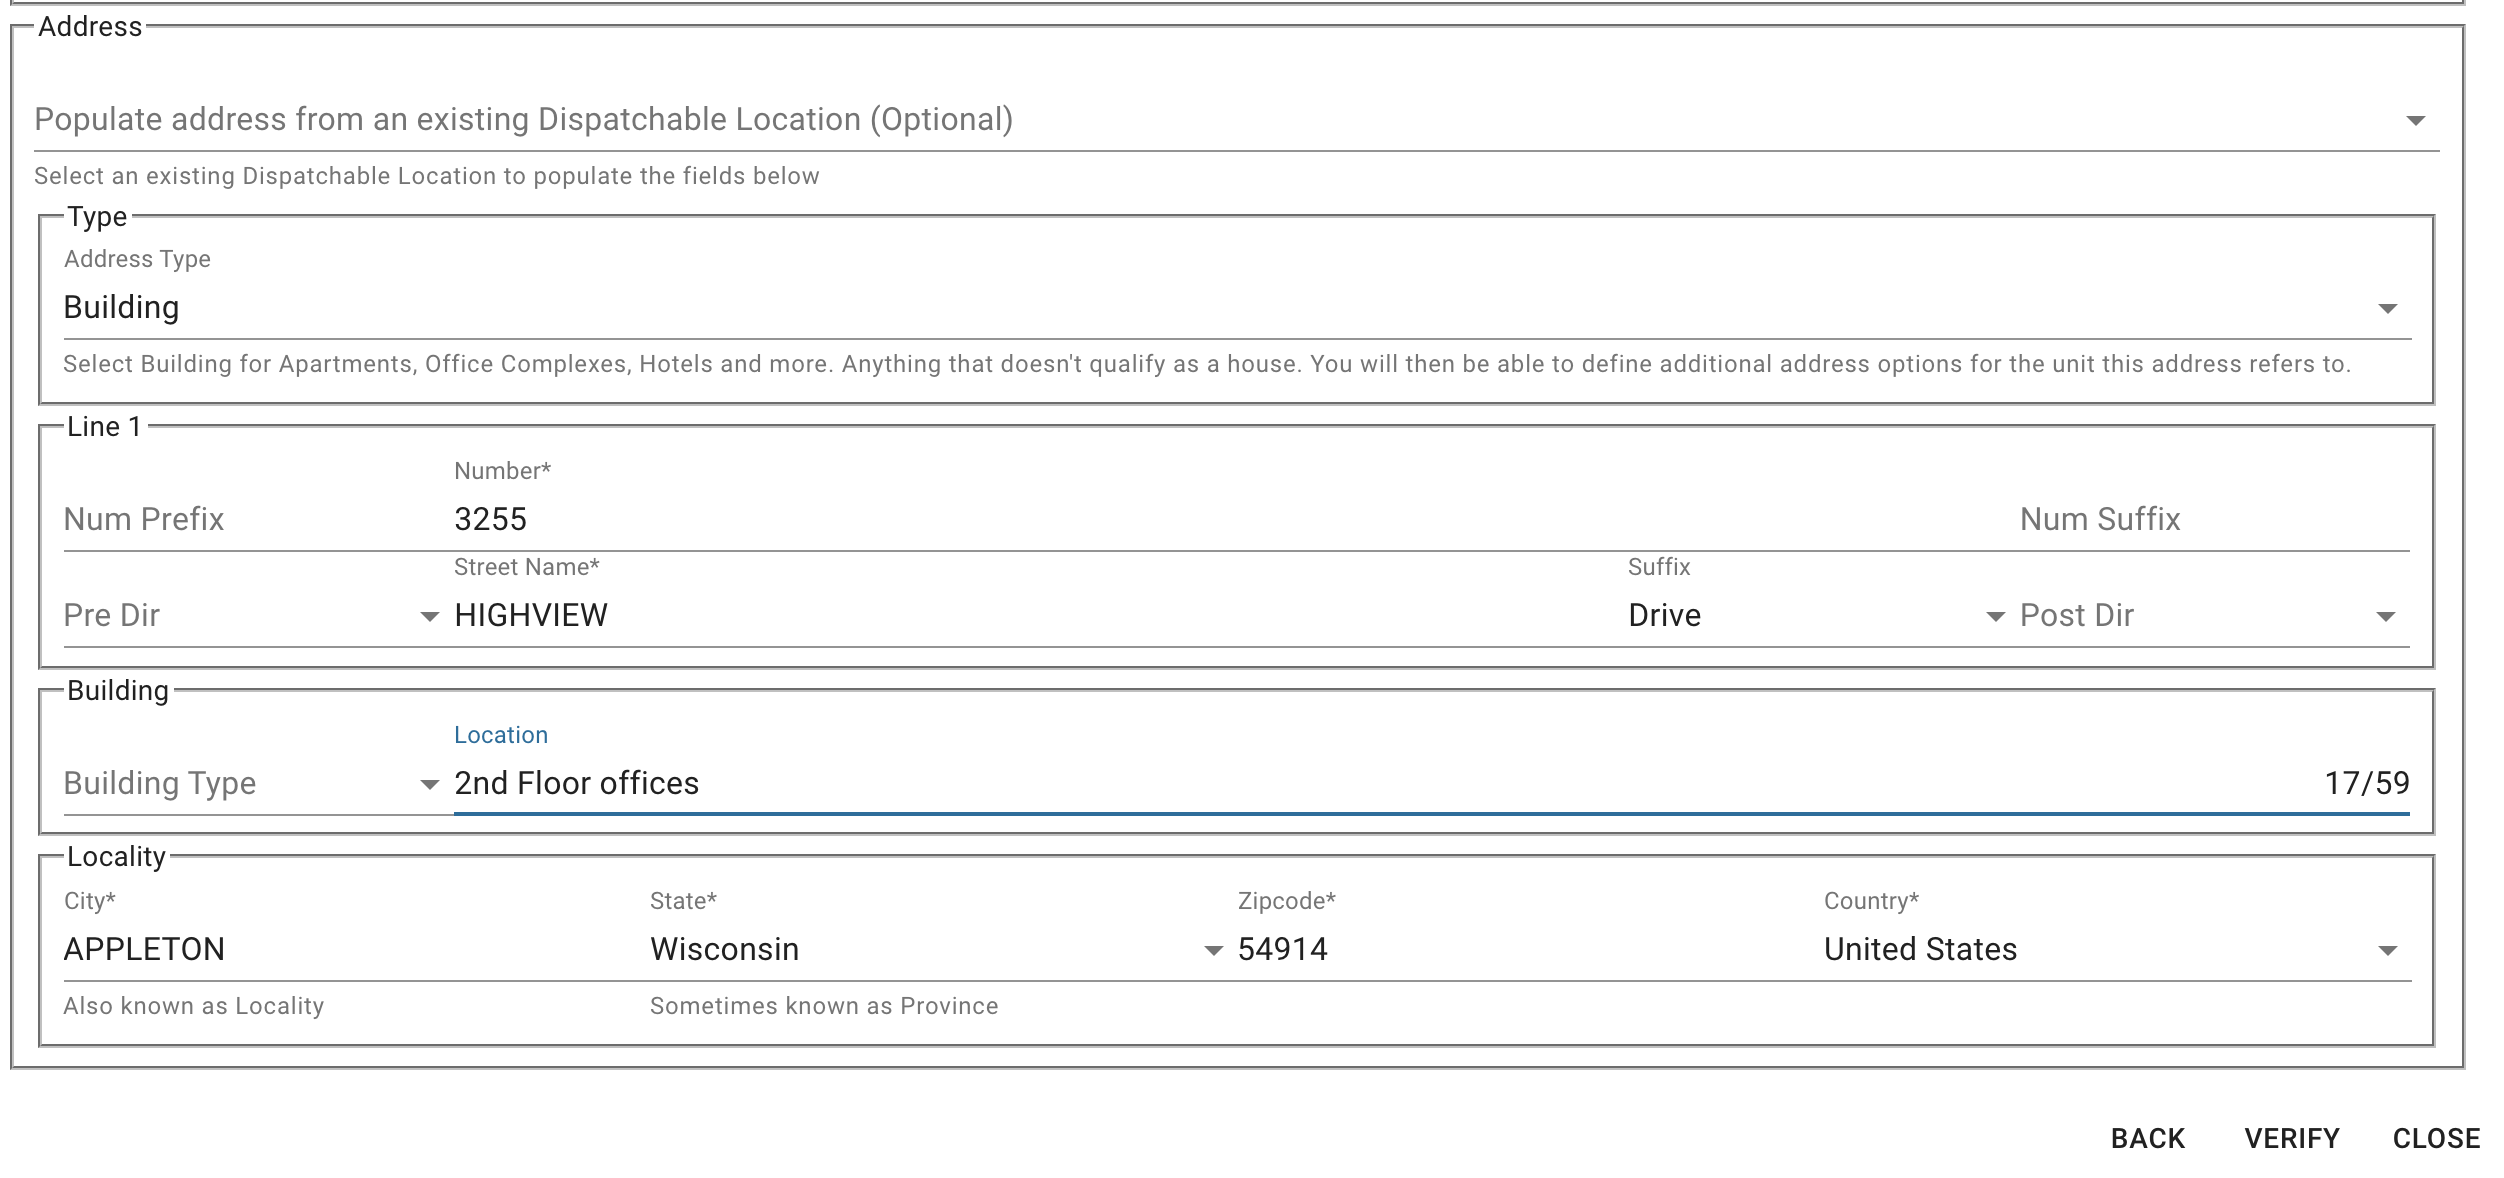
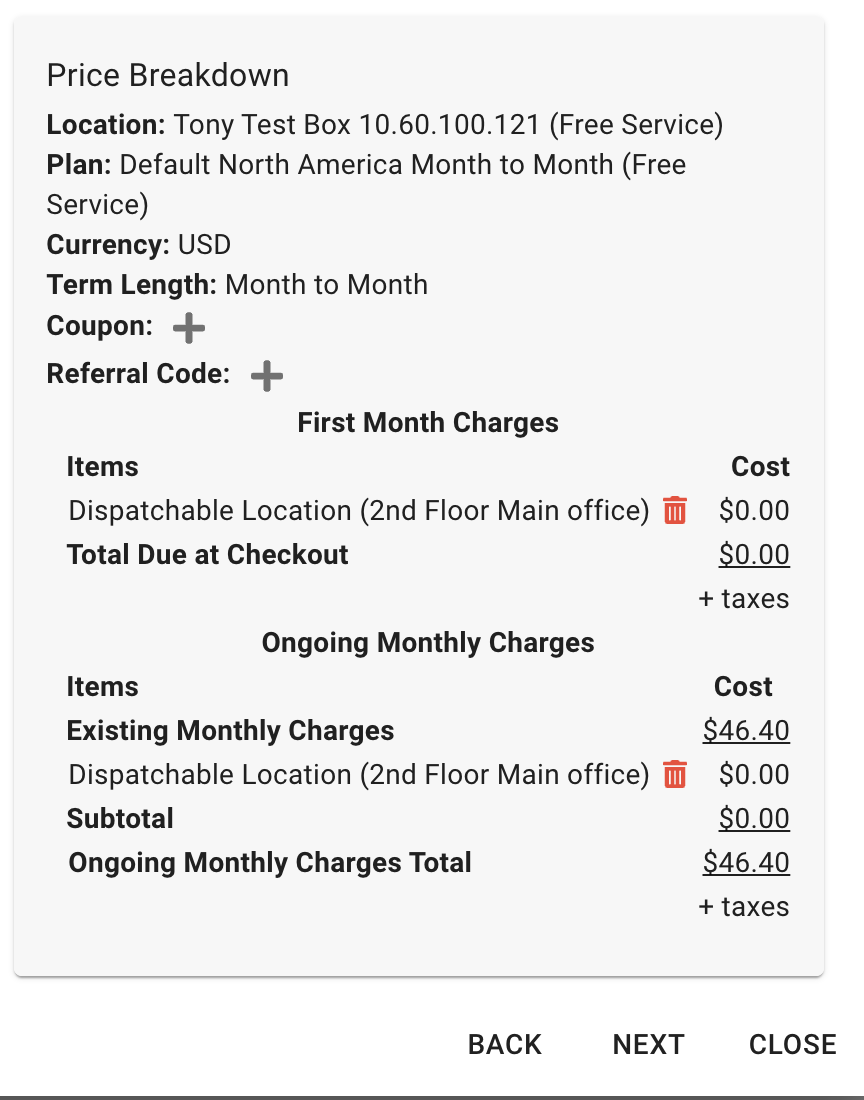
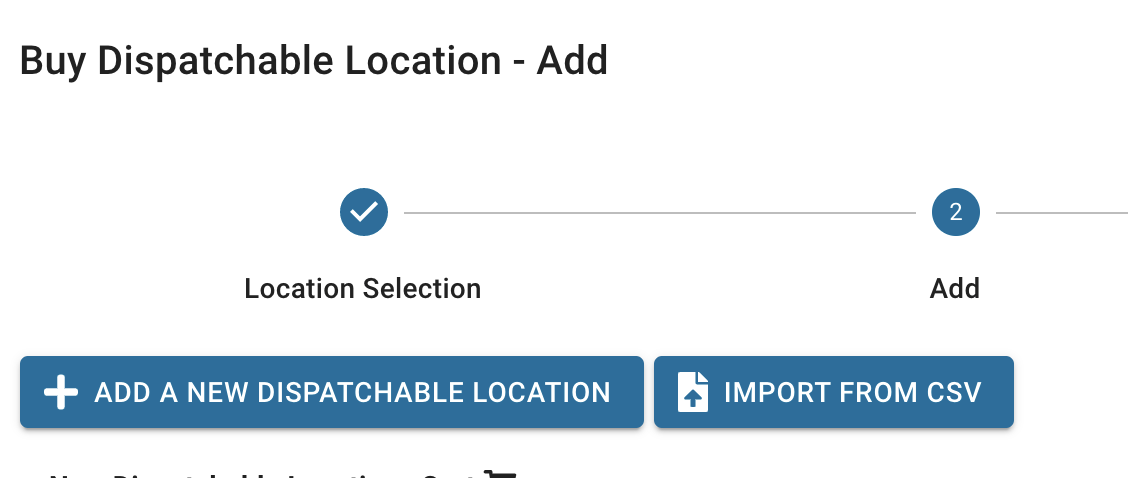
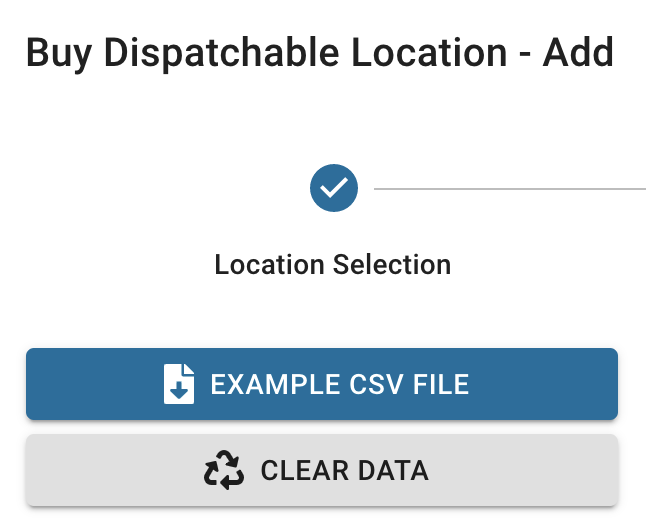
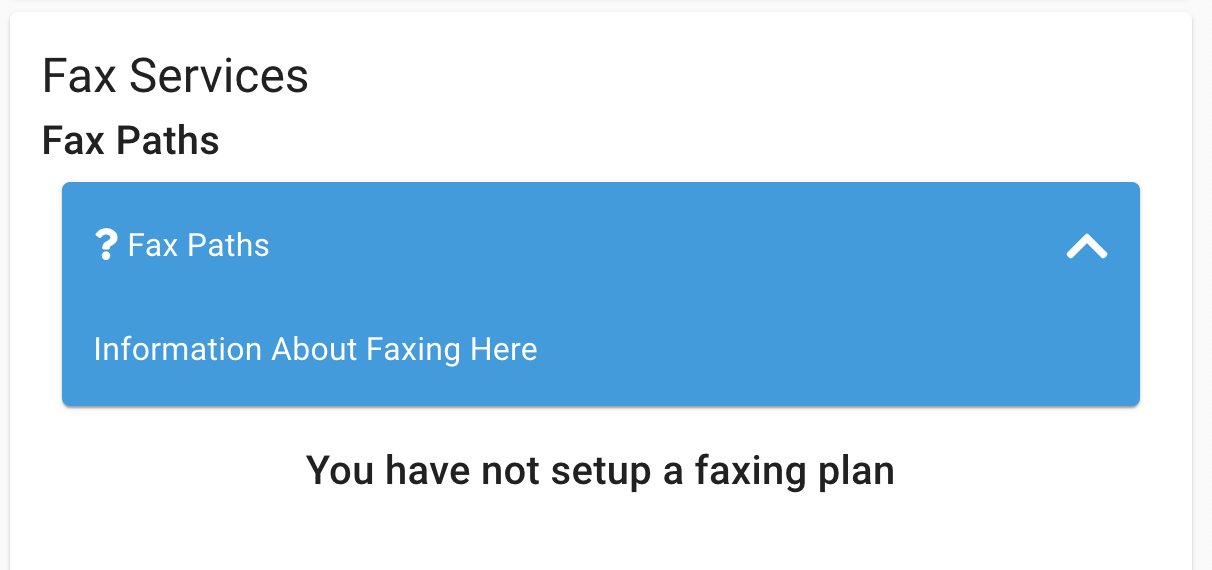
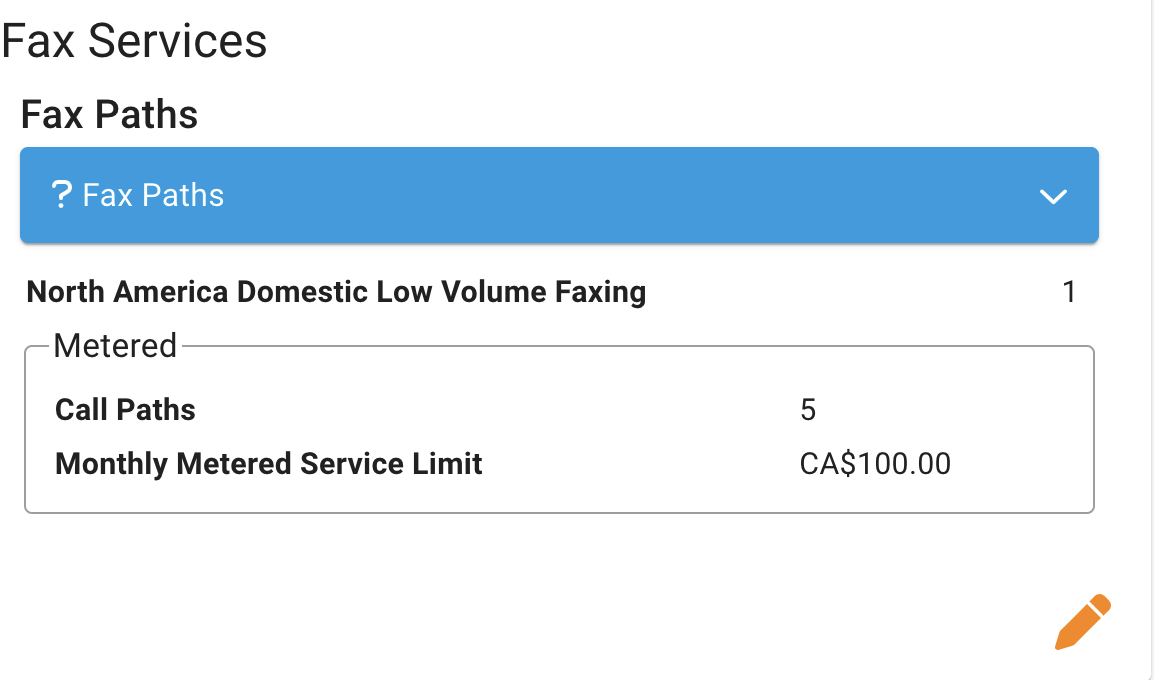
Adding Dispatchable Location Faxing Faxing Overview - ClearlyIP Trunking has the following options when it comes to your fax needs.
- You will first need to purchase Fax Call paths as outlined above here if you have not already.
- Click here for a Fax Primer Feature overview of the Clearly IP Faxing solutions
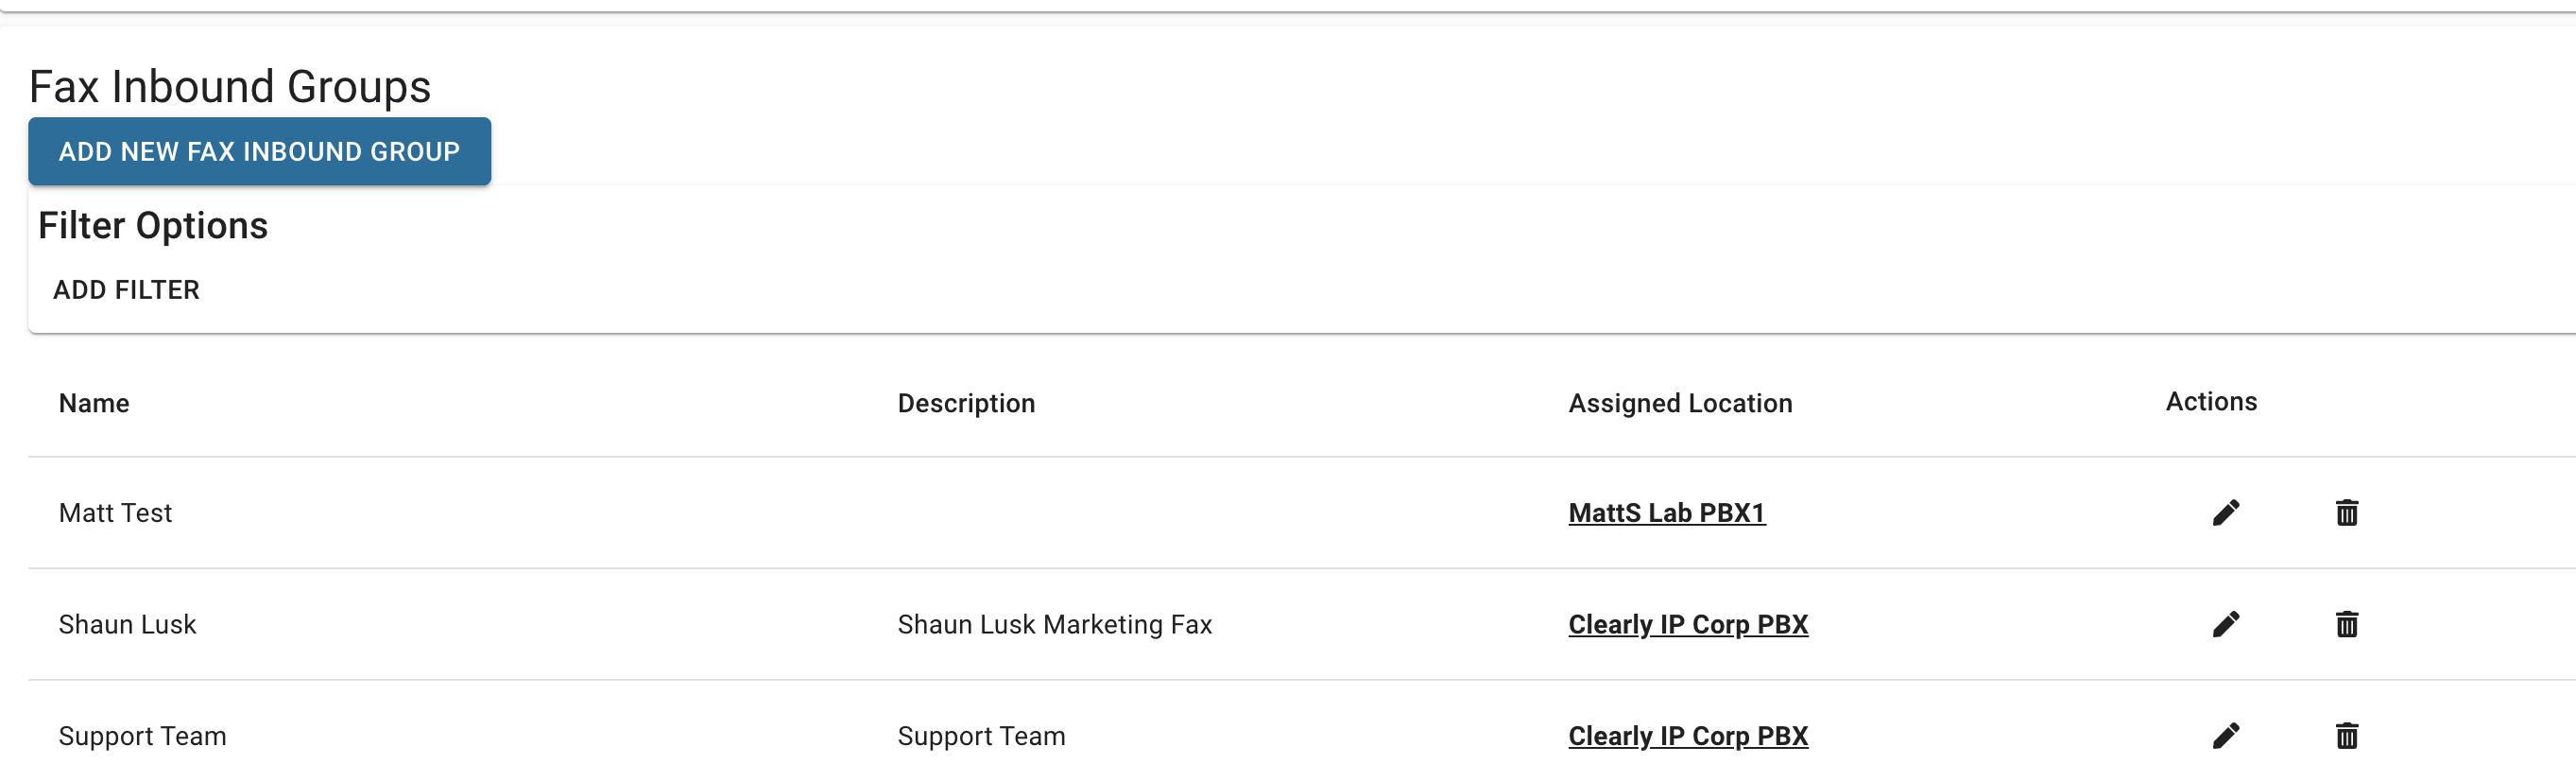
Fax Inbound Groups (Incoming Faxes) - All inbound faxes are routing through the Fax Inbound Group portion of Faxing. A Fax Inbound Group can be setup to route inbound faxes to Emails, SendFax.to Appliances or both.
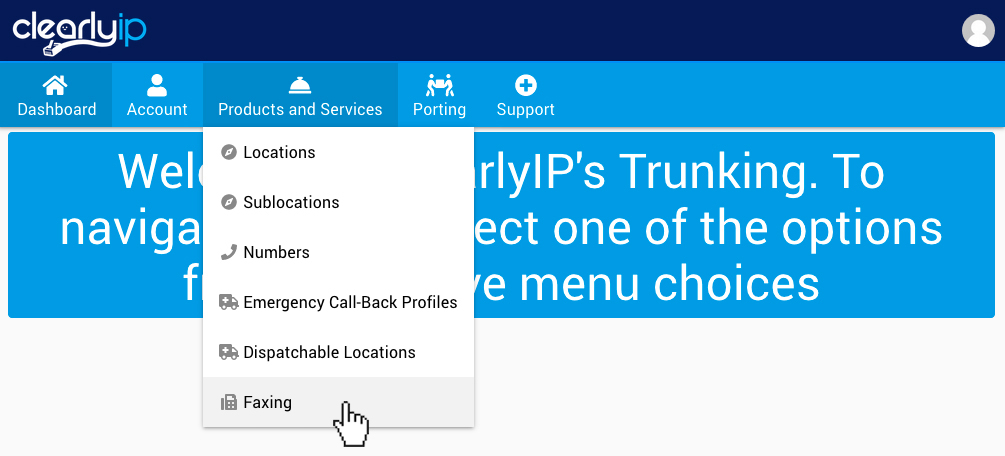
- Click on Products and Services > Faxing
 - Scroll down to the Fax Inbound Group section and click on Add New Fax Inbound Group button or edit an existing group you already have setup.
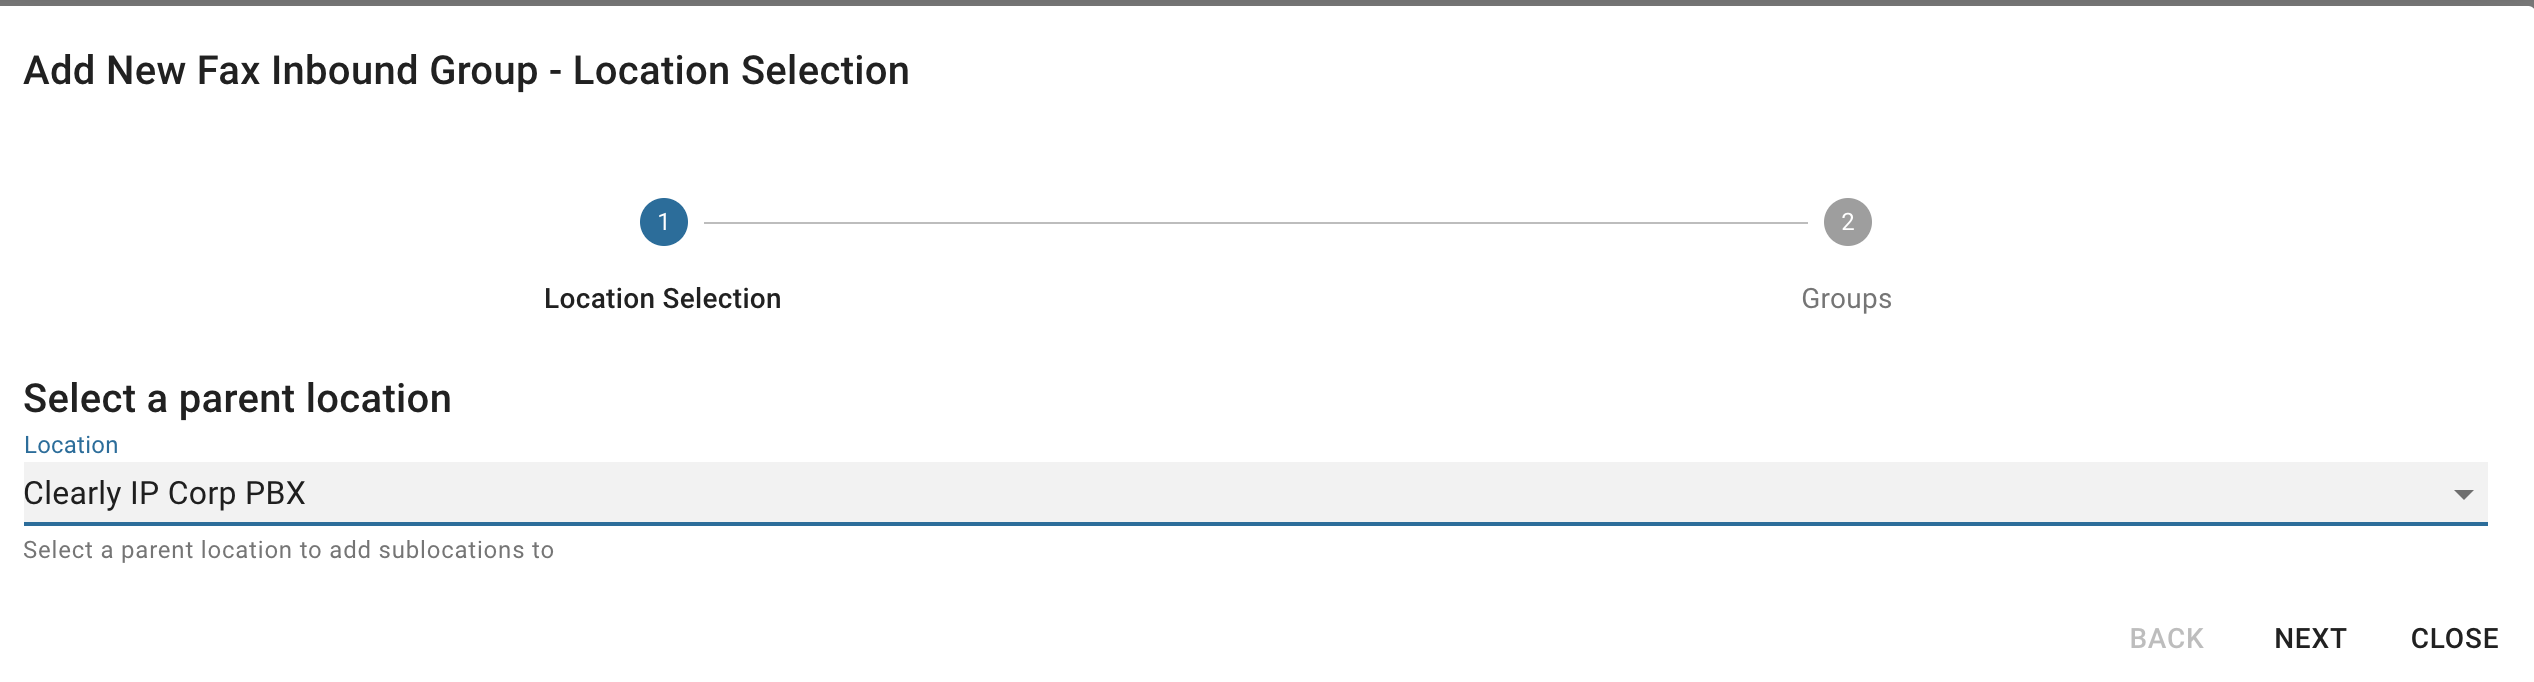
- Pick what Location this group is for and press the Next button. The dropdown will only show you Locations that are setup with Fax Call Paths. If you are not seeing your Location here that means you need to first purchase 1 or more Fax Call Paths for the location as outlined here.
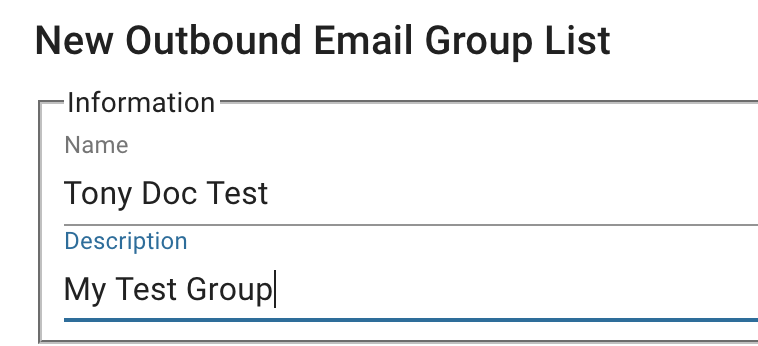
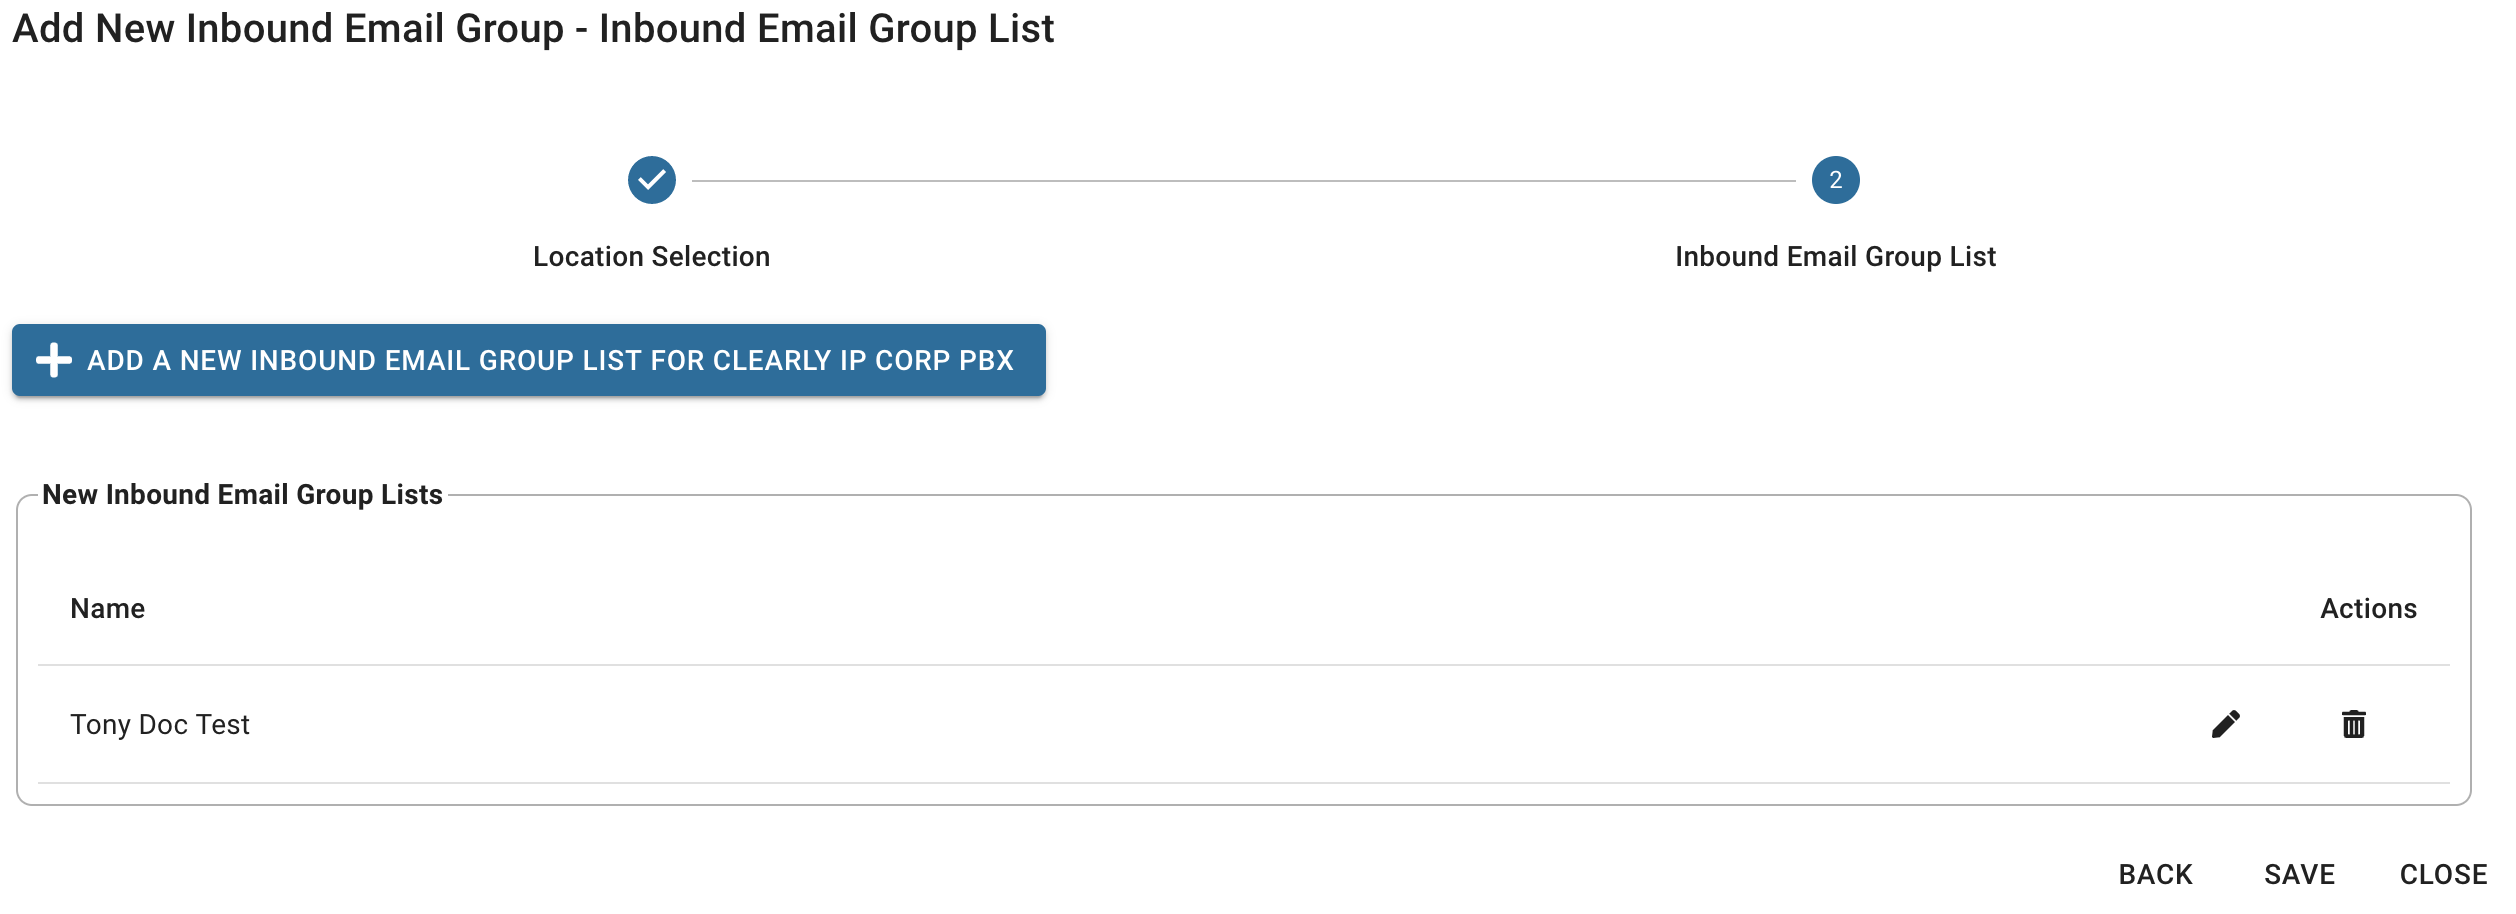
- From here you can add 1 or more Email Groups for the location by pressing the Add A New Fax Inbound Group List for XXX button

- Provide a name and description for the new group.
- Pick how you want your inbound faxes to be delivered. You can pick from the following options
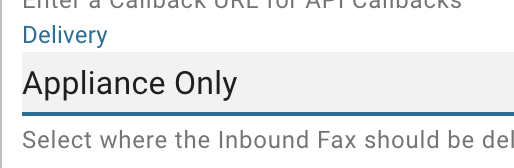 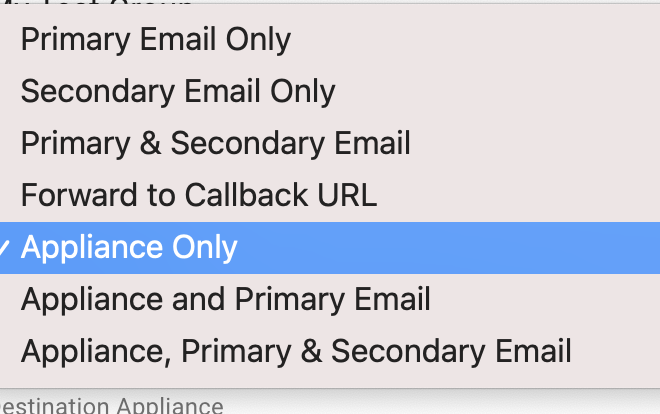
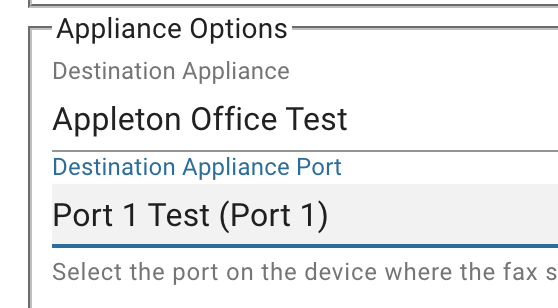
- If you pick an Appliance option you will need to pick which Appliance faxes that come from this group will be routed to and which Port on the Appliance you want the fax to route to. You can pick Port 1 or Port 2 or Any. If you pick Any it will randomly try sending the fax to Port 1 or 2 and if it fails it will try the other port.
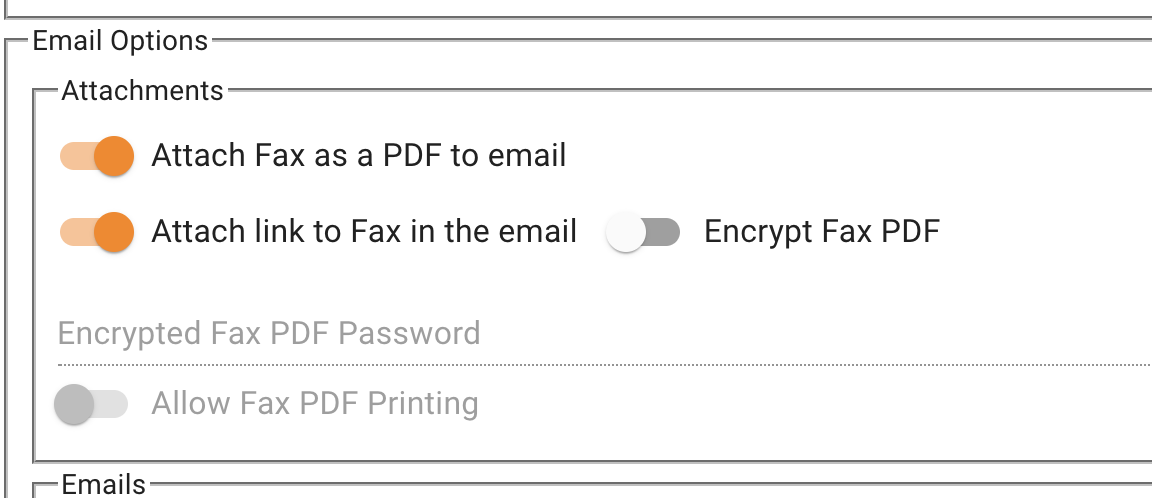
 - If you pick an option that includes Primary and/or Secondary Email you can now choose which options you want enabled for when faxes come to this group to your email(s)
- Attach PDF to Email - If enabled will attach a copy of the inbound fax as a PDF to the email that is sent.
- Add link to PDF in Email - If enabled will include a link to the PDF you can use to download the PDF.
- Allow PDF Printing - If enabled it will allow printing of the PDF. NOTE: This option only works if you also enable Encrypt PDF
- Encrypt PDF - If enabled will require you to provide a password that we will use to Encrypt the PDF that is attached to the Email and/or the Link to download the PDF that is included in the Email.
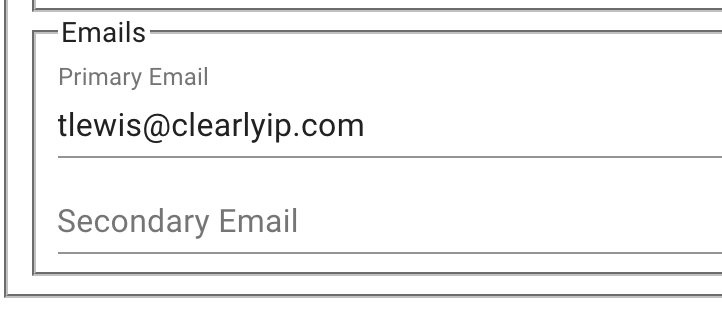
- Define a Primary and optionally secondary Email addresses for this group
- Press Add to List button

- From here you can create additional Inbound Fax Groups if you need to or if done press the Save button and your new groups will be created and saved.
- We can now see the list of Fax Inbound Groups that we have setup for our account.
Fax Outbound Groups (Outgoing Faxes) - Click on Products and Services > Faxing

- Scroll down to the Fax Outbound Groups section and click on Add New Fax Outbound Group button.
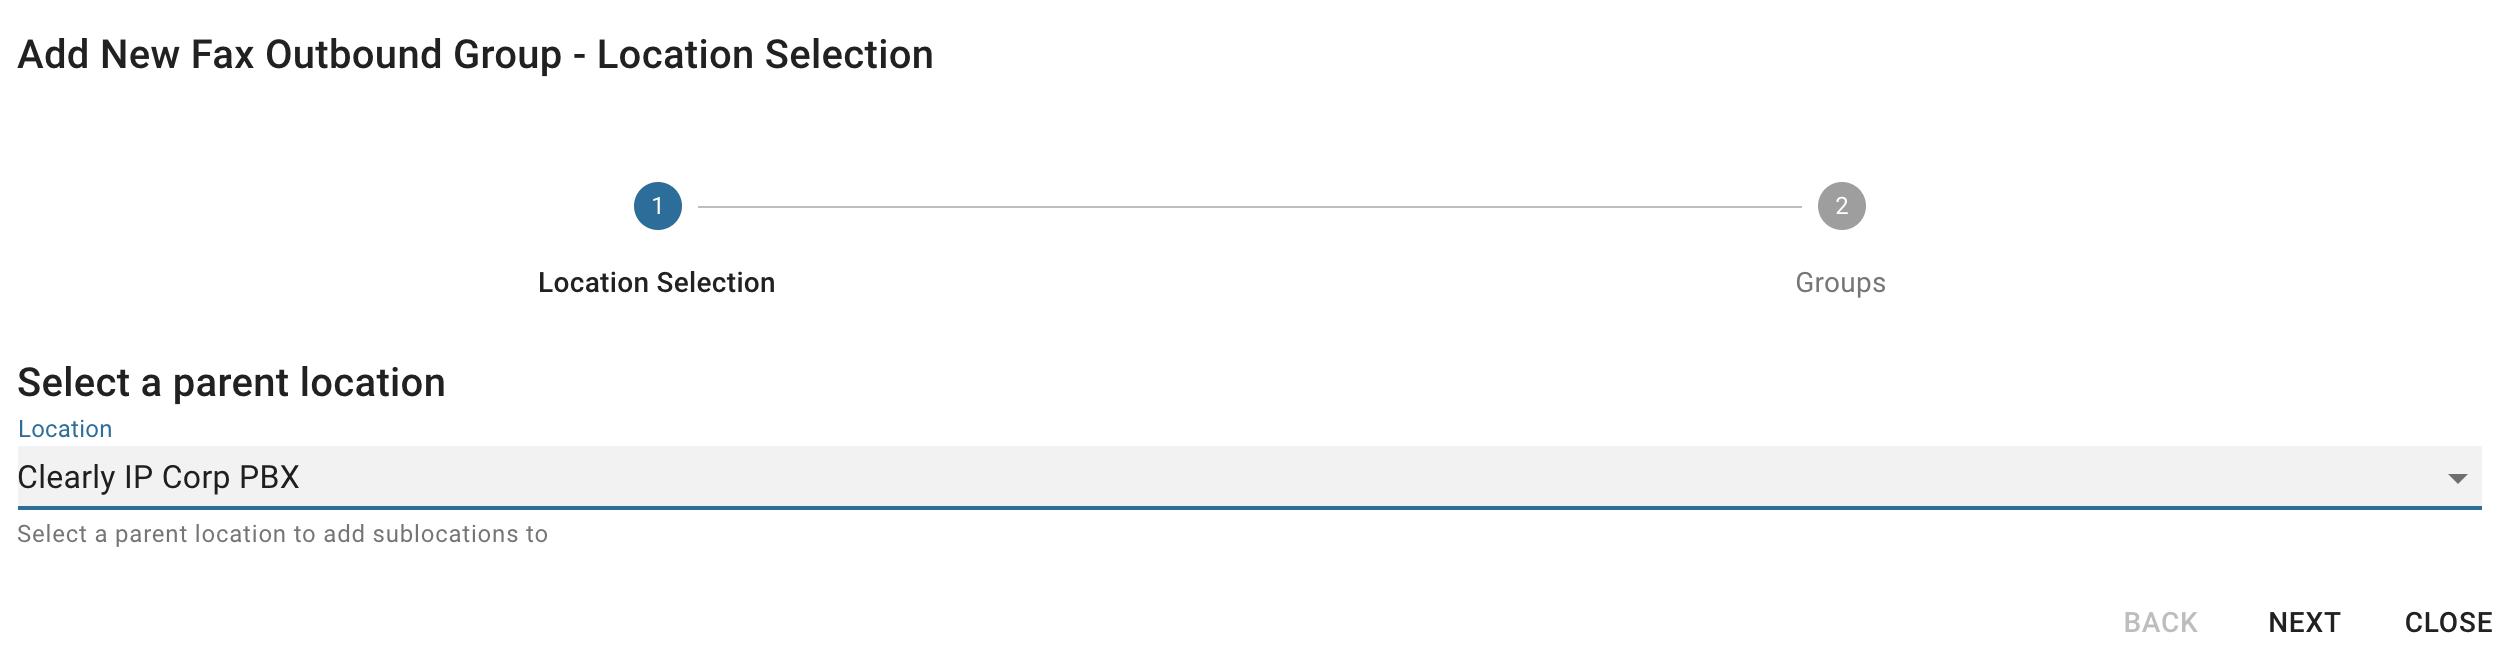
- Pick what Location this group is for and press the Next button. The dropdown will only show you Locations that are setup with Fax Call Paths. If you are not seeing your Location here that means you need to first purchase 1 or more Fax Call Paths for the location as outlined here.
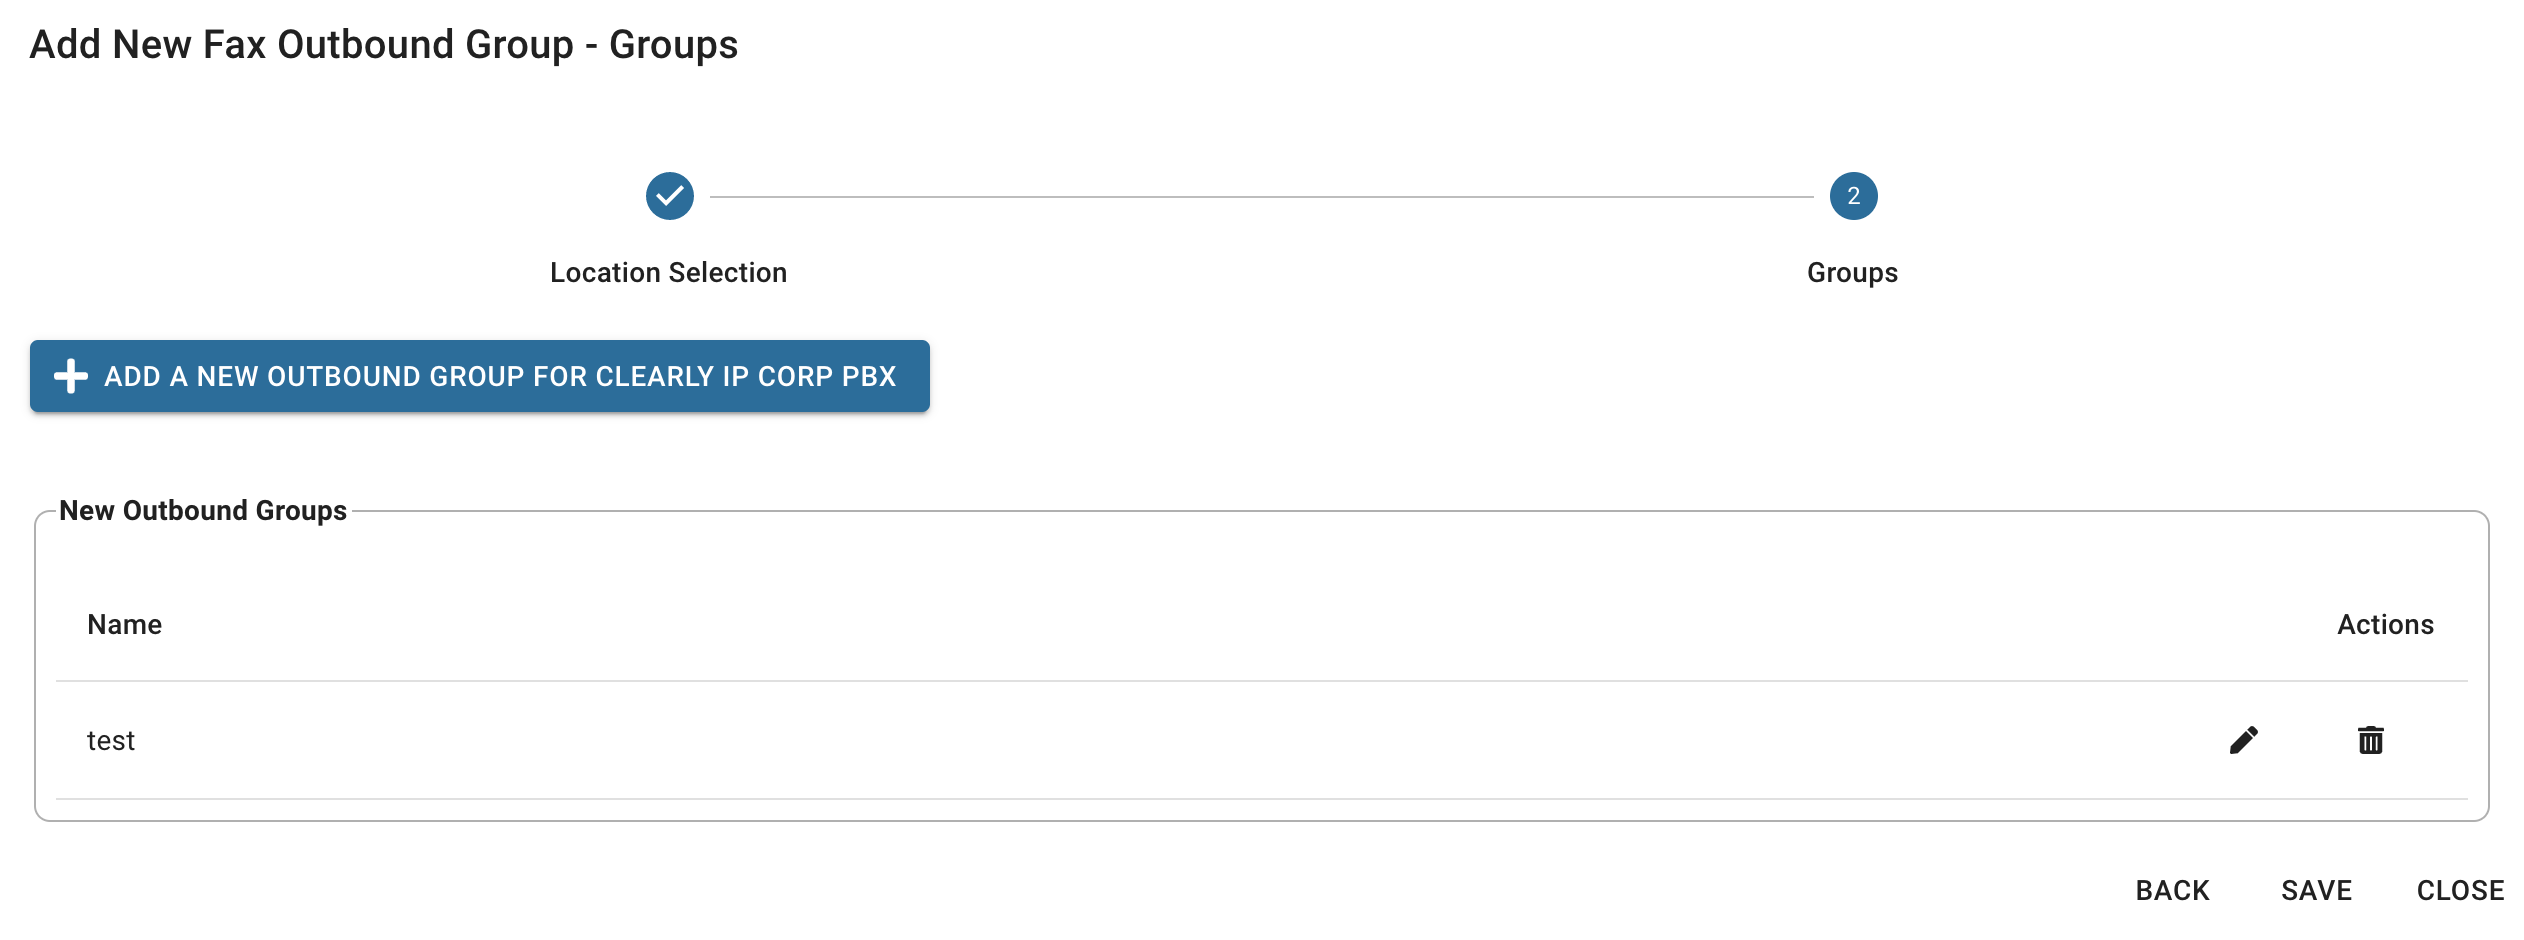
- From here you can add 1 or more Fax Outbound Groups for the location by pressing the Add A New Outbound Group List for XXX button

- Provide a name and description for the new group.

- Station ID here you can define what Station ID upto 20 characters that we will send to the receiving Fax service or machine when you send a fax. If you leave this blank we will set this to be the number you fax from.
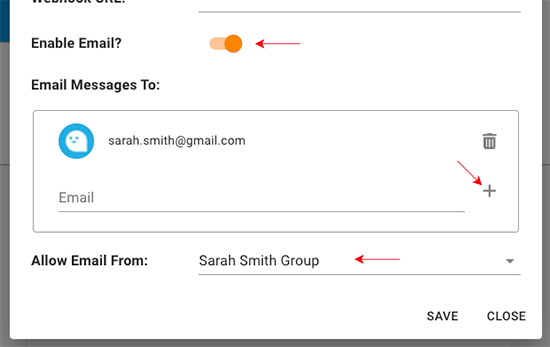
- Enter an email address for this group and press the + icon to add it to the group. You can also add domains such as @clearlyip.com which would allow all users of that domain to send faxes from this group. You can have a maximum of 100 entries.
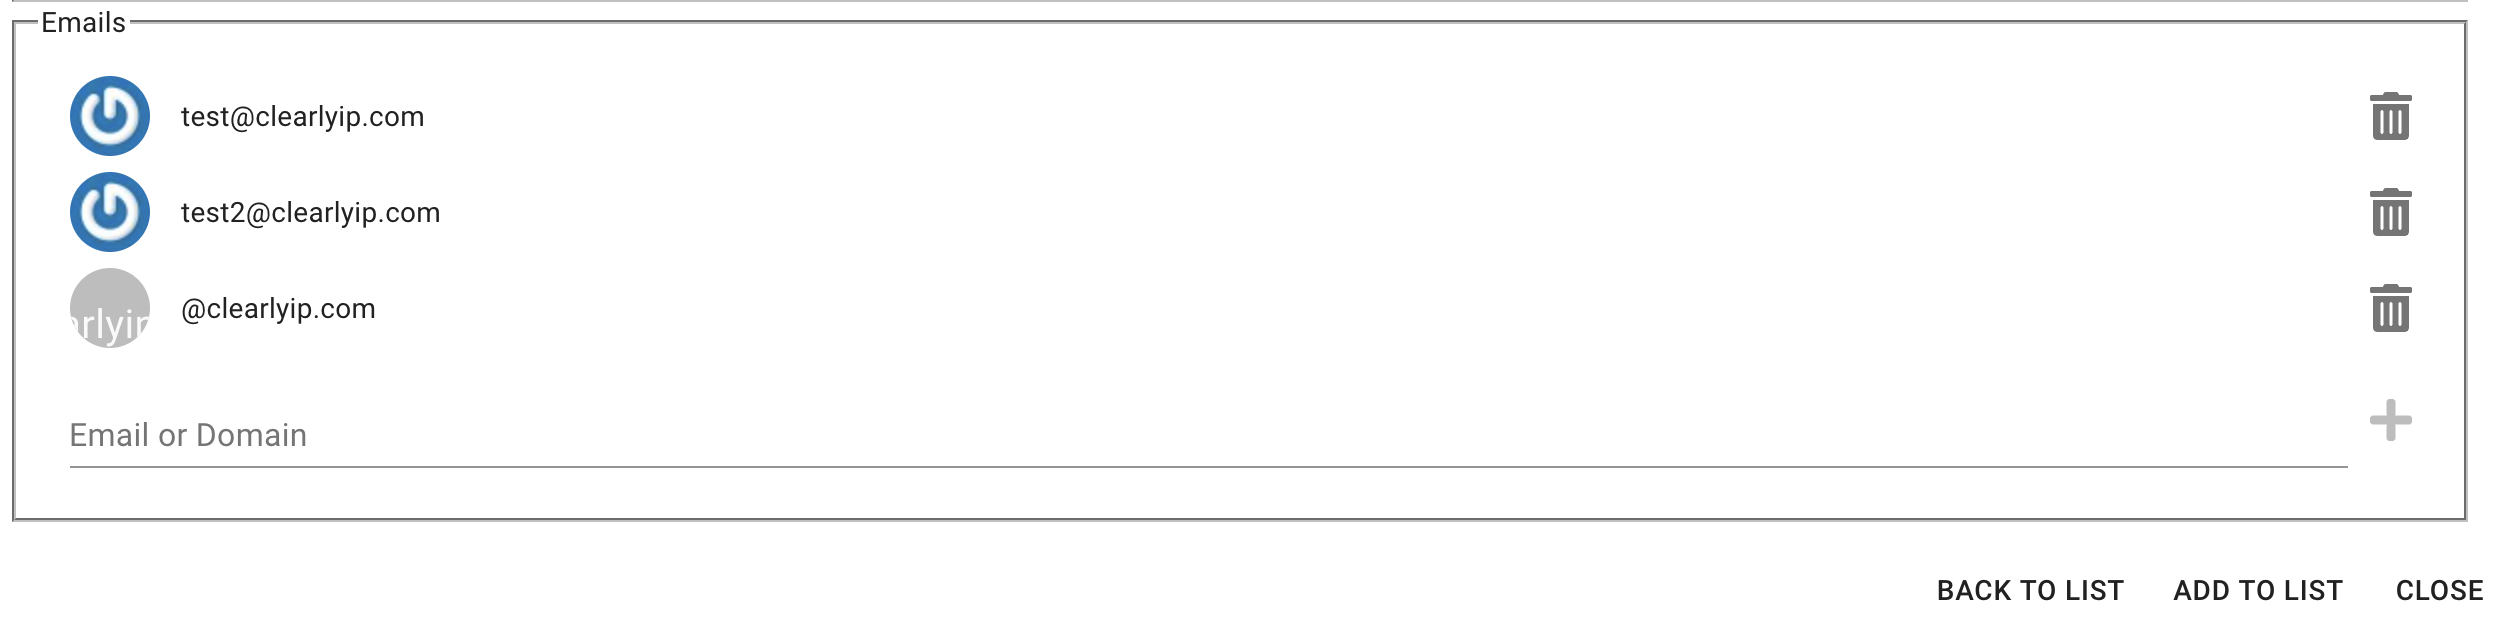
- Press Add to List button

- From here you can create additional Fax Outbound Groups if you need to or if done press the Save button and your new groups will be created and saved. We can now start pointing phone numbers at these groups for sending outbound faxes.
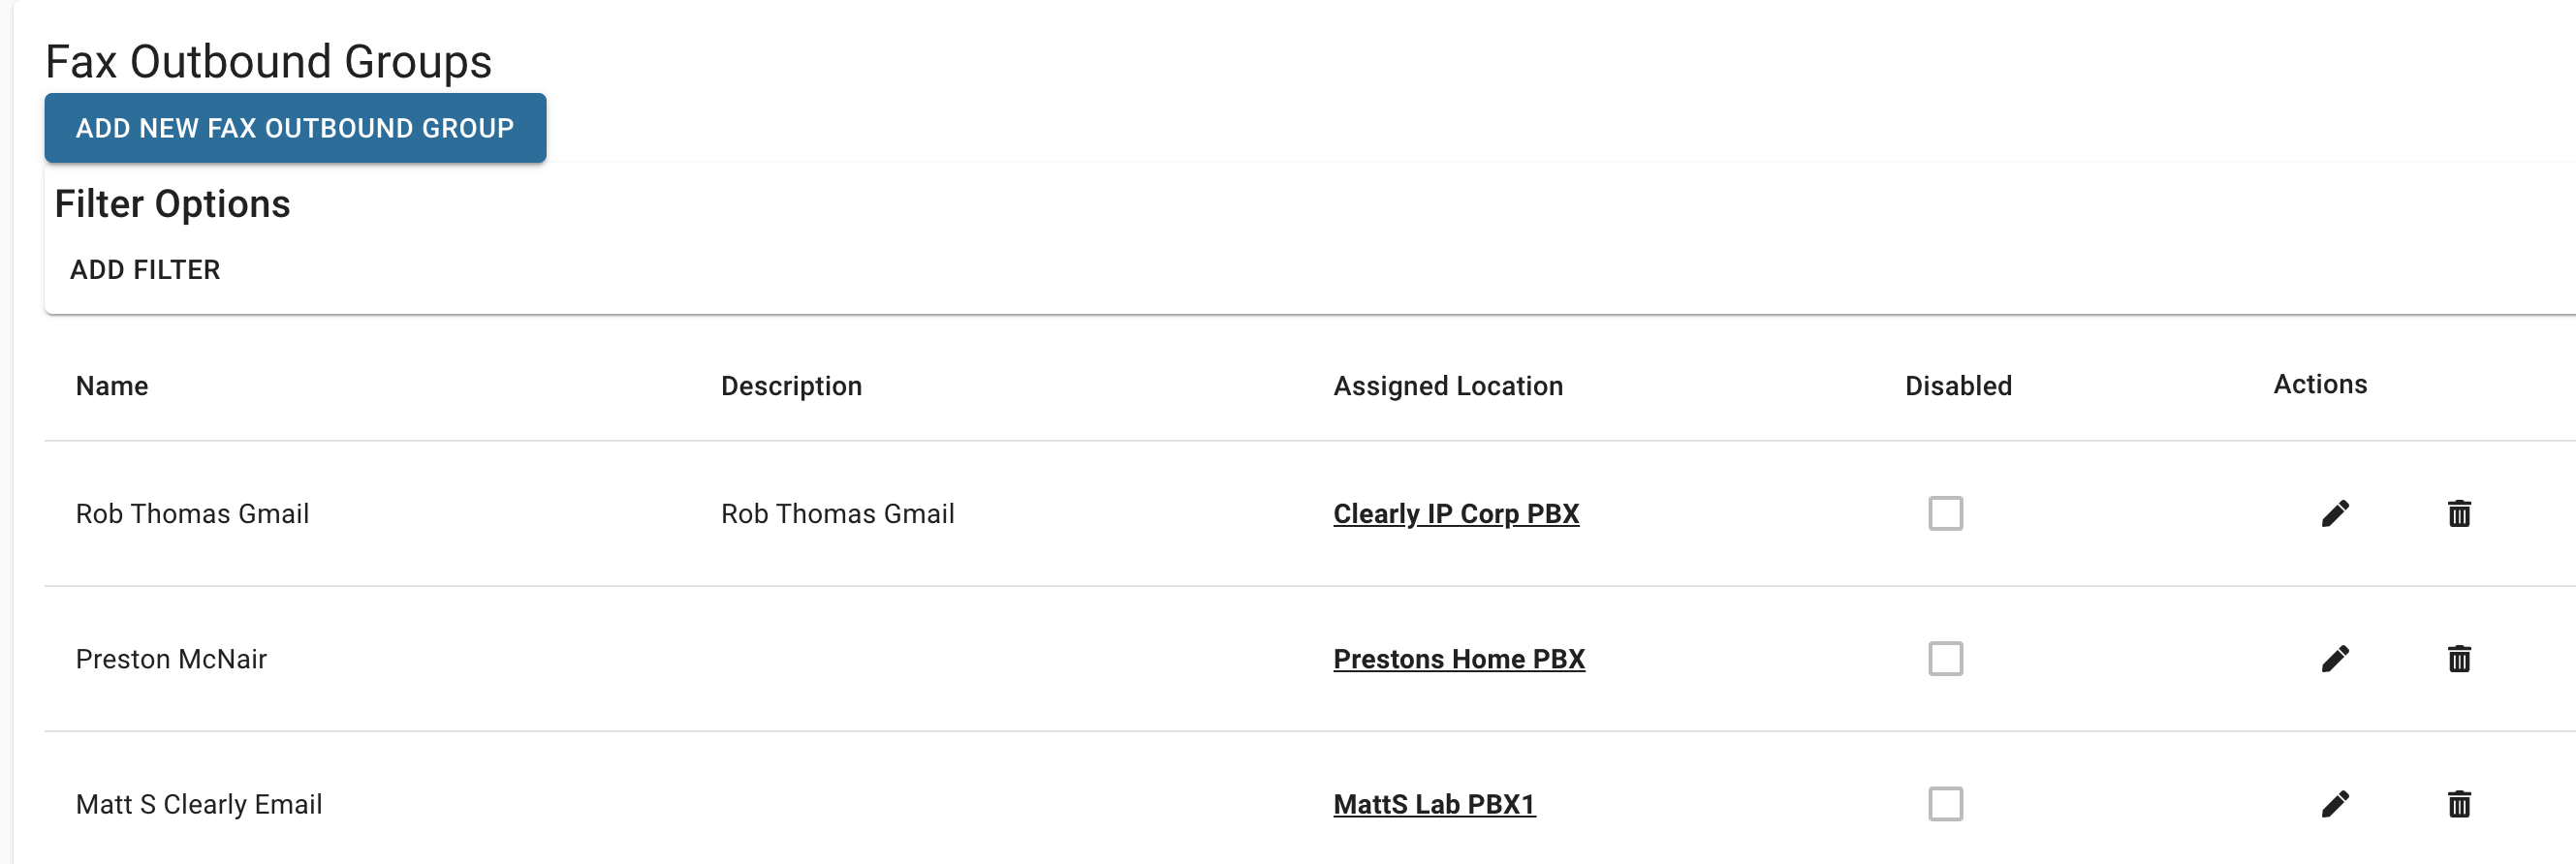
- We can now see the list of Fax Outbound Groups that we have setup for our account.
Routing Phone Numbers for Inbound and Outbound Faxing - Click on Products and Services > Numbers
- From here you will see a list of ALL your phone numbers on your account. You can click on the Binocular icon to pick which phone number you want to change routing on. You can see in our list below all 3 Numbers are routing to the PBX location currently and not to Faxing. Click the binoculars on the Number you wish to change to Faxing.

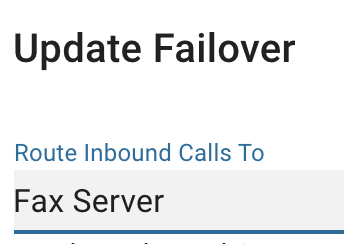
- Scroll down to the Routing Options tile and Click the orange Pencil icon so we can modify the routing of this number from voice to fax.

- Pick Fax Server on where to route calls to.
- You can now pick 1 Fax to Email group to route inbound faxes to and up to 100 Email to Fax groups for routing outbound faxes from this number and press the Save button

How to Send Faxes from Email Review our full guide here on how to use Send Fax Email to Fax to send outbound faxes from email once you have everything above setup.
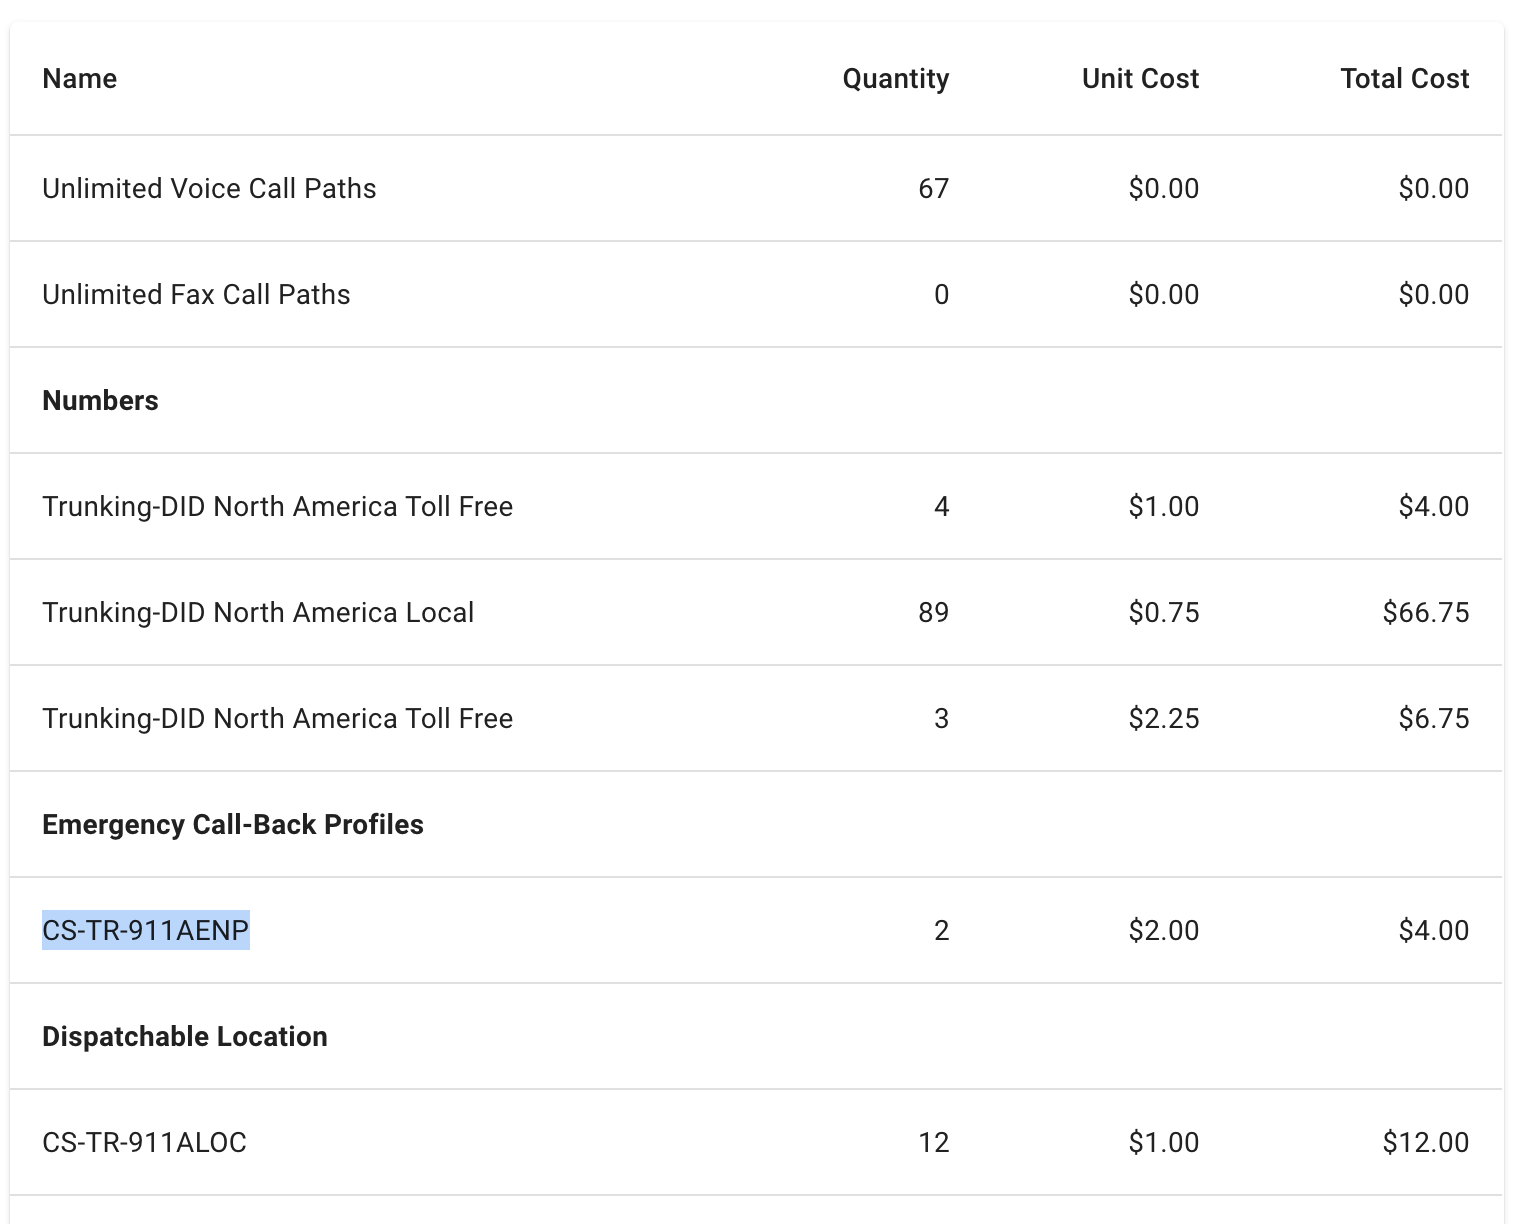
Service Recap - The Service Recap menu option will show you a list of all items on a per Trunking Location basis that you will be charged for on your next monthly renewal. This will only show items that have a monthly recurring cost to give you an idea on what your recurring charges will be on the next renewal.
- Click on Products and Services > Service Recap
- At the top you can see what day of month your service will renewal and pick any Trunking Location to see a recap of all recurring services.
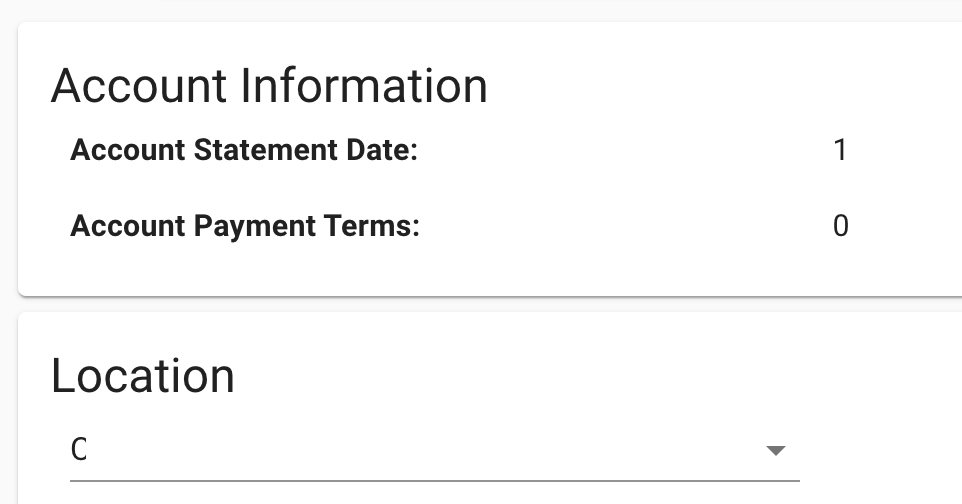
- From here you can now see all your Recurring charges on your location
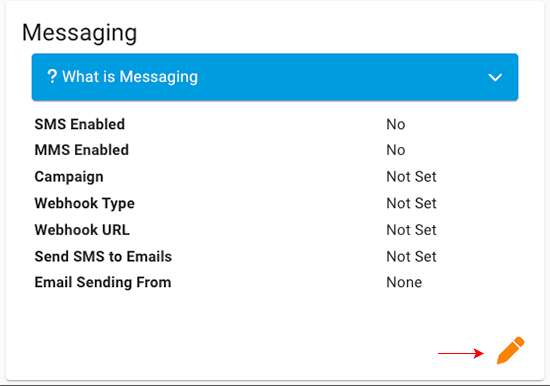
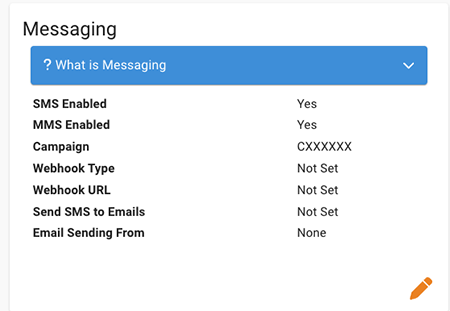
- The messaging section is where you can manage your SMS/MMS Brands and Campaigns. Starting in 2022 most US wireless carriers now require you to Register a Brand and Campaign and link your phone numbers to a Campaign in order to send messages to any mobile number. Starting April 1st 2022 Clearly IP will block all messaging if you have not setup a Brand and Campaign and linked your numbers to a Campaign. This process is known as 10DLC in the industry. You can review more information here on 10DLC and the surcharges associated with messaging here.
Brand - Brands are where you register information about your company. Setting up a brand is required before you can submit a Campaign. A Brand carriers a 1 time charge of $8.00 to submit your Brand information.
- To create a new Brand navigate to the Messaging under Products and Services of our trunking portal
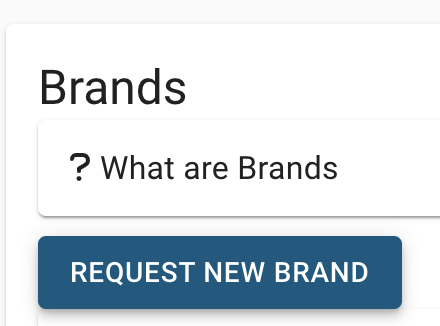
- From here you can click on the "Request New Brand" button and submit all the relevant information related to your company.
- The process to get a Brand ID approved usually takes 1 business day. You will receive a email from us once you Brand is approved and you can start submitting Campaigns as outlined below once your Campaign has been approved.
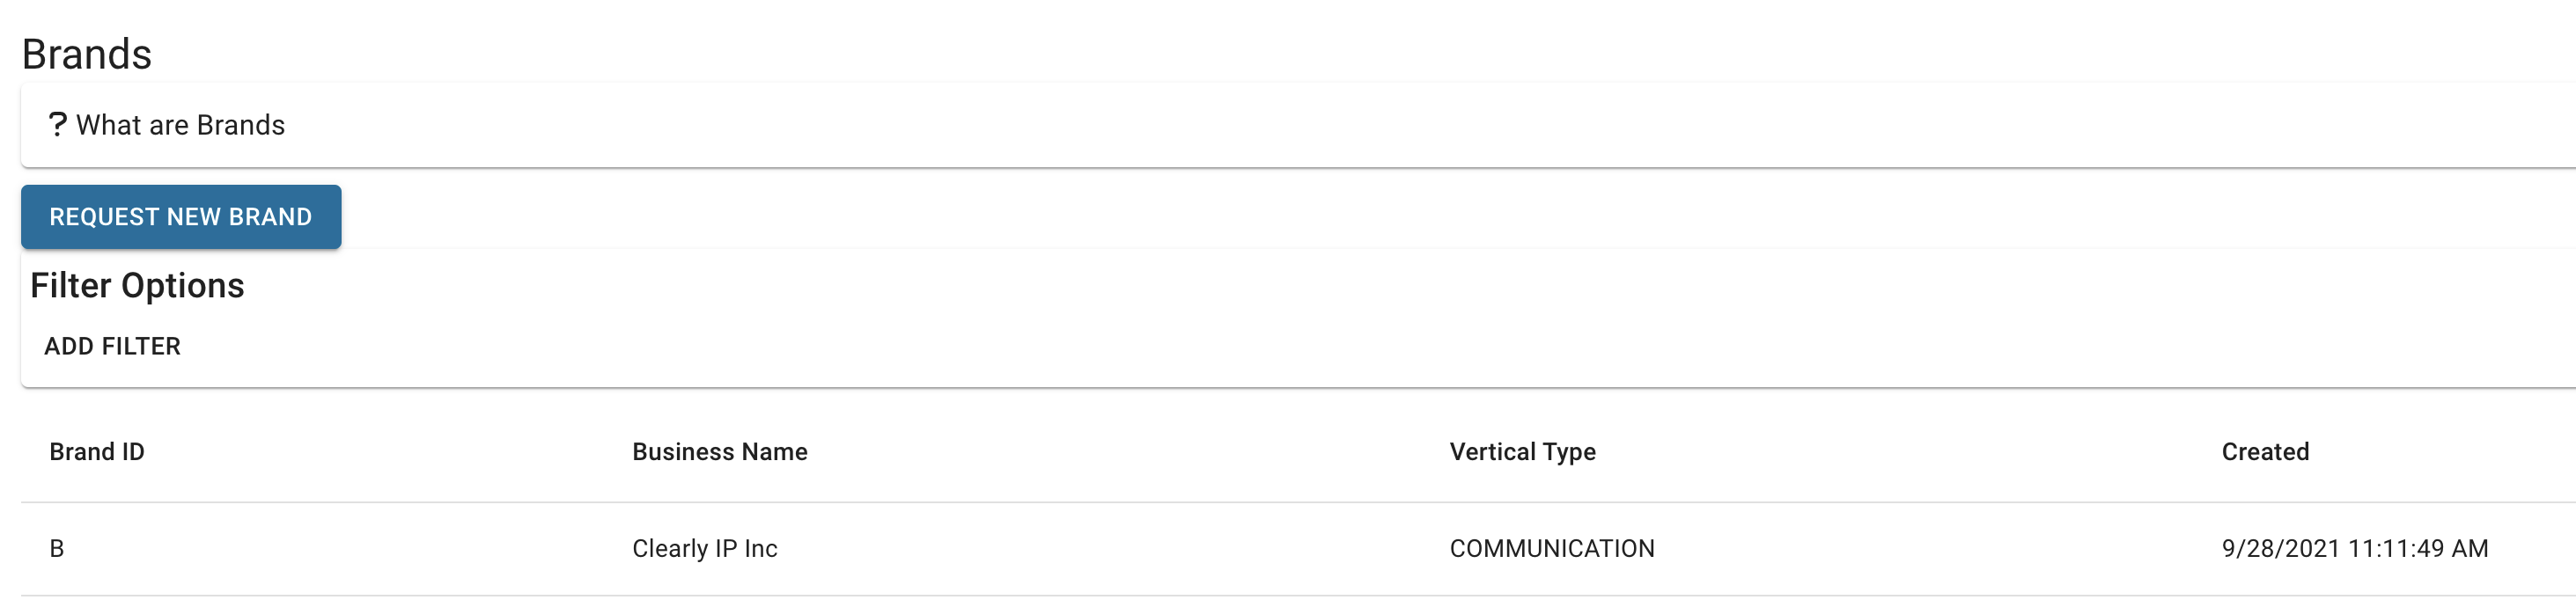
- You can also view all your Brands from here and see the approval status at anytime. If the Brand ID field has information that means your Brand is setup and approved.
Campaigns - Campaigns are we you define the type of messages you will be sending. Once you setup a Campaign you can now link up to 49 numbers to a single Campaign. If you want to enable messaging on more than 49 numbers you will need to create additional Campaigns.
- Each campaign has a monthly fee charged by the Campaign Registry to register your Campaign. This fee depends on the type of campaign that is registered, as described in the table below. The Campaign Registry also requires you to agree to a three-month contract period for each campaign, and each renewal period is also three months. Meaning that if you cancel service with us partially during your campaign period, we will still have to charge you for the remaining months of the three-month contract for your campaign.
- Campaign Registration is only required for Local US Numbers. Toll Free Numbers and Canada Local Numbers have no concept or requirement at this time to be linked to a campaign.
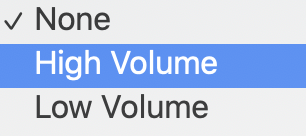
- Campaign Types supported by Clearly IP
- Standard Campaigns - $10.00 a month TCR Fee plus $2.00 Fee from Clearly IP for a total of $12.00 a month
- Depending on the Carrier outlined below, you have either a day or a minute limit on the number of messages that can be sent.
- Low Volume Mixed Campaigns - $2.00 per month TCR Fee plus $1.00 Fee from Clearly IP for a total of $3.00 per month.
- Low-volume campaigns are designed for non-time sensitive messages. Choose a Low Volume use case if you don’t exceed 15,000 messages/ month or if you don’t have a need for high throughput. Low volume mixed campaigns are restricted to 75 messages a minute on the AT&T network.
- To create a new Campaign navigate to the Messaging under Products and Services of our trunking portal

- From here you can click on the "Request New Campaign" button and submit all the relevant information related to your Campaign. When submitting a new Campaign you have to provide the Brand ID that the Campaign is being linked to which means this step can not be completed until you have a submitted and approved Brand. The creating and approval of Campaigns happens within 1 business day usually. You will receive a email from us once your Campaign has been setup and approved.

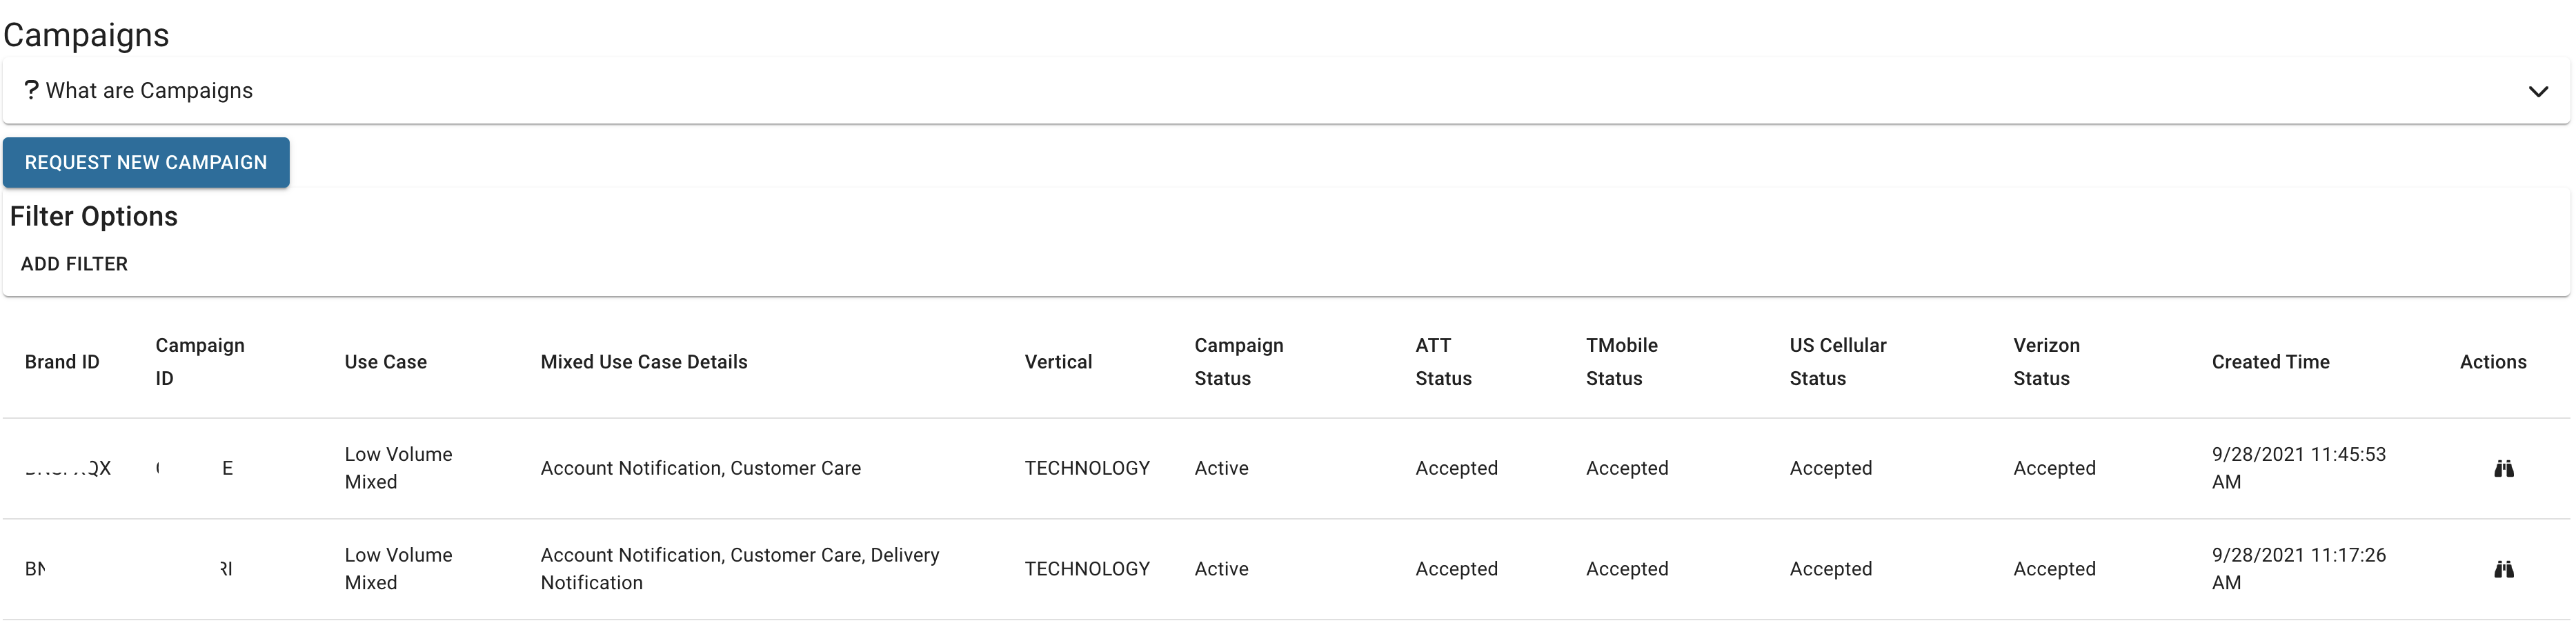
- You can also view all your Campaigns from here and see the approval status at anytime. Once your Campaign has been approved you can now start associating your phones number to a single Campaign to allow sending and receiving of of SMS and MMS messages on those numbers.
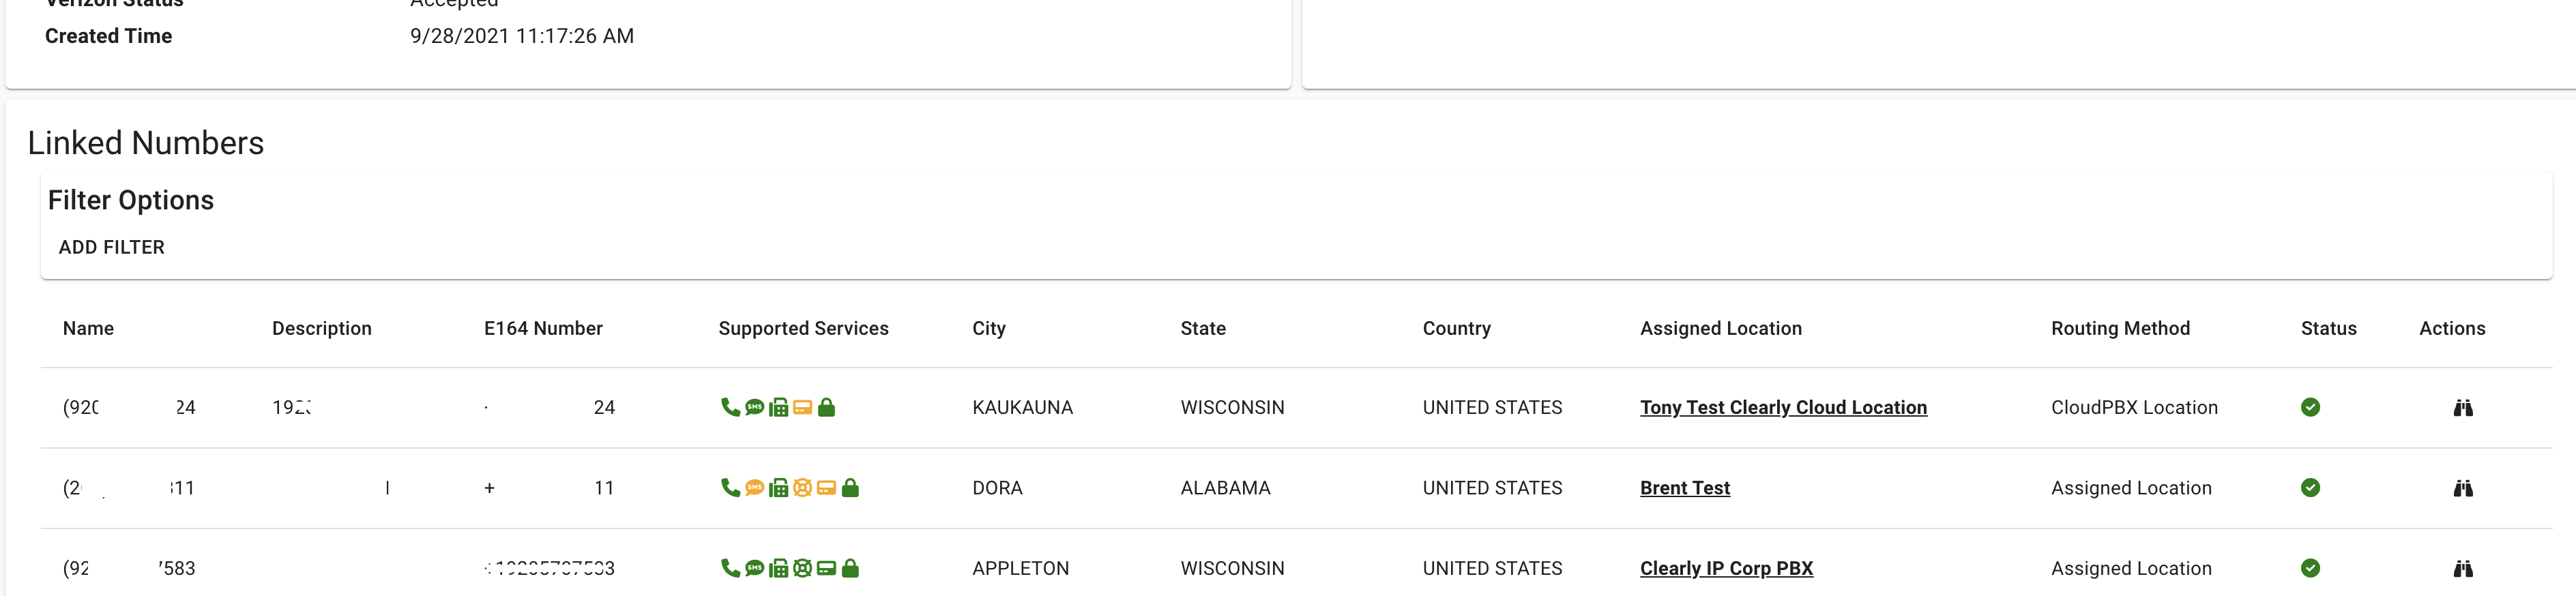
Linking Phone Numbers to Campaigns Viewing Linked Numbers to Campaigns - To view all numbers linked to a Campaign click on the Binoculars
 next to the campaign to see all the numbers linked to that campaign. next to the campaign to see all the numbers linked to that campaign.
- From here you will see a list of all the Linked Numbers
Cancelling a Message Campaign - Currently if you wish to cancel or close our a Message Campaign you will need to open a support ticket at https://support.clearlyip.com under the Customer Service department requesting that we cancel your Campaign Brand and include the Campaign ID in the request.
- A friendly reminder that all Message Campaigns under TCR requirements auto renew for 3 months at a time so we can only cancel your Campaign on the 3 month renewal period from the last renewal date.
- Our customer service team will process your cancellation and update the ticket with what date the Campaign is scheduled not to renew on based on the current 3 month renewal that you are in.
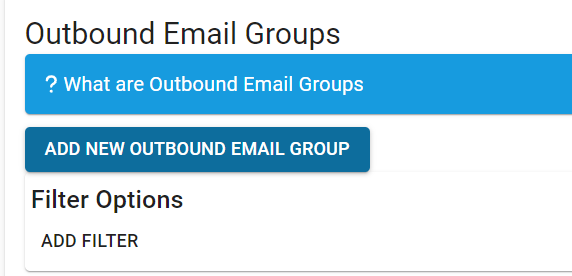
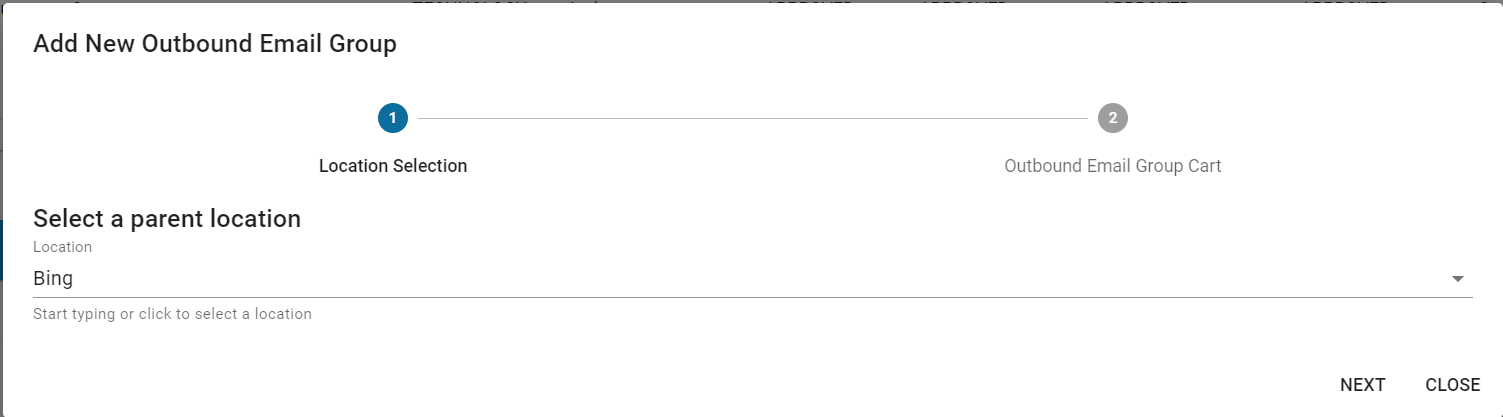
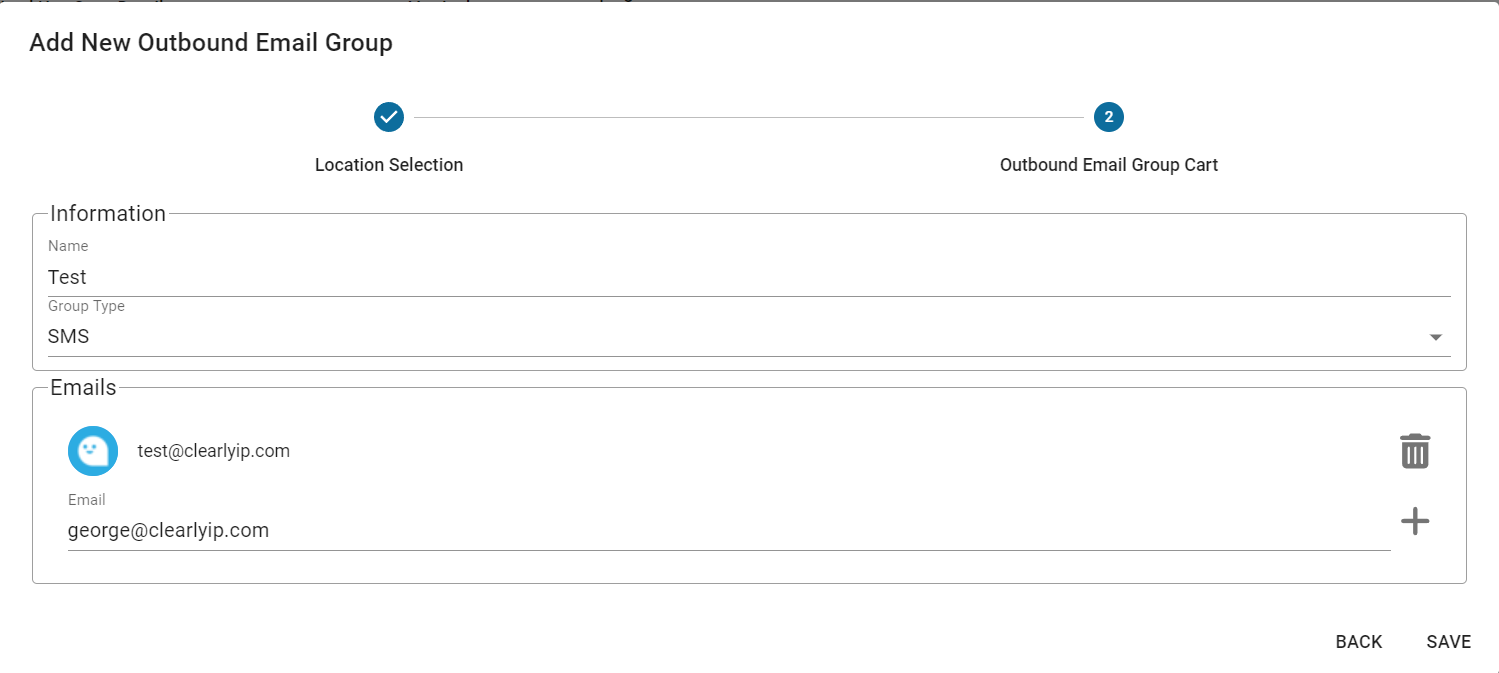
Outbound Email Groups
|
|
|
| | | |
|


 s
s


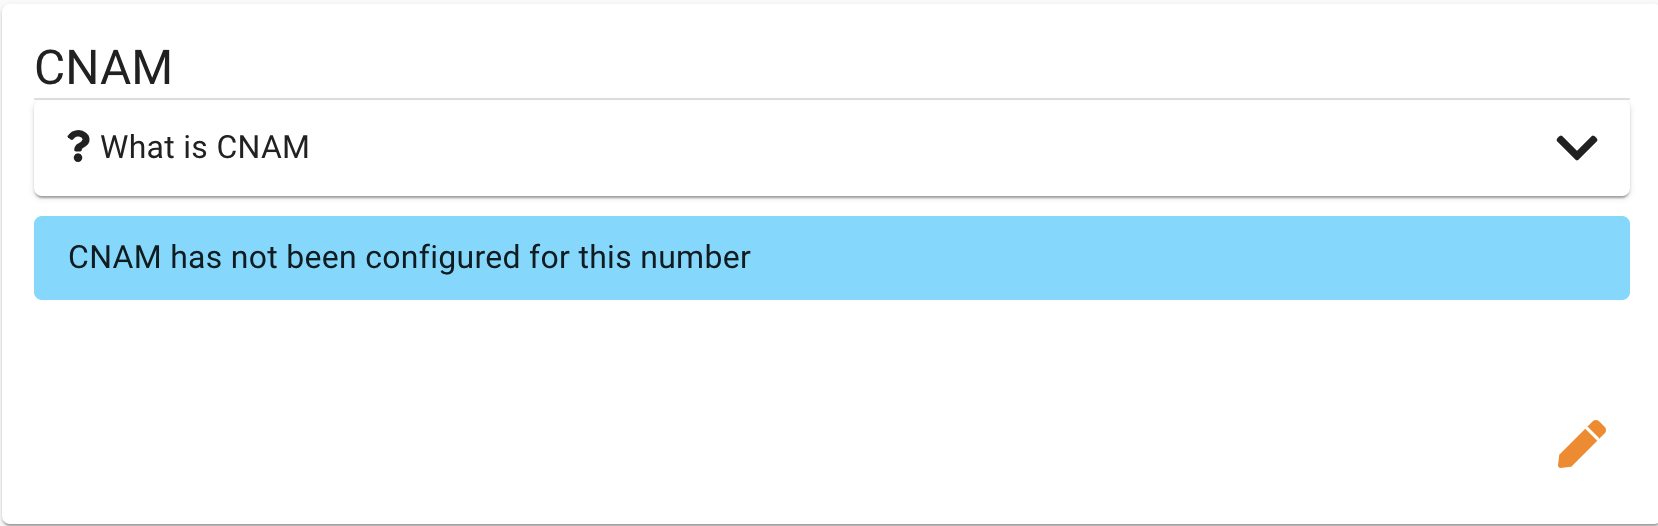
 and if the CNAM has not been set ever we will see a

 of the number you want to set or change the CNAM on and you will see a Section called CNAM