| | | |
 Uploading .... Uploading .... Overview -
The existing Clearly IP Cloud Portal at https://cloud.clearlyip.com/ now includes Clearly Cloud Locations’ for purchase. -
By default, only Resellers of Clearly IP can purchase new Clearly Cloud Locations. -
If you are an end-user looking to purchase a Clearly Cloud Location, please contact our sales group here https://www.clearlyip.com/request-quote/, and we will pair you with a local Reseller to assist you. -
Once your Reseller account with Clearly IP is approved for purchasing Clearly Cloud, you can log in to your our portal at https://cloud.clearlyip.com/ and create a new Location for your new Clearly Cloud system. -
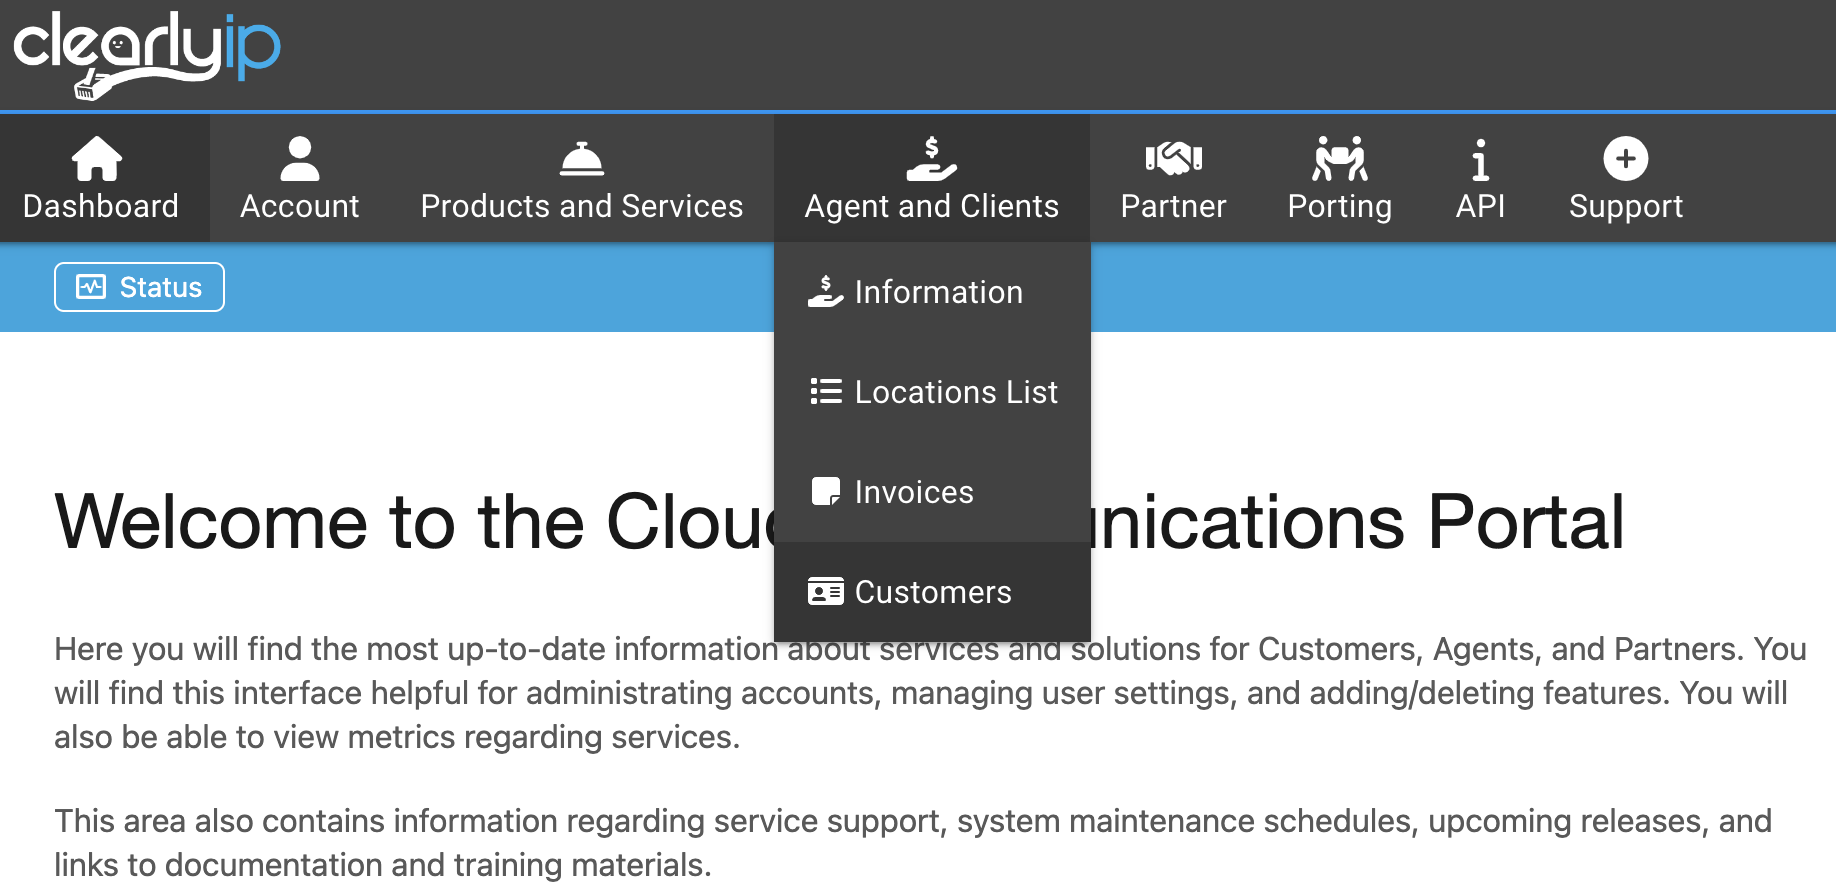
If you are a Reseller and wanting to purchase a Clearly Cloud location for your End Customer and you would like us to bill the end customer directly as an Agent model, you can log into your Portal Store account, and then use the Agent and Clients menu to add a new Sub-Customer under your account. Once you create the Sub-Customer account you can follow the instructions below to setup their Cloud Services. 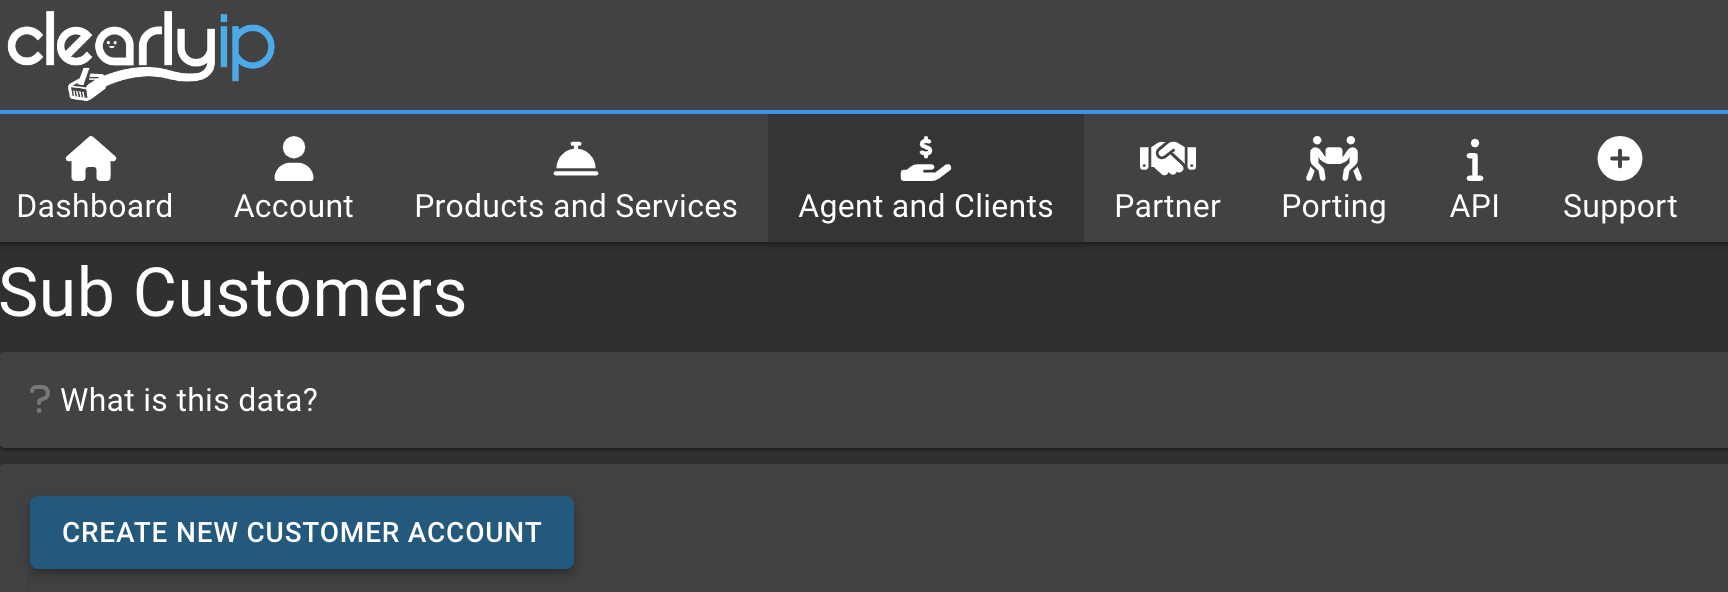
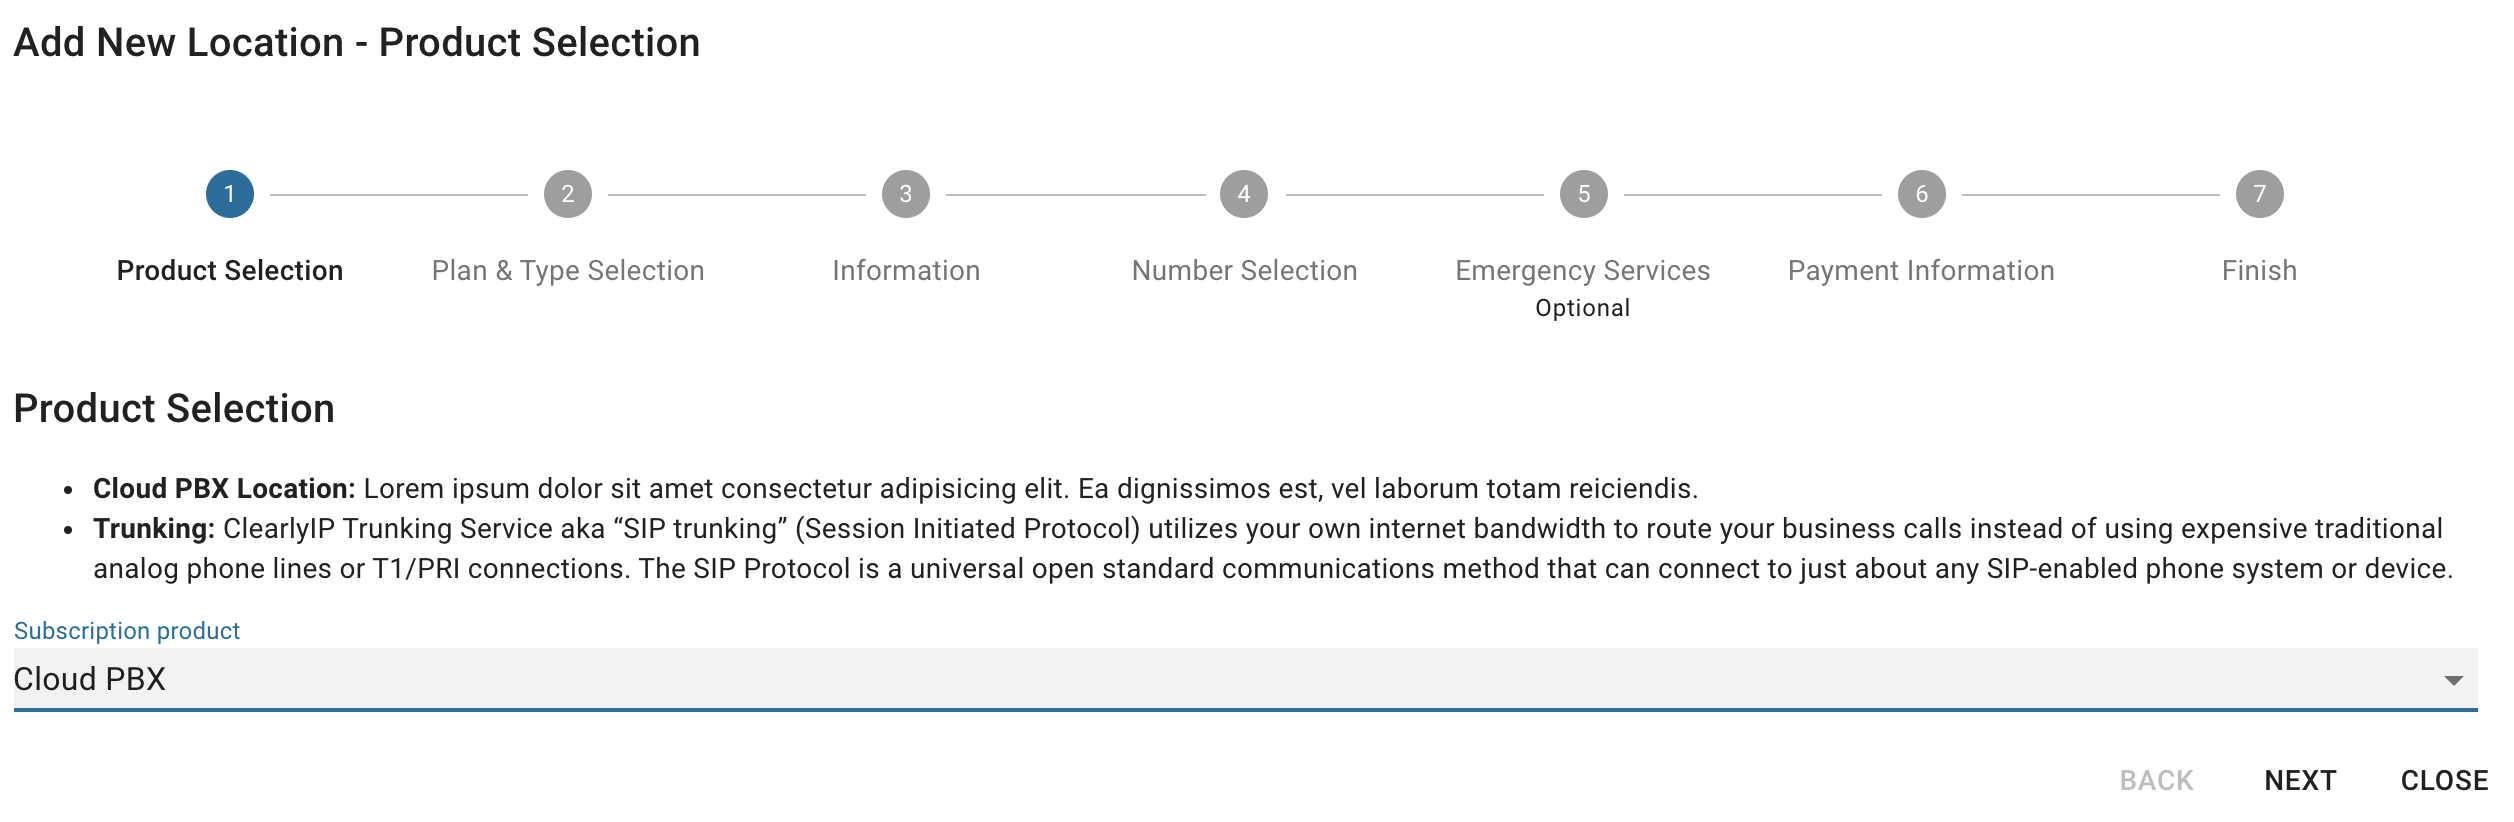
Purchasing a New Clearly Cloud PBX Location - Log into https://cloud.clearlyip.com/
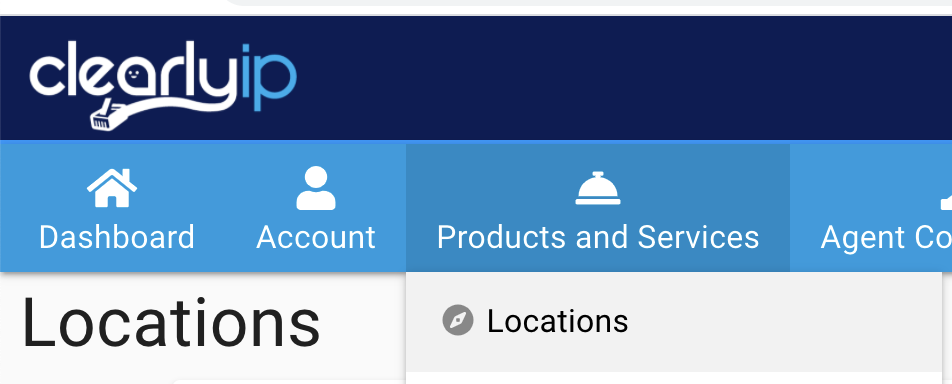
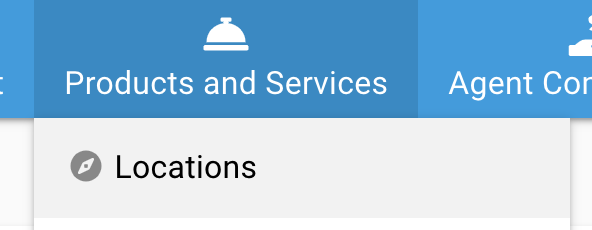
- Click on Products and Services > Locations
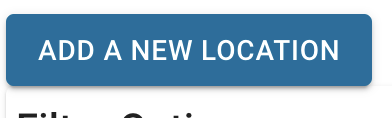
 - Click on the New Location button
 - Under the "Subscription Product" section pick Cloud PBX
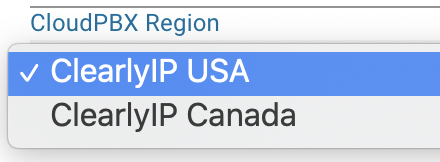
 - From here you can pick from a region where you want your Clearly Cloud system to be provisioned. Currently we offer US and Canada regions and press the Next Button
 - Under the Plan pick the contract length that you want to sign up this Location for.
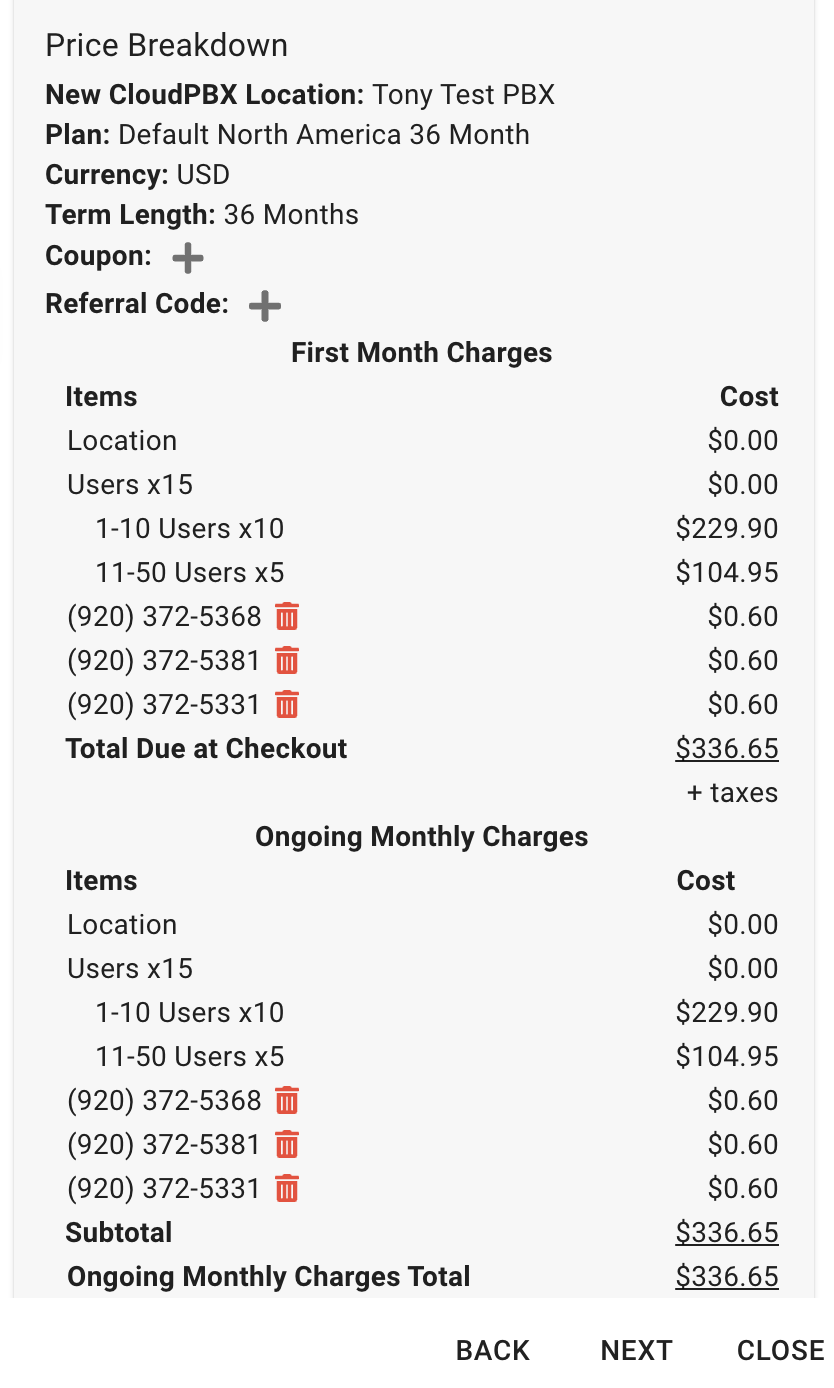
 - Next we need to define how many users you want to purchase for this location. A user is generally best thought of as a Extension. A single user can be setup with a extension number and connect 1 or more Phones to that user. The price per user is based on the plan you pick with the longer term plans offering better pricing along with a tier that the more users you add the more discounts that are applied for those users. The per user cost can be seen in the shopping cart on the right of your screen once you add 1 or more users into the field below.
 - The price per user is based on the plan you pick with the longer term plans offering better pricing along with a tier that the more users you add the more discounts that are applied for those users. The per user cost can be seen in the shopping cart on the right of your screen once you add 1 or more users into the field below.
 - The last piece of information for this screen is if we want to setup a new Cloud Device Manager (CDM) Location for this Cloud Location. CDM is a Device and Phone Provisioning tool used to provision different brands of Desk Phones. A subscription for Clearly Cloud Device Manager is included free of charge with your Clearly Cloud purchase. Check this box "Add this location to Cloud Device Manager". If you already have a Cloud Device Manager account setup with the same login you are using for the Clearly Cloud store here it will automatically ask you if you want to connect this new Location to that account. Otherwise it will create a new Login Account for CDM automatically and email you the login details. We generally recommend checking this option as its no cost or charge for you. Press the Next button to continue to the next step.

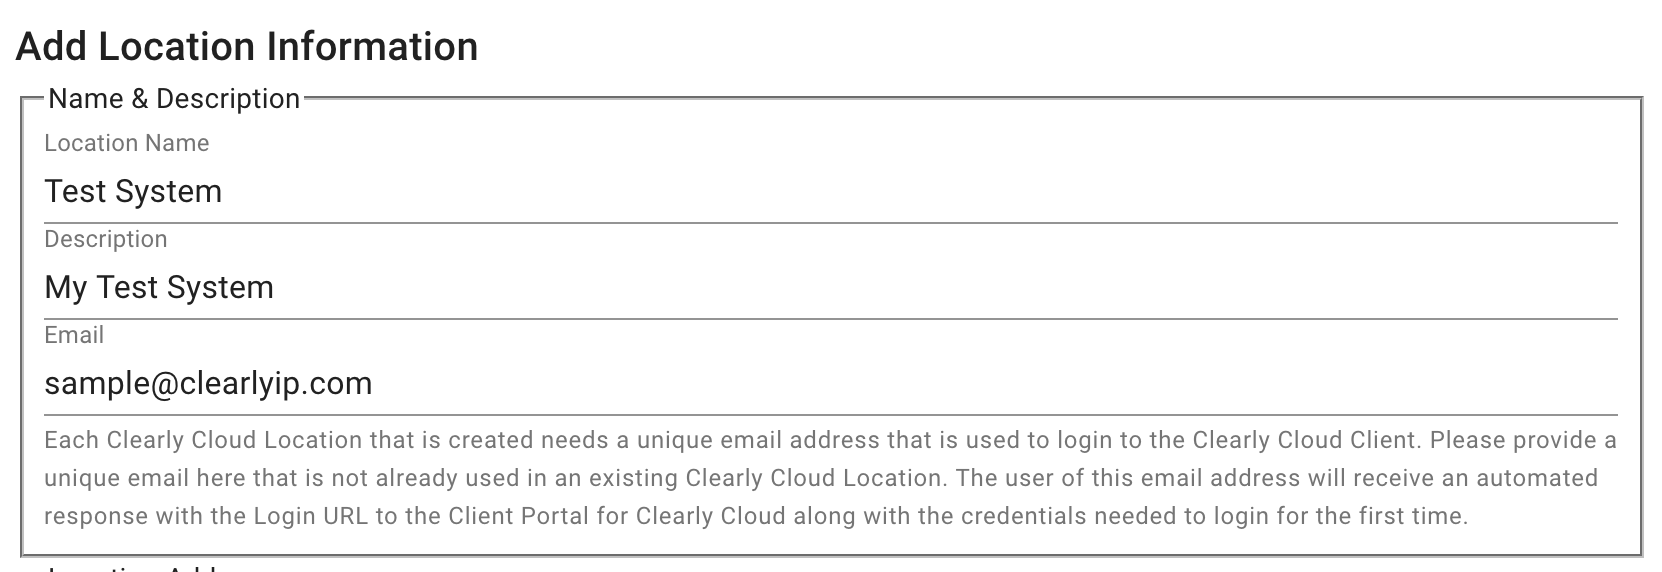
 - Add Location Name and Description Information
- Location Name - Friendly name for this Location
- Description - Optional additional information to describe this Location for your reference
- Email - Each Clearly Cloud Location created here needs a unique email address we set up for Login to the Clearly Cloud Client level login. Please provide a unique email here that is not already used in an existing Clearly Cloud Location. The User of this email address will receive an automated email from us with their Login URL to the Client Portal for Clearly Cloud along with a temporary password to Login the first time
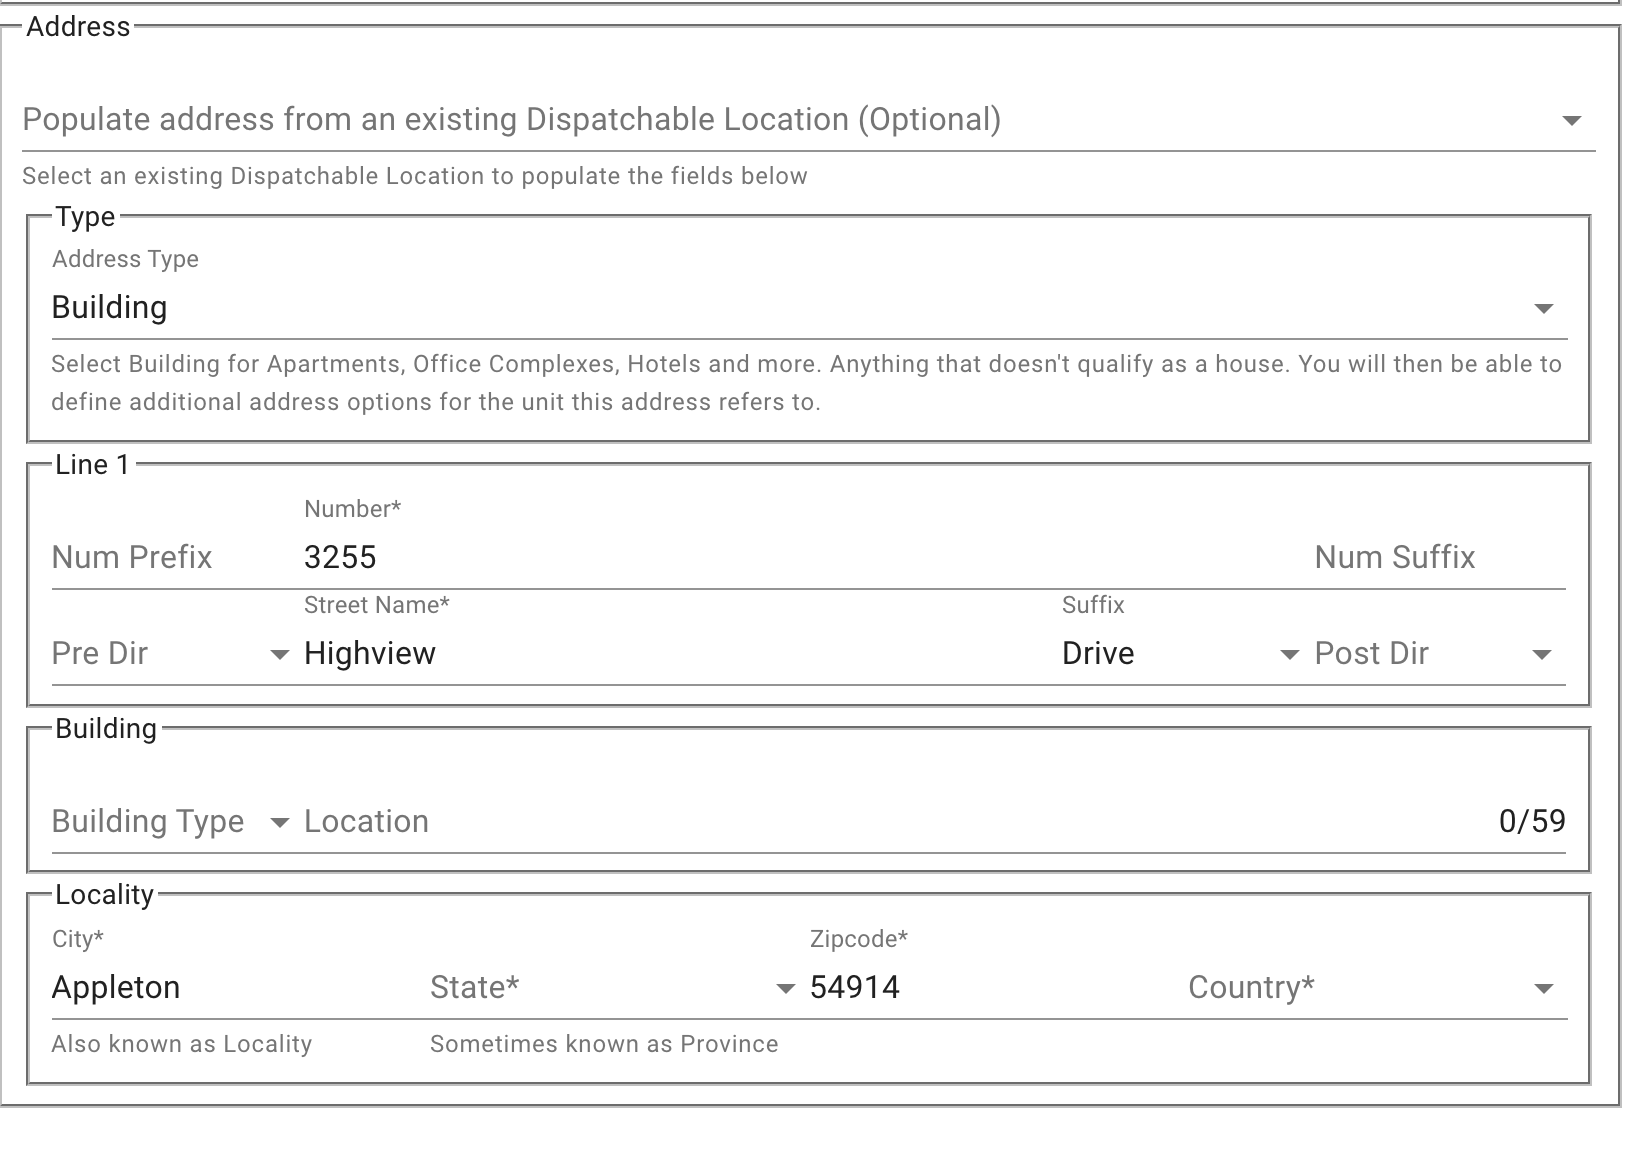
 - Address Information - Provide the physical address for this Location as this is needed for us to figure out taxation rating based on this address and press the Next button
 - The next screen is where we can purchase DIDs or Phone Numbers.
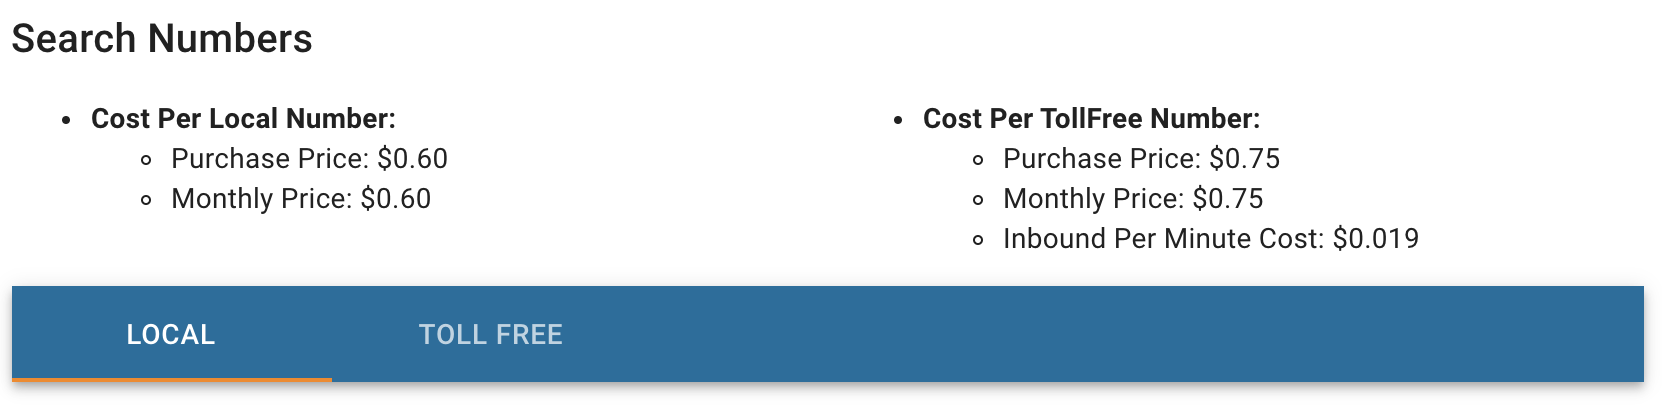 - From here you can buy US, Canada or Toll Free Numbers. For Location numbers pick the Country, State and City you want to search for Numbers in.
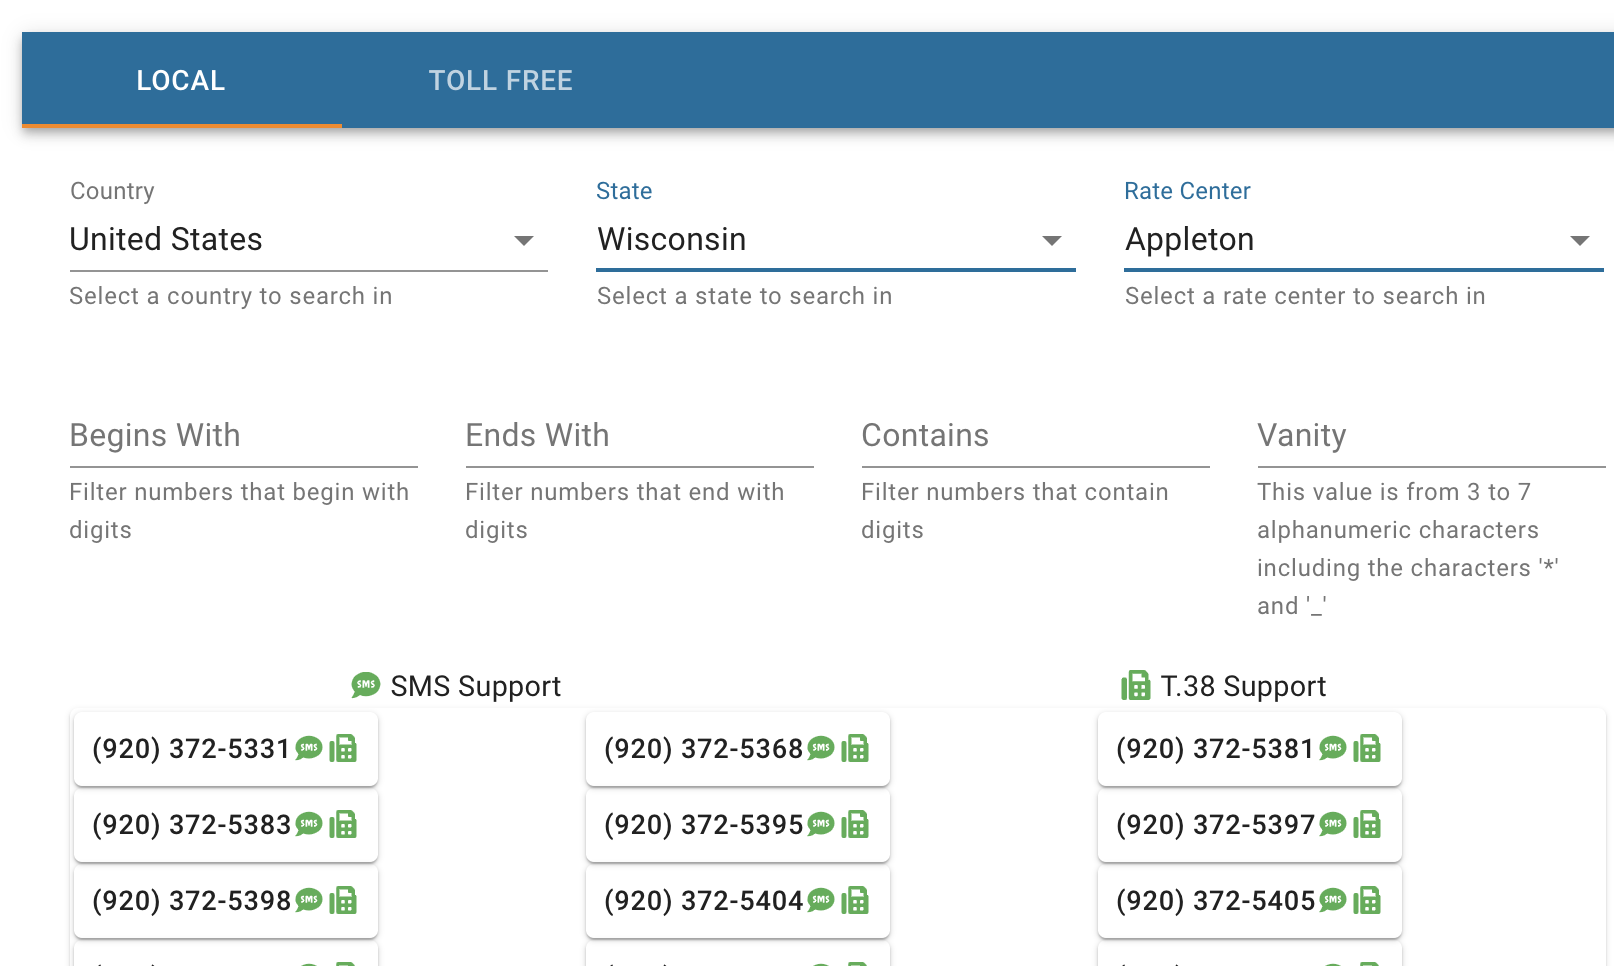 - Click on each number to add them into the shopping cart on the right side
 - You can do an additional search to add other numbers and repeat the process above to add them to your shopping cart and press "Next" when done
 - The final step now is to decide if we want to enable 911 calling and set up at least a single 911 record, which we HIGHLY recommend doing. Check the box in the screen below
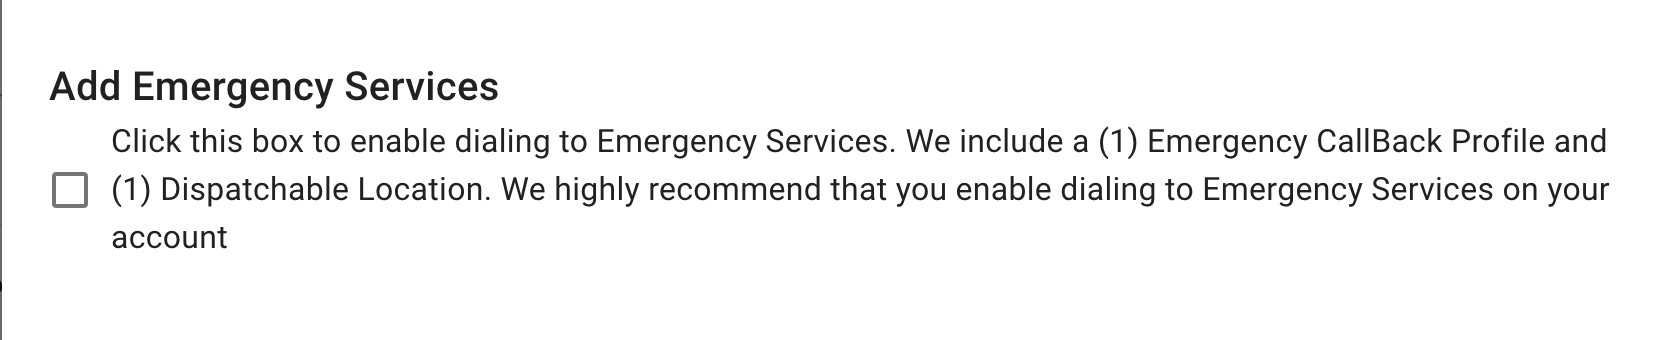 - From here, we will define our 911 information and pick which of the DIDs we want to enable 911 for. We can add additional 911 records after completing this checkout process if you need to purchase additional Locations for remote offices or workers.
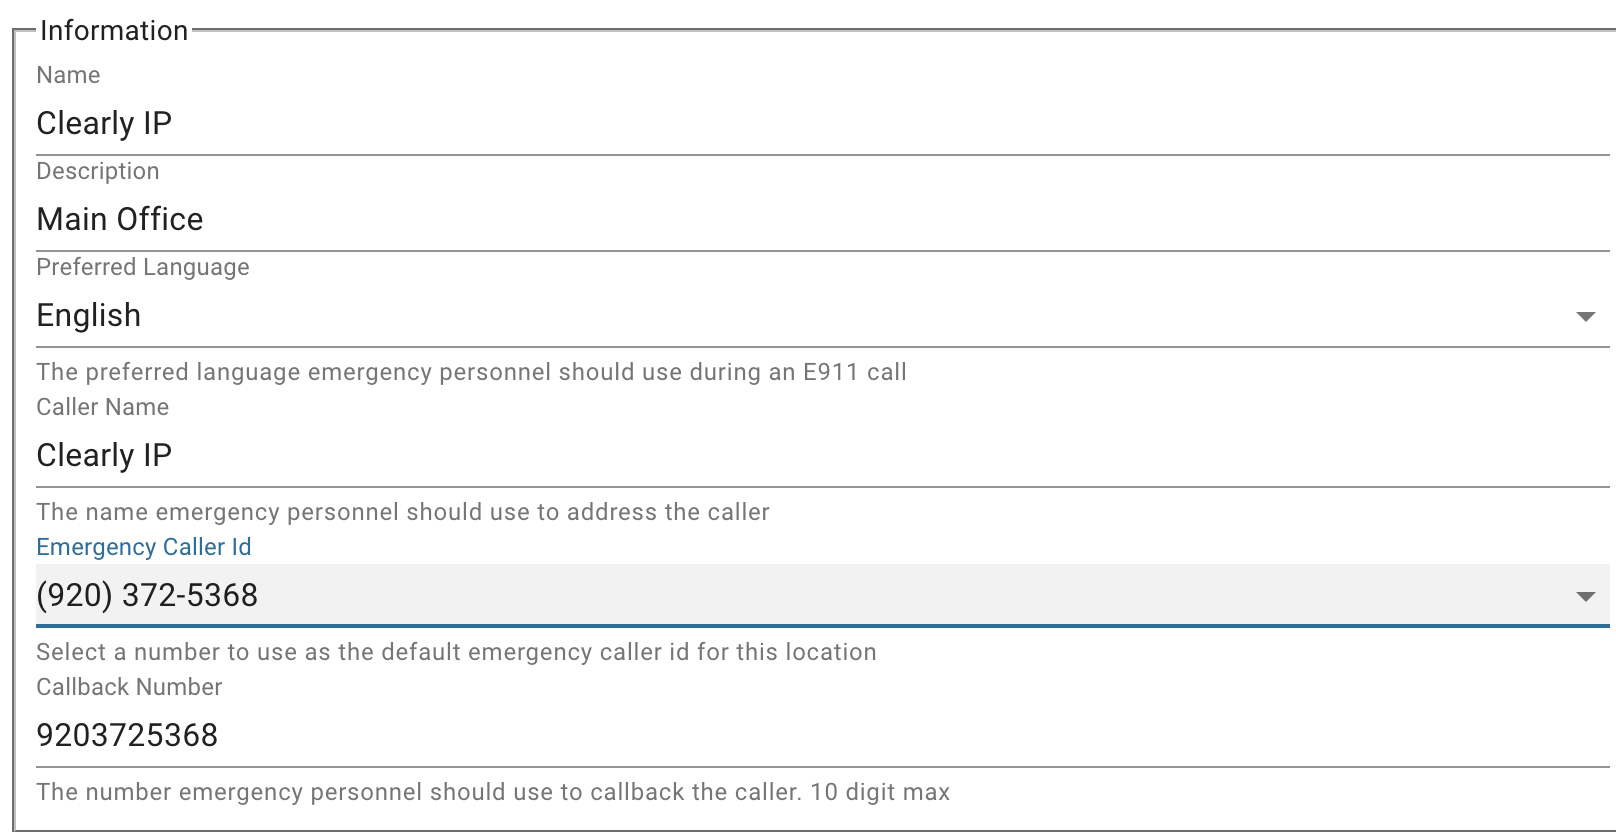 - Now we will provide the Address info for the above 911 information.
 - Press the "Verify" button. The verification system will verify all the Address information is correct by sending the 911 sub system request and having it confirm the information.
- If the information can not be verified, you will need to try and fix the address. If you cannot get the system to accept your information, you can skip this step and contact our support team, and we can resolve this and add it to your system after the fact.
 - If everything verifies correctly, you will now see the "Verify" button replaced with a "Next" button, and we can press that to finish the checkout process.
 - If your account already has a Credit Card on file with us or set up with payment terms, you will see this here; otherwise, press the "Add New Payment Method" button to add a credit card and complete the purchase process.
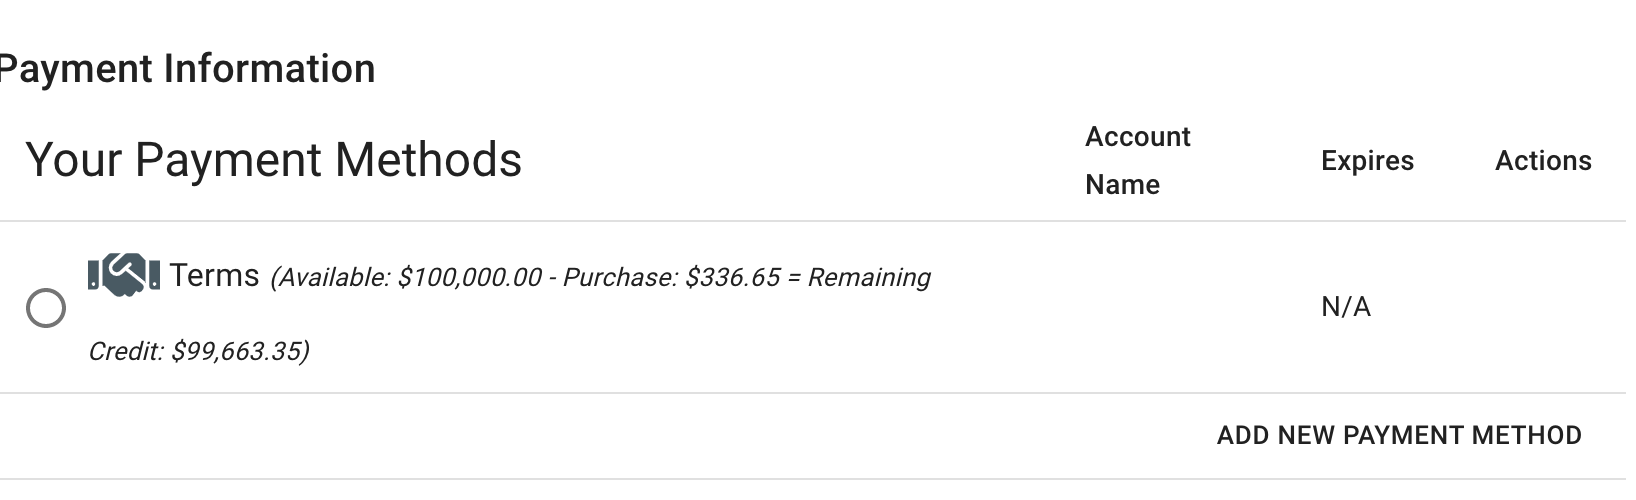 - Press the "Next" button after pricking a payment method
 - Final step is to agree to the Terms of Service and Press the "Save" button
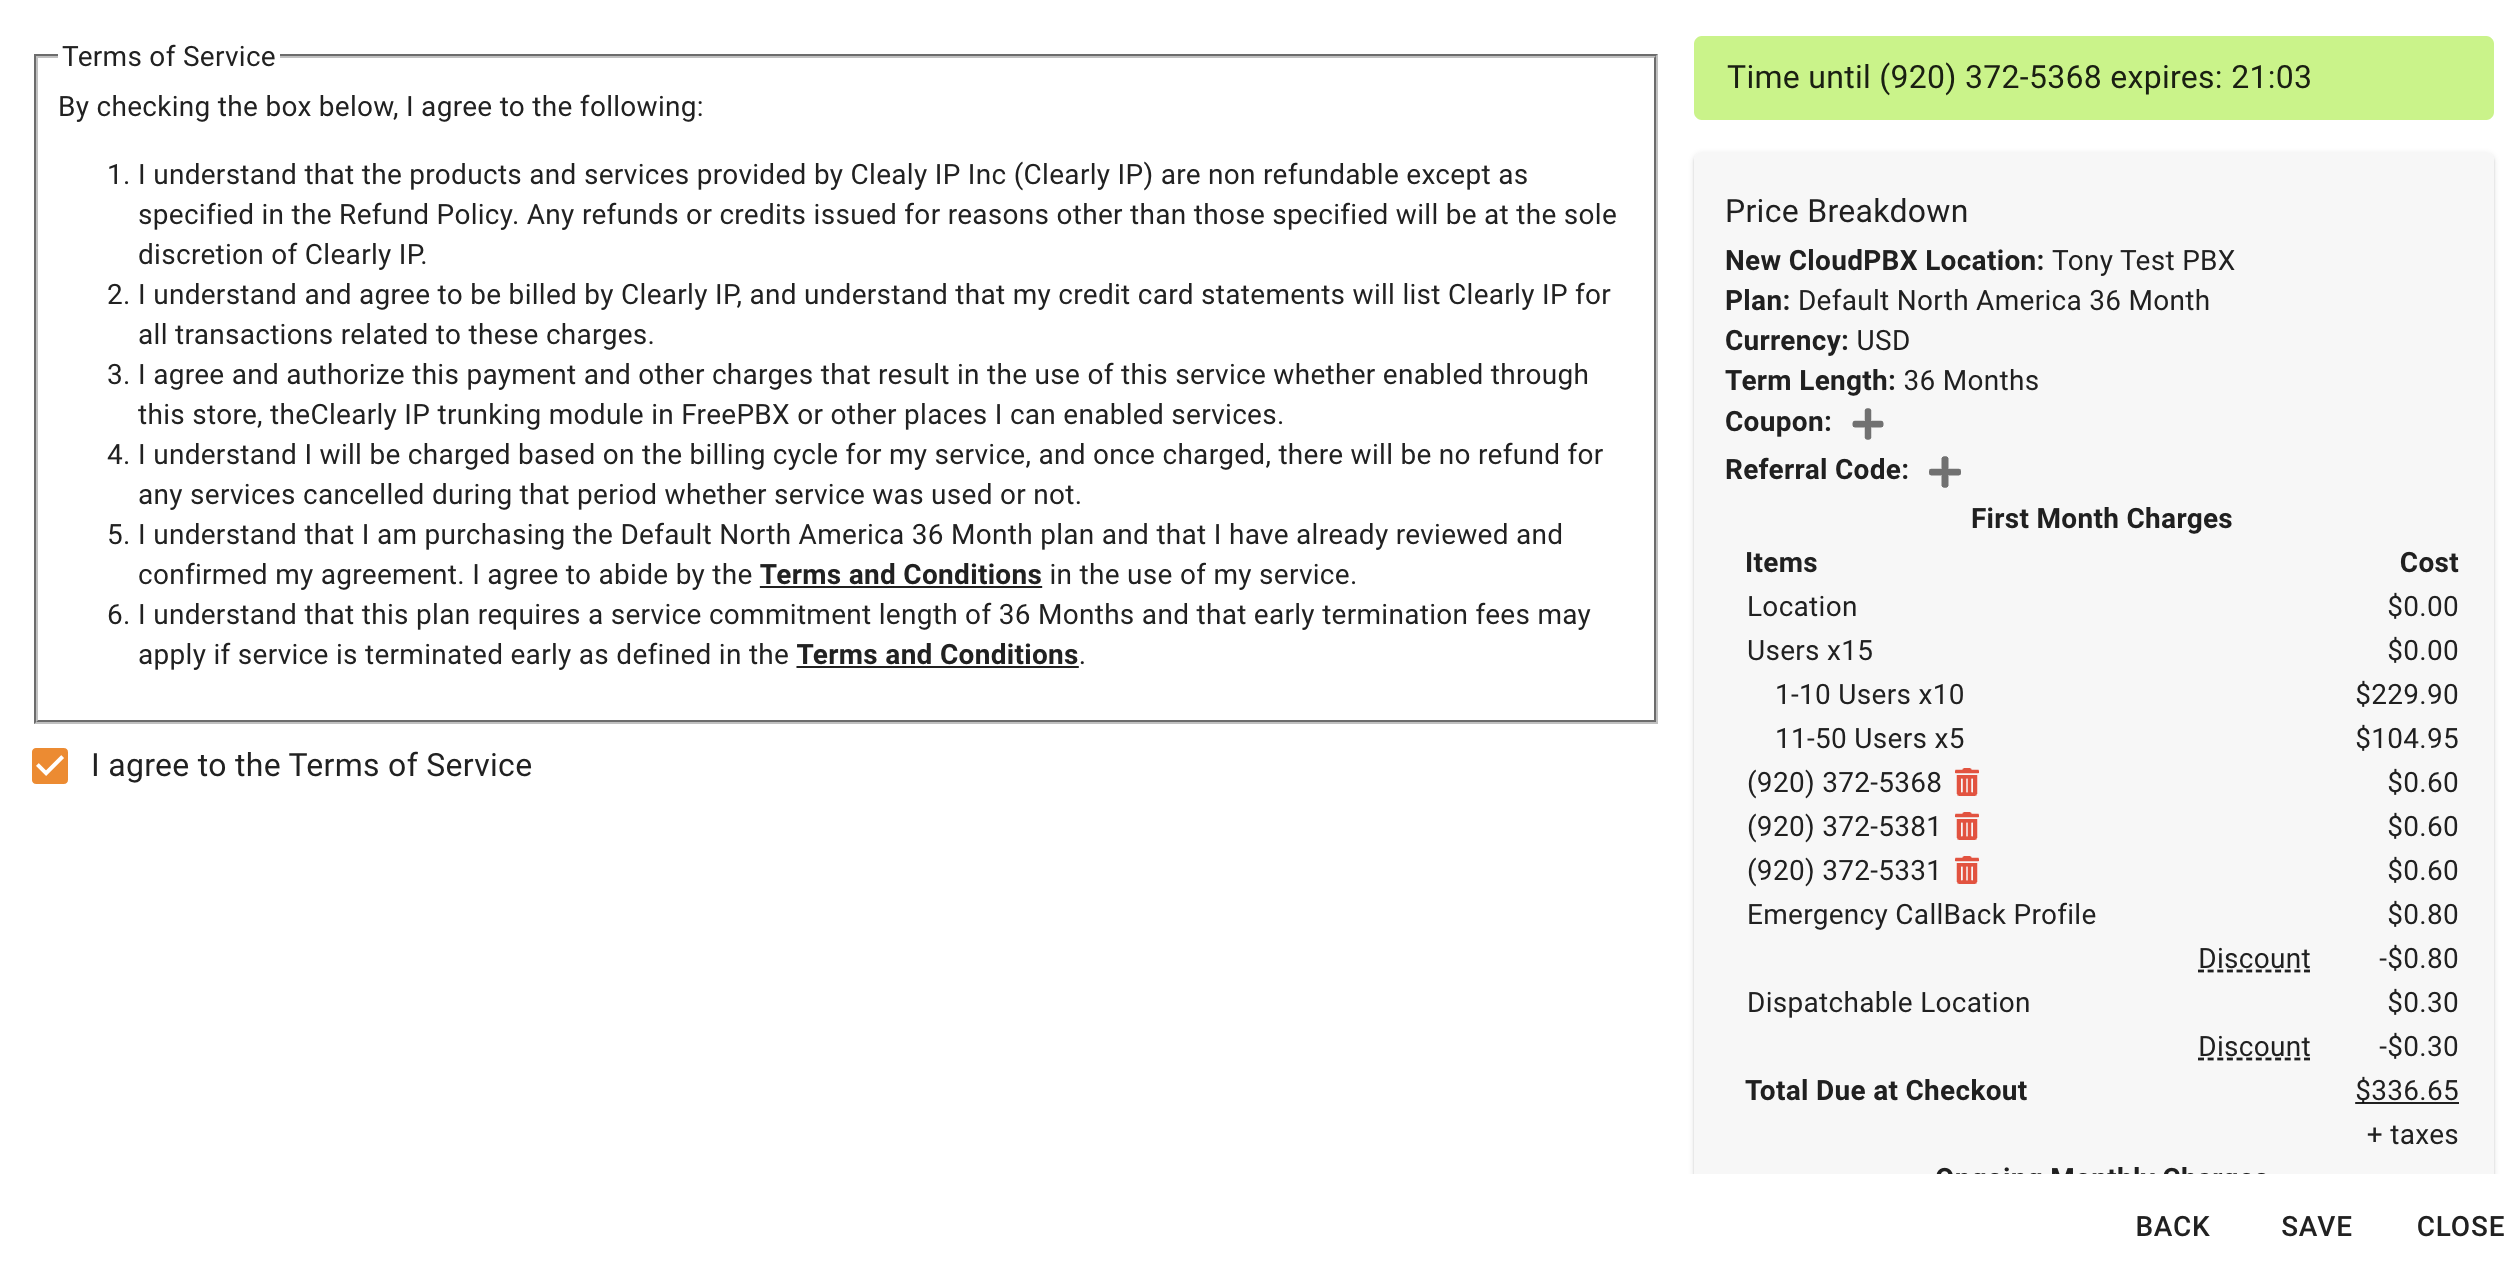 - You will now see a full recap of everything, and you can press the Close button once it appears
 - Your new Clearly Cloud PBX is now deployed and ready for you to start configuring it, following the steps below. The Emergency Locations and Call Back Profiles and Phone Numbers you have purchased here have already been pushed into your new Client PBX and ready for setup and configuration
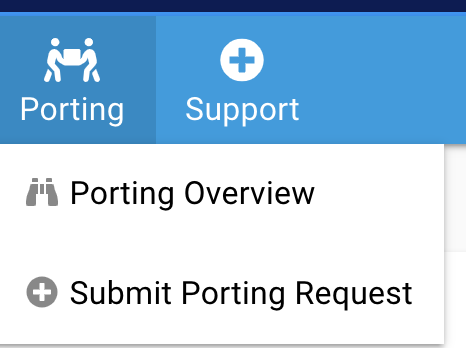
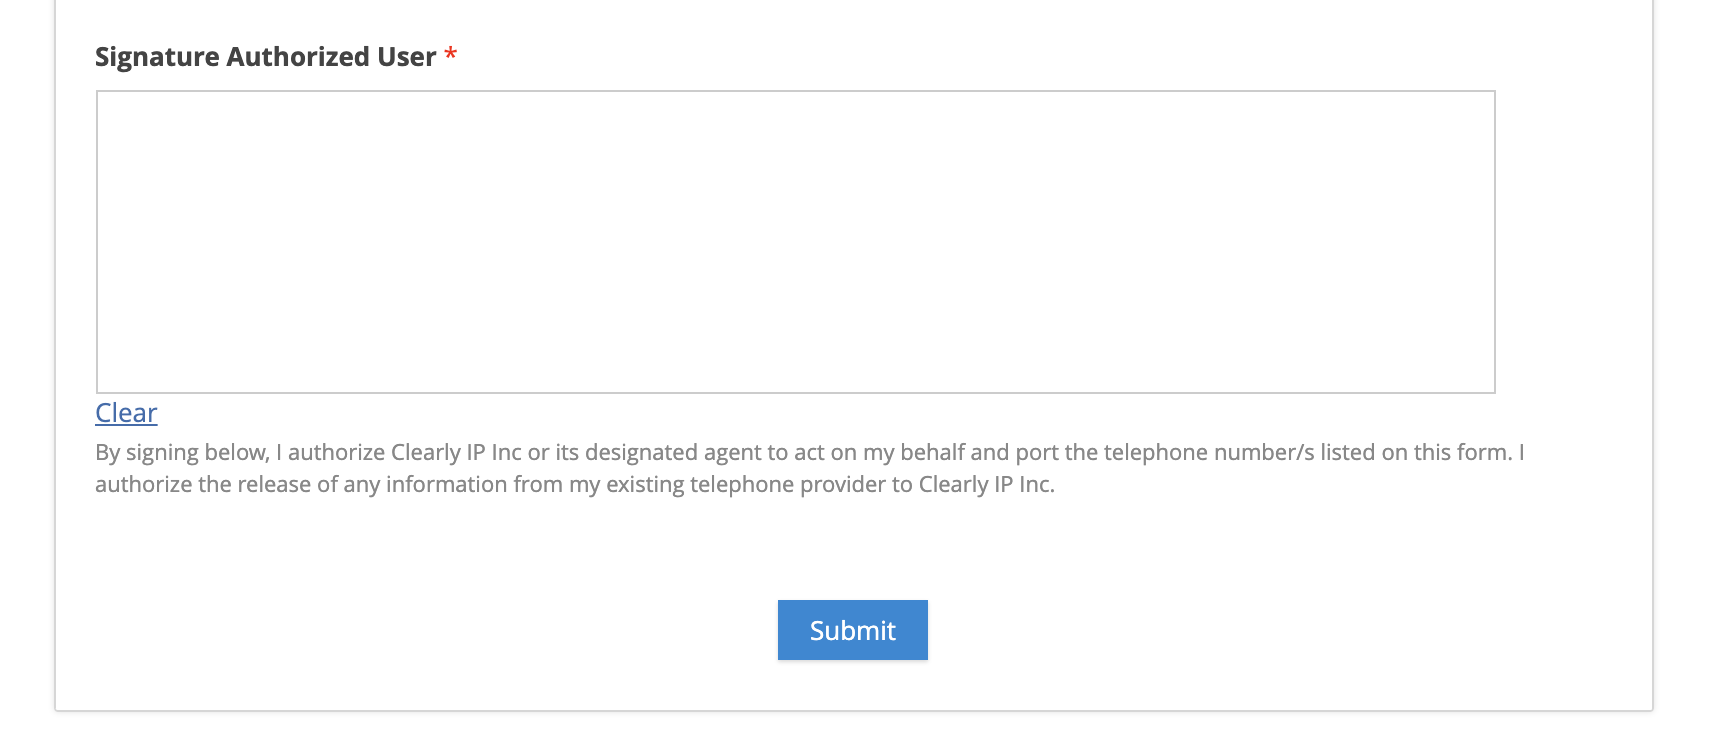
Submitting Number Ports To Submit the request, go to the Porting drop-down menu and select Submit Porting Request, which will bring you to our LOA.
 It is essential that you fill in as much information as possible; the more information, the smoother the port will be If you are porting numbers from 2 or more carriers, please fill out a separate LOA for each carrier. - Press Submit once you have filled in all the information. For a more in-depth guide on Number Porting, you can review our wiki here.
Adding or Removing Users After Purchase- From the Portal, click on Products and Services >Location
 - Locate the Location you want to change the user count on and click on the Binocular icon for that Location

- Scroll down to the CloudPBX Users widget and you can see how many users you are licensed for and click on the Edit pencil icon to increase or decrease the user count.
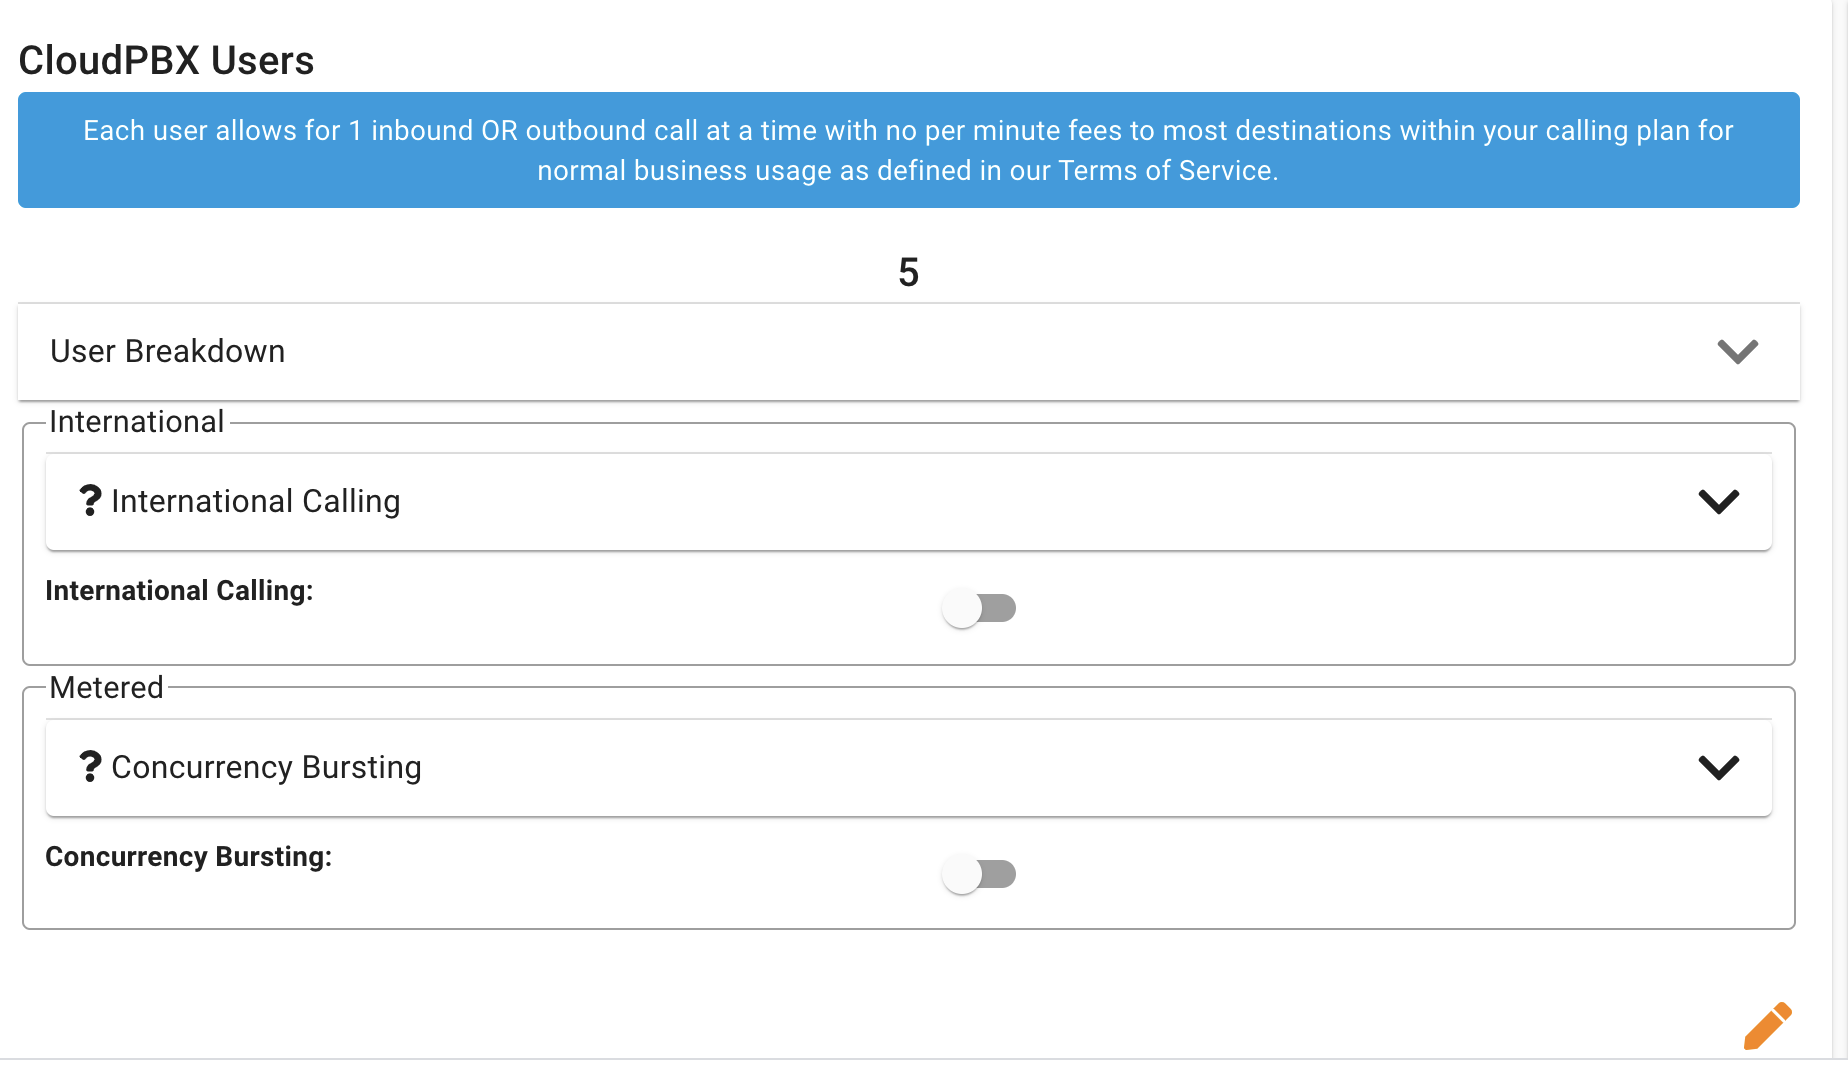
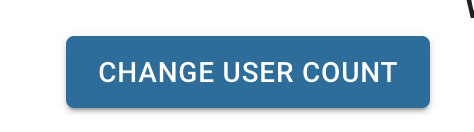
- Press the "Change User Count" button
- Set how many users you want in total to be on the system. If you currently have 5 users and want to have a total of 7 you would put 7 in this field.
- If you are adding users the shopping cart will show you the cost for those new users.
- If you are removing users the shopping cart will show you the monthly amount that will be reduced on your current billing with the removal of those users.

- Press the Next button and complete the Checkout Process.

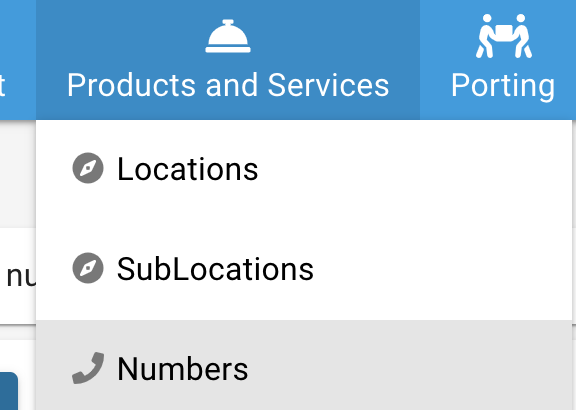
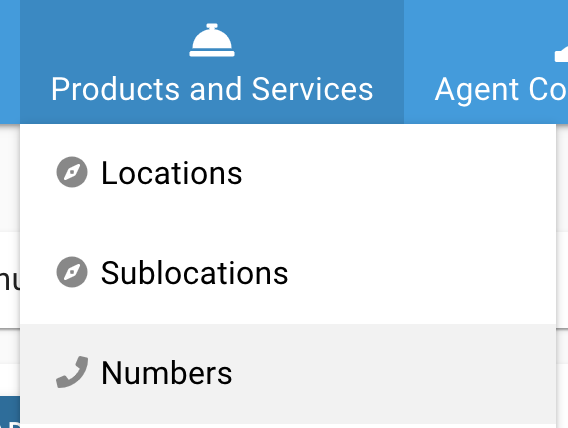
Adding Phone Numbers After Purchase- Click on Products and Services > Numbers
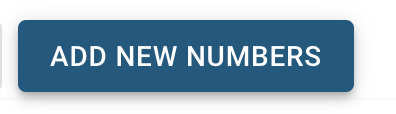
- Click on the Add New Numbers button
- Pick what Cloud Location you want to purchase the new numbers for

- From here we can buy North America and Toll Free Numbers (DIDs). At the top you will see what your per month rate is for the Local Numbers and for Toll Free Numbers, as well as what the per minute rate is for incoming calls received on the Toll Free Numbers you purchased.
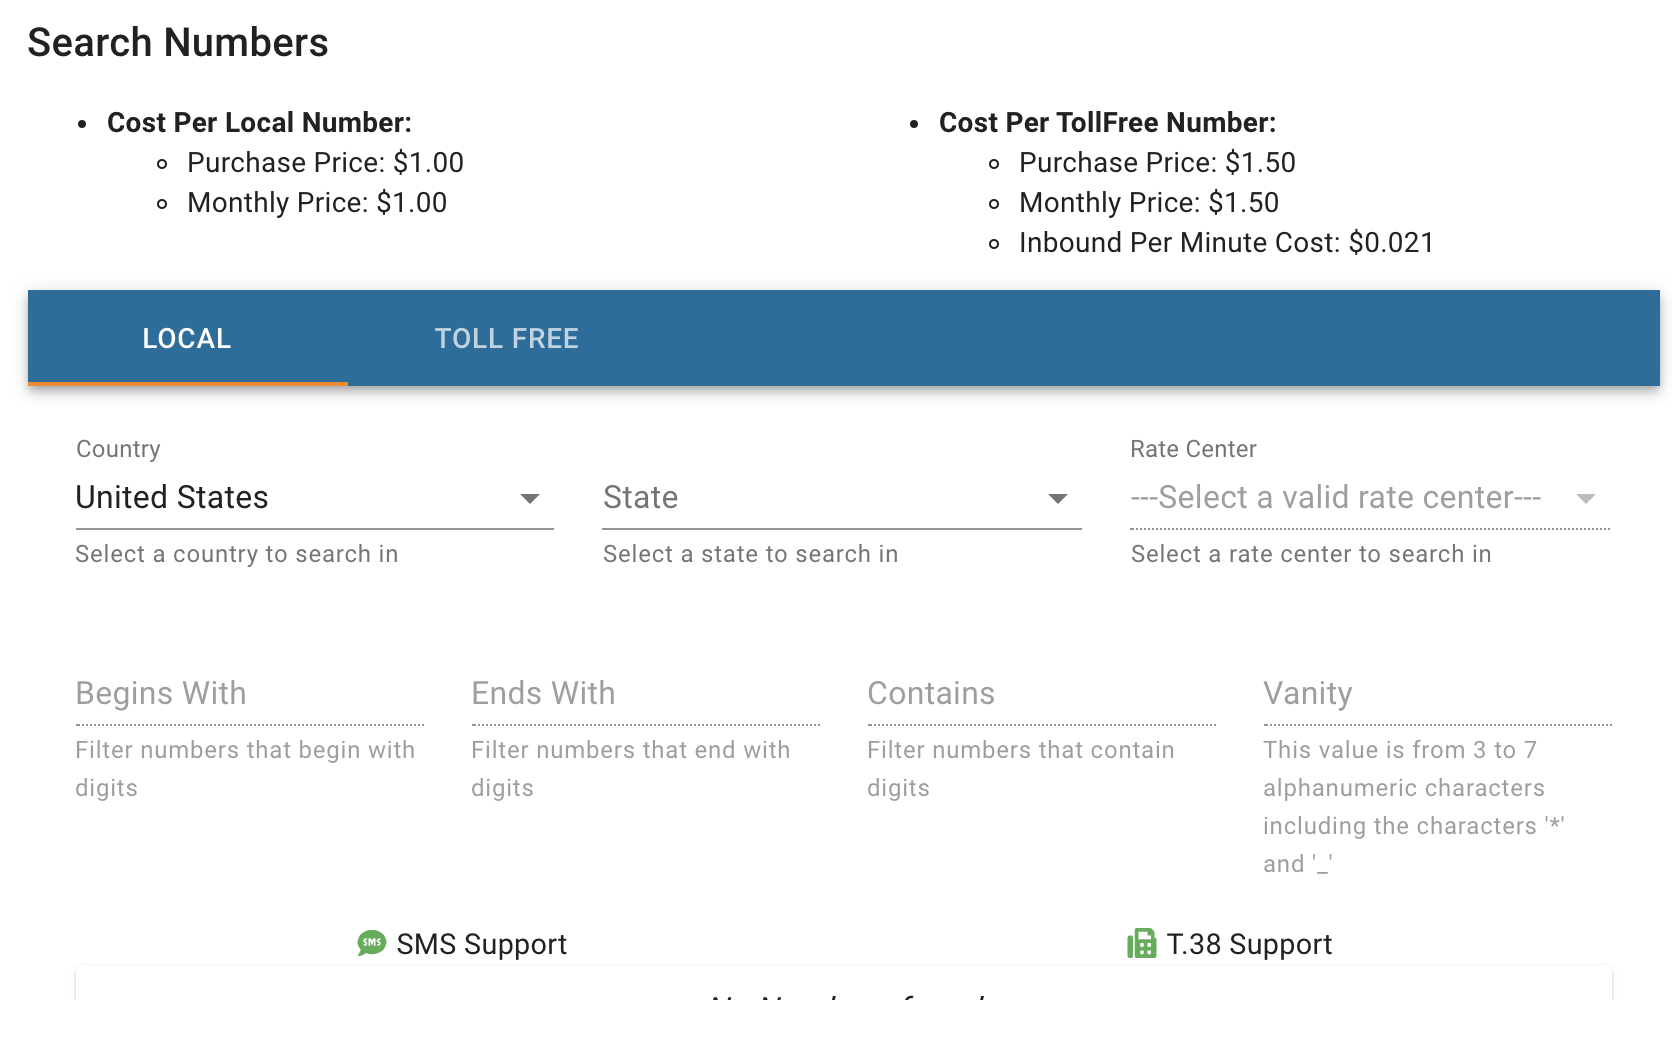
- Once you have picked 1 or more numbers they will be added to your cart. Click on the number will add it to your cart and grey out the number in the selector below as shown. You can then search for numbers in different rate centers and add them to your cart, and even add Toll Free Numbers.
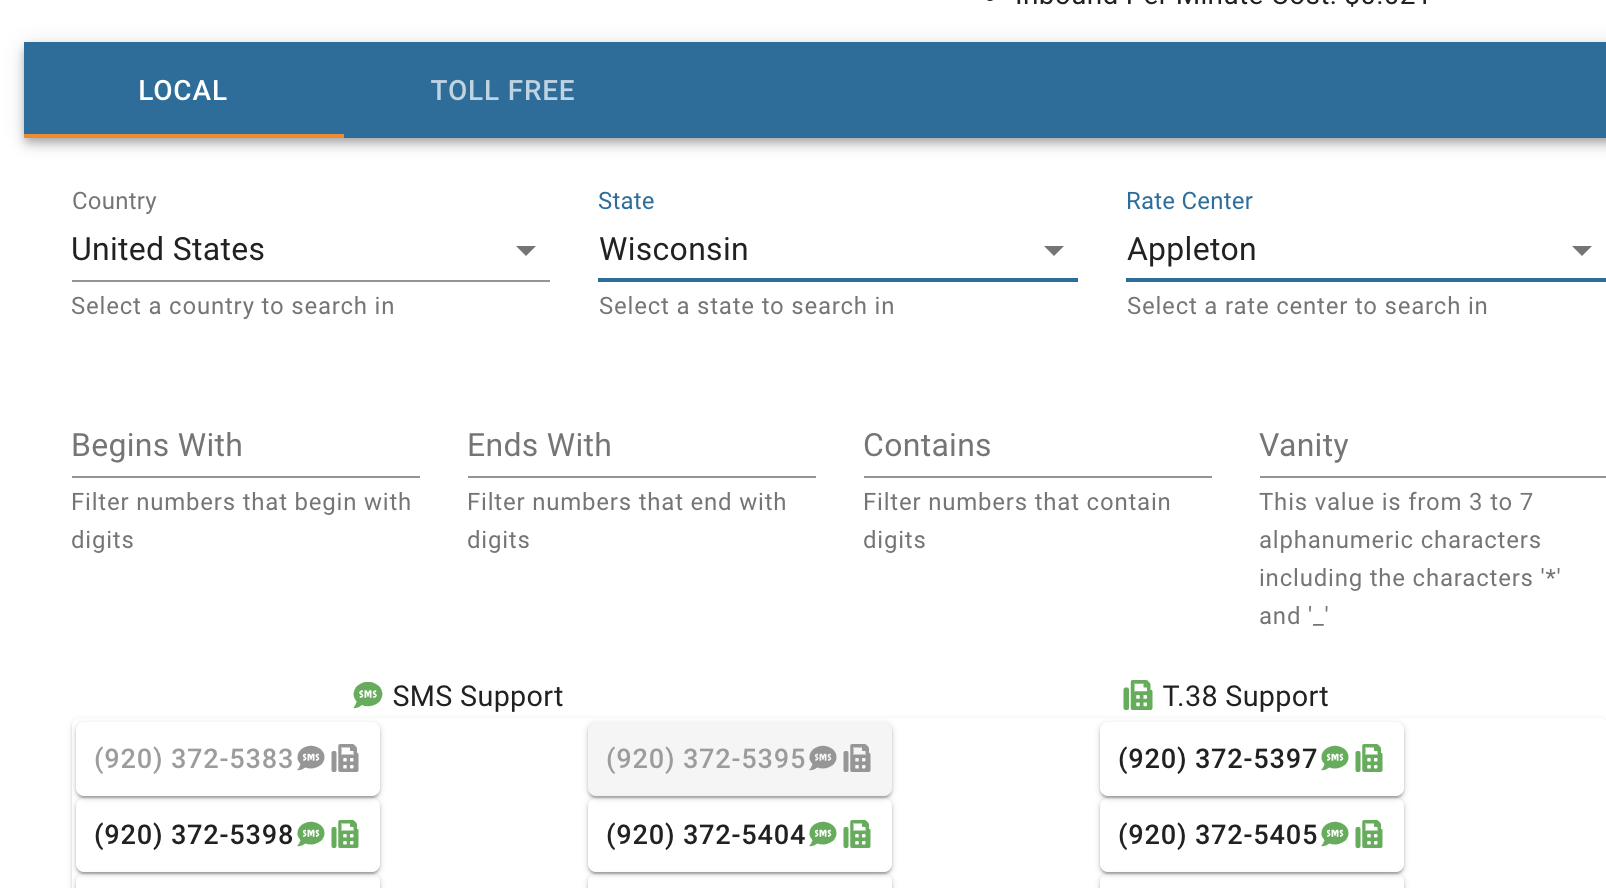
- All your numbers that you have picked will be shown in the cart on the right hand side along with what the per month price for each number is.

- Press the Next button and complete the checkout process and your new numbers will be active and ready to be used now.
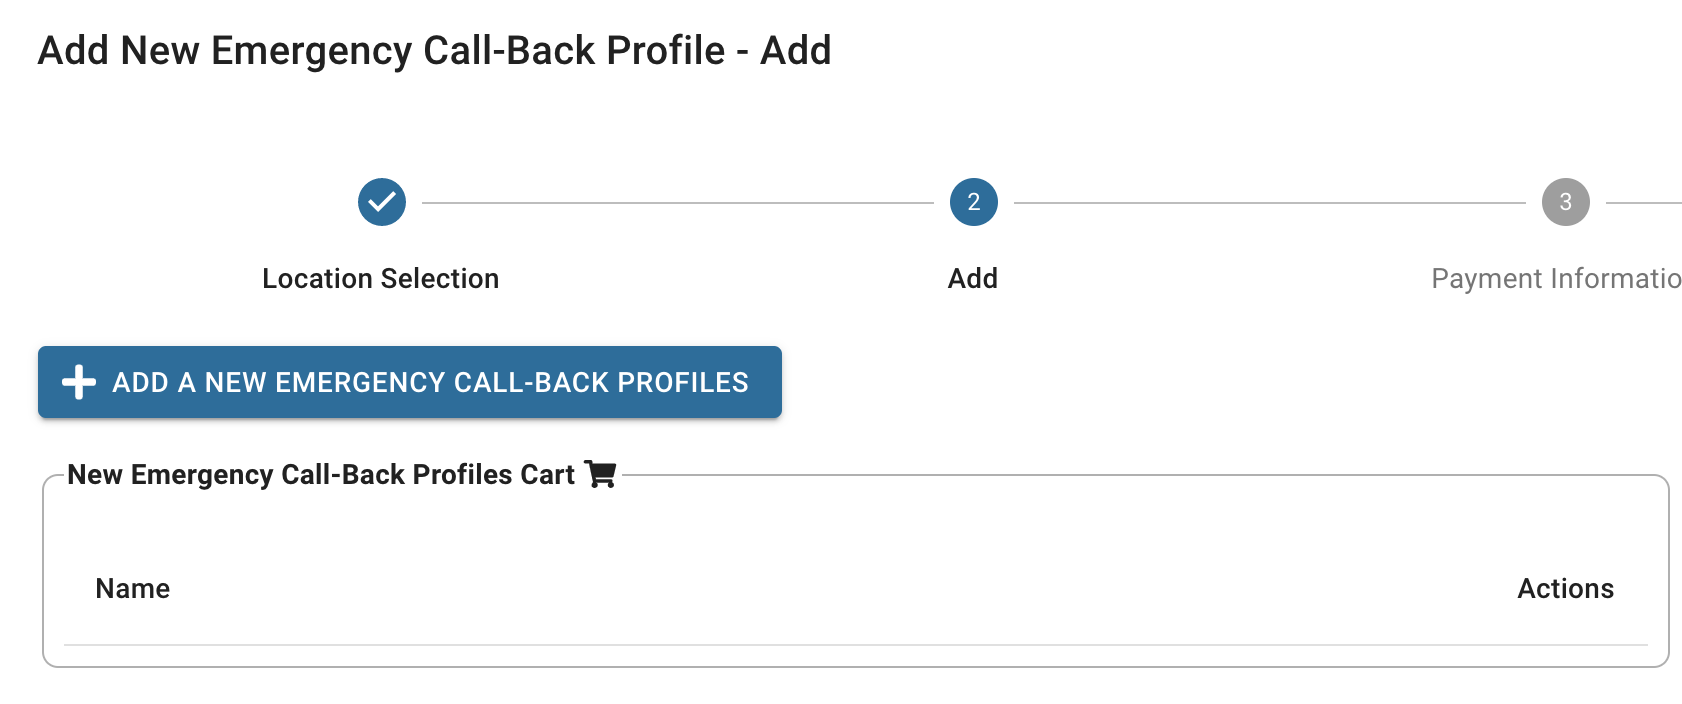
 Adding Additional Emergency Callback Profiles After Purchase- Call Back Profiles:Has a Call Back Phone Number and Company Name. When calling 911, your PBX tells us which Emergency Call Back Profile and which Emergency Dispatchable Location we send to the 911 center for each call. A single Call Back Profile can have one or more Dispatchable Locations associated with it. The Call Back Profile is how the 911 center can know the Caller ID of who is calling them and where they can call back if need be, and the Emergency Dispatchable Location tells the 911 center your physical location.
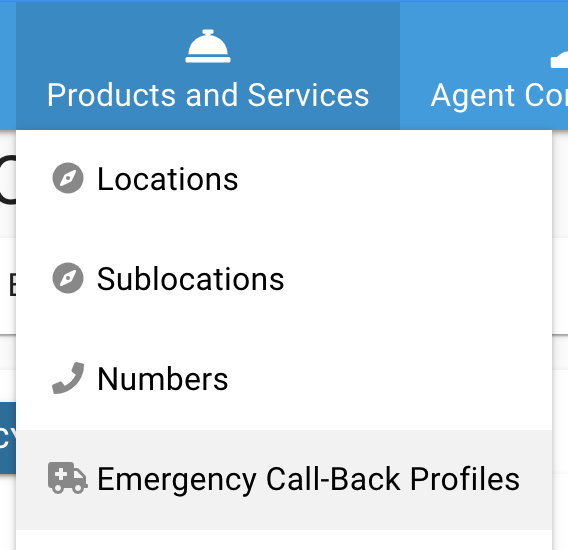
- From the Portal, click on Products and Services > Emergency Call-Back Profiles
- Select Add New Emergency Call-Back Profile button
 - Select which CloudPBX Location you want to add this for and press the Next button
 - Click on the Add New Emergency Call-Back Profile button to add your 1st additional call back profile here.
Set the Call Back Profile information
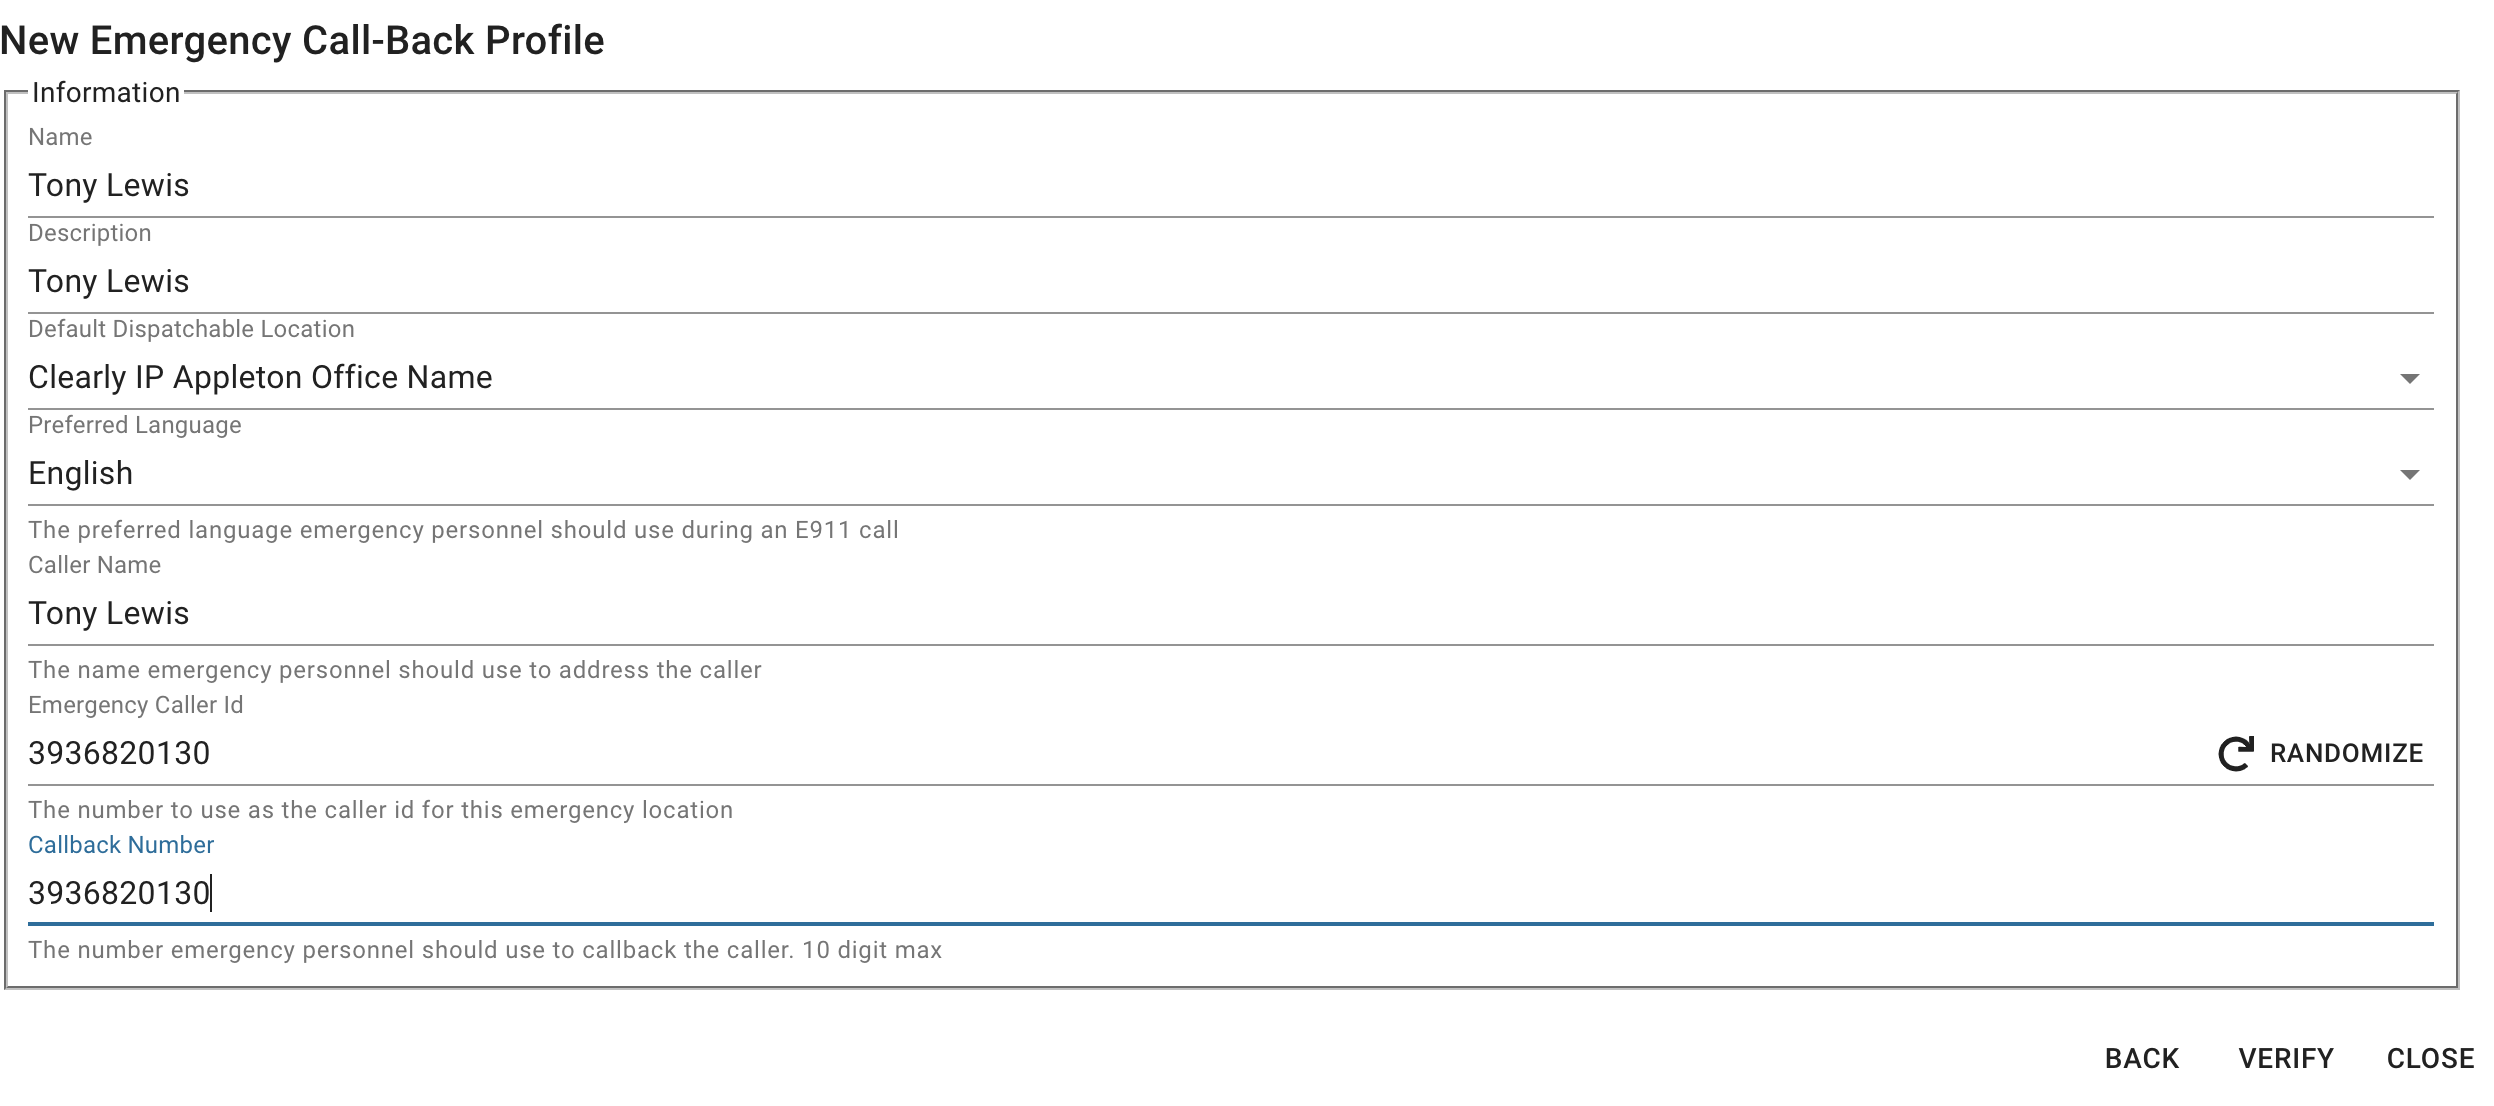 - Press the "Verify" button. The verification system will verify all the Address information is correct by sending the request to the 911 subsystem and having it confirm the data.
- If the system cannot verify the information, you will need to try and fix the address. If you cannot get the system to accept your location data, you can skip this step and contact our support team, and we can resolve this and add it to your system after the fact.

- From here, we can add more Emergency Call-Back Profiles by pressing the "Add New Emergency Call-Back Profile" button or walk through the normal checkout process by pressing the "Next" button.
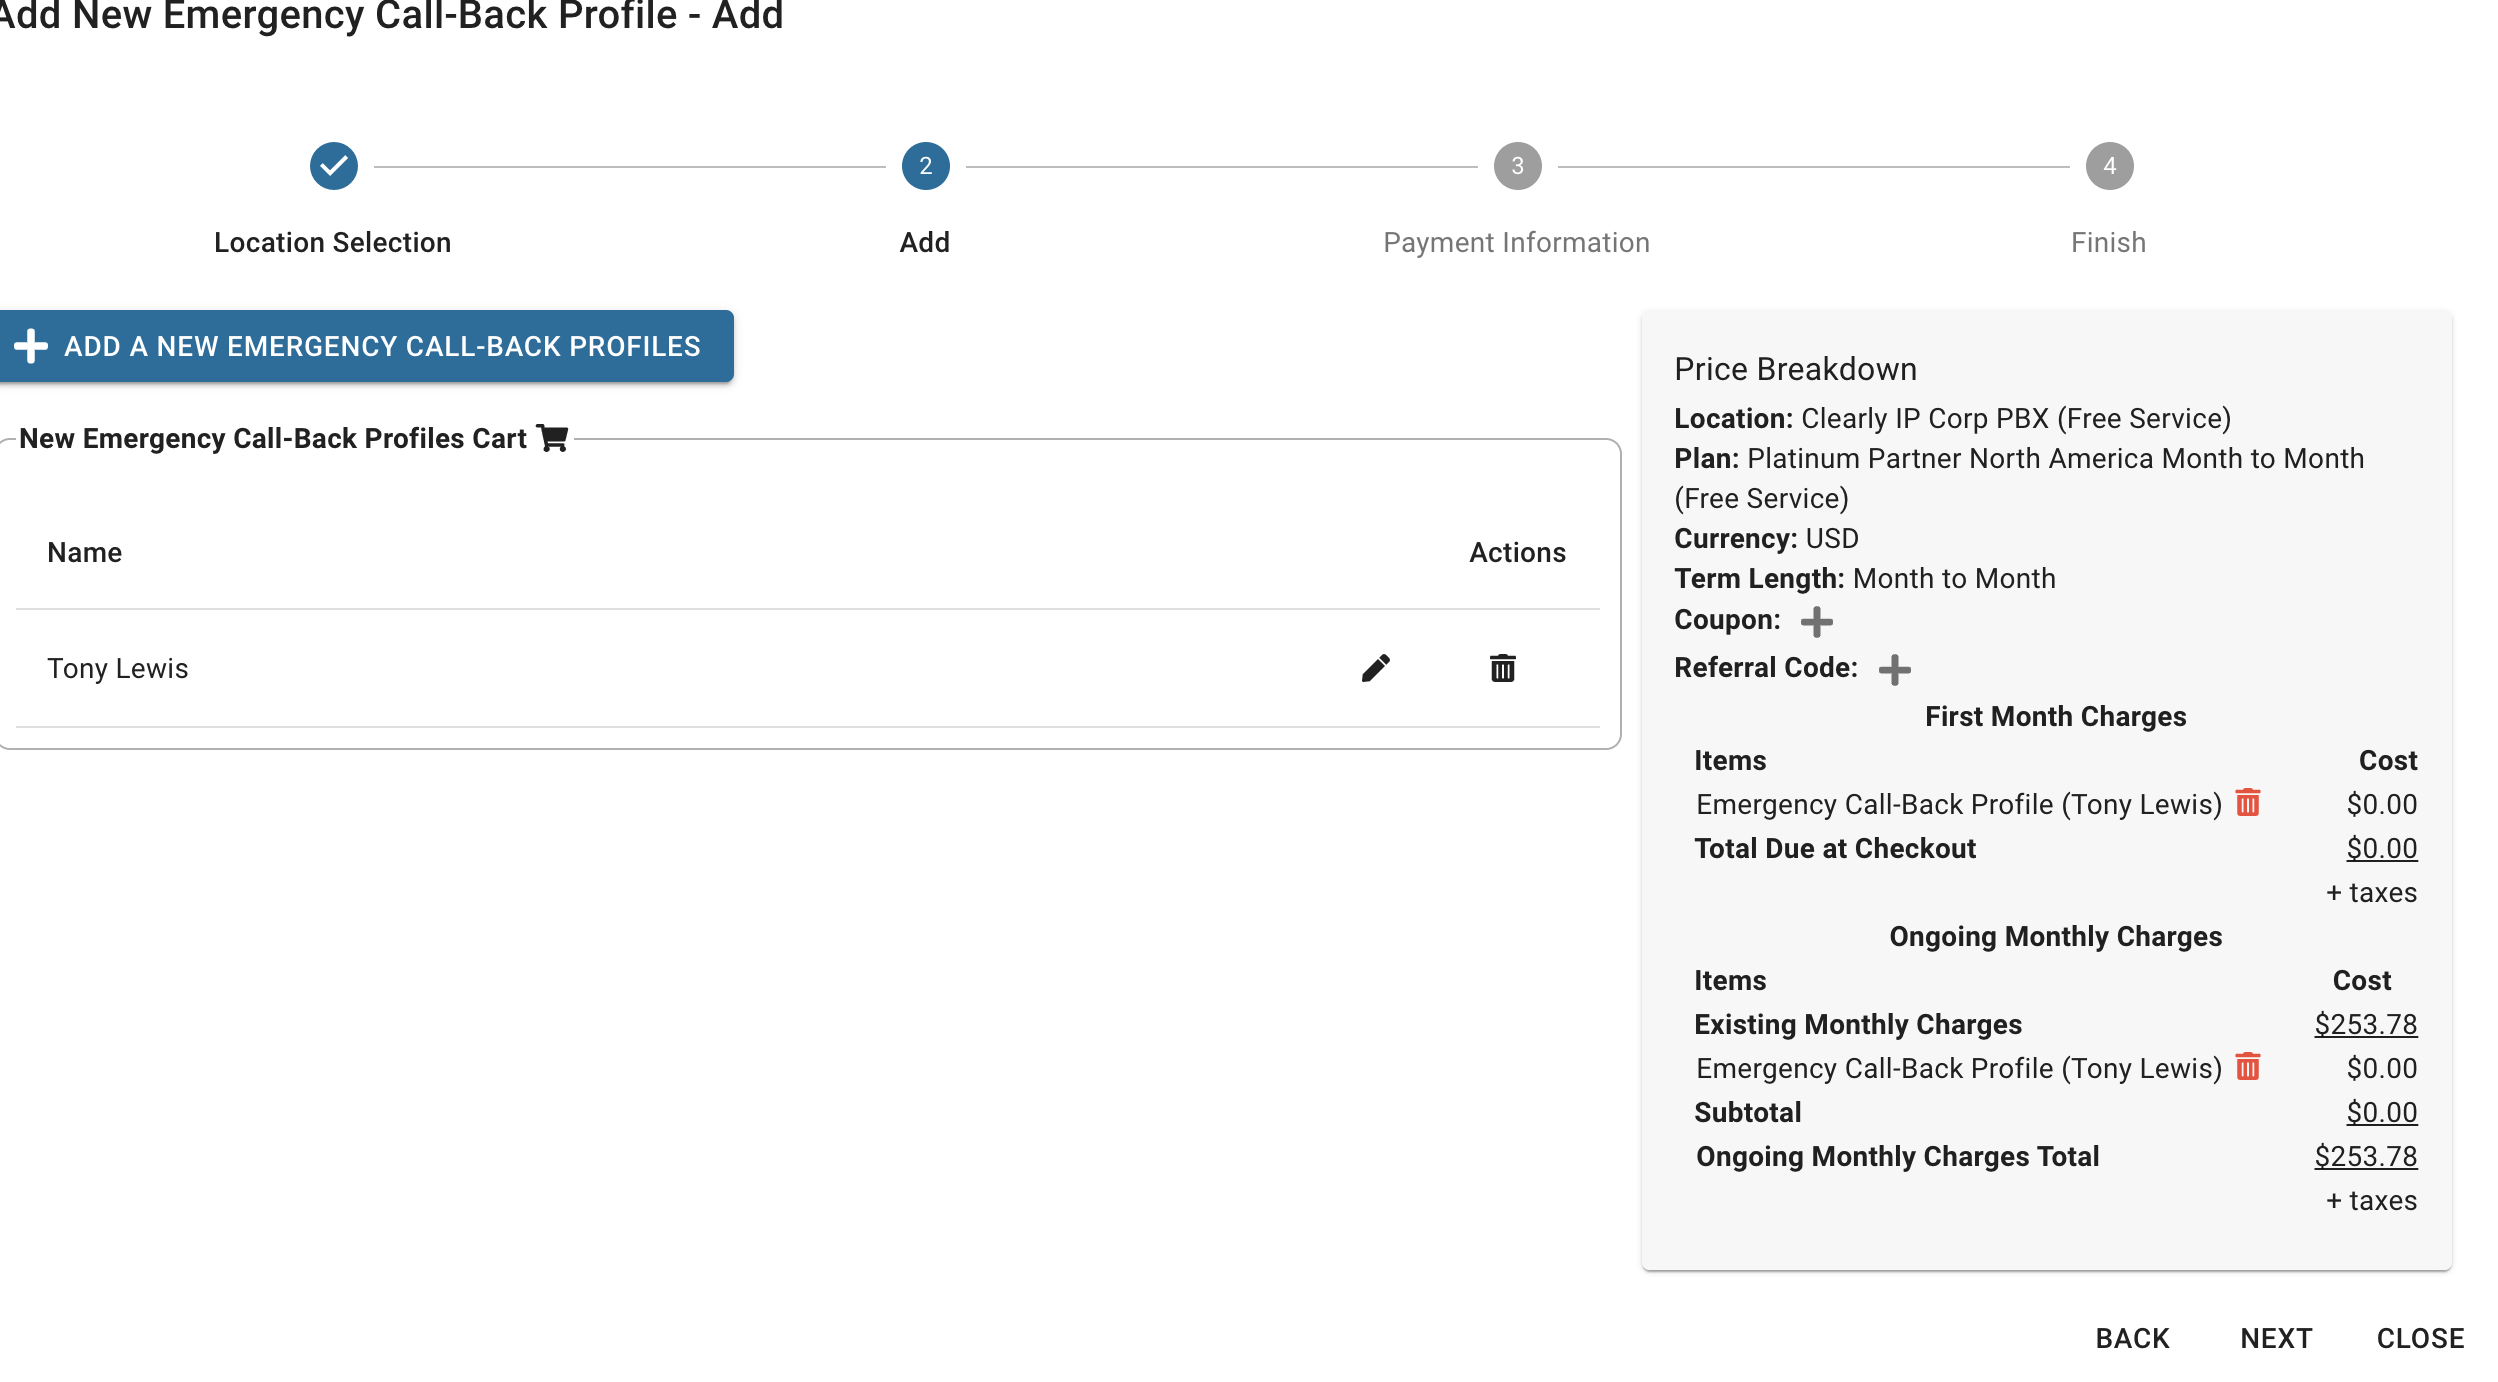
- Once you complete the checkout process under the Client level Login, your new Call Back Profile will be automatically added to your CloudPBX system. This will allow it to be mapped to any user who needs to use this Location as outlined in the Client guide here.
Adding Additional Emergency Dispatchable Locations After Purchase- Dispatchable Location: Is a unique Physical Address. When calling 911 we send the Emergency Call Back Profile and the Emergency Dispatchable Location to the PSAP. You can have a single Call Back Profile as defined below and 5 Dispatchable Locations for example and each Location would be a different identifier or address such as "Northeast Corner" or "Suite 5" or "2nd Floor West Wing"; but all part of the same main address/building with the same Call Back Number that is in the Call Back Profile below.
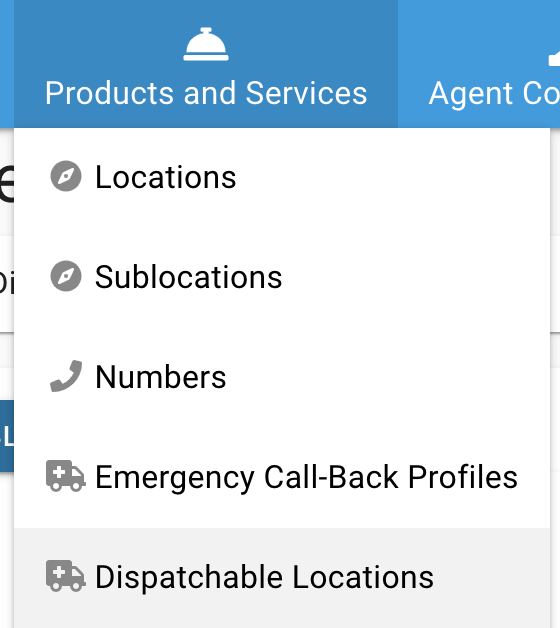
- From the Portal, click on Products and Services > Dispatchable Locations
 - Select Add New Dispatchable Location button
 - Select which CloudPBX Location you want to add this for and press the Next button
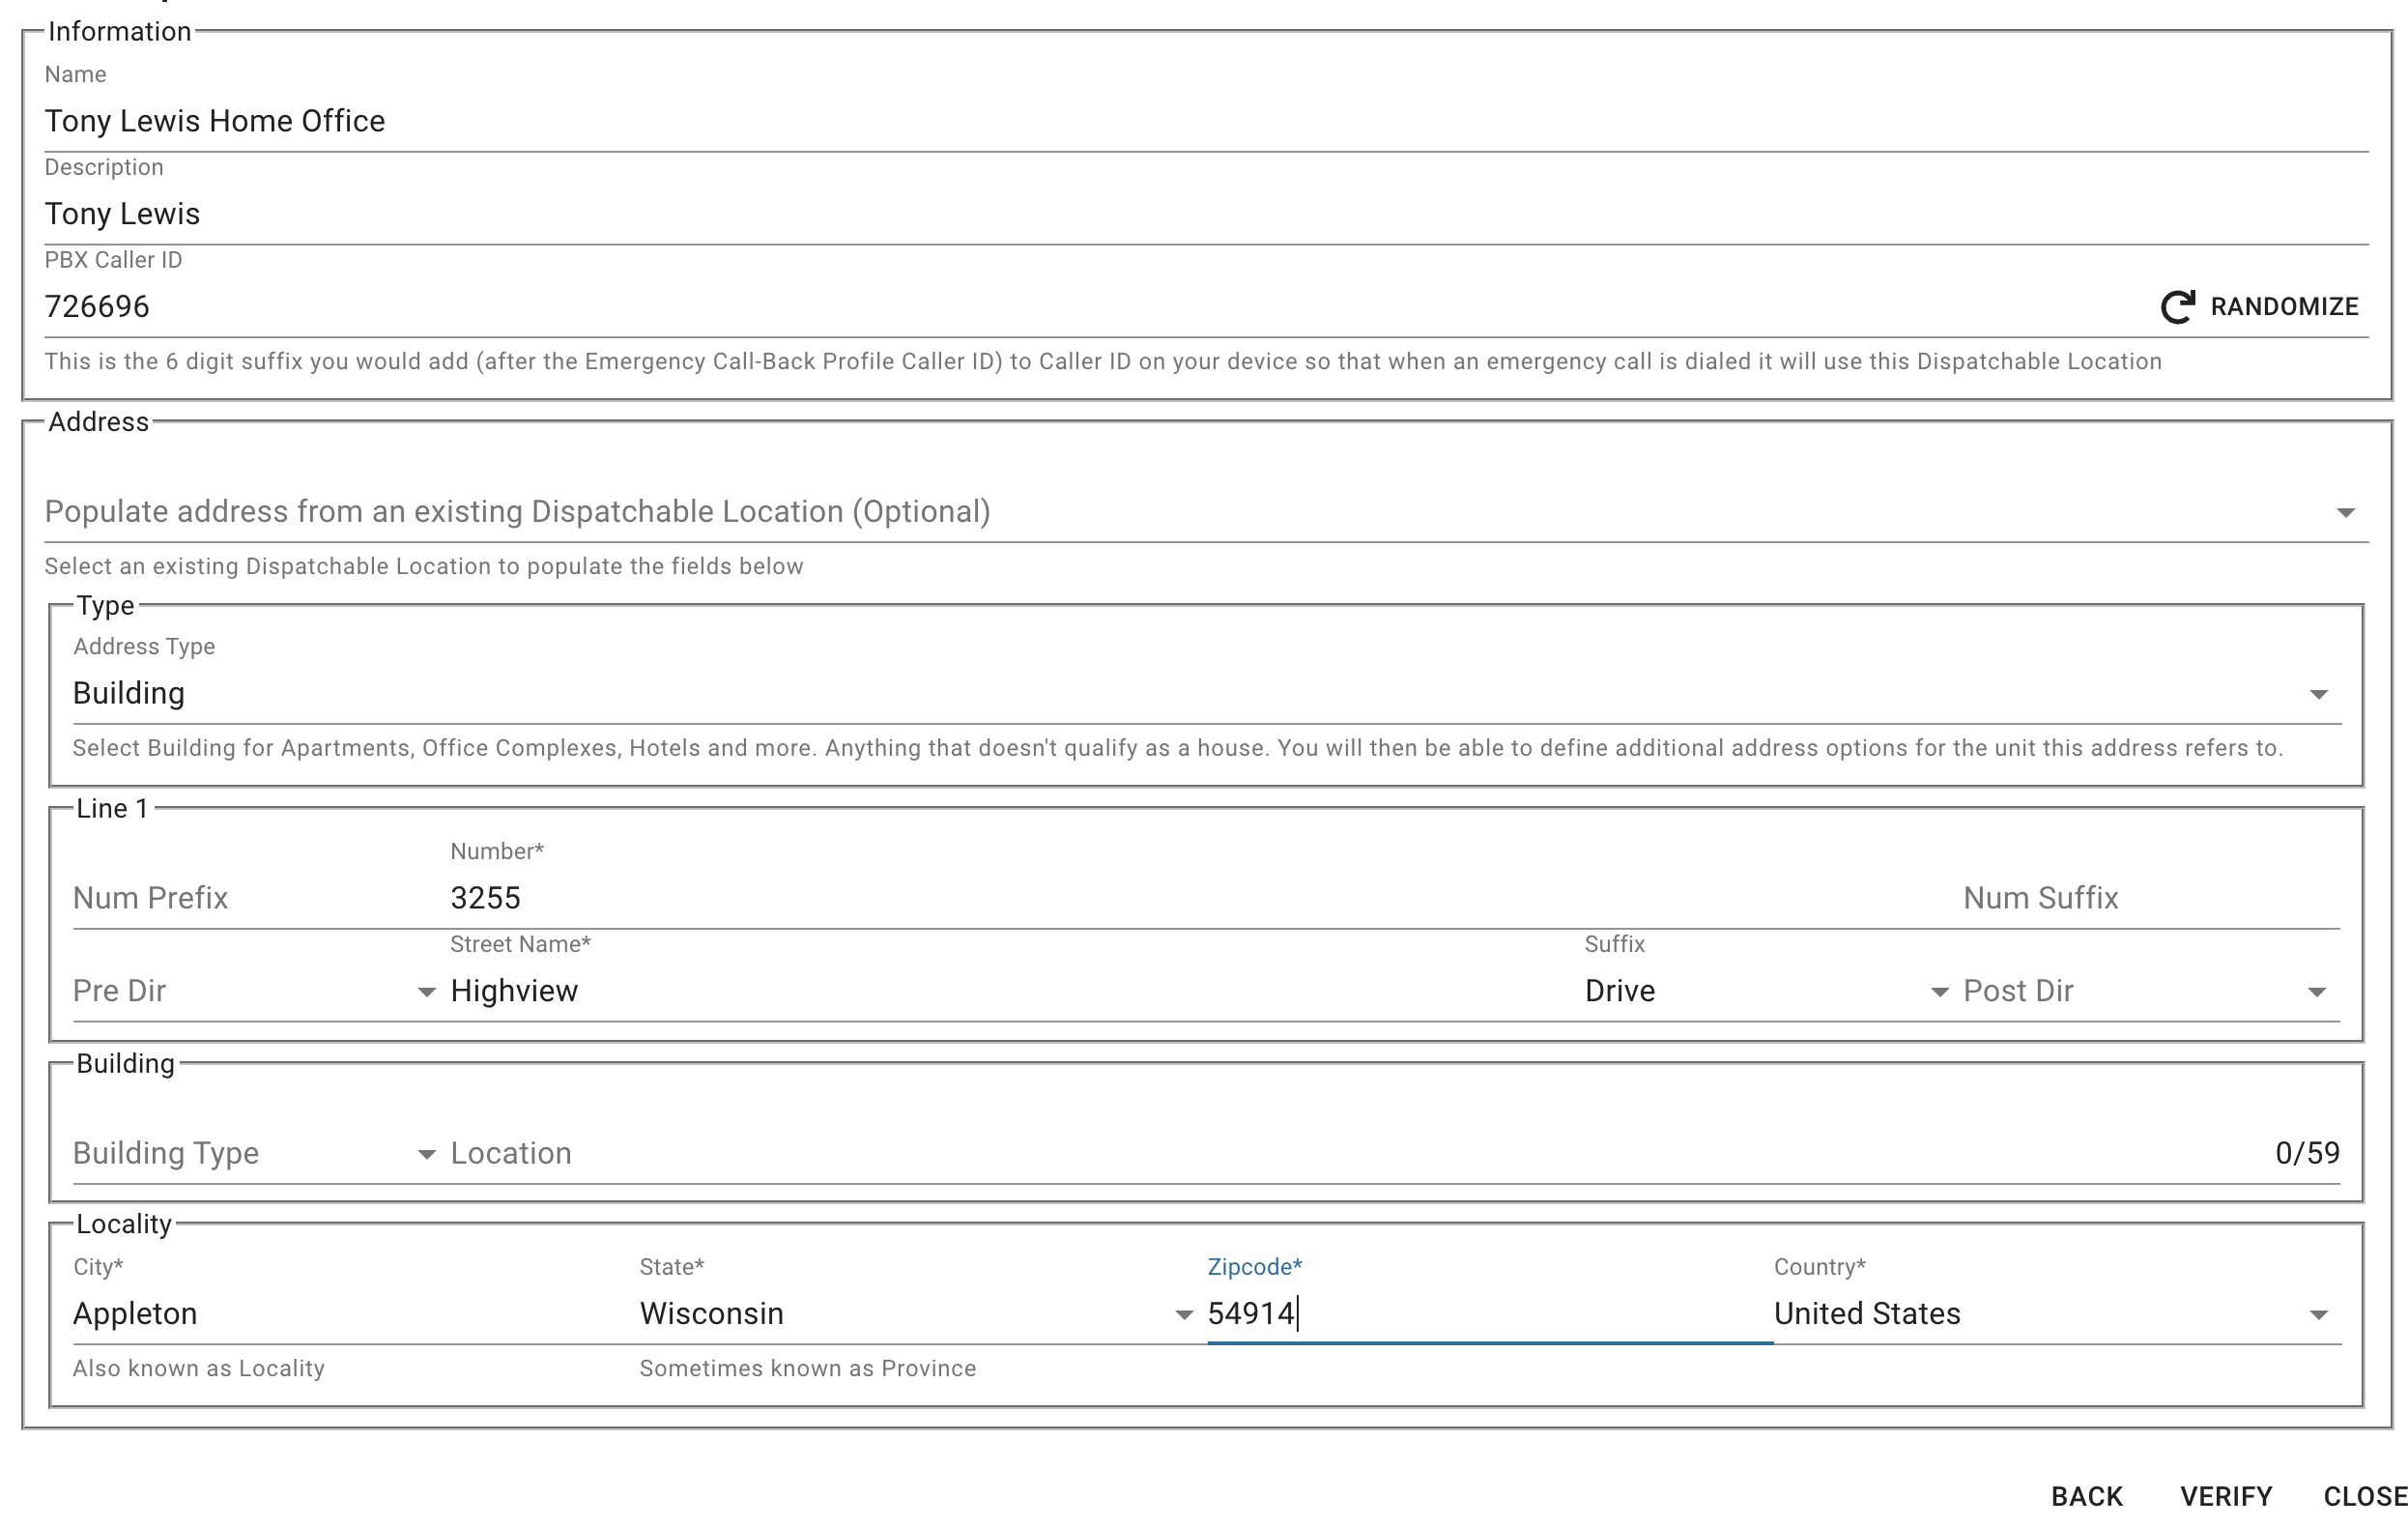
- Click on the Add A New Dispatchable Location button to add your 1st additional Location here.
 - Set the Locations Address information
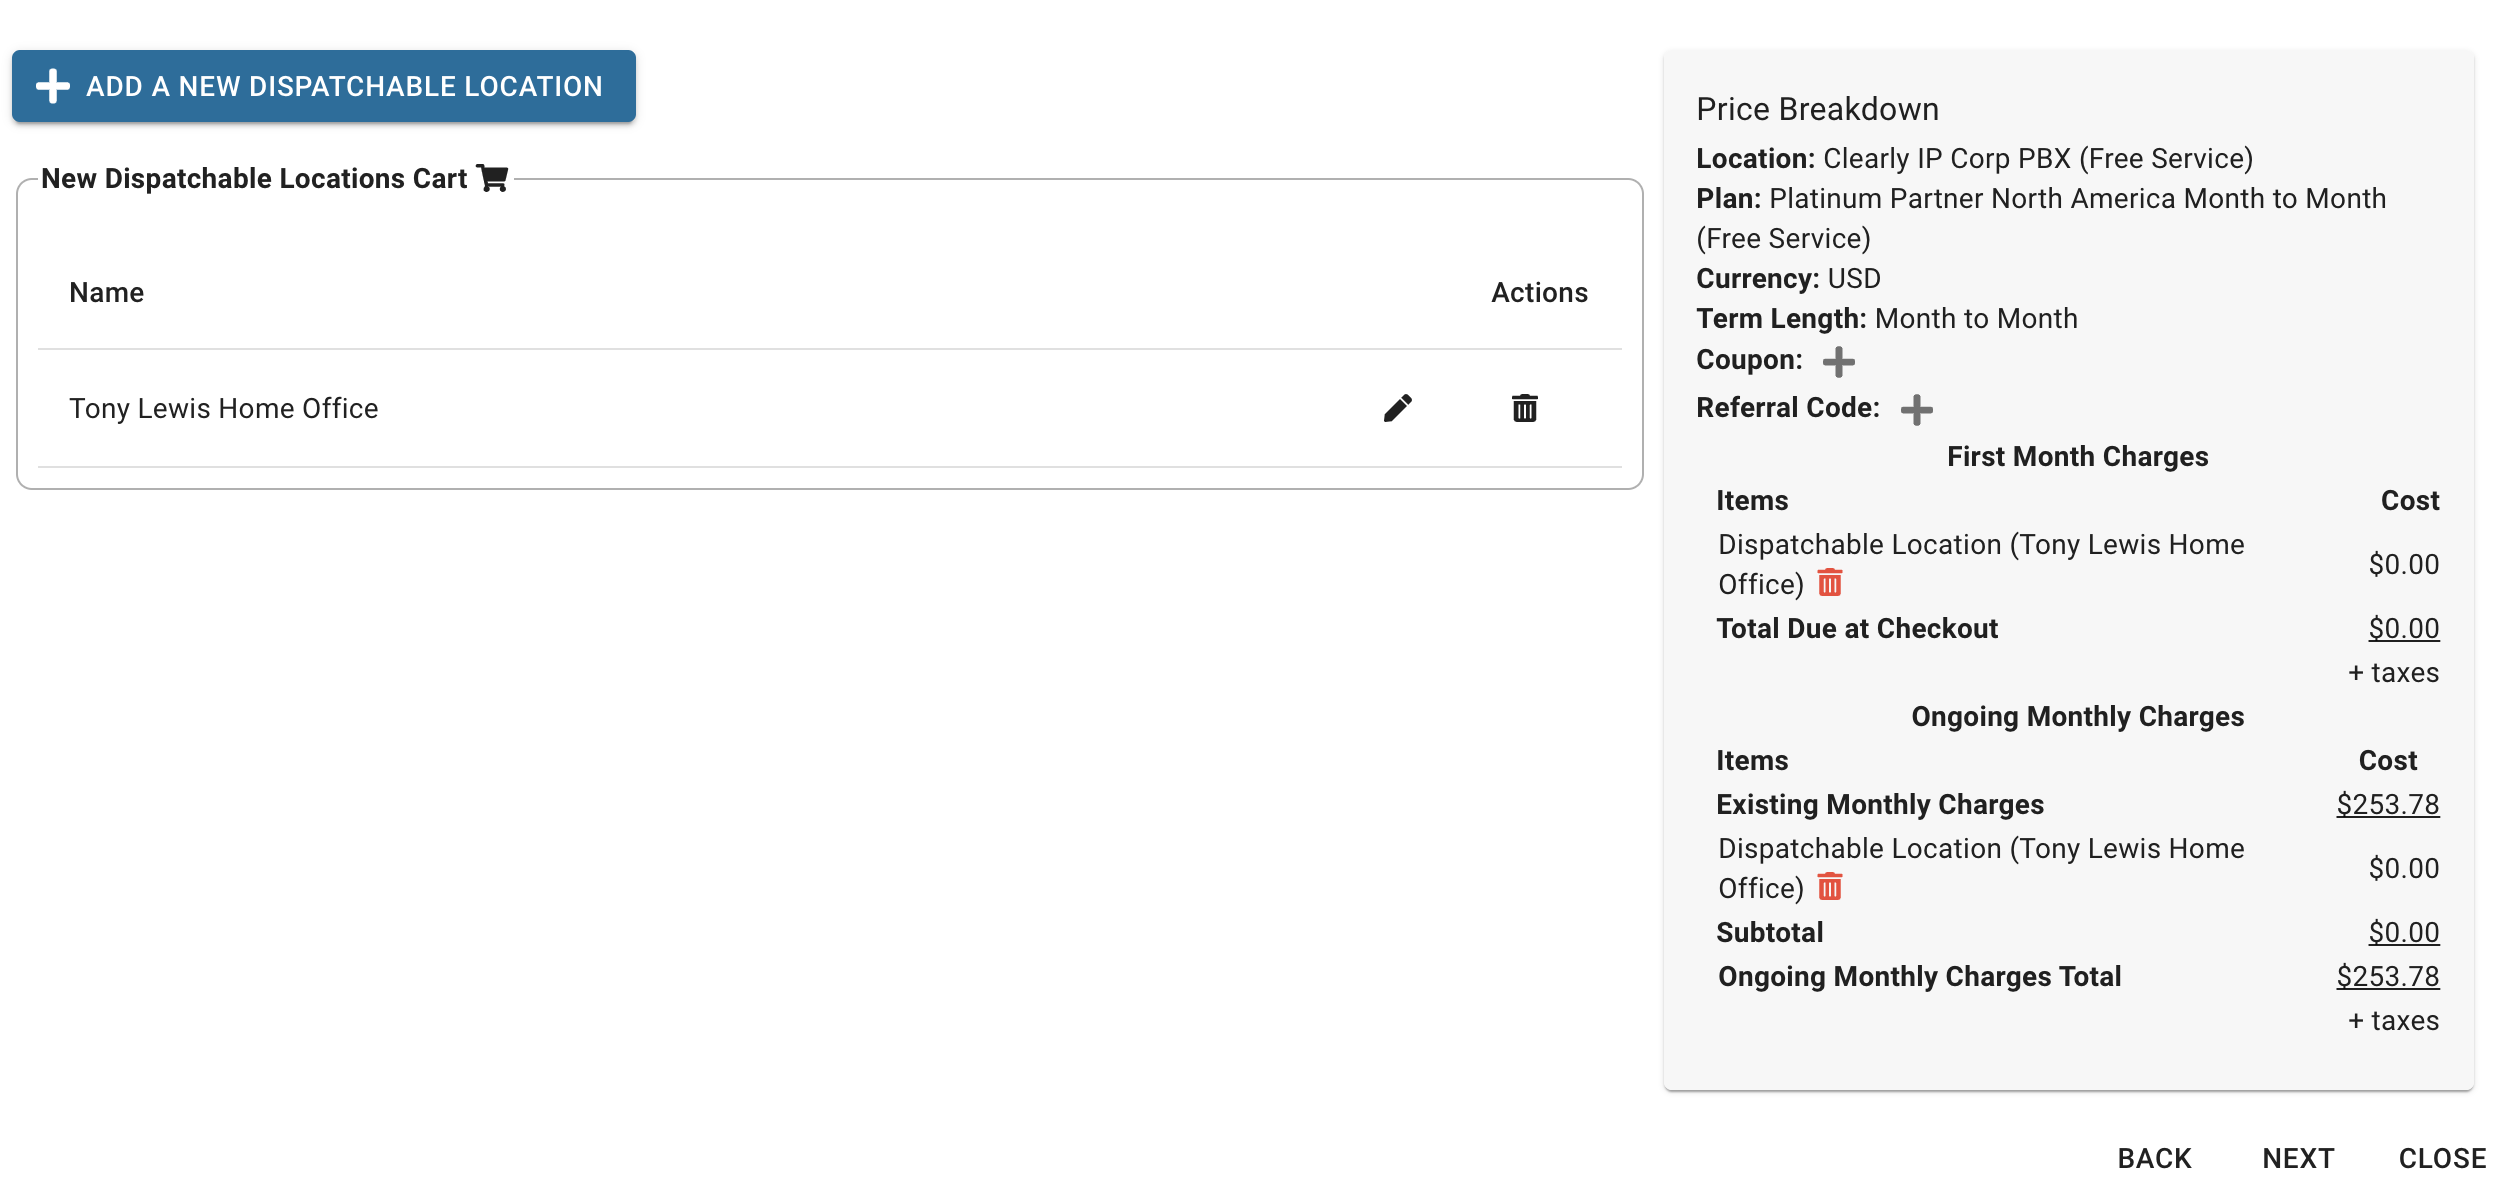
Press the "Verify" button. The verification system will verify all the Address information is correct by sending the request to the 911 subsystem and having it confirm the data. - If the information can not be verified, you will need to try and fix the address. If you cannot get the system to accept your data, you can skip this step and contact our support team, and we can resolve this and add it to your system after the fact.
- If everything verifies correctly, you will now see the "Verify" button replaced with a "Save" button and we can press button.
 - From here, we can add more Dispatchable Locations by pressing the "Add A New Dispatchable Location" button or walk through the normal checkout process by pressing the "Next" button.
 - Your new Dispatchable Locations will automatically be added to your CloudPBX system once you complete the checkout process under the Client level Login. They can then be mapped to any user who needs to use this Location as outlined in the Client guide.
Setting Up Failover for Inbound Calls- In the unlikely event that the Clearly Cloud system which is fully redundant goes offline completely you can have failover of inbound calls setup that if a customer calls one of your numbers you can have the number failover to a Cell Phone or other external number. This failover is independent of the Clearly Cloud system and happens at the core telephone switching level before the call is sent into Clearly Cloud. This is considered a last resort failover.
- You can set this failover at a Global Location level where all numbers for a specific Location in the Portal failover but you can also set the failover at a per Number level.
- If you set a failover at the Global Location level and at a Phone Number level the Phone Number level failover will be used when set versus the Global Location failover.
Setting Global Location Failover- To set a Global Location level failover from the Portal, click on Products and Services >Location
- Locate the Location you want to set or edit the Global Failover on and click on the Binocular icon for that Location

- Scroll down to the Failover widget and you can see what failover you have set and edit the failover settings by clicking on the "orange pencil" icon
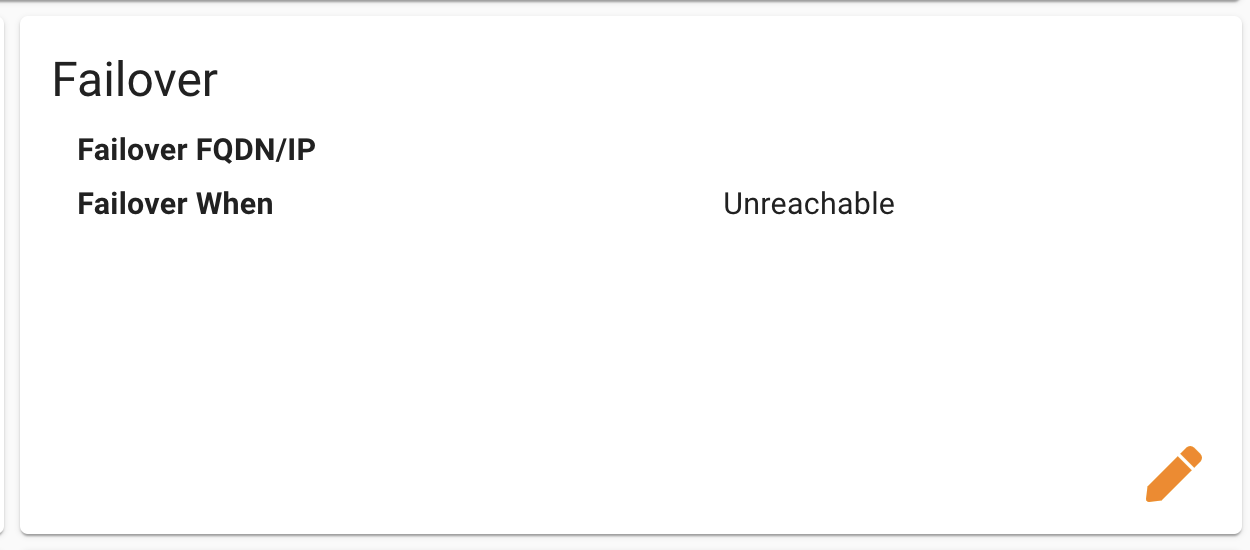
- From here you can set the following fields and press Save when done.
- Type - Set to DID meaning you want to failover calls to this Location to a Phone Number. Think of this as Call Forwarding.
- DID - Set the Number you want us to failover inbound calls to. This can be any routable number such as a Cell Phone, Landline or any other number.
- When - Set to Unreachable. This means if we are not able to route the call into Clearly Cloud we will failover the inbound call.
- If you set this to Immediate it means we will never try and send the call to Clearly Cloud and instead forward the calls to this Location right to the number you defined here.
 - Once you have saved the changes you will now see in the widget your settings.

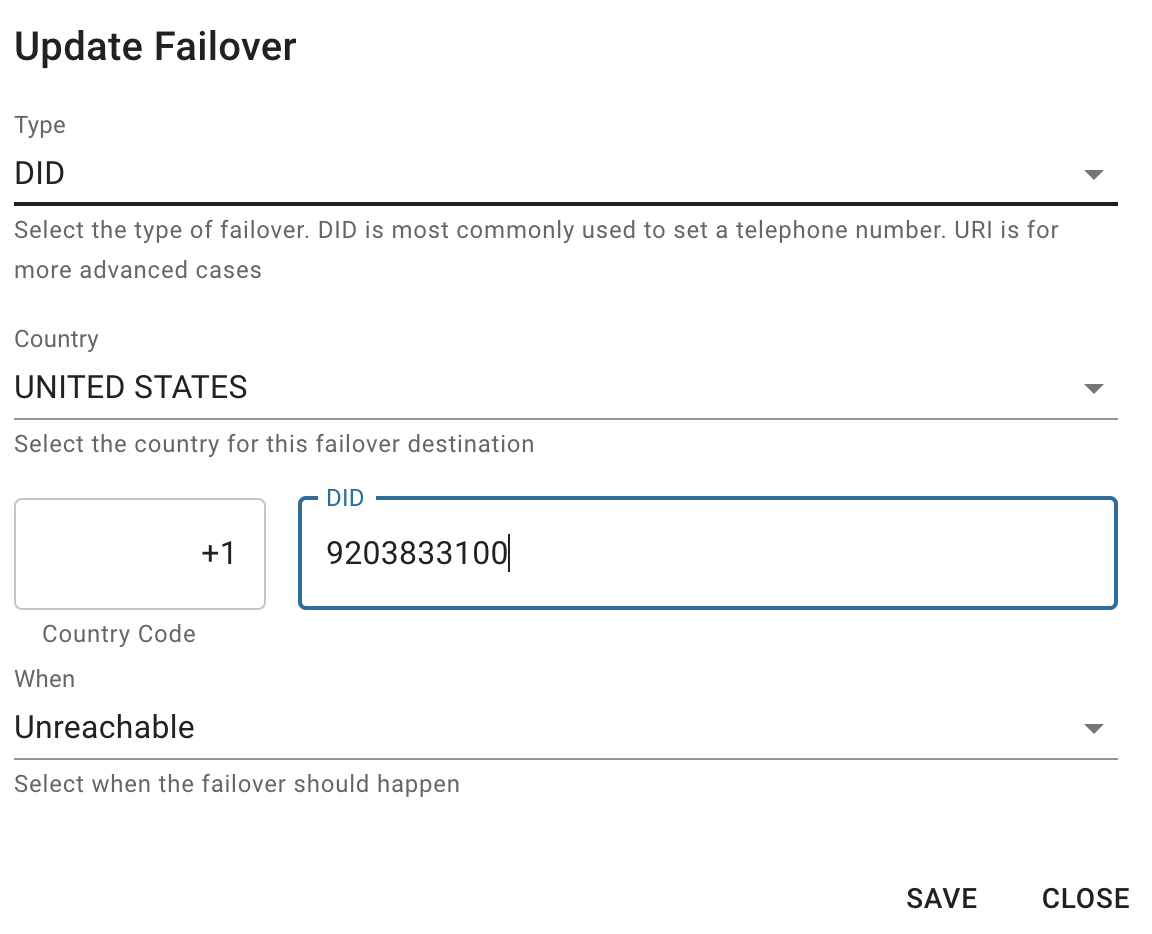
Setting Per Number Failover- To set a a Failover per Phone Number click on Products and Services > Numbers from the Portal
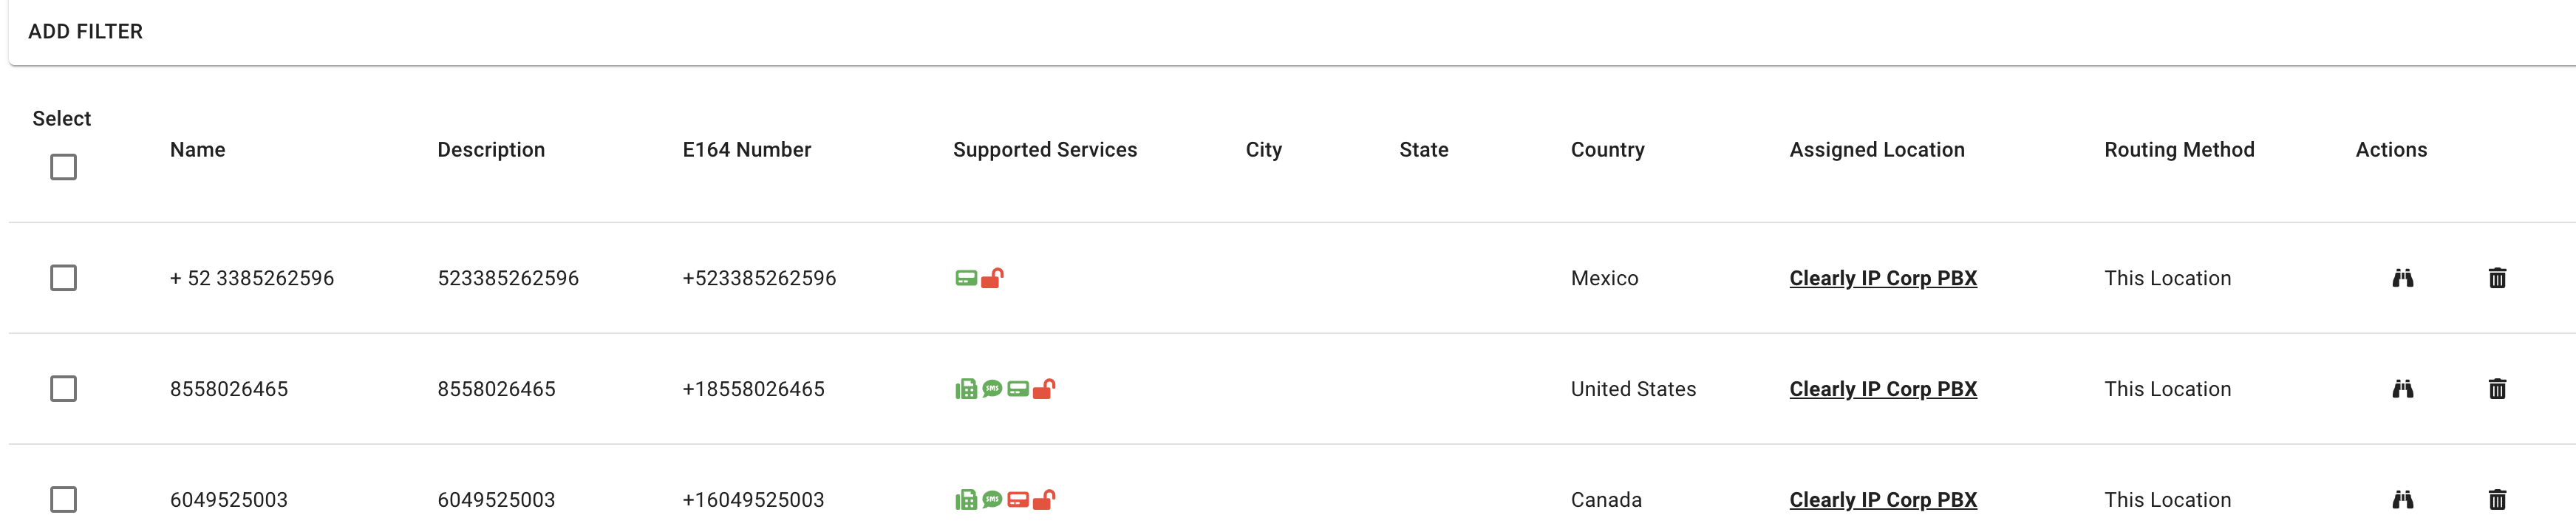
- From here, you can see a list of all the Numbers on your account. Find the Number you want and click on the binoculars icon to go to the Numbers page
 - Scroll down to the Number Failover widget and you can see what failover you have set and edit the failover settings by clicking on the "orange pencil" icon
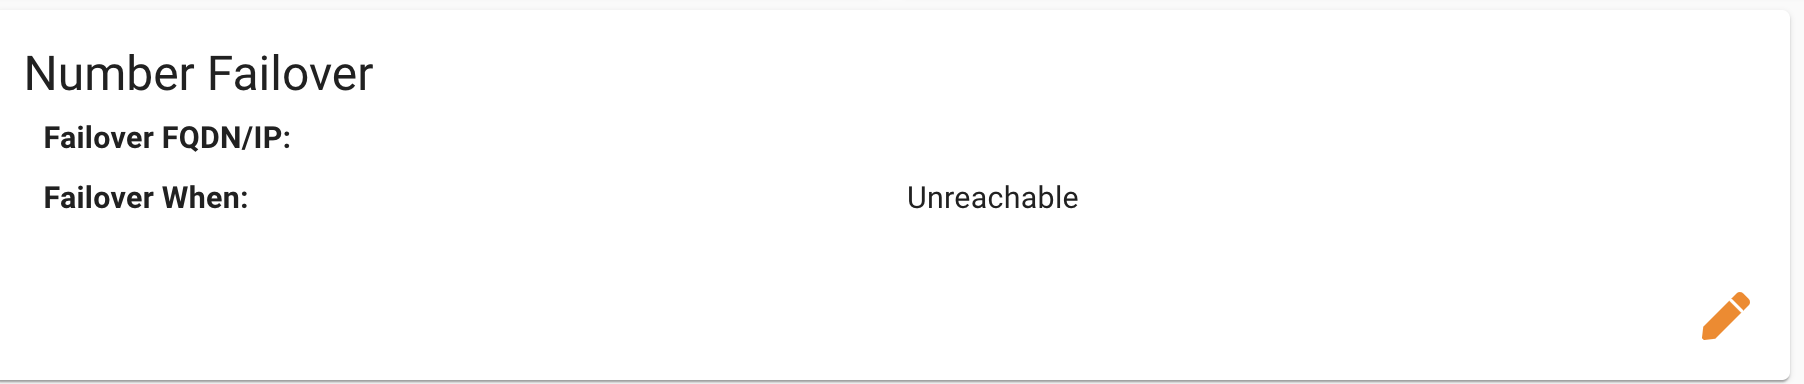
- From here you can set the following fields and press Save when done.
- Type - Set to DID meaning you want to failover calls to this Location to a Phone Number. Think of this as Call Forwarding.
- DID - Set the Number you want us to failover inbound calls to. This can be any routable number such as a Cell Phone, Landline or any other number.
- When - Set to Unreachable. This means if we are not able to route the call into Clearly Cloud we will failover the inbound call.
- If you set this to Immediate it means we will never try and send the call to Clearly Cloud and instead forward the calls to this Location right to the number you defined here.

- Once you have saved the changes you will now see in the widget your settings.

Setting up Email to SMS and SMS to EmailCancelling Phone Numbers- From the Portal, click on Products and Services > Numbers
- From here, you can see a list of all the Numbers on your account.
- Locate the number you wish to cancel and press the Delete Icon from the Action column
 - The number will be cancelled and you will not longer be charged for it moving forward on any future invoices.
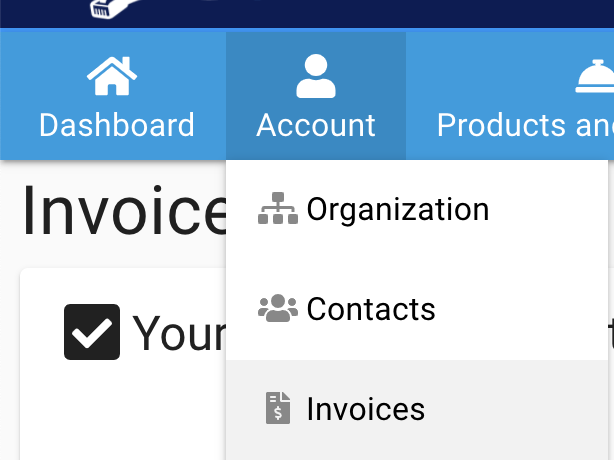
Viewing Invoices- From the Portal, click on Account > Invoices
 - From this screen, you can view your current status (Outstanding Invoices) or view (look for the binoculars under Actions) currently due or previously paid Invoices based on their due date, as well as print to PDF, etc.
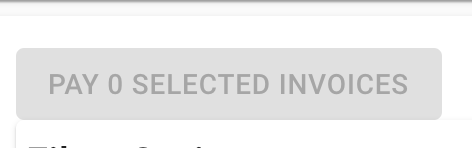
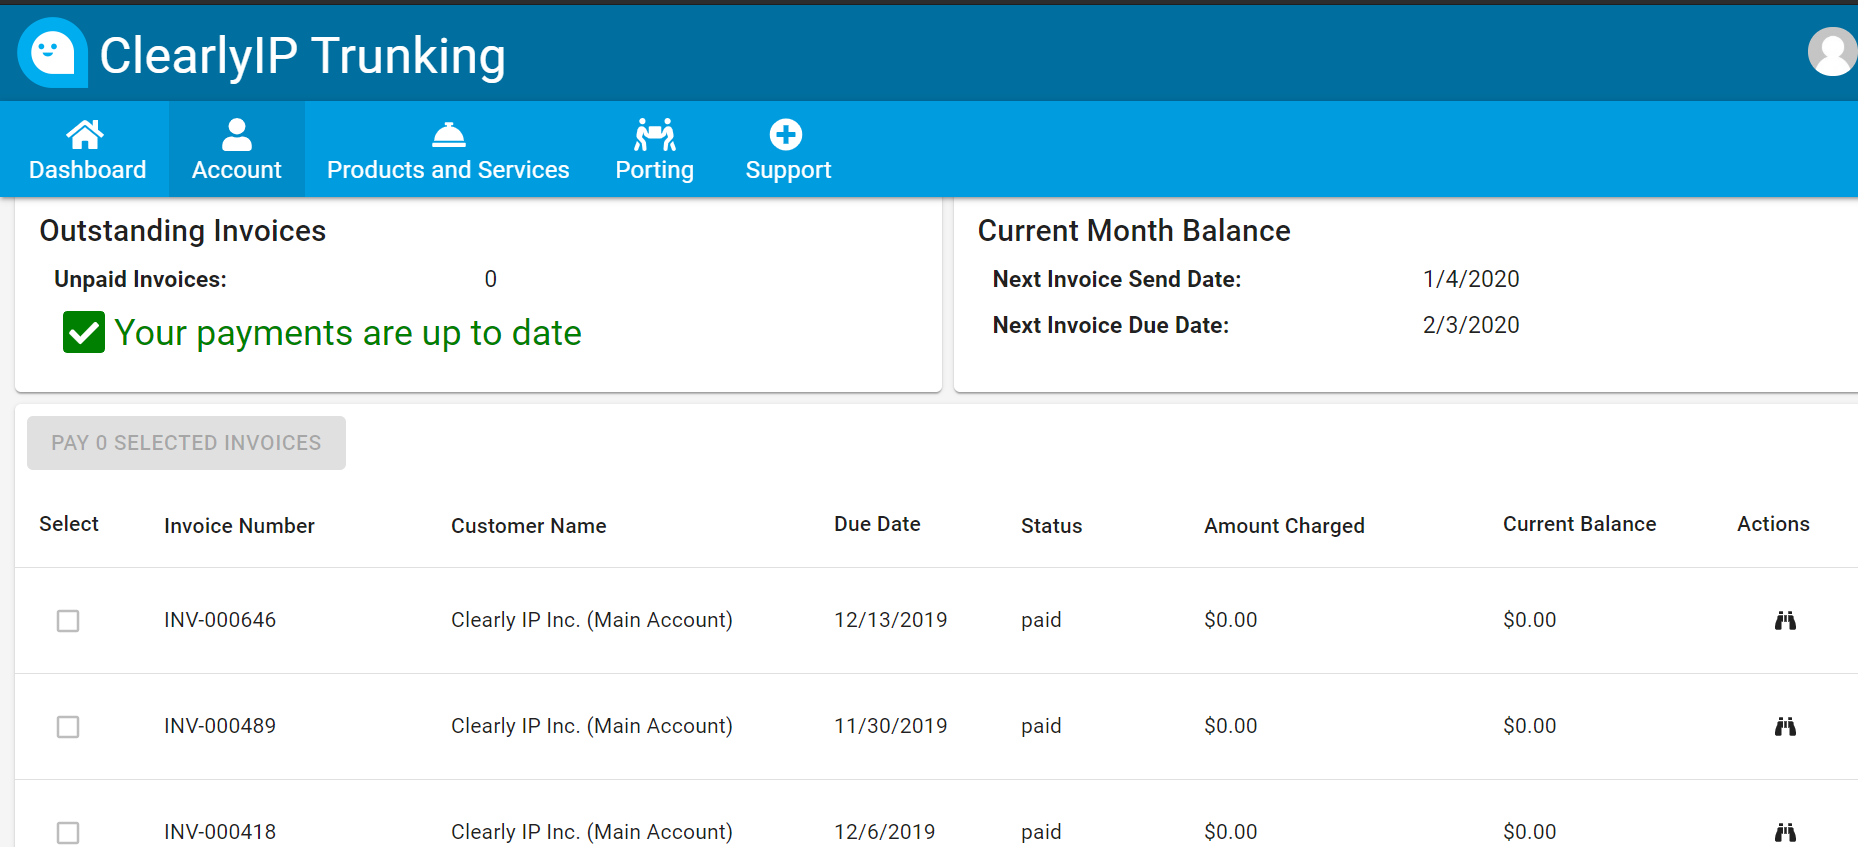 - You can also pay any unpaid invoices using your Credit Card by selecting one or more invoices in the Check Box and press the Pay button at the top.
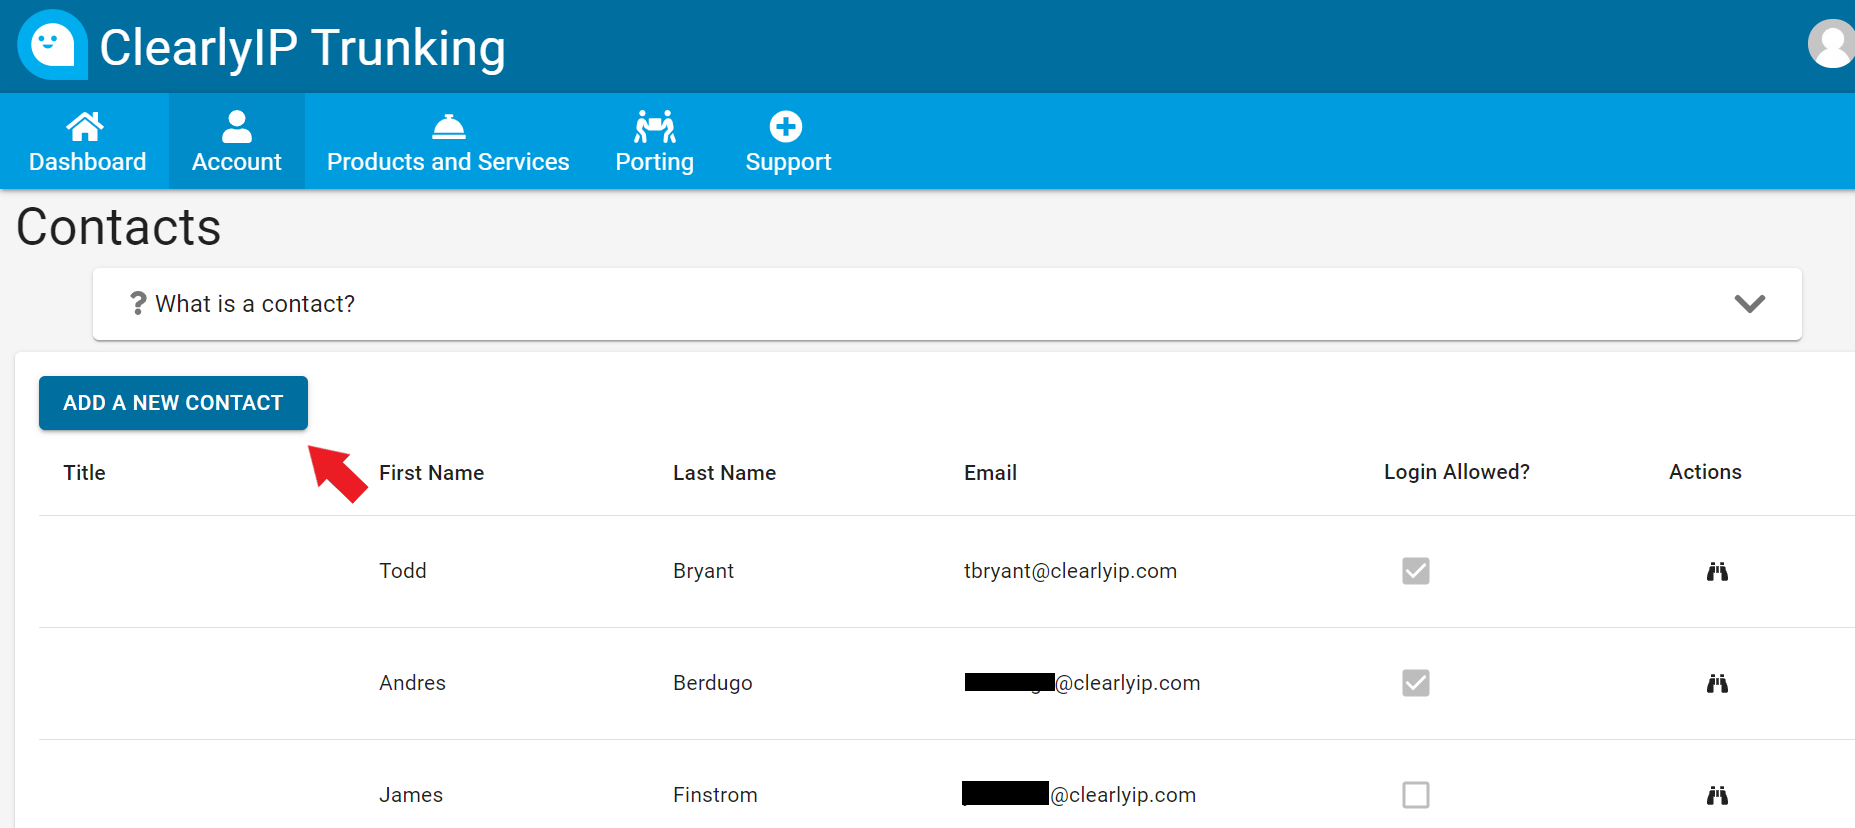
Updating Payment MethodUpdating Email Contacts for Invoices- From the Portal, click on Account > Contacts
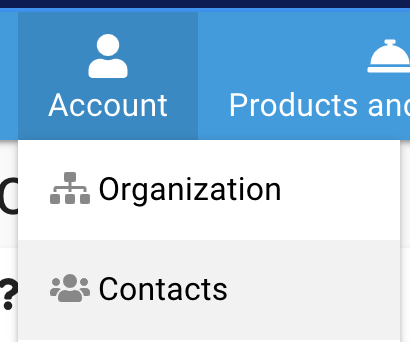 - From here, verify the invoicing Contact. If the contact is not listed here, click on the "Add New Contact" button to create a new Contact.
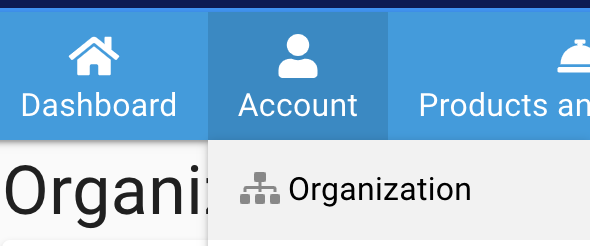
 - Once we verify the Contact has been added, we can add them as a Accounting Contact by clicking on Account > Organization at the top
 - From here, we can see all the Contacts listed under the Billing Contact section. All the contacts here will receive a copy of all invoices and credit card success and failure emails.
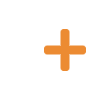
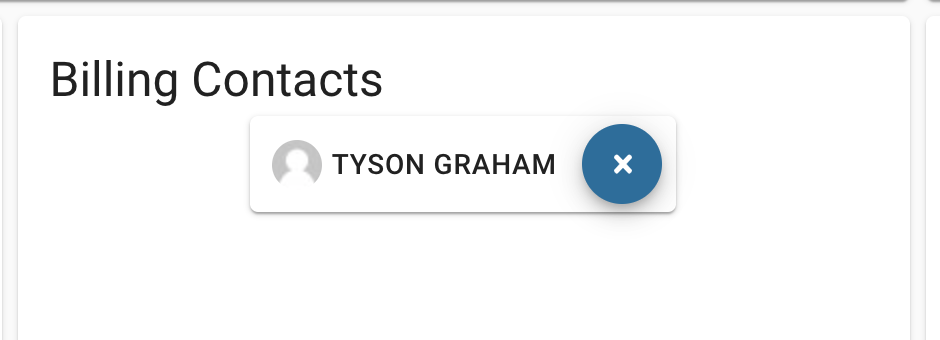 - Click on the Orange Plus icon to add additional Billing Contacts. Or select one of the existing organization contacts from the drop-down.
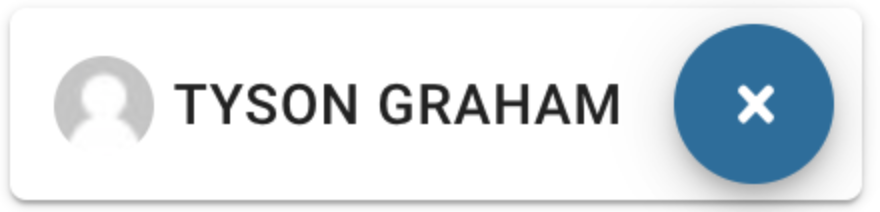
 - Click on the Blue X next to each contact to remove them from being a Billing Contact
Closing Clearly Cloud Location- To close your Clearly Cloud Location and stop all services for that location, you can follow the steps below:
PLEASE NOTE THE FOLLOWING BEFORE CLOSING THE LOCATION - Cancellation is immediate.
- You can only cancel a Location that is not under an active Contact Plan. If you agreed to a 12 or 36 month Plan, you would not be able to cancel the Location until that Plan date expires.
- This action will close your Location and delete the Client from CloudPBX and All users.
- All Numbers will be canceled and returned to a pool for other users to purchase.
- All future billings for recurring Users, Numbers, and 911 locations will no longer occur.
- You will still be responsible for a final invoice for all metered services such as inbound Toll-Free calls, SMS or MMS messaging, or outbound International calls up until the point of your account closure.
- To continue with this process, you will click on Products and Services > Location
 - Locate the Location you want to Cancel and click on the Binoculars under the Action column
 - Click on the orange Cancel Service button in the top right corner
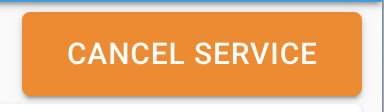 - If this button is greyed out and not orange, that means your Location is still under a non-expired plan. You can verify the Plan Start Date and length of the Plan from within the Location under the Information Box.
 - In our example, the Plan Start Date is 1-21-21, and it’s month to month so that I can cancel at any time.
|
|
|
| | | |
|