Introduction
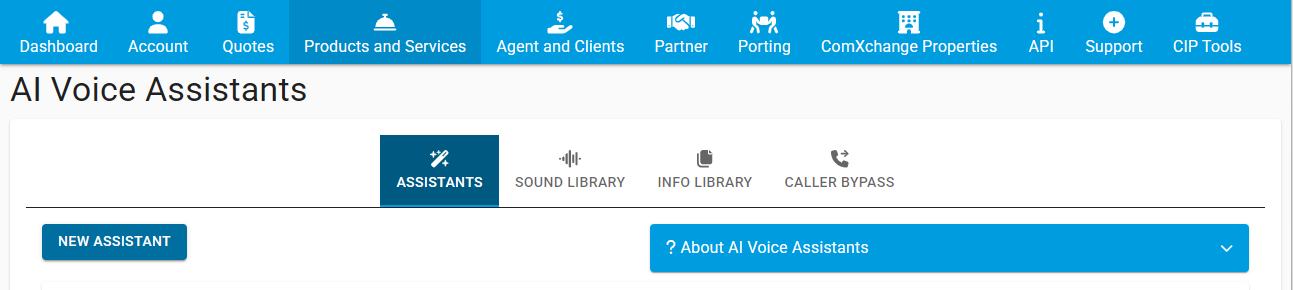
The ClearlyIP Xivea AI Voice Assistants can be added and managed from the Trunking Portal within the Products and Services section from the top menu:
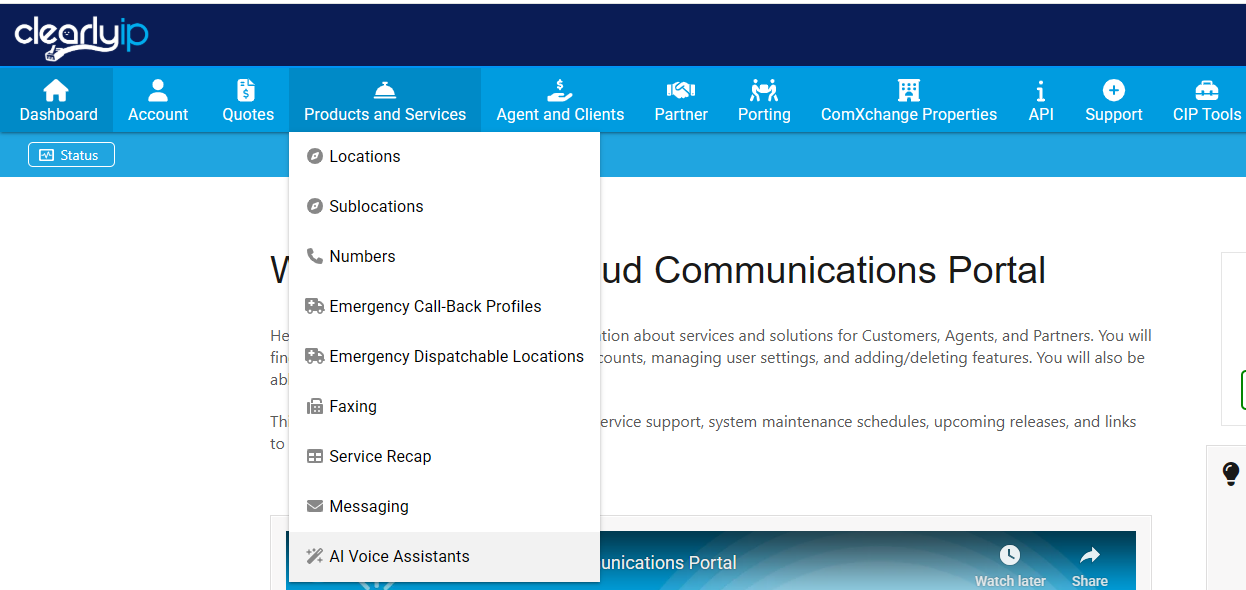
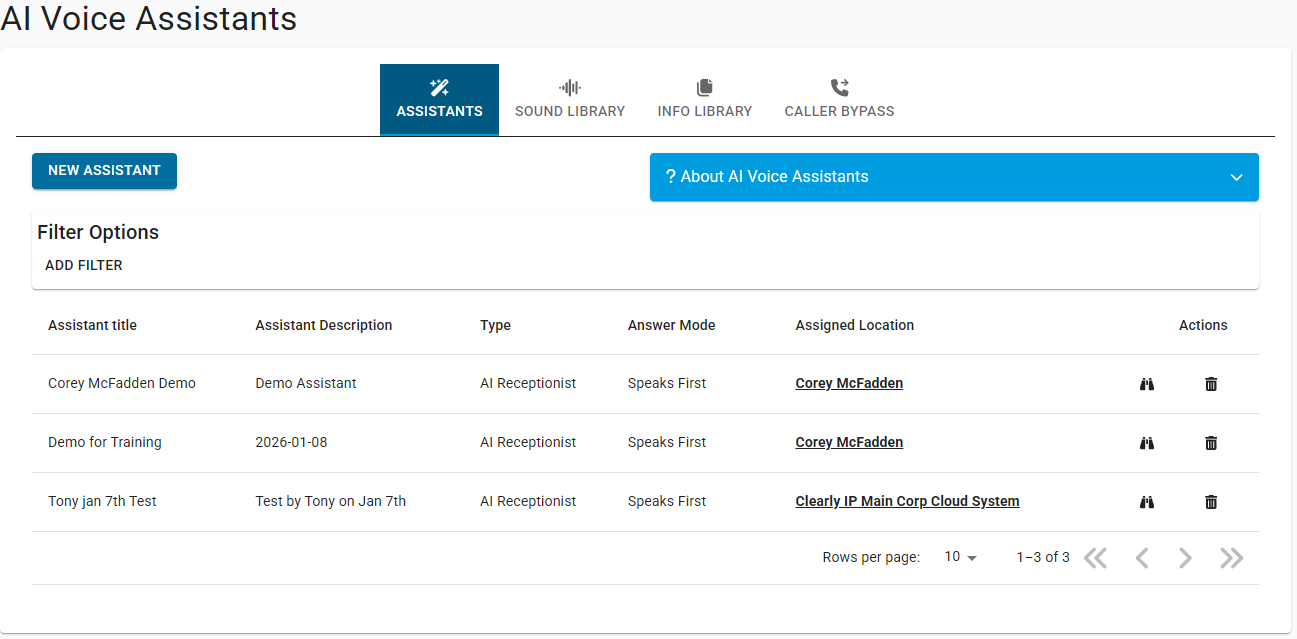
Once there (AI Voice Assistants) you have a second level horizontal menu for being able to add any of the following:
- ASSISTANTS: Xivea AI Voice Assistants
- SOUND LIBRARY: Audio files that can be reproduced to callers during calls being handled by any of your AI Assistants
- INFO LIBRARY *: Documentation to feed into one or more of your AI Assistants with proper knowledge of the Organization such as addresses, business hours, FAQs, and all other relevant information
- CALLER BYPASS *: Caller bypass rules to bypass one or more of your AI Assistants based on the Caller ID of the person calling in
* Here you can add these resources/rules to be available whenever you create a new AI Assistant but note that these can also be configured at a per AI Assistant level during the New Assistant creation wizard
We'll be covering all these sections in this guide.
Note: In this same page, once an AI Assistant has been created, it will start showing as a new entry in a table that will appear there below listing all the AI Assistants you have created:
From that table you are able to enter to modify the settings of an Assistant or even delete the Assistant altogether, these operations are done by clicking the corresponding icons under the Actions column of the table (binoculars and trash can icons respectively).
Creating a New Xivea AI Assistant
Within the ASSISTANTS section, click on the NEW ASSISTANT button to launch the AI Voice Assistant creation wizard:
Basics
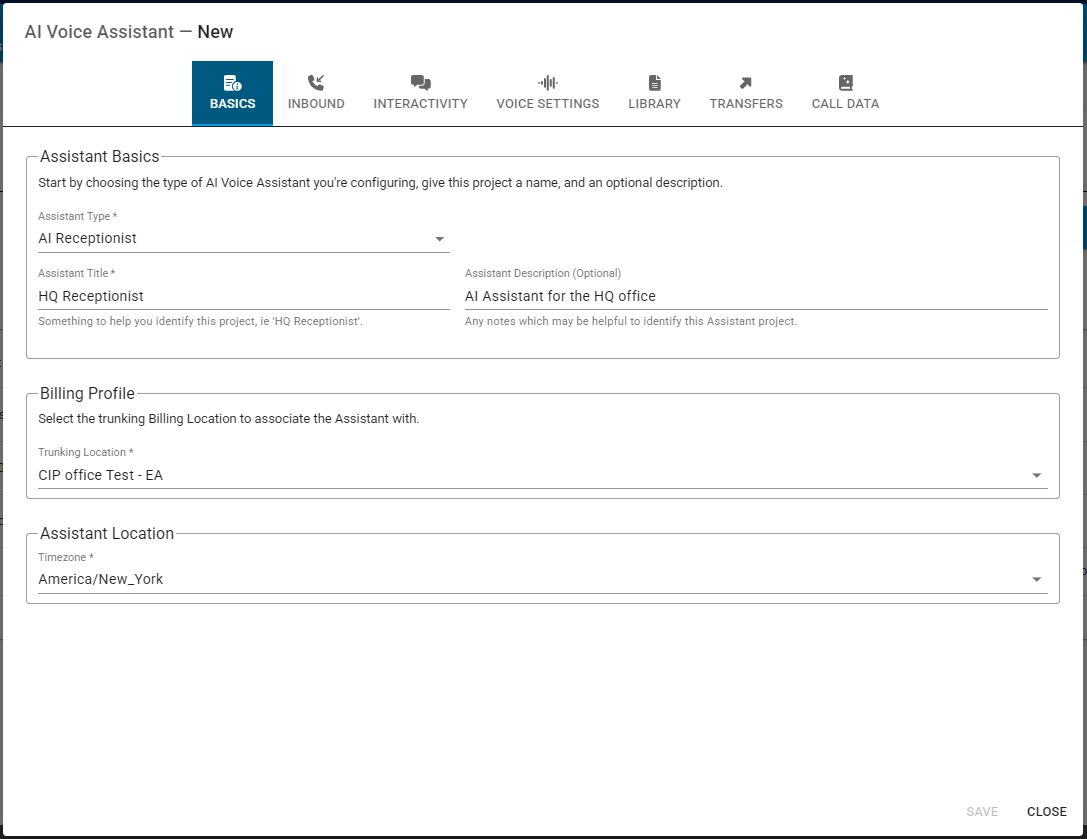
First step are your AI Assistant Basics:
Assistant Type: - AI Receptionist: Most common type used, select this if the AI Assistant will be answering the calls and provide information to callers and/or route the calls accordingly
- Custom: Select this for other types of calls needs, for example for outbound calls campaigns
Assistant Title: Title to help you identify the assistant (this is not the same as the actual Name to give to the assistant which is something that can be entered at a later step, in Voice Settings)
Assistant Description: Enter any additional information here that can further help identify your assistant, if desired.
Billing Profile:
Trunking Location: Assign the Assistant to an existing Trunking Location for billing purposes.
Note: The Trunking Location selected here will be the one containing the DID(s) that are to be considered for routing the calls to the AI Assistant (the actual DIDs are selected in the next step, Inbound)
- Timezone: Timezone to assign to the Assistant (this helps with business hours for example)
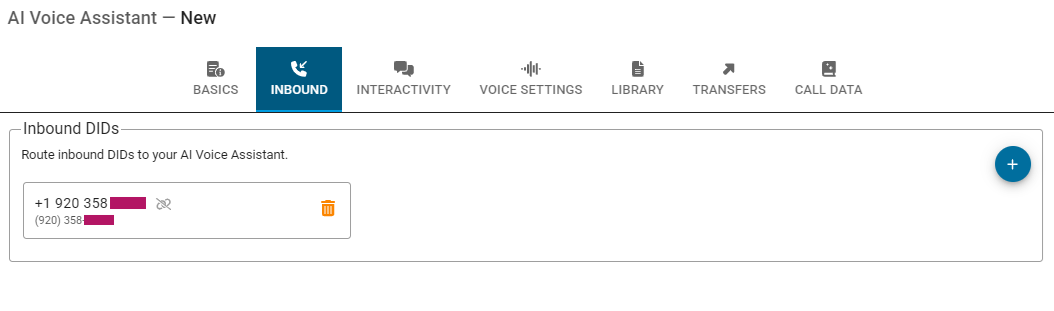
Inbound
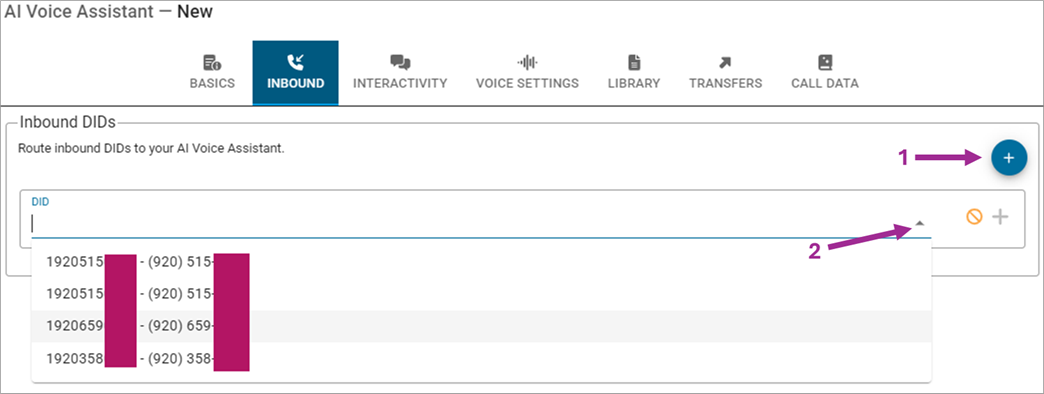
Next step is to select the DID or DIDs that will send their Inbound calls to the AI Assistant for it to handle them. Note that the DIDs that will be available here in this dropdown menu are the ones assigned to the Trunking Location that you selected in the previous step (Basics)
Note: You are indeed able to move your DIDs between your Locations, as explained
here.
So, to assign a DID from the selected Trunking Location to this AI Assistant, just click on the white plus icon and then on the down arrow to display the dropdown menu with the available DIDs:
Select a DID and then click on the orange plus icon to save it:
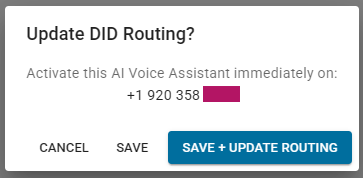
A confirmation prompt will appear:
If you want to route more DIDs to this AI Assistant just repeat the process (
white plus icon > select DID from dropdown menu > orange plus icon > save).
After having added all the desired DIDs here, just click on Interactivity at the top menu to go to the next step.
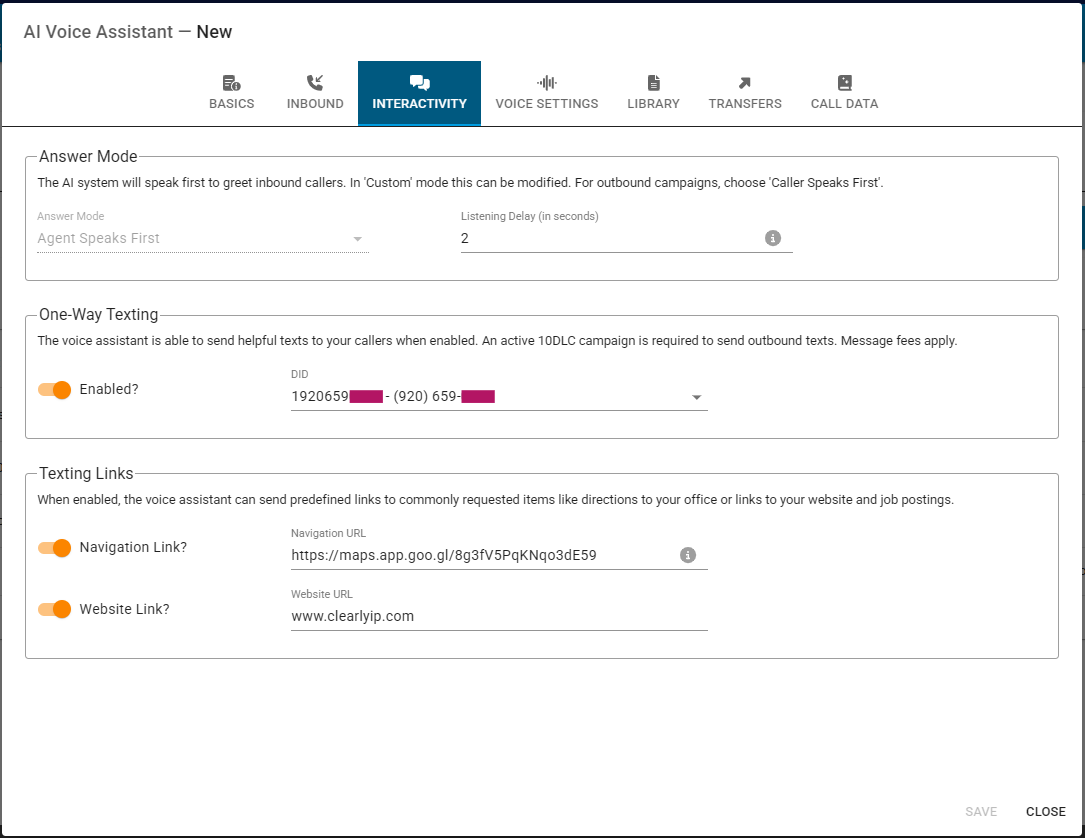
Interactivity
In the Interactivity section you can define:
Answer Mode:
- Agent Speaks First (agent being the AI Assistant) - this would be the most common mode and actually is the only one available when the Assistant Type setting has been selected as AI Receptionist (selected in the Basics section explained here above)
- Caller Speaks First - 'Caller' being the remote side of the call, not necessarily the caller, as, for outbound campaigns, this would be the preferred mode
Listening Delay (in seconds): Number of seconds to wait after answering the call but before listening to caller speech. When setting this value, consider (include) here the time it takes for any mandatory initial greetings and announcements to reproduce. If no initial greeting or announcement is to be reproduced, the default value of 2 seconds is recommended.
One-Way Texting: If the AI Assistant is to provide information to callers (mainly: Organization Website and Location URL) via text messages enable this toggle and then just select, from the dropdown menu, the DID to be used for sending out the SMS messages Note than an active 10DLC campaign is required to send outbound texts and also note that message fees apply per message as usual.
Texting Links: - Navigation Link - a Location URL for callers' convenience, to easily reach your office/business location
- Website Link - a website URL for callers' convenience, to easily reach your business's website
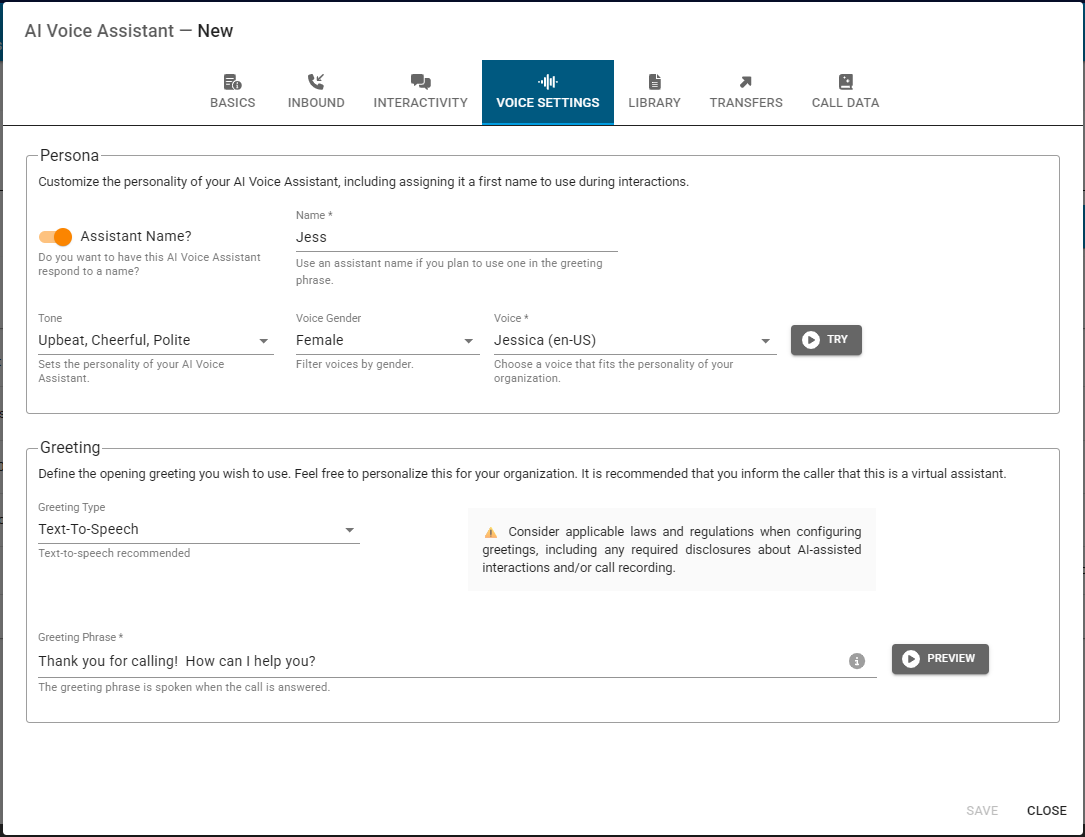
Voice Settings
Here you can define voice aspects of your AI Assistant such as its personality and also fixed pre-defined greetings.
Persona:
Assistant Name - Name: You can give your AI Assistant a first name for it to be used during interactions, including greetings.
Tone: Select from:
- Polite and Professional
- Upbeat, Cheerful, Polite
- Casual but Polite
- Formal
Voice Gender: Female or Male
Voice: Depending on the gender selected, there are numerous available options to pick from here (examples: Jessica, Melissa, Richard, David..).
Note: Next to the Voice dropdown menu there is a Try button that allows to hear the different voices before settling for one; remember that the voice produced here will depend on the Tone, Gender, and Voice parameters previously selected.
Greeting:
Greeting Type:
- Text-To-Speech: Just use text to speech (entered in the Greeting Phrase text field) for the greeting that will get spoken when the call is answered
- Advanced: Instead of the TTS Greeting Phrase you can build your greeting via segments of audio (or silence) that can be composed by one or multiple of the following:
- Upload WAV: Wav or mp3 file to be uploaded from your computer
- TTS Segment: Text-to-speech portion
- Pause: Silence for the defined amount of seconds (fractions are supported)
- Shared Announcement: Announcements previously uploaded via the SOUND LIBRARY section (Trunking Portal > Products and Services > AI Voice Assistants > SOUND LIBRARY)
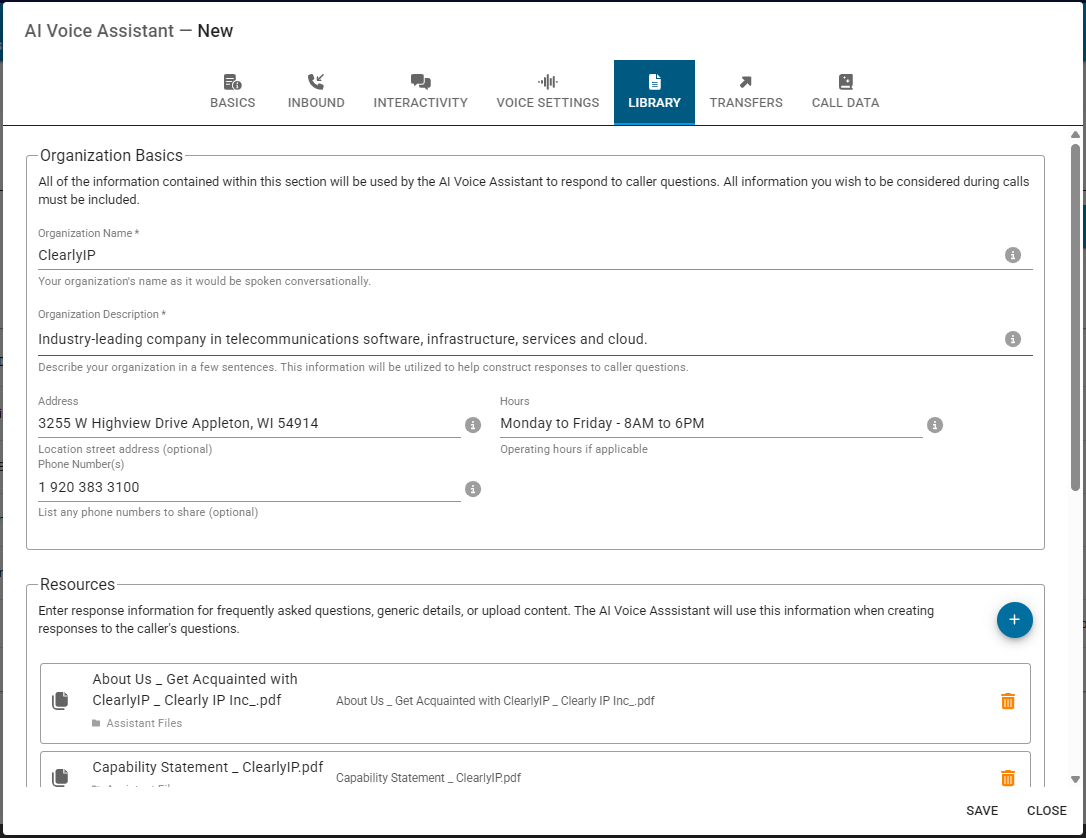
Library
The Library is where you enter all the basic information of your Organization together with all the knowledge base resources that will get feed into the AI Assistant so that it can best know how to handle the different questions and requests that arrive:
Organization Basics:
Organization Name: The name of your organization as it would be spoken during interactions with the Assistant
Organization Description: Enter a brief description of your organization, this information will be utilized as proper context to help construct responses to caller questions
Address: (Optional) enter the physical address of your organizarion for your Assistant's knowledge
Hours: (Otional) enter the operational or business huors of your organization if applicable
Phone Number(s): (Optional) enter your public phone numbers that the Assistant can share
Resources:
Enter response information for frequently asked questions, generic details, or upload content. The AI Voice Asssistant will use this information when creating responses to the caller's questions. Available options here are:
- Upload File: Accepted files formats: .txt, .pdf, .doc, .docx, .rtf, .md - A maximum of 10MB per file is allowed
- Custom Q&A: enter your own question with its respective answer
- Shared Resource: Use any documentation resource previously uploaded into your INFO LIBRARY (Trunking Portal > Products and Services > AI Voice Assistants > INFO LIBRARY)
Suggested Questions - pick any of the following predefined questions and provide its corresponding answer.
- Are We Hiring?
- Languages Spoken
- Parking Options
- Payment Methods Accepted
- Products and Services Description
- Return Policy?
- Shipping Methods
The way to add Resources here is similar to when adding DIDs into the INBOUND section: white plus icon > select the resource type from dropdown menu > fill in the corresponding information > orange plus icon
Transfers
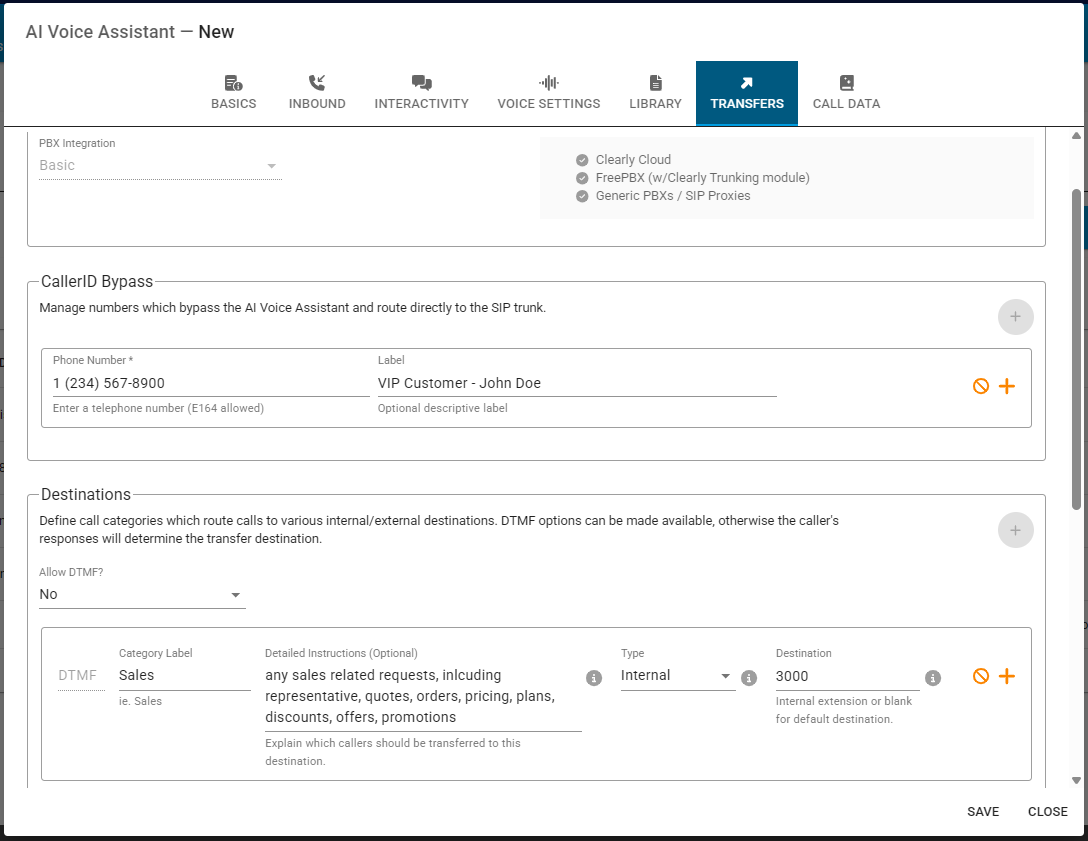
In the Transfers section you can define how, where and when to perform call trasnfers to internal extensions (on Supported PBXs), to external numbers, or downstream to the SIP Trunk. Rules to bypass the AI Assistant based on who is calling can also be defined here.
Transfer Integration: The AI Assistant can transfer calls internally as long as the PBX is any of the following:
- Clearly Cloud
- FreePBX (with ClearlyIP SIP Trunking module)
- Generic PBXs / SIP Proxies
CallerID Bypass: you can add one or more numbers here that will skip the AI Assistant and go directly to the SIP trunk
- Phone Number: Enter the phone number of the caller will bypass the AI Assistant
- Lable: (optional) a label for you to aeasily identify the phone number being added
Destinations: Here you can define call categories which route calls to various internal/external destinations. DTMF options can be made available (optional), otherwise the caller's responses will determine the transfer destination based on the Category Label and the Detailed Instructions entered (also optional).
Allow DTMF: Options available:
- No
- During Greeting (only)
- Entire Call
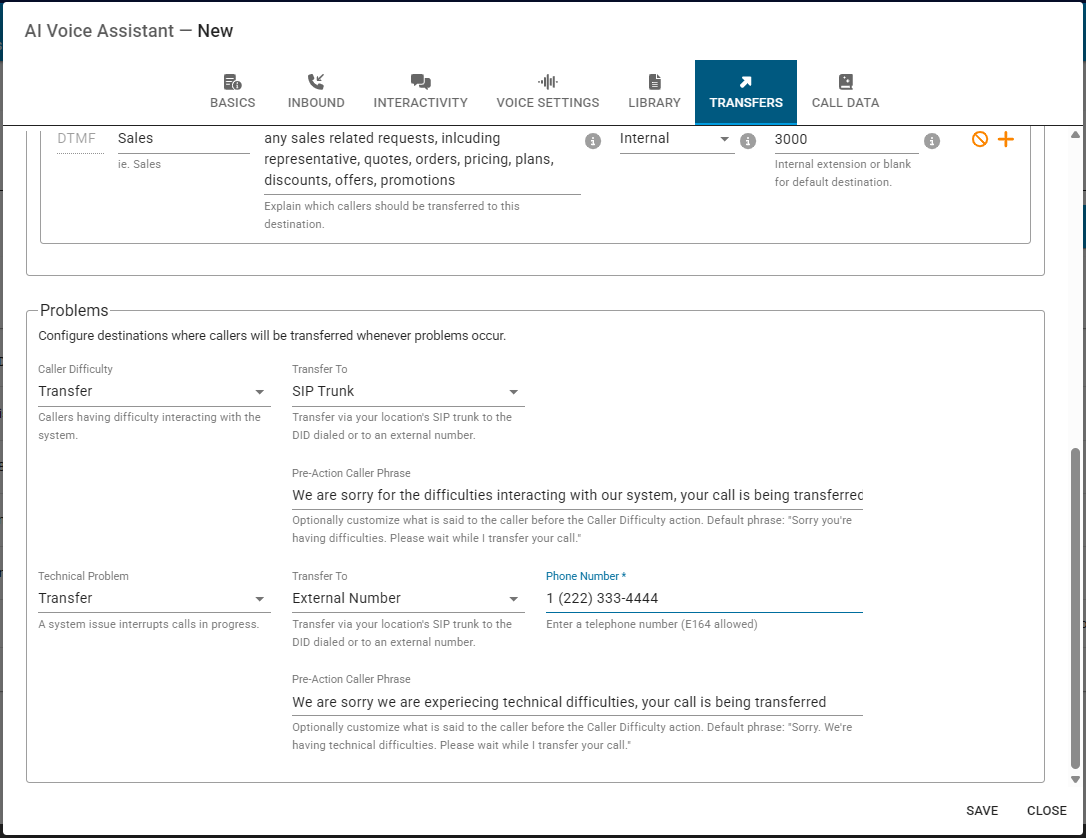
Problems: You can configure destinations to send callers to if a problem occured. The transfer method for these can be to send the call to the SIP Trunk or to an External Number; or alternatively, the call can be just hung up. A text-to-speach phrase can also be added here to be spoken to the caller before transferring the call, depending on the problem. Problems could be:
- Caller Difficulty: Callers having difficulty interacting with the system
- Technical Problem: A system issue interrupts the call in progress
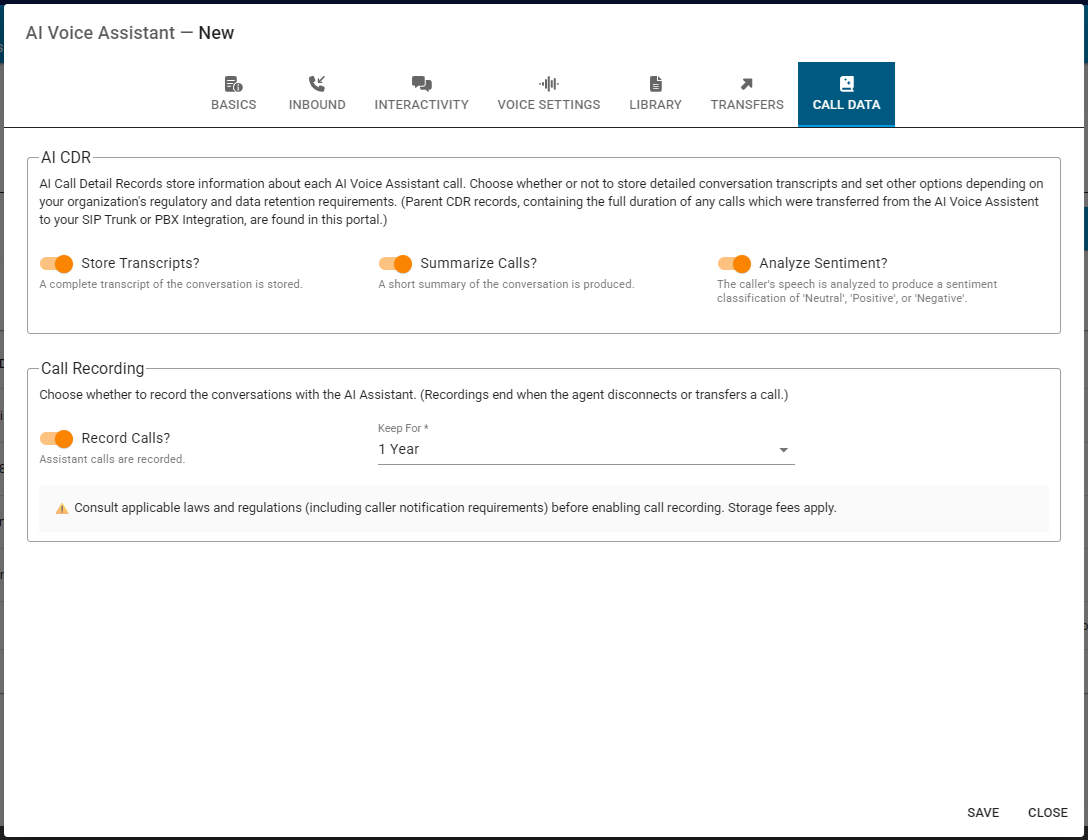
Call Data
The Call Data section allows you to select what data to store in the CDRs of this AI Assistant. The
Xivea AI Assistant CDRs are accessed in the Trunking Portal under Account > View CDRs > AI CDRS
AI CDR:
Store Transcripts: If enabled, a complete transcript of the conversation is stored in the AI CDRS
Summarize Calls: If enabled, a short summary of the conversation is produced and stored in the AI CDRS
Analyze Sentiment: If enabled, the caller's speech is analyzed to produce a sentiment classification of 'Neutral', 'Positive', or 'Negative'
Call Recording:
Record Calls: If enabled, assistant calls are recorded
Keep For: Select how long to keep the AI Assistant calls recordings for, available options are: 30 days, 60 days, 90 days, 6 months, 1 year
Finally just click the SAVE button at the bottom right corner of the wizard window. Once the new AI Assistant is saved, it will show as a new entry in a table that gets displayed in the bottom section of the ASSISTANTS page, as described in the
Introduction of this current guide.
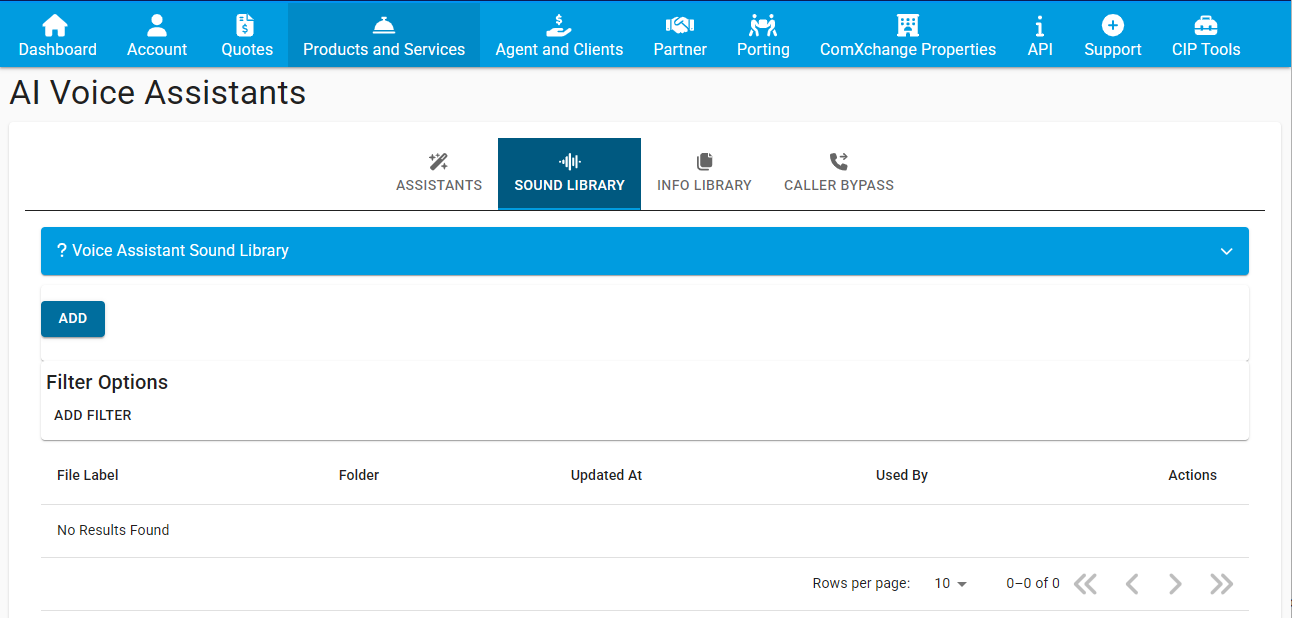
After ASSISTANTS, the next section from the second level horizontal menu at the top is the SOUND LIBRARY. Sound files shared in the Sound Library can be used by multiple Xivea AI Voice Assistants. This library consists of recordings, spoken FAQs, and/or uploaded audio content.
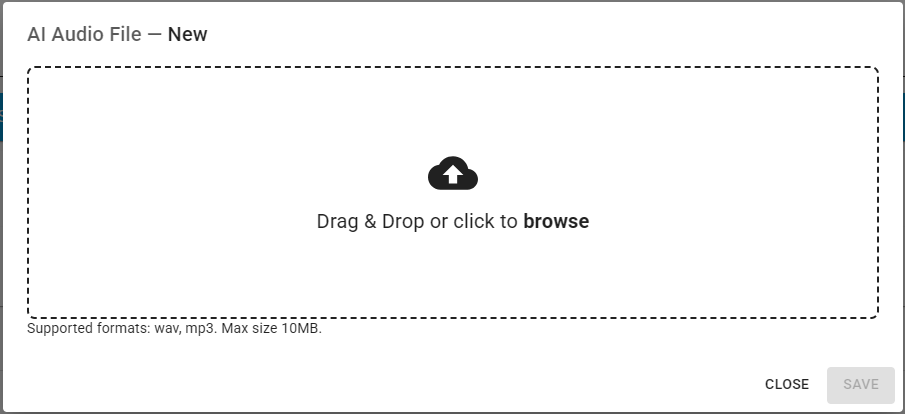
Click on the ADD button to add an audio resource to your library, the supported file formats are wav and mp3 with a maximum size of 10MB per individual audio file:
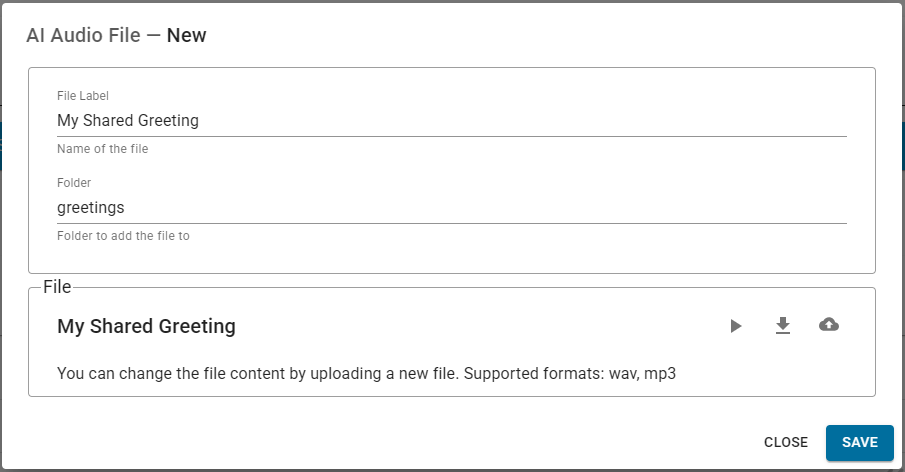
After adding a supported audio file, via either drag and drop or clicking to browse your computer, you can change the name/label of the file to be stored in the library and also define a folder where to store the file if so desired (the default folder is 'root').
You are able to replace the audio file here if needed by clicking on the cloud icon containing the up arrow. When ready just click the SAVE button to add the audio file into your Sound Library, inside the defined folder.
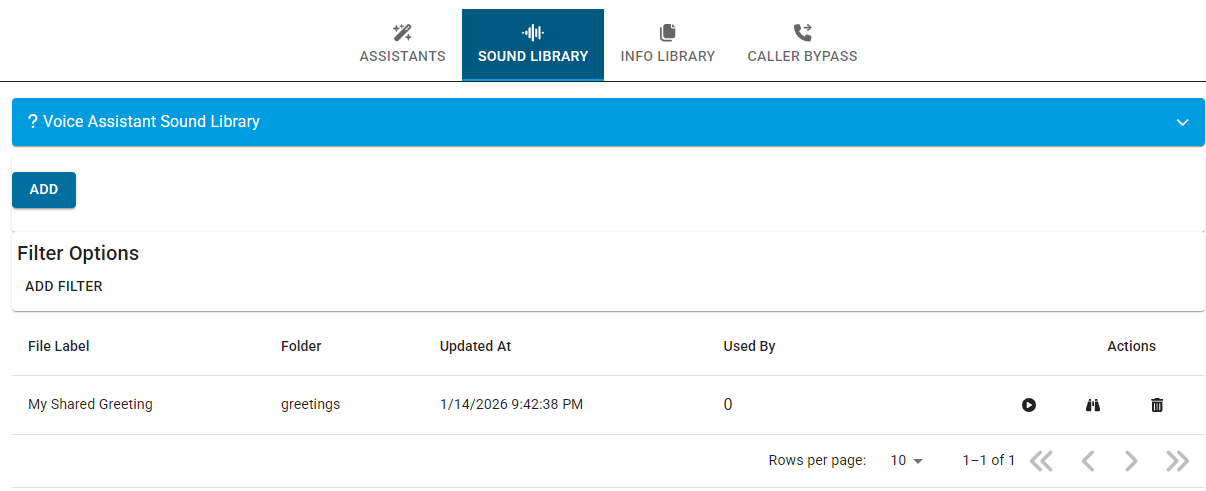
Once a file has been included into the Sound Library, it will show as a new entry in a table that gets displayed in the bottom section of the SOUND LIBRARY page:
The actions available to each individual audio file stored in the Sound Library are:
- Playback icon: Reproduce the file right from within your web browser
- Binoculars icon: Modify the file: the same window as when adding the file is shown, there you can, as we already saw, replace the file, rename it or move it to another folder
- Trash can icon: Delete the file
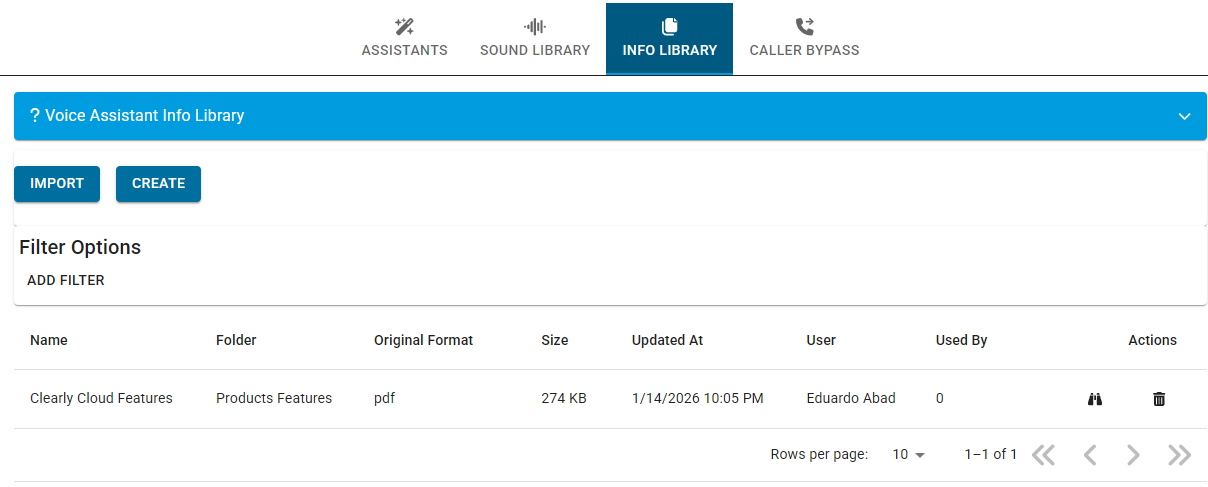
The next section from the second level horizontal menu at the top is the INFO LIBRARY. In the Info Library you can upload information files that get shared in the library can be used by multiple Xivea AI Voice Assistants. This library consists of FAQ items, freeform text, and/or uploaded documentation files (PDFs, text files and others).
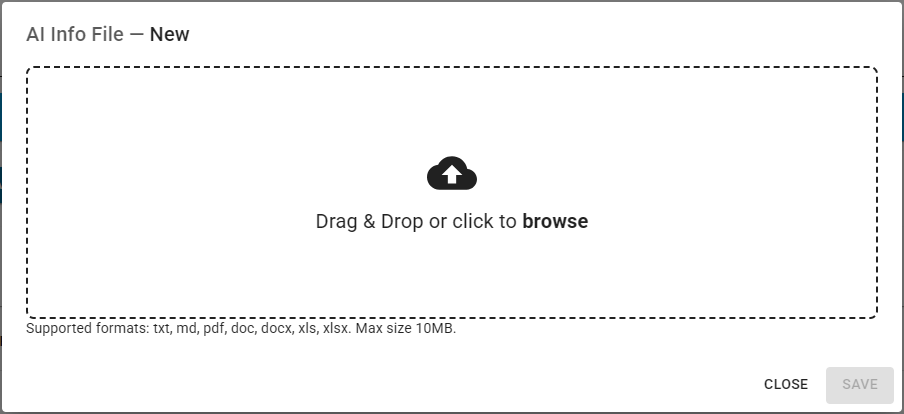
Click on the IMPORT button to upload a written documentation resource to your library, the supported file formats are txt, md, pdf, doc, docx, xls, and xlsx with a maximum size of 10MB per individual documentation file:
After adding a supported documentation file, via either drag and drop or clicking to browse your computer, you can change the name/label of the file to be stored in the library and also define a folder where to store the file if so desired (the default folder is 'root').
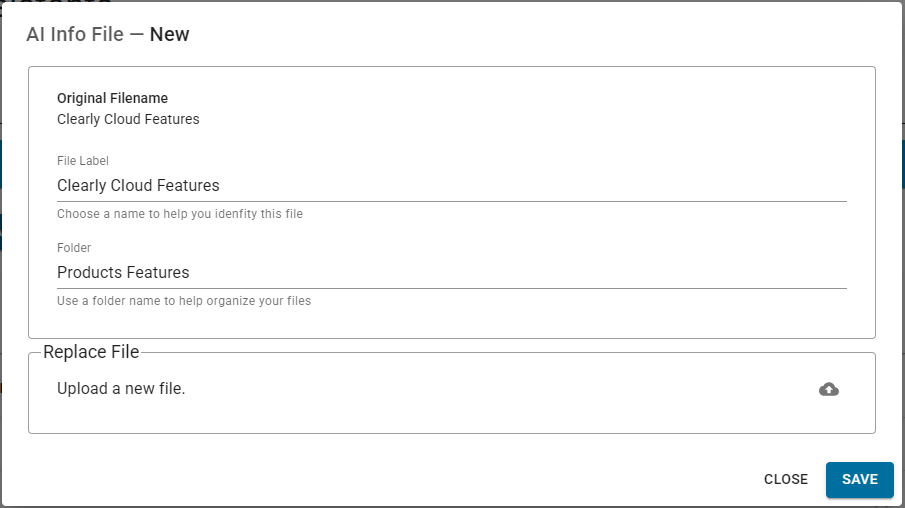
You are able to replace the documentation file here if needed by clicking on the cloud icon containing the up arrow. When ready just click the SAVE button to add the documentation file into your Info Library, inside the defined folder.
Once a file has been included into the Info Library, it will show as a new entry in a table that gets displayed in the bottom section of the INFO LIBRARY page:
The actions available to each individual documentation file stored in the Info Library are:
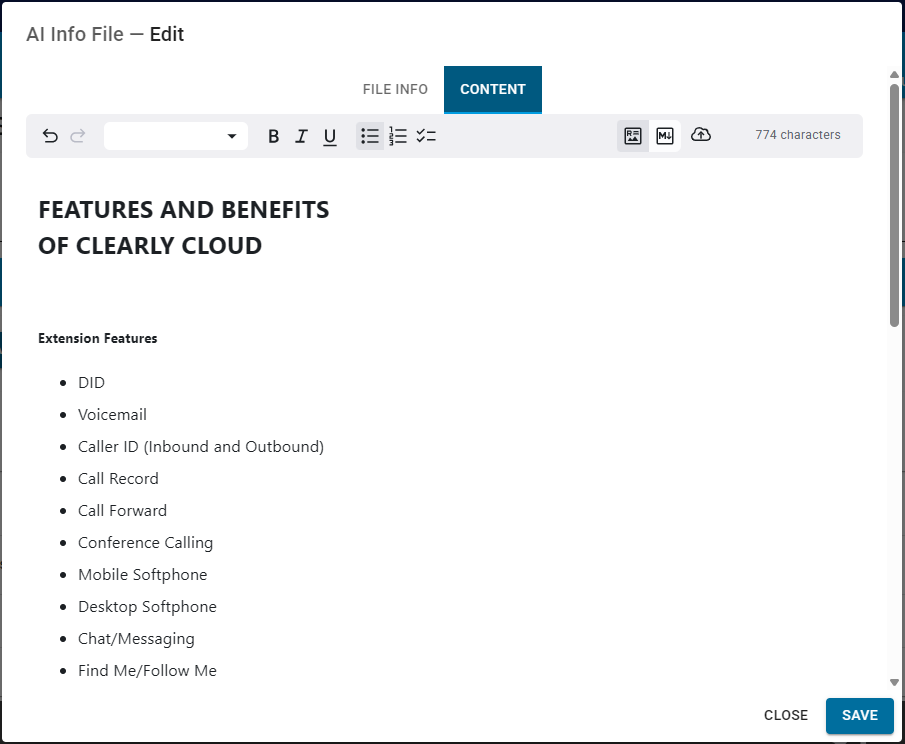
- Binoculars icon: Modify the file: a similar window as when adding the file is shown, there you can replace the file, rename it or move it to another folder. You also are able here to check the contents of the file or also even edit it, this by clicking on the CONTENT tab at the top
- Trash can icon: Delete the file
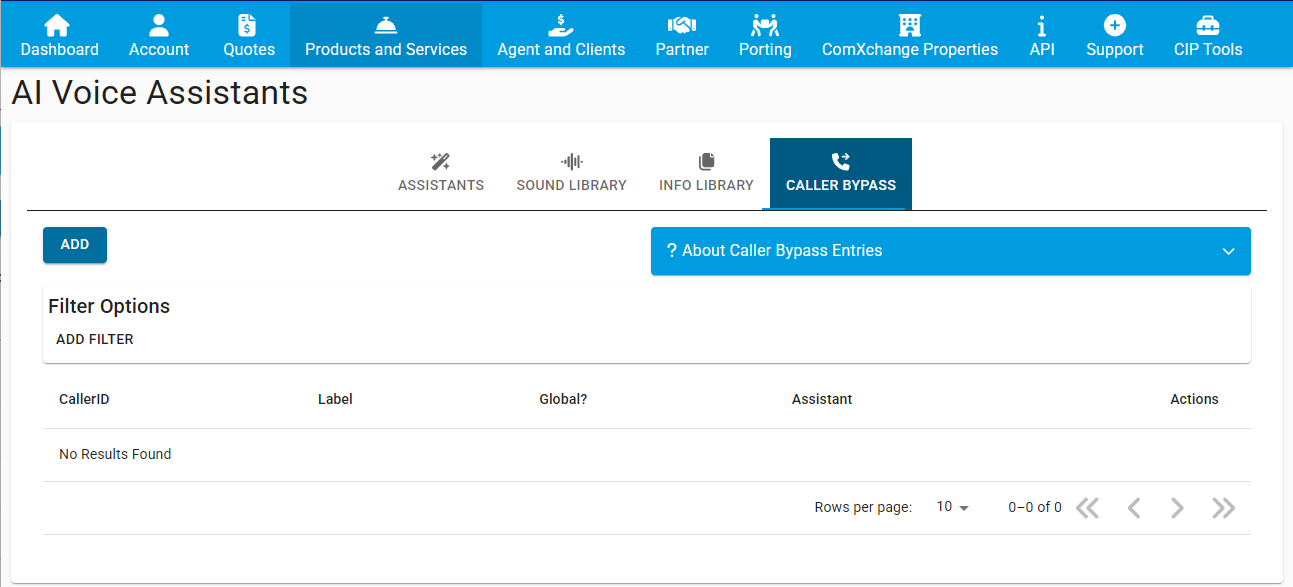
The final section from the second level horizontal menu at the top is CALLER BYPASS. In the Caller Bypass section you can add rules for bypassing AI Assistants based on the CallerID Number of the party calling in.
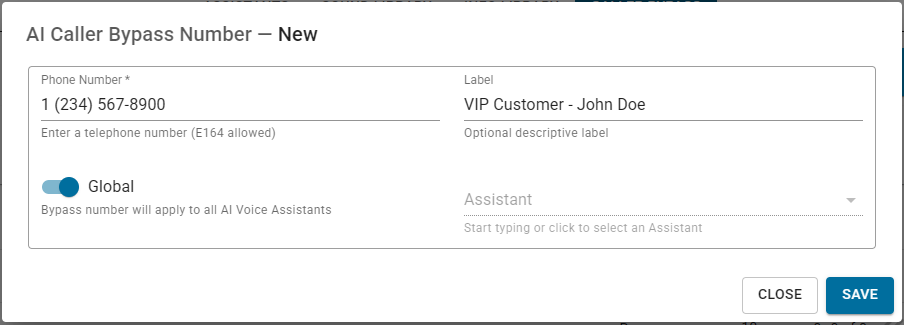
Click on the ADD button to add a new Caller Bypass rule:
The available settings here are:
- Phone Number: Phone number corresponding to the CallerID Number of the party for which you want their calls to bypass AI Assistant(s) and rather get routed according to the regular routing as per defined for that number in the Trunking Portal
- Label: (Optional) label to help you identify the phone number
- Global: Toggle to define wether this caller bypass rule should apply to an specific AI Assistant only or to all your created AI Assistants
- Assistant: If the Global toggle is off, select from this dropdown menu the AI Assistant to apply the caller bypass rule to
Once a caller bypass rule has been added, it will show as a new entry in a table that gets displayed in the bottom section of the CALLER BYPASS page:
The actions available to each individual rule in the CALLER BYPASS table are:
- Binoculars icon: Modify the rule: the same window as when first adding the rule is shown, there you can, as we already saw, set a phone number for the rule, assign it a label, and select which AI Assistant(s) the rule will apply to
- Trash can icon: Delete the rule
 Uploading ....