Below you will find information on how to use the ClearlyIP Devices module in ComXchange
Module Settings
Now that we have the module installed we need to go configure it. Navigate to the Clearly Devices module in ComXchange
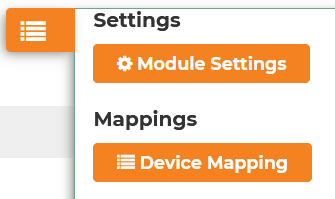
- Click on "Module Settings" button at the top.
- We will need to define some settings for Phone Apps and the Provisioning Server itself. These are 1 time settings.
Phone Apps
- Click on the "Phone Apps" tab
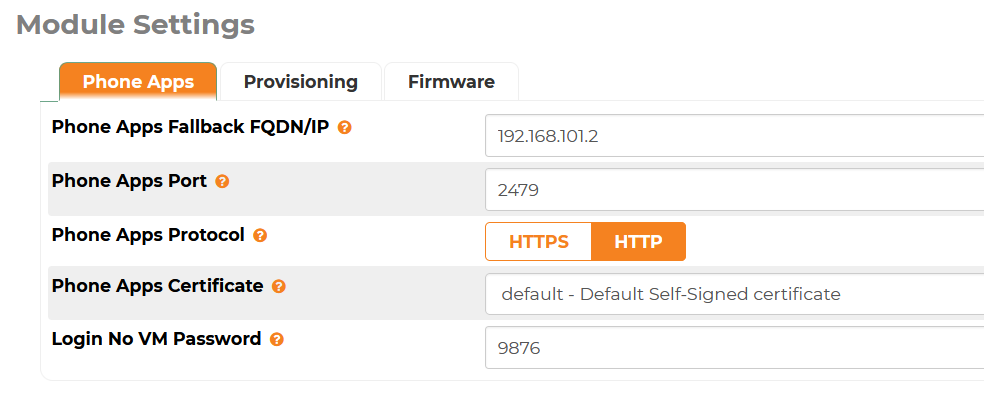
- Here is where we set information about Clearly Devices Phone Apps that all devices will use.
- Phone Apps Fallback FQDN/IP - This is the IP or FQDN that the phone apps will use when not defined differently in a template (usually the LAN IP of the ComXchange, 192.168.101.2 by default)
- The only time this is used is when the phone is not logged in since it has no template assigned to the phone when its not logged in at all, it does not know what IP or FQDN to use for the Login button on the phone so it will fallback to using this setting. If you will have phones that are on the same local network as the PBX and External you will want to use a FQDN here that can resolve to the local IP inside the network and the external IP when remote.
- Phone Apps Port - What port you want the Phone App server to run on that the phones will connect to for all Phone Apps. If the phones are external from the PBX make sure you open this port on any firewalls you have setup in front of the PBX.
- Phone App Protocol - Do you want phone apps to use HTTP or HTTPS. If using HTTPS make sure you are using a FQDN as the IP and that you have a valid SSL certificate setup on your ComXchange system for that FQDN.
- Phone Apps Certificate - What SSL certificate you want to use if you have picked HTTPS above. Make sure this certificate you pick is setup for the FQDN above. See System Admin module in ComXchange on how to setup a SSL Certificate.
- Login No VM Password - If you have extensions that do not have voicemail setup but you want to allow the user to still use our Login Hotdesking which relies on the Voicemail Password when logging in you can optionally set a numeric password here and any user with no voicemail setup can use this password instead.
Provisioning
- Click on the "Provisioning" tab

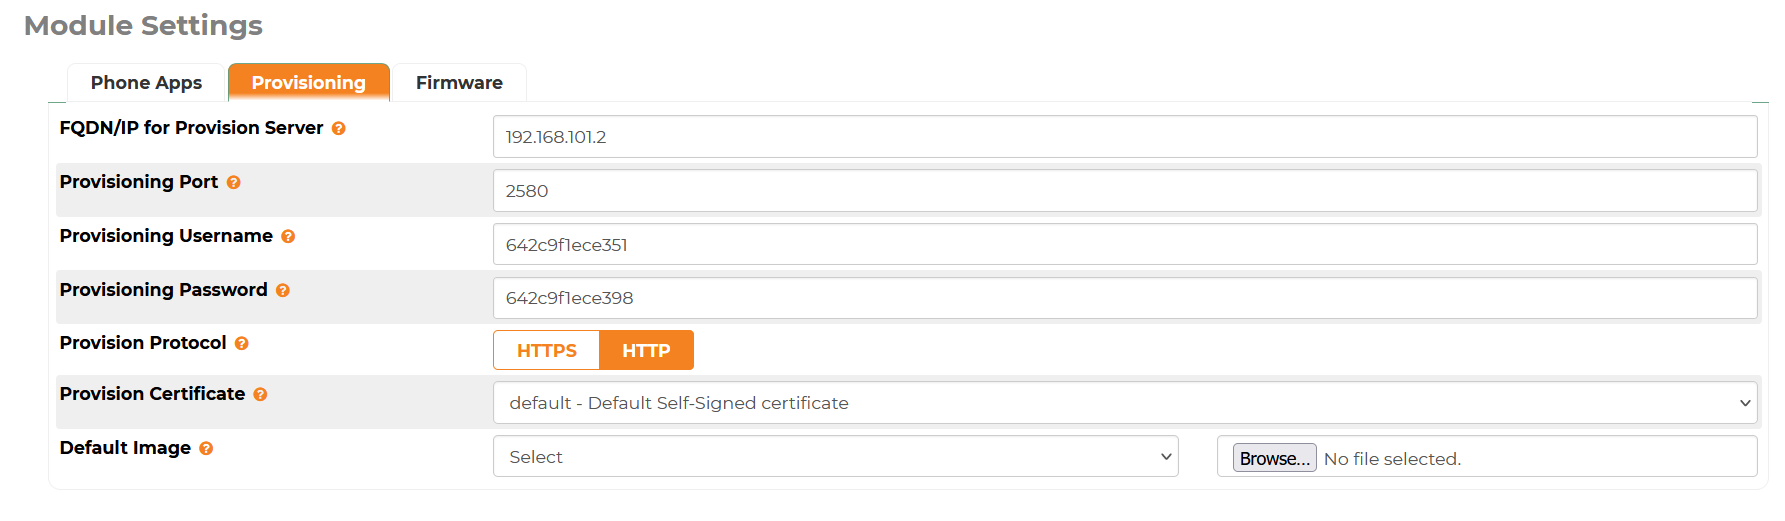
- Here is where you can set information about the Clearly Devices built in HTTP/HTTPS provisioning server.
- FQDN/IP for Provision Server - What IP address or FQDN you want setup as the standard IP address for phone provisioning. This will be the default IP used in your Templates (usually the LAN IP of the ComXchange, 192.168.101.2 by default).
- Provisioning Port - What port you want the built in provisioning server to run on that the phones will connect to for getting their config files. If the phones are external from the PBX make sure you open this port on any firewalls you have setup in front of the PBX.
- Provisioning Username - Username to access the provisioning server
- Provisioning Password - Password to access the provisioning server
- Provision Protocol - HTTP or HTTPS that the Provisioning Server should be setup to use. If using HTTPS make sure you are using a FQDN as the IP and that you have a valid SSL certificate setup on your ComXchange based system for that FQDN.
- Provision Certificate - What SSL certificate you want to use if you have picked HTTPS above. Make sure this certificate you pick is setup for the FQDN above. See System Admin module in ComXchange on how to setup a SSL Certificate.
- Default Image - Optionally what background image you want the phone to load when its in a completely logged out state. We include a background image called Not Registered which will show a background image saying not registered and no 911 calling allowed.
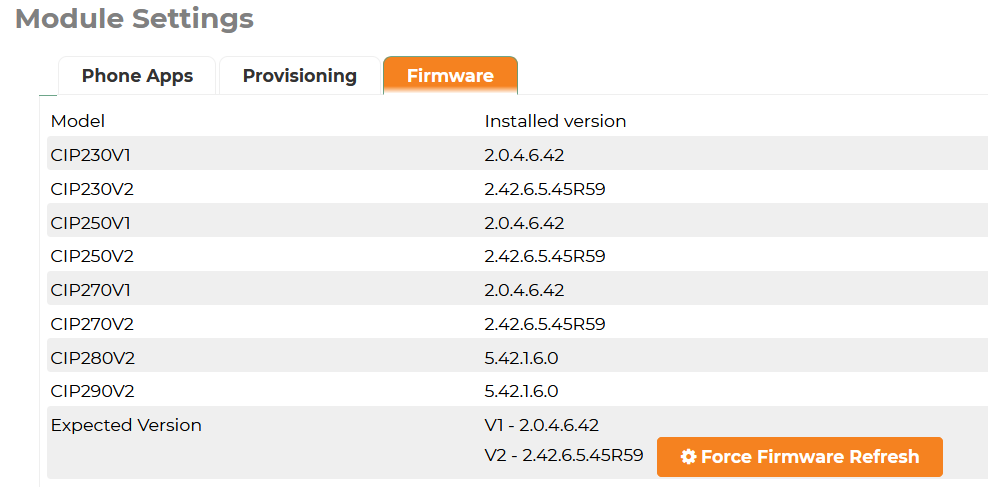
Firmware
- Click on the Firmware Tab

- Here you can see what firmware version is installed for each model of the phones and Expansion modules and redownload the firmware to the PBX if its missing or corrupt.
Templates
- Templates are where we define information that relates to the family of phones and not specific features or buttons of a model.
Creating a template
Note: We will only cover the basic required settings in detail here, most settings have tool tips  to explain their function.
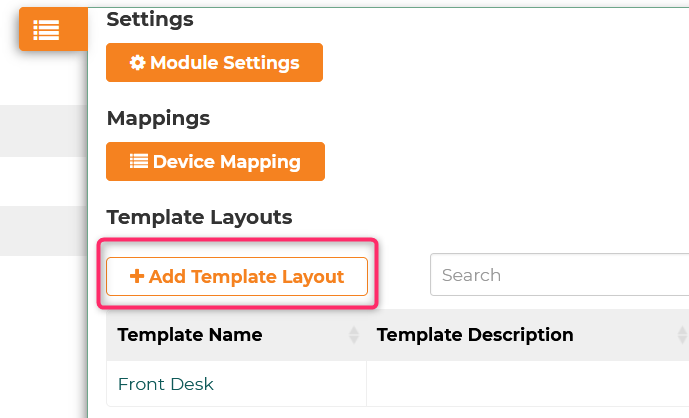
 - Click on the 4 dots menu on the right and pick “Add Template”
- On the General Tab
- Template Name - Name this template
- Description - Describe what this template is used for.

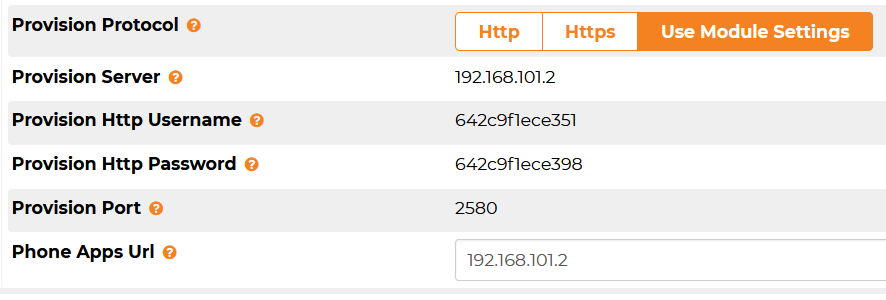
- Provision Protocol - Here you can pick from HTTP, HTTPS or Use Module Settings.
- Use Module Settings - If you pick this option it will auto fill in all the settings below based on what you have setup with the built in Provisioning Server from the previous step. This is the recommended setting.
- Provision Server - This is the IP or FQDN of the provisioning server. This only needs to be set if you are not using the built in Provision Server above.
- Provision HTTP Username and Password - These fields only need to be set if you are not using the built in provisioning server above.
- Provision Port - The port the provision server is listening on. This only needs to be set if you are not using the built in Provision Server above.
- Phone Apps URL - FQDN or IP for Phone Apps to use. This does NOT include the Guest management or PMS apps which are setup separately in the phone Model layout.
- Admin Username - Username to log in to the Phone GUI.
- Admin Password - Password to log in to the Phone GUI.
- Default username and password that comes on the phone from the factory is admin username and admin for the password. We set a replacement username and password here and once the phone is configured from this module the defined username and password below is how you will log into the phone GUI.

- Resync Enable - Do you want the phone to check in for new configuration files at a regular interval time. We recommend setting this to Enable just in case the phone missed getting notified of any updated configs.
- Resync Time - How often in minutes the phone should check for updated configurations. 1440 is every 24 hours. This timer is set from when the phone last booted. If it was rebooted at 11AM it will check in at 11AM every day for updates
- Primary Host - Should be your IP address or FQDN of your PBX. This is where the phone will actually register the SIP connection to.

- If we had some phones setup on a Local network with the PBX and some phones setup to connect across the internet as remote users we would setup 2 templates. 1 for remote phones and 1 for local phones using the Local IP Address and the External IP Address
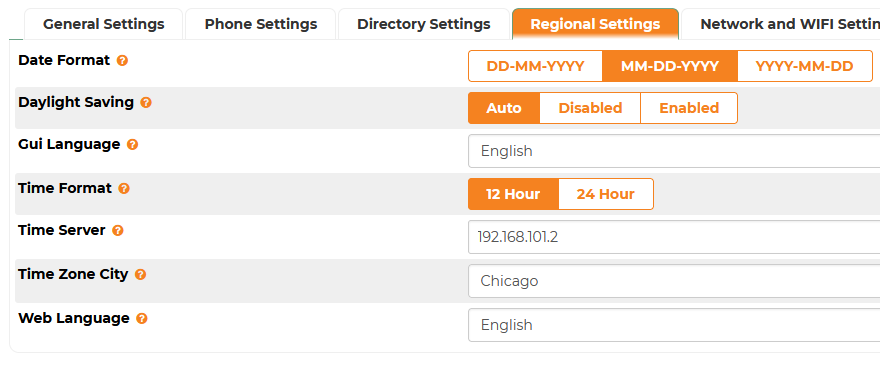
- On the Regional Settings Tab
- Make sure the Time Server is reachable from your Network. If your phones are having issues getting the correct time the NTP server being blocked is a likely cause.
- Tip: Most Routers, Local DNS servers, & Domain Controllers can provide NTP service, you might be able to use one of those internal sources if NTP is blocked from the WAN/ISP.
- If connecting the phones locally to the PBX, the ComXchange will provide NTP.
- Verify your Time Zone City, Daylight Savings, Languages, and Date & Time formats are correct for the site where the Phones will be located.
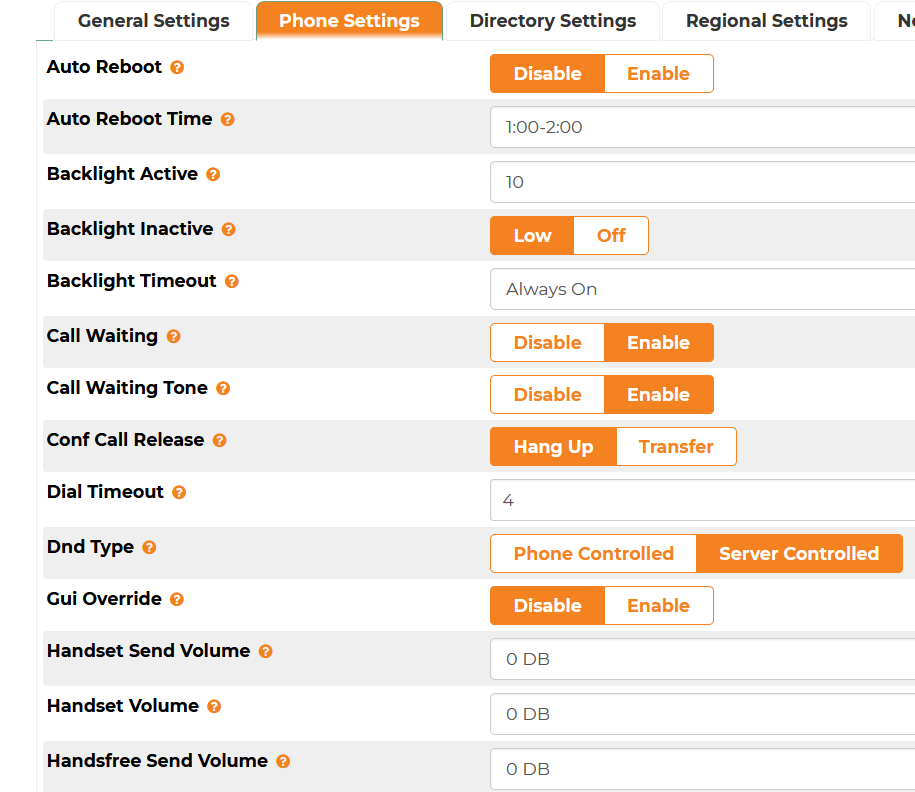
- On the Phone Settings Tab
- Here we can set things that are generic to the all the models of Clearly IP Phones.
- Auto Reboot - This feature will have the phones reboot at a random time a day once per day.
- Auto Reboot Time - The time frame in which the phones will auto reboot each day.
- Backlight Active - Backlight brightness level when phone is actively being used. 270v1 and all v2 models.
- Backlight Inactive - Backlight brightness level when the phone is not actively being used after the timeout is reached. Low will dim the light versus off will turn off the screen.
- Backlight Timeout - How long to wait after the phone was last active before we dim the backlight.
- Call Waiting - If you are on active call and the PBX sends you another call do you want to have the phone allow a second call to come in. If enabled it will show on the screen the caller ID of who is calling and let you answer the call or ignore it. Answering the call will put the existing call on hold.
- Call Waiting Tone - If Call Waiting above is enabled do you want to play a beep notification when receiving another call while on a active call.
- Conf Call Release - If on a Conference call initiated from the phone and you hang up from the call do you want to terminate the call for everyone in the conference call or let them continue to talk without you.
- Dial Timeout - The delay in seconds before the phone will proceed with dialing. 0 will force the phone to wait for a # or send command. 4 will have the phone wait for 4 seconds of inactivity, then will dial the digits provided. 4 is recommended for emergency numbers such as 911, as users may not know to press send or #.
- DND Type - This selects whether the individual phone should handle DND or the server. If server-controlled, enabling DND on the phone will enable DND for that extension and any devices registered to it.
- GUI Override - This setting determines if changes made by users in the GUI of the phone will be overwritten the next time the phone reaches out for its config.
- Handset Send Volume - This setting increases or decreases the microphone gain for the handset.
- Handset Volume - This setting increases or decreases the volume of the handset.
- Handsfree Send Volume - This setting increases or decreases the microphone gain for the speakerphone.
- On the Wifi Settings Tab
- You can define the WiFi network SSID and Password for wireless access.
- Note: The phones will have to be connected via wired connection or manually configured for WiFi the first time to pull the initial configuration.
- On the Redundancy Settings Tab
- Define secondary server Host and SIP Port in the event you primary server is unresponsive. For example, in the case of a failover system, the host could be: 192.168.101.3 and the Port would be 5060.
- Press the Submit button when done

Models
- Models are where we manage settings related to specific models of Clearly IP devices.
- Let's say you have CIP-270 and CIP-250 phones in your organization and you have 2 groups of users Admins and Regular users but both Admins and Regular users have a mix of both CIP-270 and CIP-250 phones.
We would create 4 models here as we want to have different buttons on the Admin phones than we do on Regular user phones.- CIP-270 Admin
- CIP-250 Admin
- CIP-270 Regular
- CIP-250 Regular
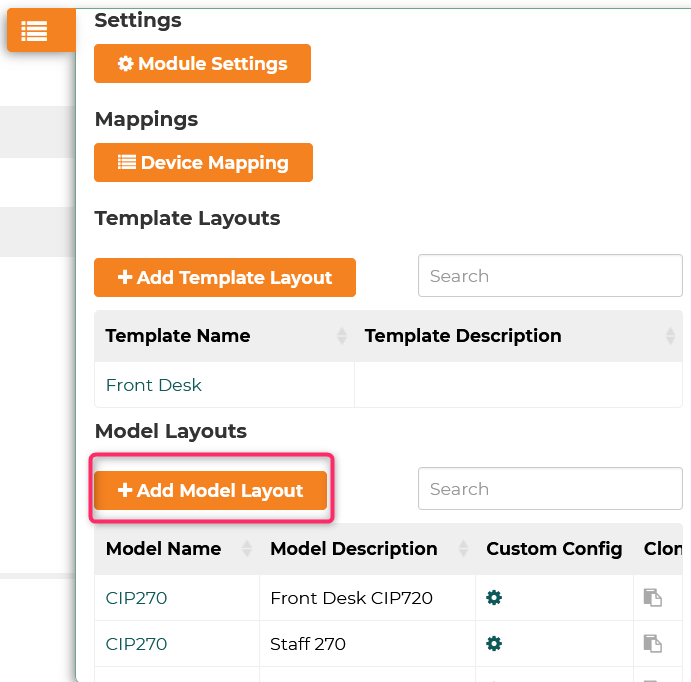
- Create a new Model by clicking on the right menu option and picking Add Model button:
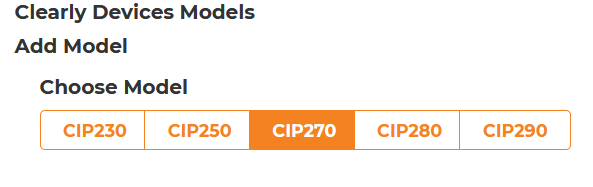
- Select the Model Number from the top:
- Set the Model Description

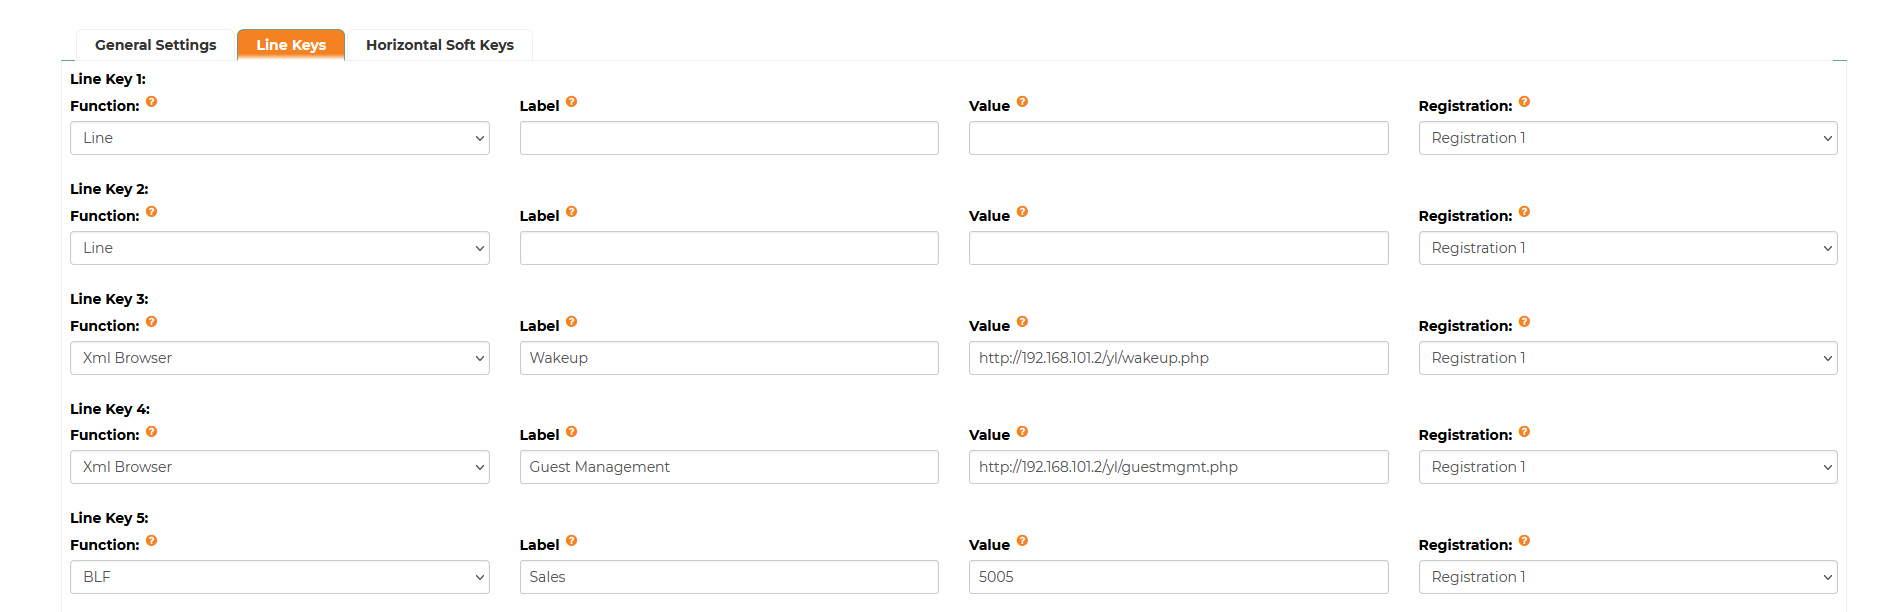
- Under Line Keys we can setup our actual Line Keys, BLFs, Speed dials and Phone Apps amongst other types of buttons
- Here we have setup 2 line keys as well as a BLF for sales and the apps for setting wakeup calls for guests and the guest management (PMS) app that allows staff to check rooms in and out through the phone.
- For line keys, you can leave the Label and Value blank as they are ignored with line keys as we set in the template what we want for the Line label as either Extension, Name or Both already and it will auto fill them in.
- Wakeup App: http://192.168.101.2/yl/wakeup.php
- Guest Management: http://192.168.101.2/yl/guestmgmt.php

Mappings
Device mappings are where we map
This will create the configuration file for the phone to pull all the information it needs
Click on Device Mapping button in the right nav


- Now all we need to do is tell the Phone now to reach the PBX the first time as outlined in this wiki
 Uploading ....
