We will setup this gateway to just register to your PBX with each of the 6 FXS ports registered to the PBX with a different Extension Number and SIP Password.
If the internet goes down the Gateway will failover to using the 4G connection to stay connected to your PBX.
The setup guide below assumes you have already setup the 4G Sim and APN as outlined in our Initial Setup guide here
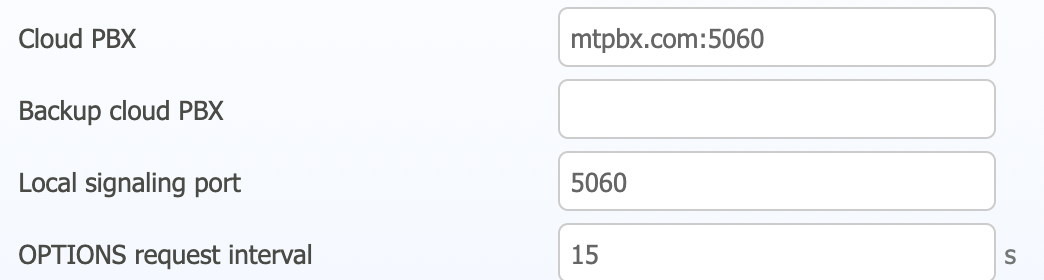
Define How to Reach your PBX
The gateway needs to be told what the IP or FQDN of your PBX that you want to register the FXS ports to.
Navigate to Outbound Calling.
Set the following fields and make sure you save your changes when done.
Cloud PBX - The IP address or FQDN of your PBX.
Local Signaling Port - The SIP signaling port of your PBX--usually 5060.
Options Request Interval - The gateway will periodically send SIP OPTIONS messages to verify whether not the PBX is reachable. We recommend something between 15-30 seconds. If its unreachable on the Local LAN this will trigger the failover to using 4G. When the PBX is reachable, service will restore back to the LAN from 4G.
Press the Save button when done
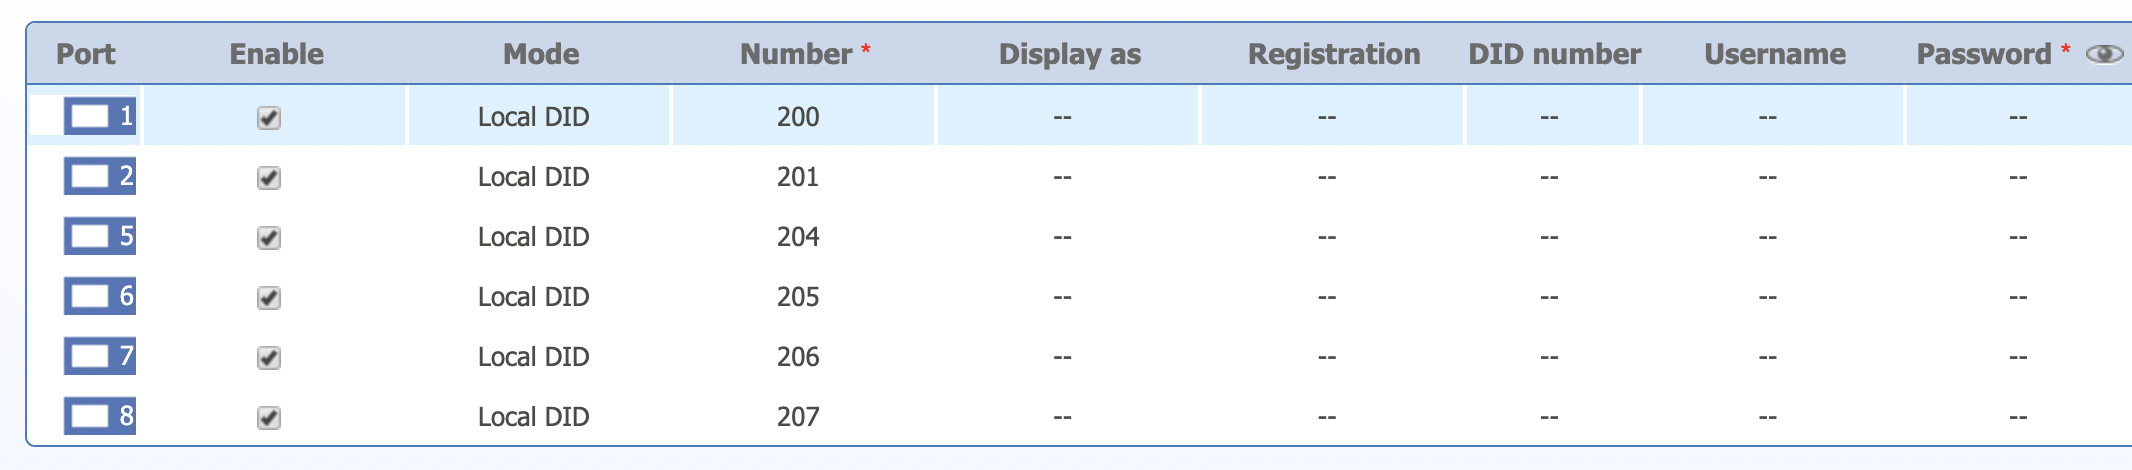
Map FXS Ports to your PBX as Extensions
Navigate to Extensions > Analog
You will see the 6 FXS ports listed. Ports 1, 2, 5, 6, 7, 8. Ports 3 and 4 wont be listed here as they are FXO ports.
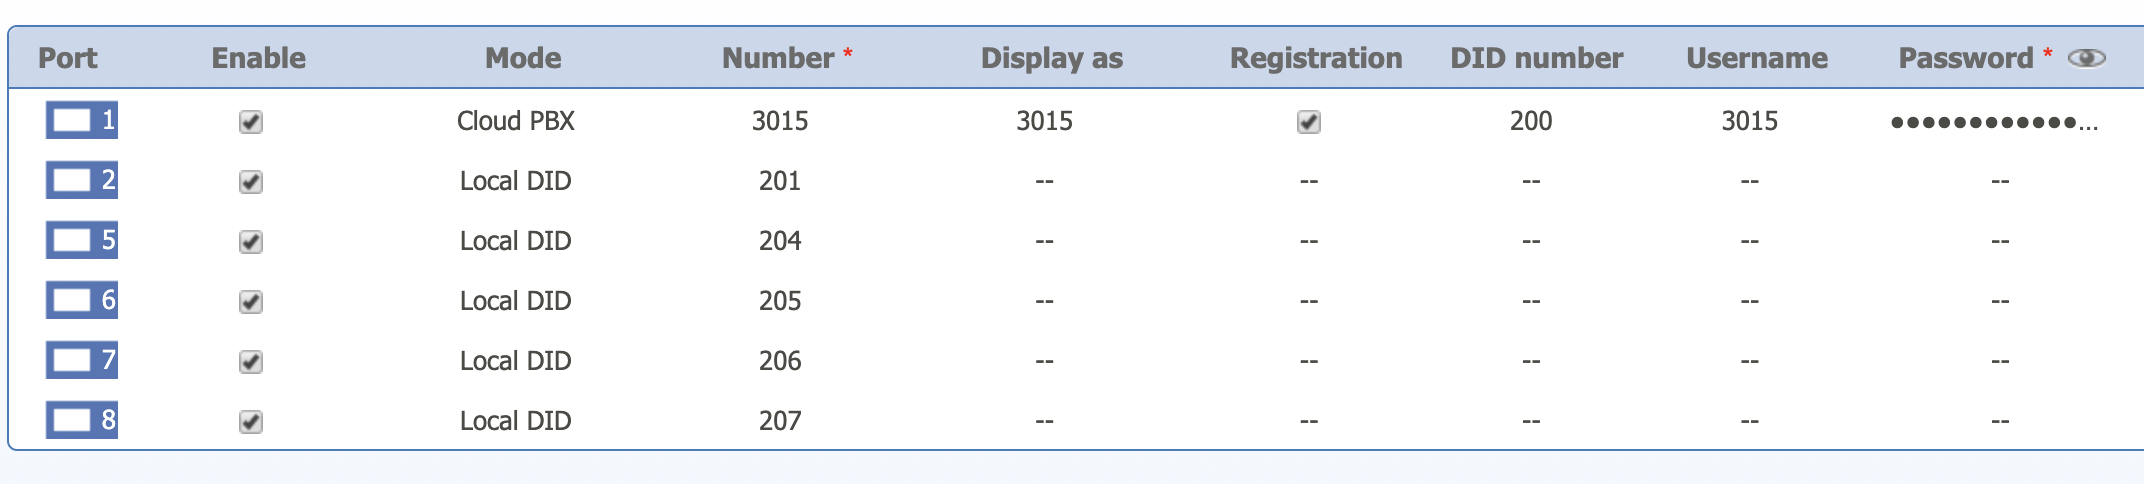
Click on the field under Mode for which port you want to setup as a Extension from your PBX and set it to be Cloud PBX.
Set the following fields based on what you have setup in your PBX for this extension.
Number - Extension Number you are registering this port as to your PBX.
Registration - Check the Enable button
Username - Extension Number you are registering this port as to your PBX.
Password - The SIP Secret for the extension from your PBX that you are registering as.
Press the Save button when done
The Port(s) should now show Register Success under Status.
Setup STUN Server for NAT
If you are experiencing 1 way or 2 way no audio issues on your LAN or 4G you may need to setup a STUN server. See our wiki here on STUN settings
 Uploading ....