Select "Add SIP (chan_pjsip) Trunk" from the Add Trunk drop down.
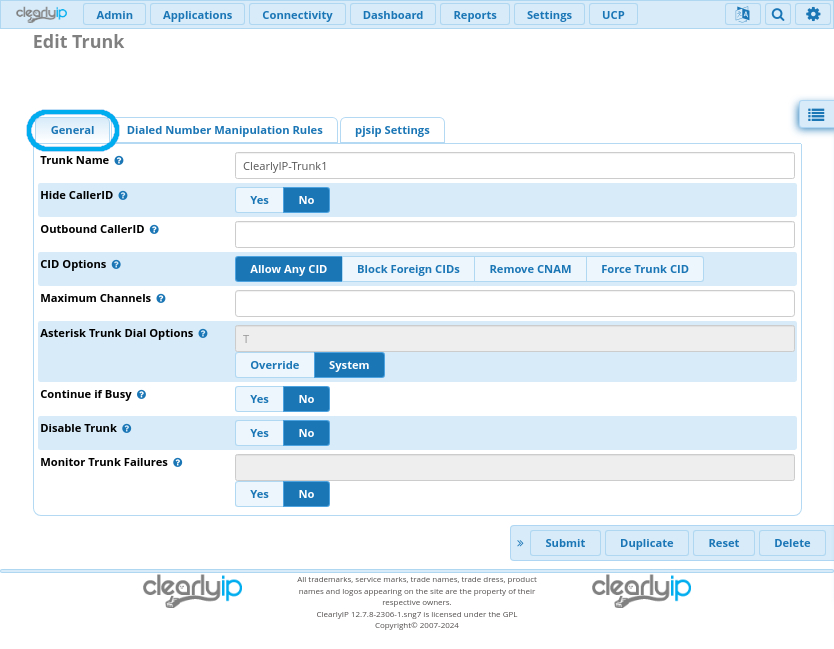
On the General tab.
Set the Trunk name (ex. ClearlyIP-Trunk1), this is the descriptive name for the Trunks.
Set the Outbound Caller ID. This will be the default Caller ID for any Calls going out this Trunk.
Optional: Set maximum channels.
If you have concurrency bursting enabled on your ClearlyIP Trunks you can leave this blank or set it to the absolute maximum calls you think would be reasonable for your environment.
If you are not using concurrency bursting, you can set this to match your number of Call Paths. That will enable calls to fail to other Trunks/Carriers if you have them.
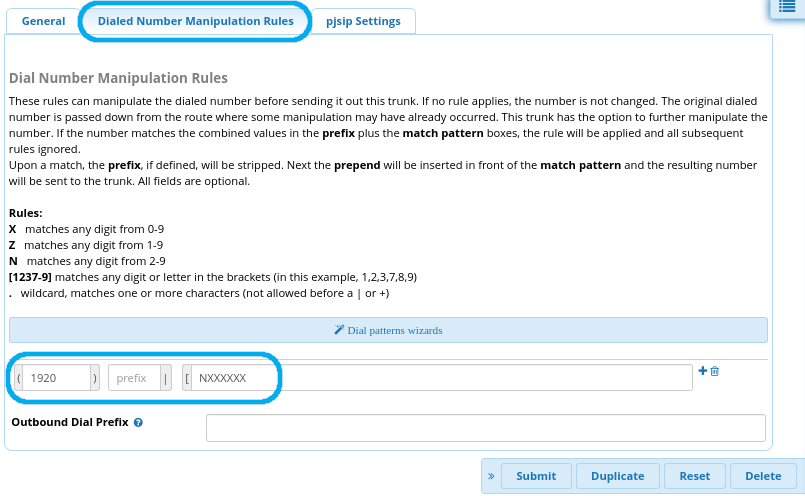
On the "Dialed Number Manipulation Rules" tab, set a Prepend of 1 for NXXNXXXXXX
If you want to enable 7 Digit Dialing you would do so by adding a second Dial Pattern of Prepend=1NPA and Match Pattern=NXXXXXX where NPA is the local area code for the PBX
On the "General" tab of the "pjsip Settings" tab you will need to set:
Set the SIP Server to be first one listed under Registrations found on your Dashboard in the Clearly IP Trunking Store. Note: When you setup the Secondary Registration your will use the second server listed.
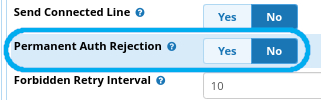
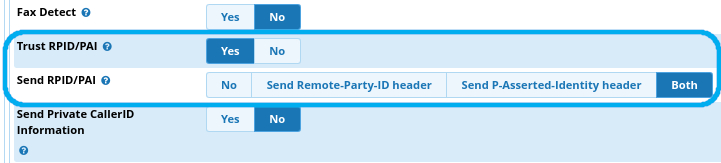
On the "Advanced" tab of the "pjsip Settings" tab you will need to set:
Set "Permanent Auth Rejection" to No
Set "Trust RPID/PAI" to Yes
And Set "Send RPID/PAI" to Both
To create the Secondary Registration it is the same process, but set the SIP Server in step 6.e to the second server listed under Registrations found on your Dashboard in the Clearly IP Trunking Store.
Be sure to Submit your changes in the bottom right and after the page reloads Apply Config in the top right to save and apply your Changes. and
 Uploading ....

 and
and