For Calls to be routed into or out from the ComXchange over a Configured Trunk the Inbound and Outbound routing must be set up in their respective Modules. Inbound phone calls are routed to a destination on the PBX when incoming dialed digits over a trunk match a rule in the Inbound Routes telling the ComXchange which destination should receive the call. Internally placed calls to the ComXchange will also match dialed digits to rules that tell the ComXchange where to send the call, whether it is an internal destination or if it matches a rule in the Outbound Routes to send a call out a trunk. Inbound Routing
A telephone carrier will direct calls to a PBX based on a telephone number. The ComXchange must know what to do with this number. When a call comes into the ComXchange it will provide information about the telephone number dialed. This is known as a Direct Inward Dial or DID, and the Caller ID or CID from whom the call originated. There can be many DID's routed by the carrier to the same PBX and the Inbound rules will be used to direct the calls to the desired destination in the PBX whether it is an extension, a ring group, an IVR (Auto Attendant), or any other destination that is selectable in the destination field of the inbound rule.
To view, edit, or create Inbound routes navigate to:
Core Configuration > Inbound Routes
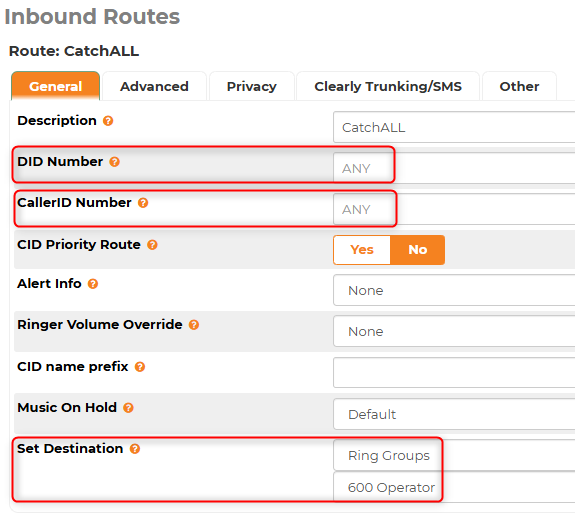
Default CatchALL Rule
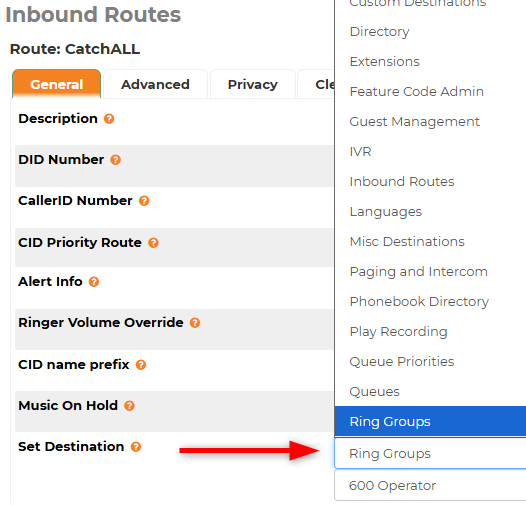
In the Inbound Routes Module there will be a preconfigured default rule named CatchALL. This rule is set to Allow any call sent over the trunk with any "DID" and any "CallerID" to be sent to the destination of a predefined Ring Group number 600 named Operator. Essentially any call that comes in over a trunk will automatically use this route unless Inbound Routes with Specified DID's are created. The destination for the catchall route can be changed by editing the rule and choosing a new destination.
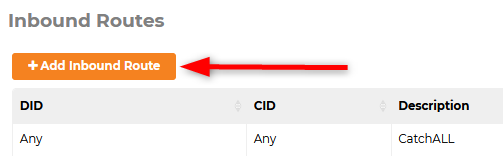
Adding Inbound Routes (DID Mappings)
To specify calls from a specific number to be sent to a specific destination you will need to add a new Inbound Route. When calls come in the ComXchange will try to match any inbound routes with specific information in the DID Number or CallerID number (not often used) before sending calls to the CatchALL
In the Inbound Routes Module Click on +Add Inbound Route
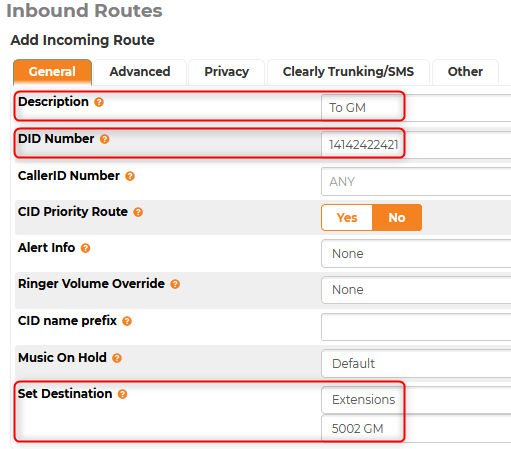
- Enter a Description.
- Enter the incoming DID number just as it is sent over the trunk.
- You can verify the number dialed using the CDR Module - Reports > CDR Reports.
- Choose your Destination in the Drop down for the Set Destination field.
- You can set the Inbound route to anything that is available as a destination in the phone system including destinations like an Extension, an IVR (Auto Attendant), a Call Flow Control (Day/Night mode), a Time Condition for time based routing, and even to a guest room if needed for a suite etc that might have their own DID.
If you are Using Clearly Trunking, there is a Number Listings tab that is integrated into the Inbound Routes module and can be used to create the the inbound routes for the numbers associated with the trunking location. For more information see the inbound routes section of setting up Clearly Trunking here:
Clearly Trunking module.
Outbound Routes
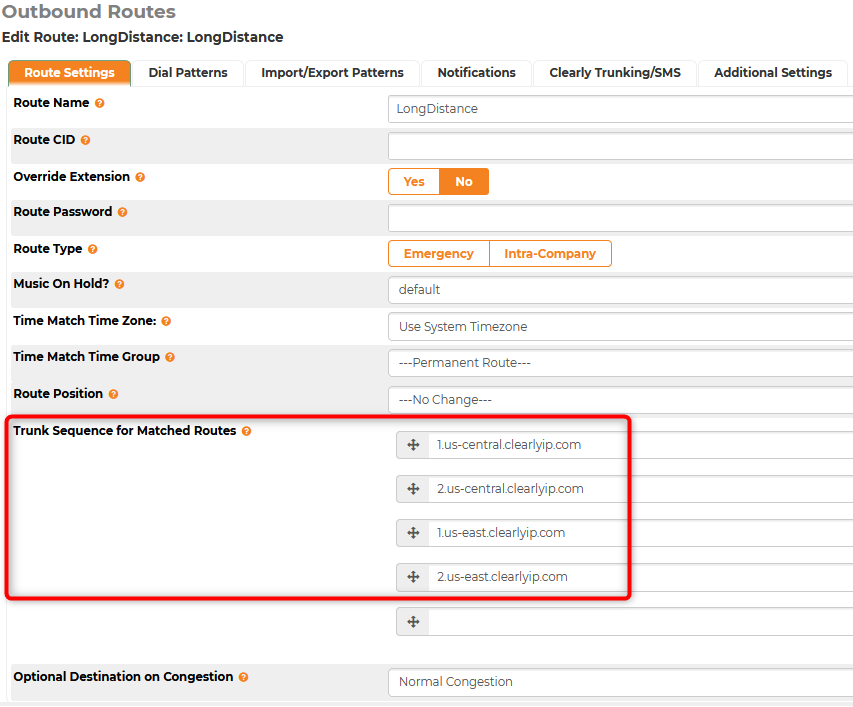
The ComXchange has predefined outbound routes set up by default. These are preset for outbound dialing, however you will still need to go through the routes to make sure there is a trunk associated with the route and that the dial patterns are as you want them. The routes are broken up into different types of dialing so that routes can be handled differently if the needed. For instance if the hotel does not want anyone to be able to dial international, You can remove any trunks in the route settings and set the Optional Destination on Congestion to go to Normal congestion. The phone system will try each route from top down to match a pattern for the route so position in the list does matter and you will want your Emergency Route to be the top route in the list. 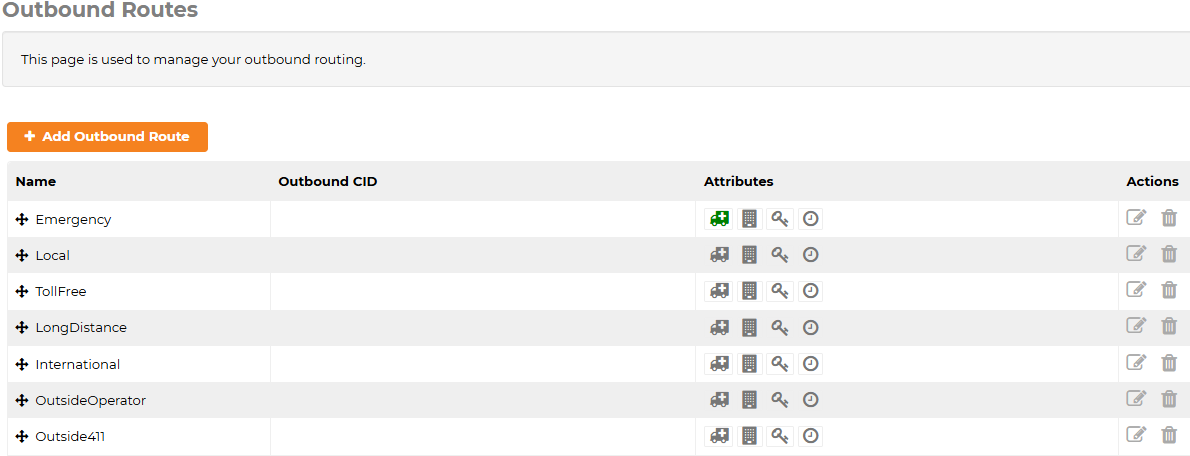
You can click on the edit action icon on the right to see the different options of the route including the associated trunks and dial patterns. Including the Trunk Sequence and Dial patterns and whether or not it is a designated "Emergency Route". You can also create new routes if needed to server different purposes.
Navigate to Core Configuration > Outbound Routes.
- Click on the Edit the edit action icon for the route you want to look at
- Route Settings Tab
- Verify the Trunk Sequence for Matched routes has the trunks you want to use, and they are in the sequence you want the phone system to try them in.
- If you have multiple trunks you can choose to make them all available for the route to use in case the first one is unable to complete a call it will keep trying each in sequence.
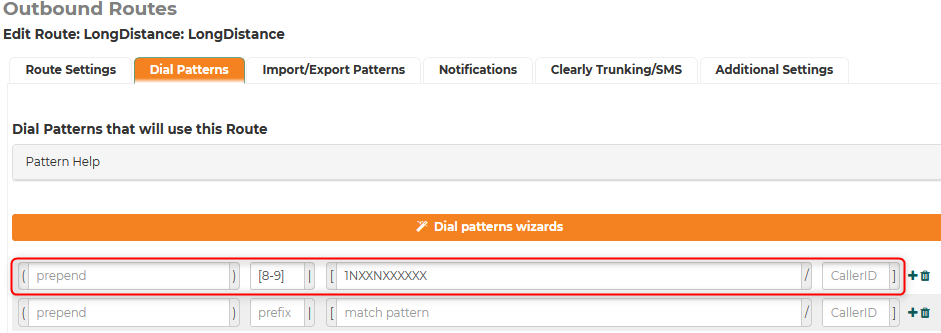
- Dial Patterns tab.
- Verify the pattern for each route is correct for calls you want the route to handle.
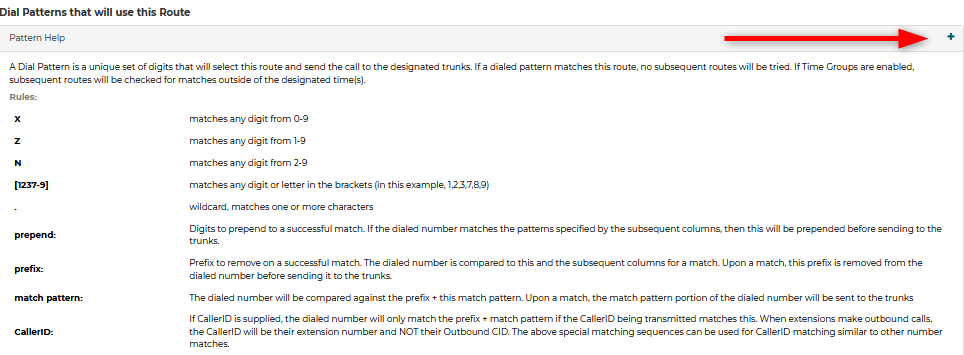
Outbound Route Dial Patterns
The Outbound Route dial patterns are made up of 4 sections
- prepend - Anything in here will be appended to the front of a matched dialed pattern made up of a prefix and matched number the phone system receives
- You can use a prepend to add a 3 digit area code to a 7 digit matched pattern so the phone system will send out a 10 digit number out the trunk to the carrier

- prefix - anything in this section will be removed from the beginning of a matched dialed pattern made up of a prefix and matched number the phone system receives before sending the call out the trunk
- In the example above the route is setup to accept an 8 or a 9 plus a 1 followed by a 10 digit external phone number.
- The 8 or 9 will be stripped, then the 1NXXNXXXXXX digits will be sent out to the trunk to the carrier
- match pattern - This is the actual telephone number pattern that you want to dial.
- Usually this will be a 7 digit local number (NXXXXXX) or a 10 digit number (NXXNXXXXXX).
- A long distance number will be the full 10 digit number with a 1 in the front (1NXXNXXXXXX).
- CallerID - you can use this to restrict calls for this pattern to be matched by only those callerID's that match the pattern in this field
- If you place a 500X in this field only calls from extensions 5000 to 5009 will match the pattern and allow the call to be sent out the trunk to the carrier.

Note: In the Pattern Help section of the Outbound Route there is a +, Click on it to drop down an Explanation of Dial Patterns in more detail.
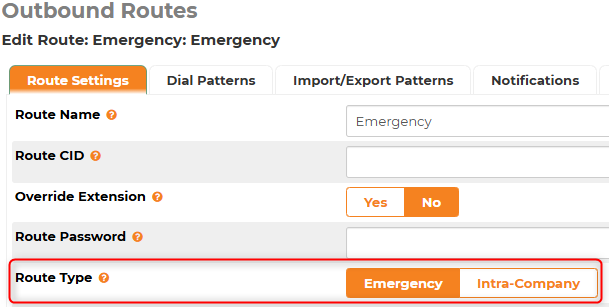
Emergency Route Type
By default there is an emergency Route at the top of the Outbound Routes that will Match calls to 911 and 933. 933 is usually available for testing the emergency location provided to emergency services from a SIP Carrier. If a route is set up with route type set to emergency type, the emergency vehicle icon will show green in the Outbound routes list.

If you are using the Clearly Trunking Module there will be two additional Outbound routes configured automatically on creating that are set to use the Clearly IP trunks. It is up to the reseller whether or not to use these Outbound routes or not verses the predefined Outbound routes. There will be one outbound route set up as an emergency route and the other a route to match all other outbound dial patterns, both of these routes will have the Clearly IP trunks already chosen and dial patters created. The difference with the Emergency route is that it has a Route CallerID that is tied to the Trunking location's dispatchable location for E911 purposes. For this reason I would consider using this route and not the predefined emergency route when using ClearlyIP Trunks. You may need to add 933 into the Dial Patterns for testing purposes. The second route added is Clearly Trunking Outbound, this route includes all dial patterns that you will find in the predefined outbound routes of Local, Long Distance, and Toll Free as well as a few others however is is not set to use the [8-9] prefix as discussed above. The prefix can always be added to each of these dial patters as well. For more information about the Clearly Trunking outbound routes you can see the Clearly Trunking Wiki here:
Clearly Trunking module.

 Uploading ....