The Hotel Dashboard is a Web GUI (Graphical User Interface) that a Hotel's Staff can use to manage the ComXchange Hospitality Features from a web browser. This includes managing wakeup calls, manually configure a room's calling permissions and check in status, set a room in DND (Do Not Disturb) and manage some voicemail options. From the Hotel Dashboard you can also access reports for emergency notification calls, and wakeup call reports.Accessing the dashboard
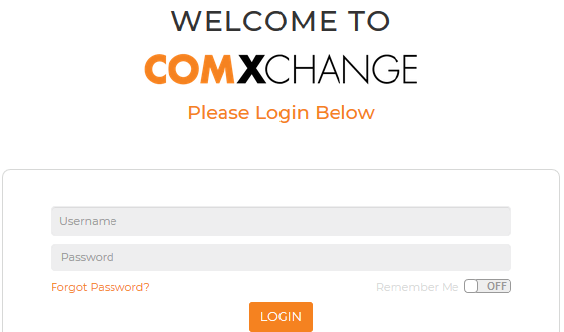
You can access the Hotel Dashboard login with the credentials and web page provided by your ComXchange partner.
Once logged in you will see the Hotel and Call Accounting (if available) Modules. Click on the Launch Hotel Dashboard button.
Hotel Dashboard
Rooms List Page
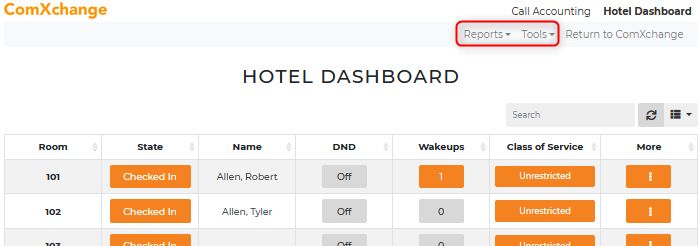
The Rooms List page is the Landing page for the Hotel Dashboard. It is a list of the guest rooms and an overview of some of the guest management settings on the phone system for that room. Some of these settings would be set by a Property Management System (PMS) interface if there is one connected, such as the State of the room, the Guest Name, and Class of Service. On this page you can View and make changes to the rooms Check In / Check Out State, DND status, pending wakeup calls, and the rooms calling permissions. You can also click on the More button to manage other options.
Manual Room Check In
The State column shows the current state of the room in the ComXchange database. If a room is checked out it is typically set to a Class of service of Restricted and the voicemail box is disabled. You can click on the State button to set a Room to Checked In or Checked Out. Once Checked in you can make changes to the other options for the room. This can be very helpful when troubleshooting guest extension issues and need to check in an unoccupied room.
- Search for the Room and click on the "Checked Out" State button.
- Fill in the Guest Name (Optional).
- Click on the Confirm button.
Guest Room Options While in the "Checked In" State
Note: If the ComXchange interfaces with a PMS changes that can be made from the PMS should be made there as they will overwrite any local changes made from the Hotel Dashboard. Making Changes in the Hotel Dashboard only affects how the phone system views the room. This doesn't affect the PMS in any way. This feature is useful if the PMS is offline or not communicating with the phone system as the PMS should automatically change the "State of", the "Guest Name" and the "Class of Service" of the room.
- Once the room is "Checked In" you can activate features such as DND, Wakeup Calls, and the Class of Service from the Rooms List page.
- Options such as Move Guest, set VIP status, set a Front Desk Message, and change the language for the guest room can be found and set in the Room Information page
DND
A checked in room can have the extension associated with it placed in or out of Do Not Disturb (DND) by clicking on the button in the DND column. The Current state of DND will be displayed. DND will be set to off when the room is checked out. When a room has DND set to On calls will go directly to voicemail. To activate the DND feature for a guest room you can click on the DND button from the Rooms List page, or toggle DND On and Off from the Room Information page.
DND from the Room List Page
- Search for the Room and Click on the DND button displaying "On" or "Off".
- Click on the Confirm button.
Wakeups
To set or delete a Wakeup call you can click on the room's Wakeups button will allow you to set a wakeup call or delete one if one is currently set. You can also set or delete a wakeup call from the Room Information page. If you would like to set multiple wakeup calls for the same time you can use the
Bulk Wakeup Tool discussed below.
Set a Wakeup Call from the Rooms List Page.
- Click on the Wakeup button for the room.
- Click on +Set Wakeup Call.
- Choose the time Hour and Minutes.
- Chose AM or PM.
- Choose if the wakeup call should reoccur until checkout.
- Click on Set Wakeup.
Delete a Wakeup Call from the Room List page.
- Click on the wakeup button for the room.
- Click on the trash can icon under the Delete Column for the wakeup call to be deleted.
- Click on Yes to confirm.
Class of Service
The current Class of service or call permissions for the room is displayed in the Class of Service Column. You can make changes to the Class of service either from the Room List page or from the Room Information Page. By Default this setting is Restricted for a room that is checked out and Unrestricted for a room that is checked in.
Change the class of service from the Room List Page.
- Click on the Room's Class of Service Button.
- Click on the Restriction you want the Class of Service Changed to.
More (Room Information Page)
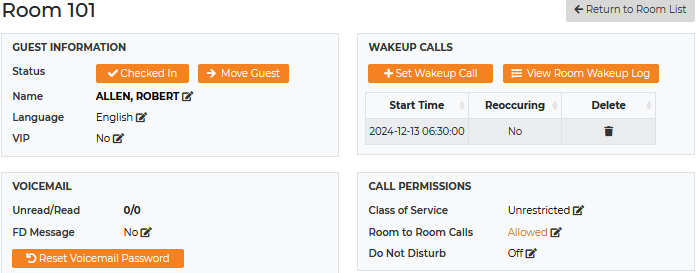
Click on the More button to navigate to the room's details page. In the details page you can edit other options not found on the Rooms List page such as changing the name, setting a front desk message or changing the language for the room prompts (needs the language packages to be ordered and installed. Below is what can be configured or viewed in the room's details page
Room Information - Guest Information
- Check a room in or out.
- Move the room.
- Edit the name. (This will be then name that shows up on the room's CallerID for internal calls)
- Set a room to VIP.
Room Information - Wakeup Calls
- Set a wakeup call.
- Delete a wakeup call.
- view the wakeup call log for the room.
Room Information - Voicemail
- See numbers of voicemails.
- Set a Front Desk Message.
- Sends a voicemail message to the room that asks the guest to call the front desk which turns the MWI on.
- This must be turned off for the FD message to be cleared and the MWI light turned off.
Room Information - Call Permissions
- Change the Class of Service.
- Allow or restrict Room to Room calls for the room.
- Set the DND on or off for the room.
Move Guest
You can move a guest to a different room from the perspective of the phone system in the Room Information page.
- Click into the More Button for the room you want to move to enter the Room Information page.
- Click on the Move Guest button in the Guest Information area.
- Enter the new room number then click on the Confirm button.
Change a Hotel Guest Name
You can change the Guest Name associated with a room from the perspective of the phone system in the Room Information page.
- Click into the More Button for the room you want to change the name for to enter the Room Information page.
- Click on the Edit icon next to the Name field.
- Enter the new name.
- Click on the Confirm button.
Enable/Disable VIP for a Hotel Guest
You can enable or disable a VIP status for a guest room in the Room Information page.
- Click into the More Button for the room you want to change the VIP Status for to enter the Room Information page.
- Click on the Edit icon next to the VIP status field.
- Click on the Confirm button to change the VIP status.
Front Desk Message
The Front Desk (FD) Message option can be used to turn a room phone's MWI light on. When the voicemail button is pressed a message stating that there is a message at the front desk for the occupant is automatically played. This can be enabled by toggling the FD Message to "Yes". Once contacted by the Guest the the front desk associate must toggle the FD Message to "No" to disable it.
- Click into the More Button for the room you want to turn the FD Message on for to open the Room Information page.
- Click on the Edit icon next to the FD Message field.
- Click on the Confirm button to enable/disable the FD Message option.
Allow or Block Room to Room Calls
You can Allow or Block room to room calls for a specific room by setting the option for Room to Room calls in the room information page to Block or Allow
- Click into the More Button for the room you want to change the status for room to room calls to enter the Room Information page
- Click on the Edit icon next to the Room to Room Calling field
- Click on the Confirm button to change the status
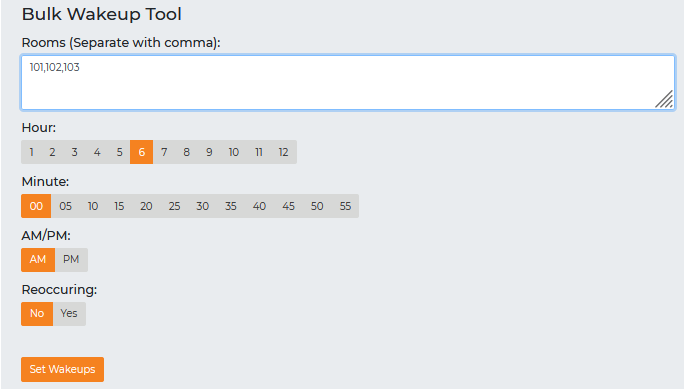
Bulk Wakeup Tool
The Bulk Wakeup tool Can be used to set wakeup calls for multiple rooms for the same time. The rooms must be entered as a comma separated list such as (101,102,103)
- Click on the tools tab on the upper right of the Hotel dashboard to navigate to the Bulk Wakeup tool.
- Enter a comma separated list of rooms.
- Set the Hour and Minute.
- Choose AM or PM.
- Set Reoccurring to No or Yes.
- Click on Set Wakeups.
Reports
There are reports that can be accessed through the Hotel Dashboard. Click on the Reports tab in the Upper Right Hand Corner and choose from one of the Report options
Emergency Notification Calls Report
In the event that a guest dialed 911 or any number that is designated as an emergency number in the phone system a notification call will be initiated from the phone system to a designated phone or group of phones that an emergency call has been placed and states which room placed the call. This call will ring the front desk until the call is answered and acknowledged by pressing "1" to accept the call. The Emergency Notification Call Report will track emergency notification calls that have been placed by the phone system and includes the room number that placed the call, the time, and whether the notification call was acknowledged.
Wakeup Calls Pending
This report provides a list of the Wakeup calls that are queued in the phone system providing room number, start time, and whether it is a reoccurring wakeup call or not.
Wakeup Calls - Completed
This report provides a list of Wakeup calls that were initiated by the phone system providing the room number, the start time of the wakeup call, and whether the call was answered or not.
Wakeup Failure Notification Calls
If the failed wakeup call notification feature is enabled and a wakeup call is not answered a notification call will be sent to a designated extension or ring group like the front desk to inform them that a wakeup call went unanswered. This notification must be acknowledge by pressing "1". This report provides a list of the notification calls initiated by the phone system, the room it was for, nd whether it was acknowledged or not.
 Uploading ....