The ComXchange Hotel Console Phone Apps are Text Based User Interface (TUI) applications that allow a Hotel's staff to manage the ComXchange Hospitality features from all models of the CIP VoIP phones and some models of Yealink, and Snom phones. The Wakeup application allows a user to manage wakeup calls for guests and the Guest Management application allows hotel staff to manually a configure a room's calling permissions, check-in status, DND (Do Not Disturb) status, etc. The below screen shots were taken using a CIP 280 model, however the other models will have very similar looks and functionality whether using physical buttons or a touch screen. See more information about adding the apps to a phone in the Staff Phone section of the Endpoint Configuration page.
Guest Wakeup Application
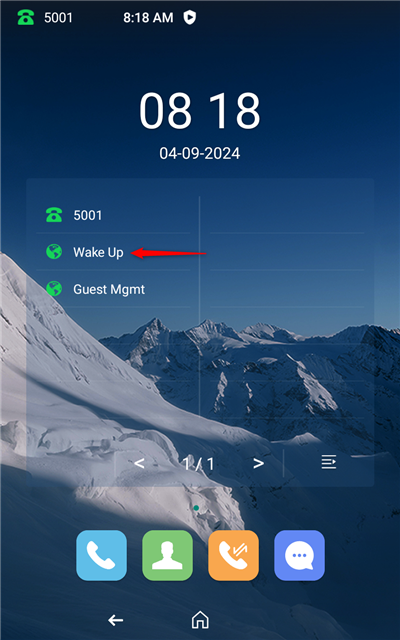
On the Phone look for a key that is labeled Wakeup
Creating a Wakeup Call
1. Push the Wakeup App key
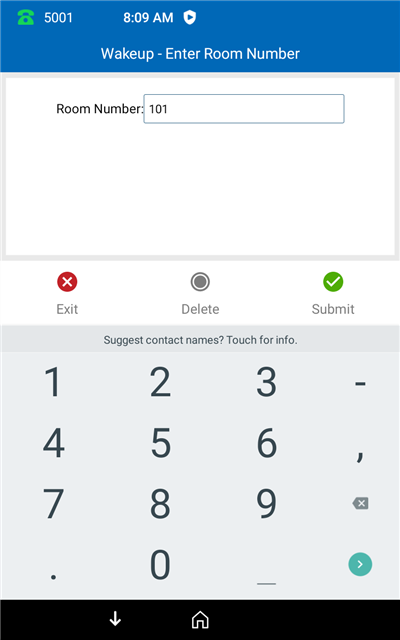
2. Enter a Guest Room Number - press Submit
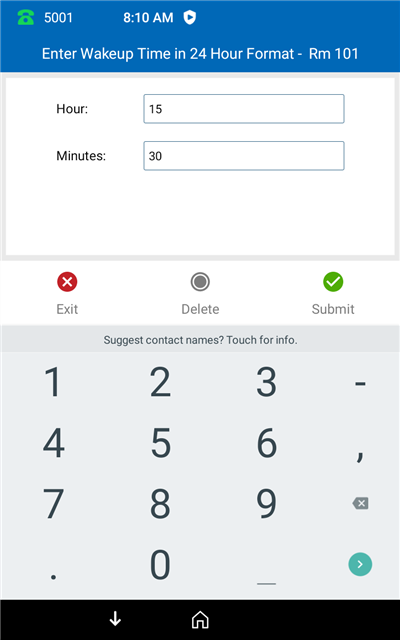
3. Enter a Wakeup Time in 24 Hr format – press Submit
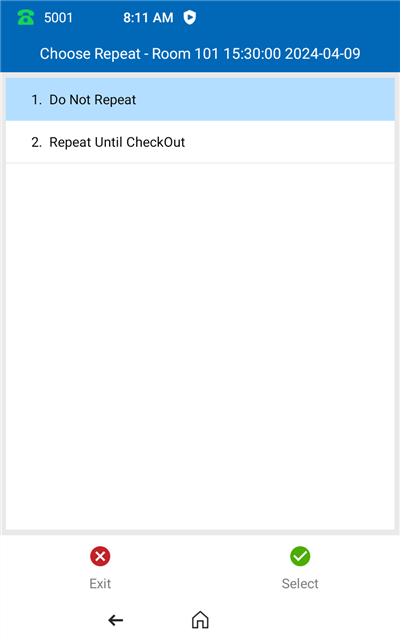
4. Choose to Repeat or Do Not Repeat - press Select
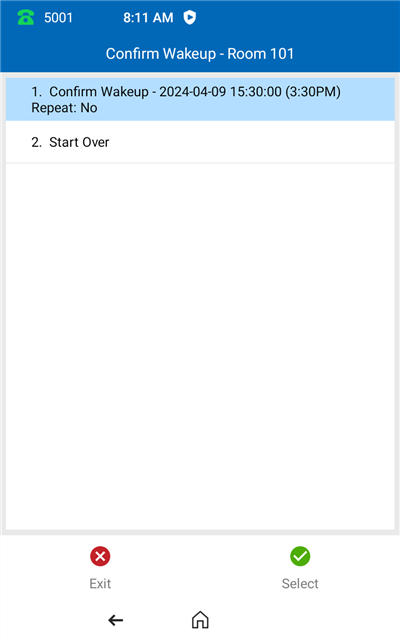
5. Choose Confirm or Start Over – press Select
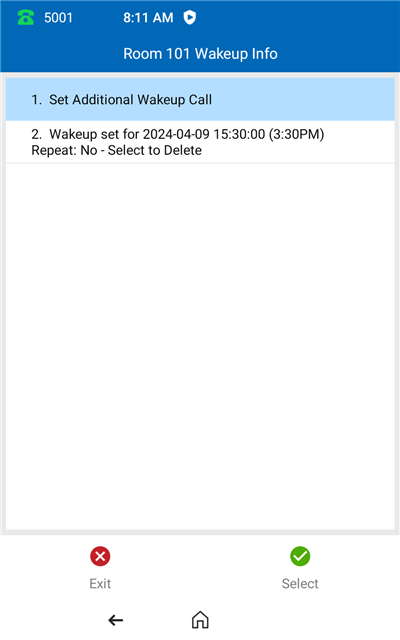
6. Press Select to set Additional wakeup calls or Press the Home button to go the main screen
Cancelling a Wakeup Call
1. Push the Wakeup App key

2. Enter the Guest Room Number – Press the Enter key or Submit
3. Select the Wakeup Call you would like to delete

4. Press Select to delete the wakeup call
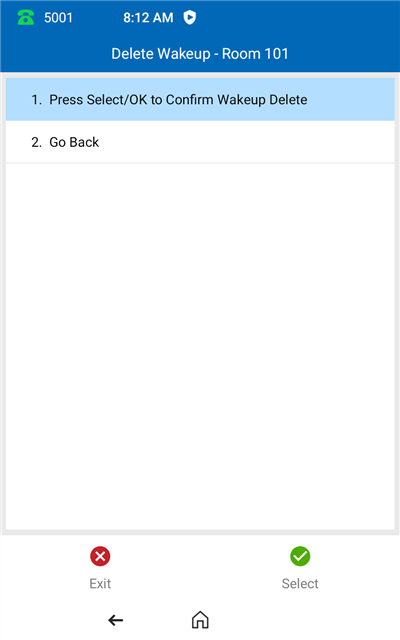
5. Press the Home button to go the main screen
Guest Management Application
On the Phone look for a key that is labeled Guest Management
![]()
Manual Room Check In / Check Out
Room Check In
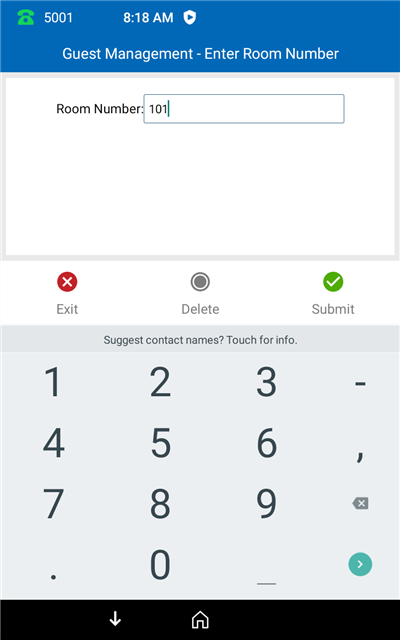
1. Press the Guest Management key
2. Enter a Room Number – Press the Return key or Submit
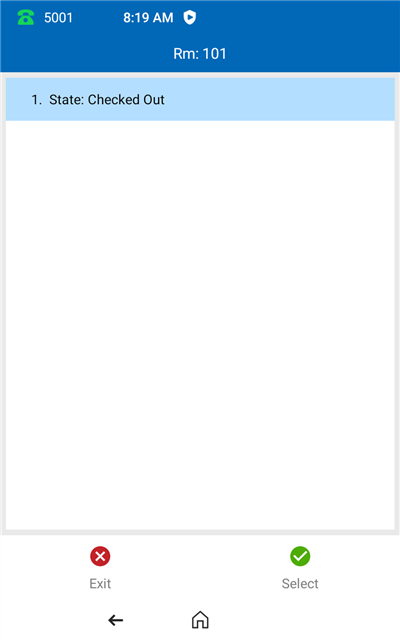
3. Press the Select button to Change the room status
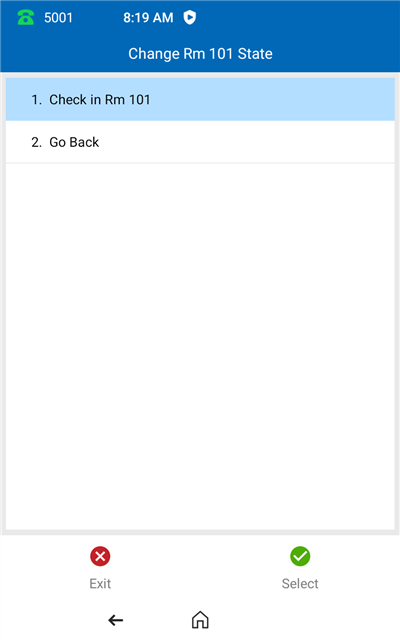
4. Press 1. or Select to Confirm the Check In
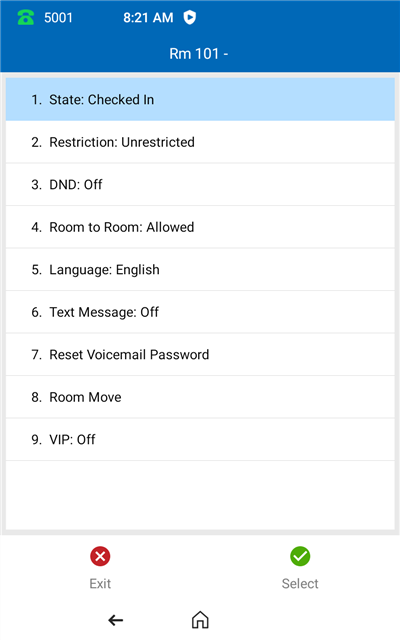
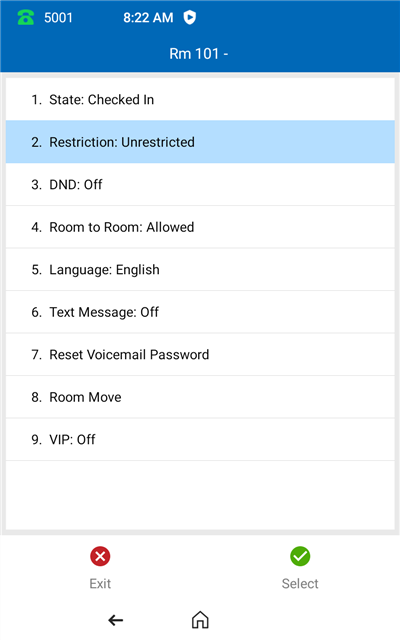
5. Once Checked In the Room is presented with other options
Room Checkout
Press the Guest Management key and enter the room number
Note : the room must be checked in first.
1. Press option 1. and then Select to Change the room status

2. Press option 1. and then Select to Check Out the room
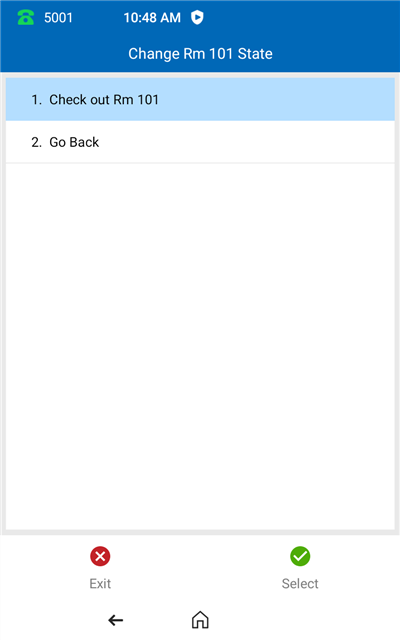
Press the Home button to go to the main screen
Manually Changing Call Restrictions (Class of Service)
Press the Guest Management key and enter the room number needing the permission change
Note: the room must be checked in first
1. Press the Option 2. then Select for the Restriction option
2. Choose a Restriction Level and then Select
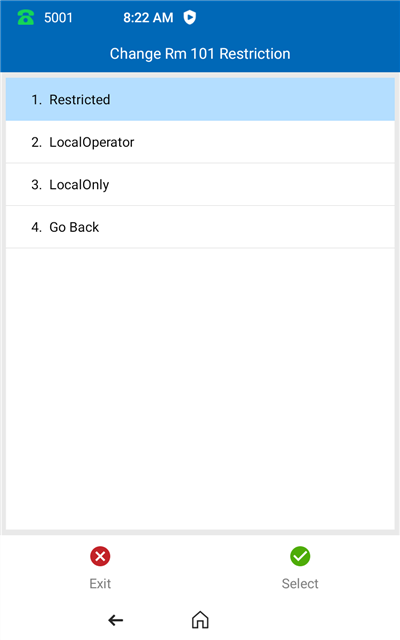
Press the Home button to go to the main menu
Activate DND for Guest Extension
Press the Guest Management key and enter the room number needing the DND On/Off
Note: the room must be checked in first
1. Press option 3. and then Select for DND

2. Choose 1. or Select Turn Do Not Disturb On
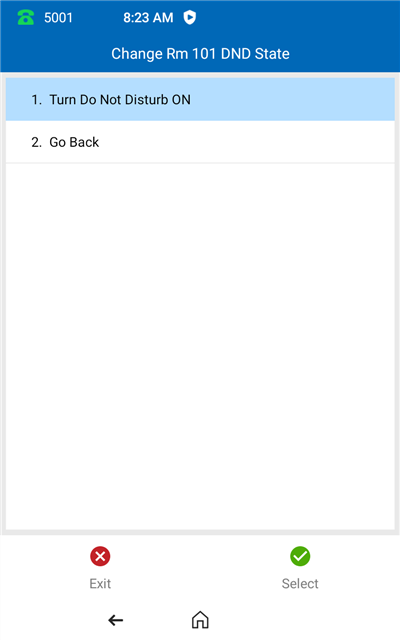
Press the Home button to go to the main menu
Block Room to Room Calling
Press the Guest Management key and enter the room number needing to Block Room to Room Calls
Note: the room must be checked in first
1. Press 4. Room to Room
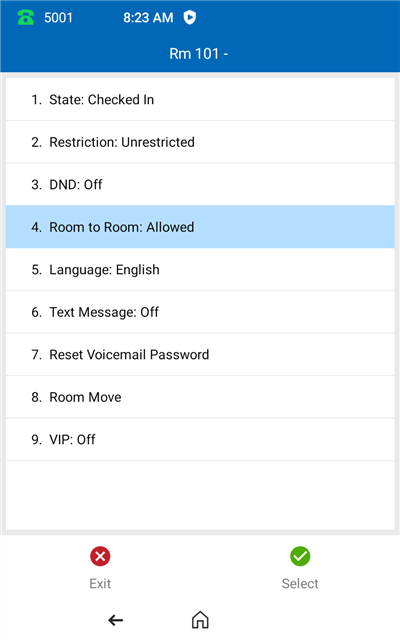
2. Choose 1. Or Select Block Room to Room Calling

Press the Home button to go to the main menu
Change the Guest Features Voice Prompts Language
Press the Guest Management key and enter the room number needing the Language change
Note: the room must be checked in first
1. Press 5. Language
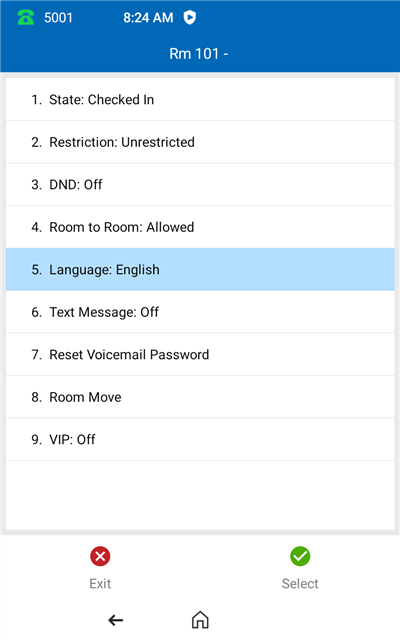
2. Choose the Language to be used for example: Spanish
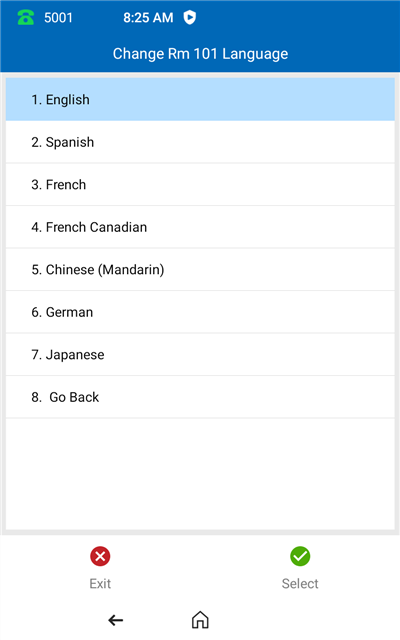
Press the Home button to go to the main menu
Text Message
A Guest Text Message turns on the MWI (Message Waiting Indicator) Lamp on a guest phone and will play a
prompt that there is a message at the front desk for the Guest when checking the voicemail. To turn this feature
On or Off press the Guest Management key and enter the room number needing the permission change
Note: the room must be checked in first. When activated the MWI Lamp will stay lit until this is deactivated
1. Press 6. Text Message

2. Press 1. and then Select to Turn Text Message On to enable the MWI and prompt
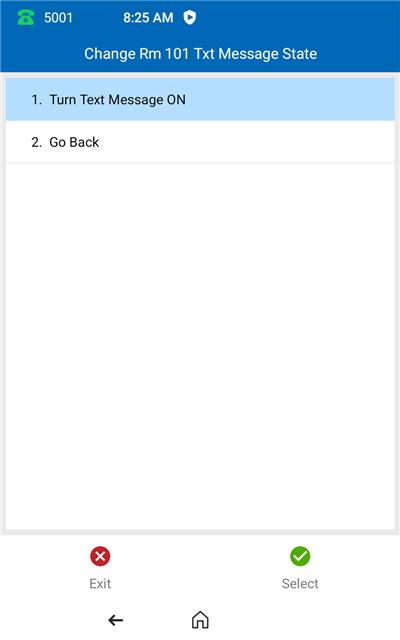
Press the Home button to go to the main menu
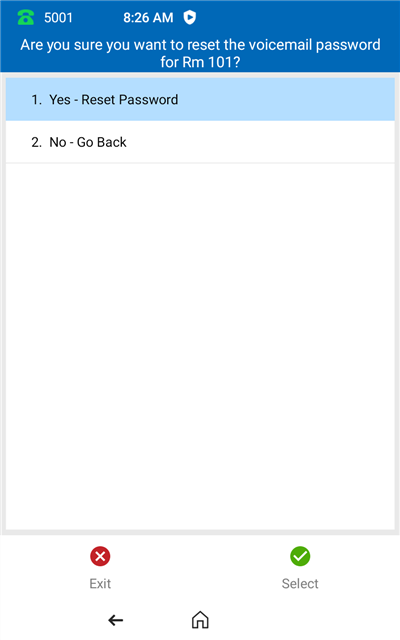
Reset Voicemail Password
Press the Guest Management key and enter the room number needing the voicemail password reset
Note: the room must be checked in first
1. Press option 7. and then Select for Reset Voicemail Password

2. Select Yes - Reset PasswordPress the Home button to go to the main menu
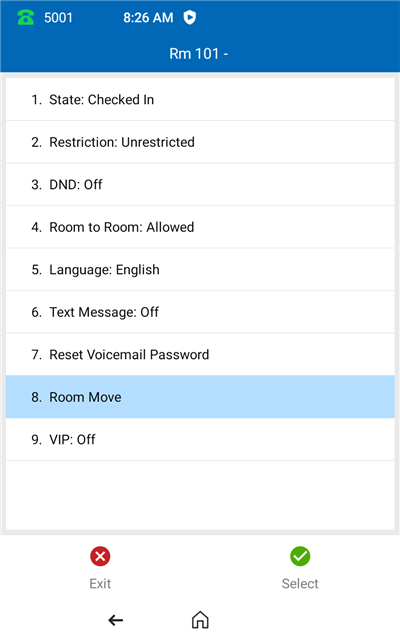
Room Move
Press the Guest Management key and enter the room number needing the permission change
Note: the room must be checked in first
1. Press option 8. and then Select for Room Move
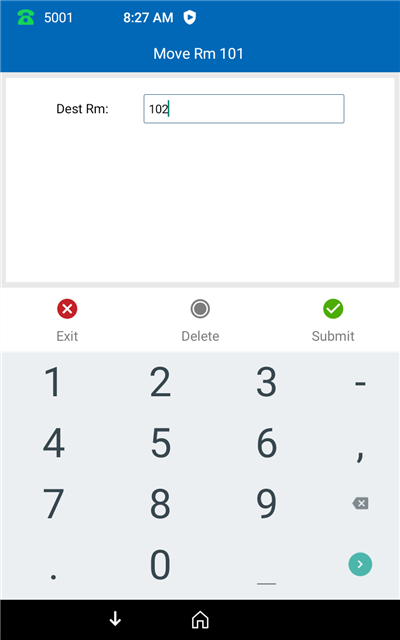
2. Enter the room number to move to – Press Submit
3. Select Yes – Move Room
Press the Home button to access the Main Screen
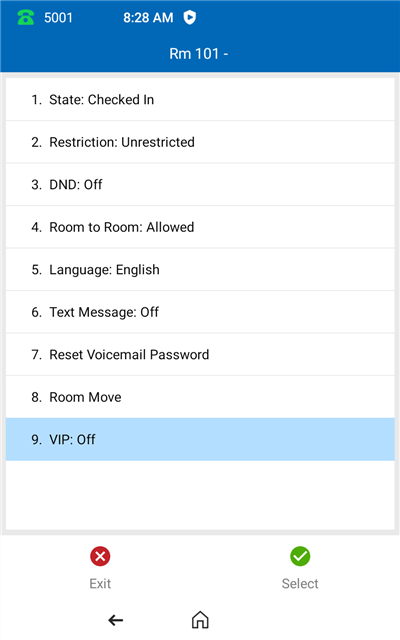
VIP
Press the Guest Management key and enter the room number needing the VIP status
Note: the room must be checked in first
1. Press option 9. and then Select for VIP
2. Press Select for VIP on

Press the Home button to go to the main menu
 Uploading ....