Overview
The following sections will discuss logging in to the web gui and looking over some of the default system information such as networking, licensing, and site information.
Logging In
Premise Server
- The Premise server has a default address and subnet prefix of 192.168.101.2/24.
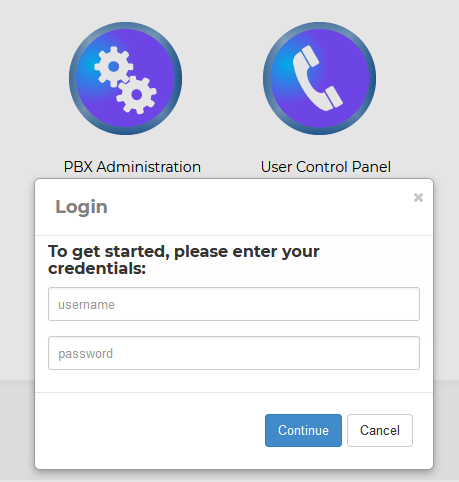
- To log in open a web browser and enter http://192.168.101.2.
- Please enter a support ticket for the default username and password if unknown. Please include the site ID (CXP-xxxx) so your support status can be verified. Support ticket
- Cloud server
- Login information for logging into a cloud system will be emailed when the server is provisioned.
- Each hosted ComXchange will have a fully qualified domain name (FQDN) that can used to get to the web gui from a browser.
- The login will be using https and port 8443 to access the web gui. https://<FQDN>:8443
- The login name will be dealer and the password will be unique to each hosted ComXchange.
- Once you navigate to the web gui, choose PBX Administration and log in with your username and password.
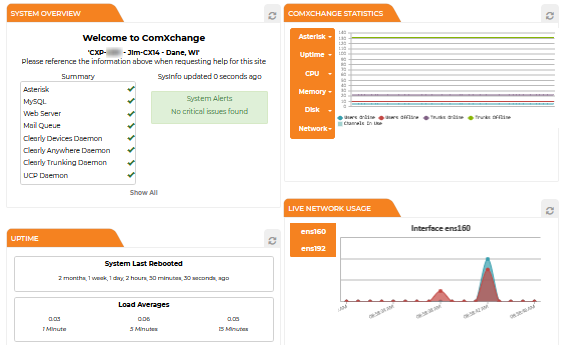
- After logging in the landing page will have the sites Property ID and site information in the upper left as well as some system information such as uptime, server statistics and any system alerts if present.
License and Site Information
The license and site information will be prepopulated and should not be changed unless discussed with Clearly IP ComXchange support. When requesting support you will need to provide the site ID of the Comxchange.
License
- Navigate to Admin > License.
- You can see the license application status, license information and usage counts.
- On the bottom of the page is the License ID
- Site Info
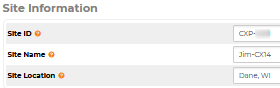
- Navigate to Admin > Site Info.
- Here you will find the Site ID, name and location.
System Settings
The System Settings module is where server administration information can be found such as DHCP, DNS, Network Interfaces, NTP, etc Many of these will have default settings that can be left alone and used for a premise based systems.
DHCP
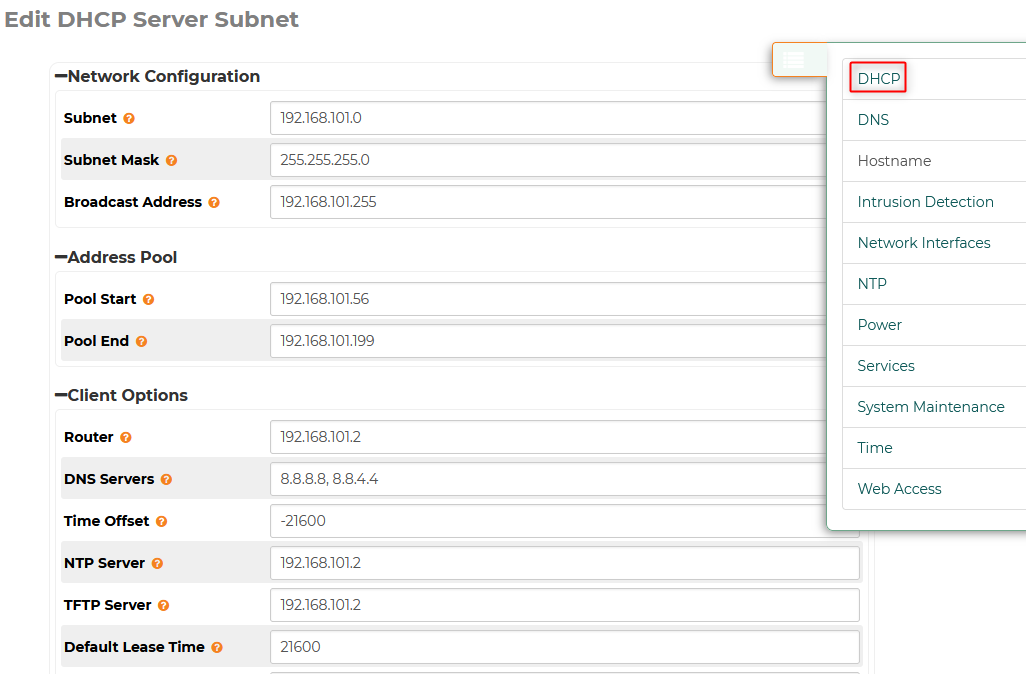
Navigate to Admin > System Settings - DHCP
- There is a DHCP server running on the ComXchange's LAN network. This will hand out IP addresses as well as option 66 for autoprovisioning phones and gateways.
- Note: The pool of addresses can be expanded however, if you are using Openvpn the ip adresses of 192.168.101.201 - 192.168.101.210 are reserved for open VPN clients. If the DCHP scope is changed, the addresses assigned by OpenVPN must usually also change. Edit the bridge addresses in the /etc/opnvpn/server.conf config file to do this. Please see the instructions here for changing the OpenVPN client range
- Below are the default settings of the ComXchange dhcp scope:
DNS
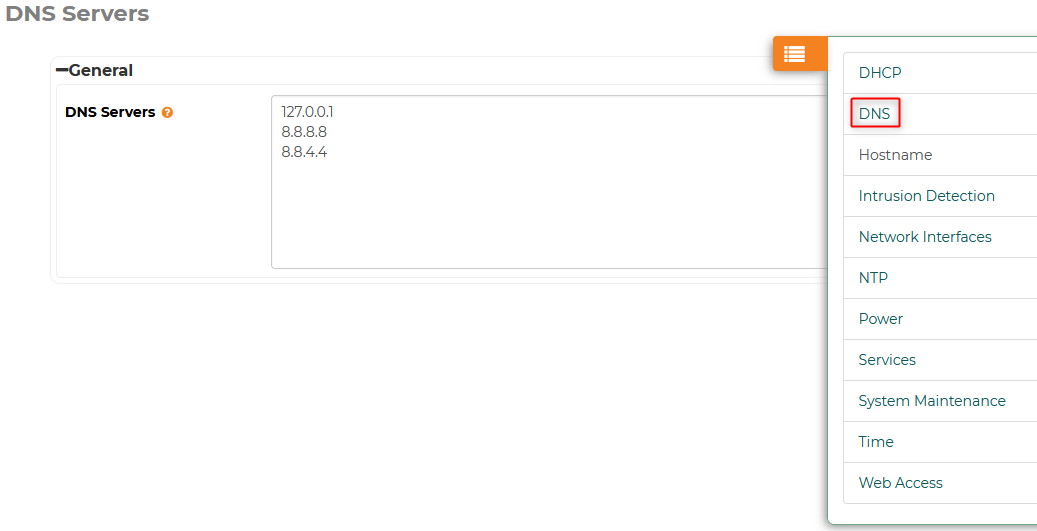
Navigate to Admin > System Settings - DNS
- The ComXchange is running a DNS server and uses google DNS servers. You can enter your preferred DNS servers here but leave the 127.0.0.1 address as is.
Hostname
- Navigate to Admin > System Settings - Hostname
- Premise servers.
- The hostname is a generic name localhost.localdomain by default you can change this name to a preferred name and reboot if desired.
- Hosted Systems.
- The hostname for the hosted servers is set to the FQDN of the server and should be left as is.
Intrusion Detection
- Navigate to Admin > System Settings - Intrusion Detection
- Intrusion Detection will ban IP addresses when devices try to access or register to the ComXchange.
- The default settings are set up to ban a device if they fail a login or registration 5 times within 600 seconds and if it reached that threshold ban the IP address for 1800 seconds.
- You can add a whitelist for the 192.168.101.0/24 network or a specific IP while you are configuring the phones and gateways so they will not be blocked due to a bad password.
Network interfaces
- The ComXchange uses two separate network interfaces / networks by default. The LAN is used for the local phone traffic and device connectivity and the WAN is setup as a connection to the ISP for SIP trunking over the internet, DNS, NTP, connecting to the hotel dashboard, and remote connectivity using OpenVPN.
- By default anything that connects to the ComXchange LAN network will have no access to the internet.
- Navigate to Admin > System Settings - Network interfaces
- LAN Interface
- The LAN interface will either be named eth0 or ens160 depending on the model of the server.
- By default the LAN is setup with an IP address of 192.168.101.2/24
- Changing the LAN IP address
- if you want to change the LAN IP address and network, and or use a single Network interface there are a few things to consider that will need to be addressed some of which will depend on if you are still going to use Open VPN to access the server
- WAN interface
- The WAN interface will either be named eth1 or ens192 depending on the model of the server
- The WAN interface is set up to use dhcp by default. Once you are connected to the server via the LAN network you should be able to see the IP address of the WAN if it receives a dhcp lease or you can set a static IP address.
- Note: If you plug the WAN interface into a network but it doesn't receive an IP address from dhcp the interfaces web page may appear blank. Unplug the WAN connection and refresh the web page. You can then set a a static IP address or troubleshoot why you are not getting an IP
- Default network schema, there is a schema that we suggest when adding gateways and other devices to the network. While this is just a suggested schema, knowing where the gateways and switches, and other devices are on the network can help with troubleshooting more efficiently
| IP Address | Device(s) if installed |
| 192.168.101.1 | Router gateway if using only one Network interface |
| 192.168.101.2 | ComXchange Management IP |
| 192.168.101.5-10 | Ethernet Switches if managed starting at 192.168.101.5 and incrementing if needed |
| 192.168.101.11 | Hypervisor IP address if present |
| 192.168.101.20 | T1/PRI gateway if present |
| 192.168.101.21-192.168.101.50 | Analog Station (FXS) gateways start at 192.168.101.21 and increment as needed |
| 192.168.101.56 - 192.168.101.200 | IP phones or other devices via dhcp |
| 192.168.101.201 - 192.168.101.210 | VPN Addresses for remote connectivity |
NTP
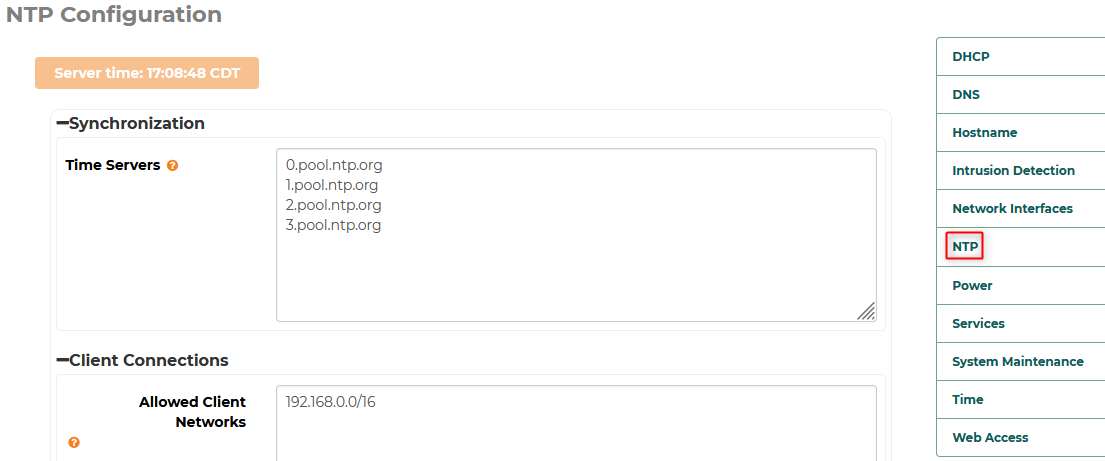
- Navigate to Admin > System Settings - NTP
- The Network Time Protocol is a service running on the ComXchange to server time to the devices that are connected to the LAN. By default the ComXchange is set to synchronize its time with pool.ntp.org. The Comxchange, in turn, provides NTP services to client devices.
- There is also an allowed client networks that covers 192.168.0.0/16 by default. You can add other networks or change the scope to fit your network setup
Power Options
- Navigate to Admin > System Settings - Power
- The Power Options is where you can power off, reboot the server, or restart all of the ComXchange services at the same time.
- This will restart Asterisk and the ComXchange specific services.
Services
- Navigate to Admin > System Settings - Services
- You can use the Services tab to start, stop, enable and disable the ComXchange and some of the system services.
System Maintenance
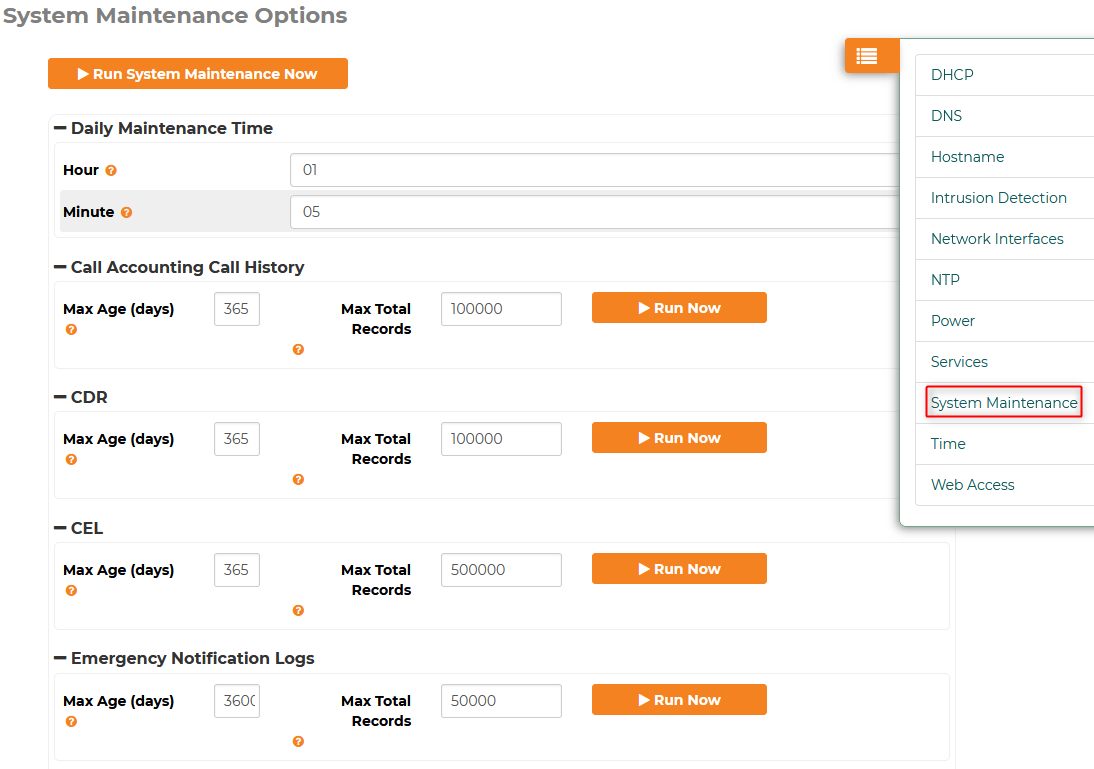
- Navigate to Admin > System Settings - System Maintenance
- On this page you can interact with the database and choose how many records to keep based on Max Age and Max Records
Time
- Navigate to Admin > System Settings - Time
- This page is where you can verify the time zone and server time.
- Note: the time zone is set to the property time zone when the server is provisioned and is tied to the license status, if the time zone needs to be changed please contact ClearlyIP support so the time zone can be updated in the Clearly IP database at the same time. If the database is not updated the license will become inactive until the time zone again matches.
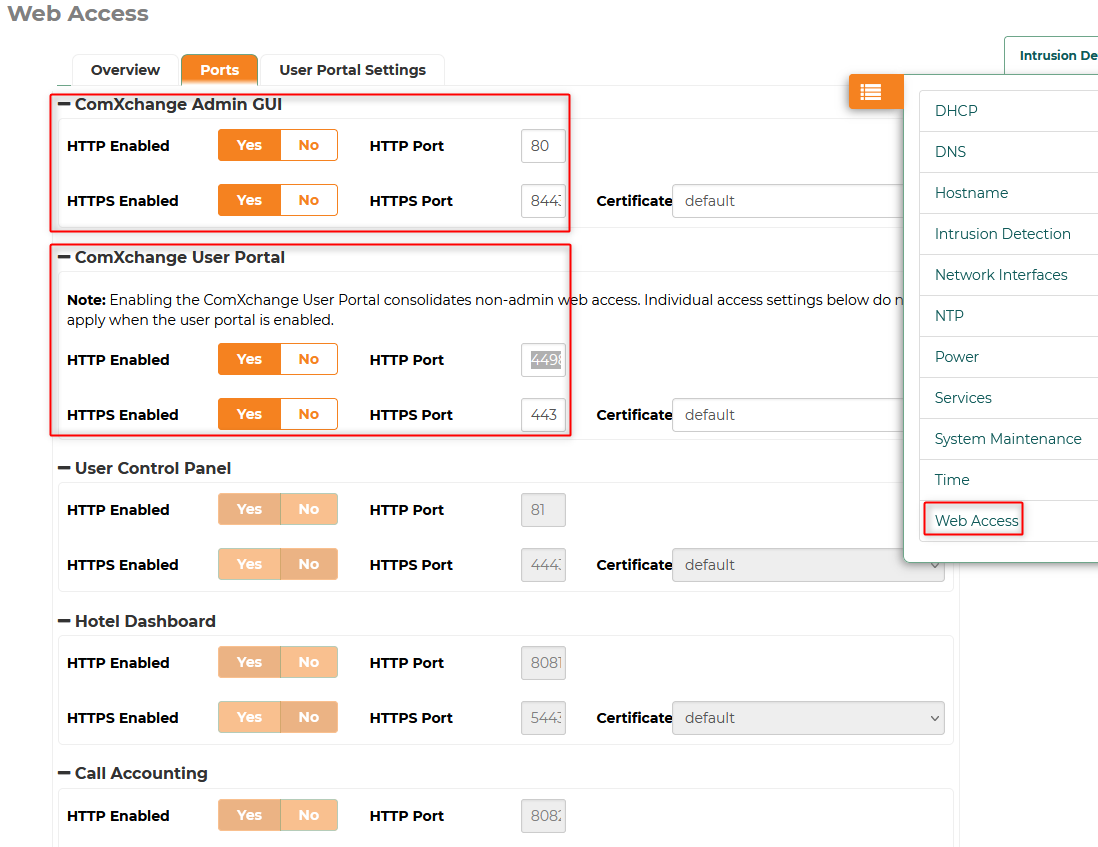
Web Access
- Navigate to Admin > System Settings - Web Access
- The Web Access Page allows you to set the ComXchange Admin GUI and the ComXchange User Portal ports.
- By default the Admin GUI is running on port 80 but can be changed to 8443 by enabling HTTPS access.
- It is suggested you test the access to HTTPS before disabling HTTP.
- By default the ComXchange User Portal uses separate ports for each services such as UCP, the Hotel Dashboard, and Call Accounting.
- When you enable HTTP on port 4498 or HTTPS using port 443 a proxy is enabled that allows connection to all of these through a single port.
- You will notice that when HTTP or HTTPS is enabled the individual ports are grayed out and you will not be able to reach the pages using the individual ports any longer.
- Each enabled web-facing port may cause a vulnerability scan to trigger now or in the future. Enable only those ports that are absolutely necessary for a particular installation. Consider restricting ports to a limited number of specific source IP addresses too, to limit exposure. Contact Clearly IP support to assist with planning these strategies if needed.
SIP Settings
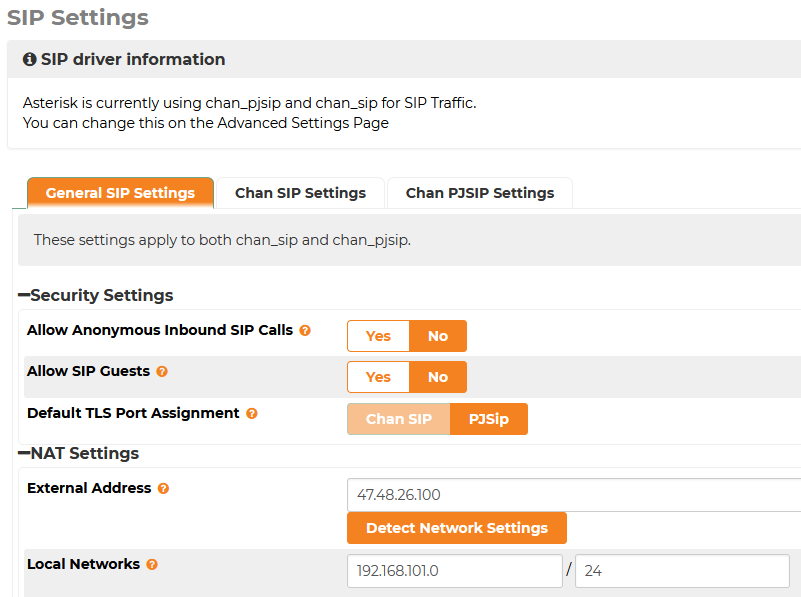
- Navigate to Admin > SIP Settings
- Sip Settings is where you will enter the SIP ports and IP addresses associated with your voice traffic.
- External IP address of the server for NAT purposes and used in the SIP headers for Contact information.
- Local Networks is the Network addresses you will expect to have local voice traffic coming from to the ComXchange.
- The 192.168.101.0/24 is set as a Local Network by default
- Without the LAN address here you may experience one-way audio on the local network
- Chan SIP and PJSIP are currently enabled by default,
- Chan SIP uses port 5060 by default
- PJSIP uses port 5160 by default
- if you do not see PJSIP it can be enabled in the Admin > Advanced Settings
- Navigate to Admin > Advanced Settings
- Search for "SIP Channel Driver"
- Set it to both in the drop down and reboot the server
 Uploading ....