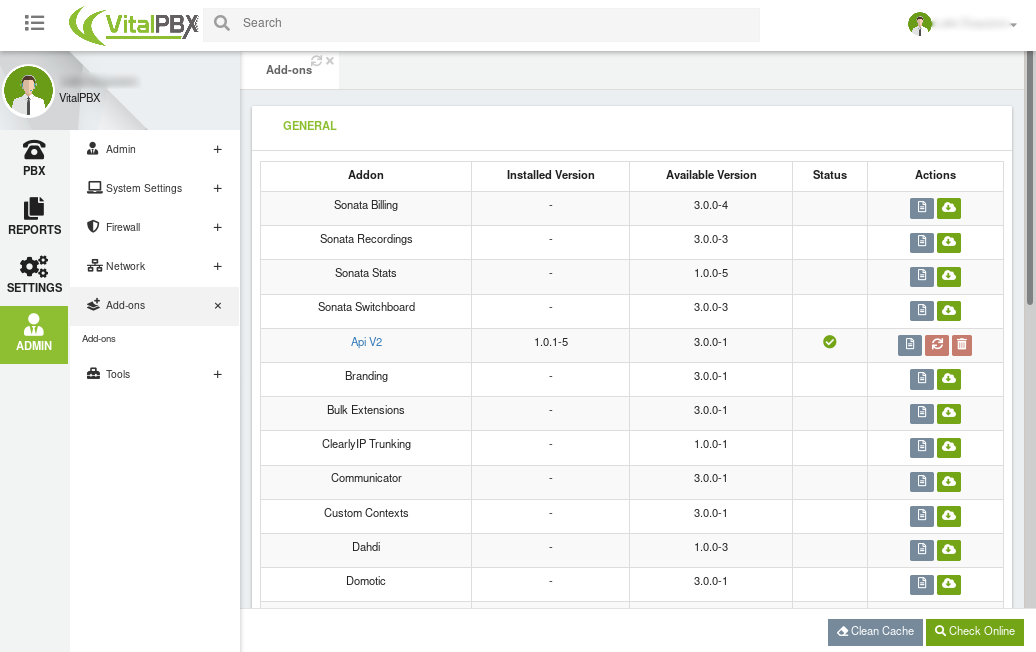
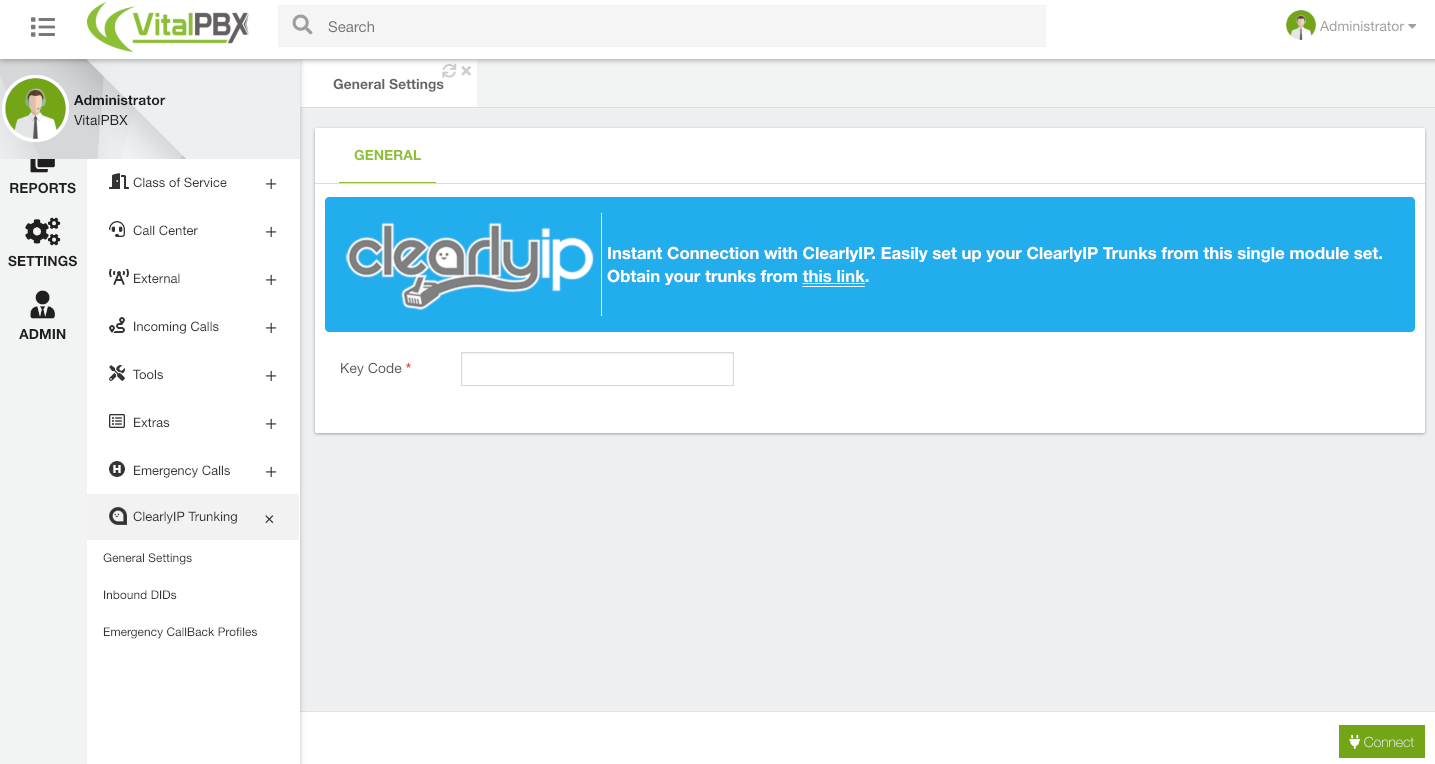
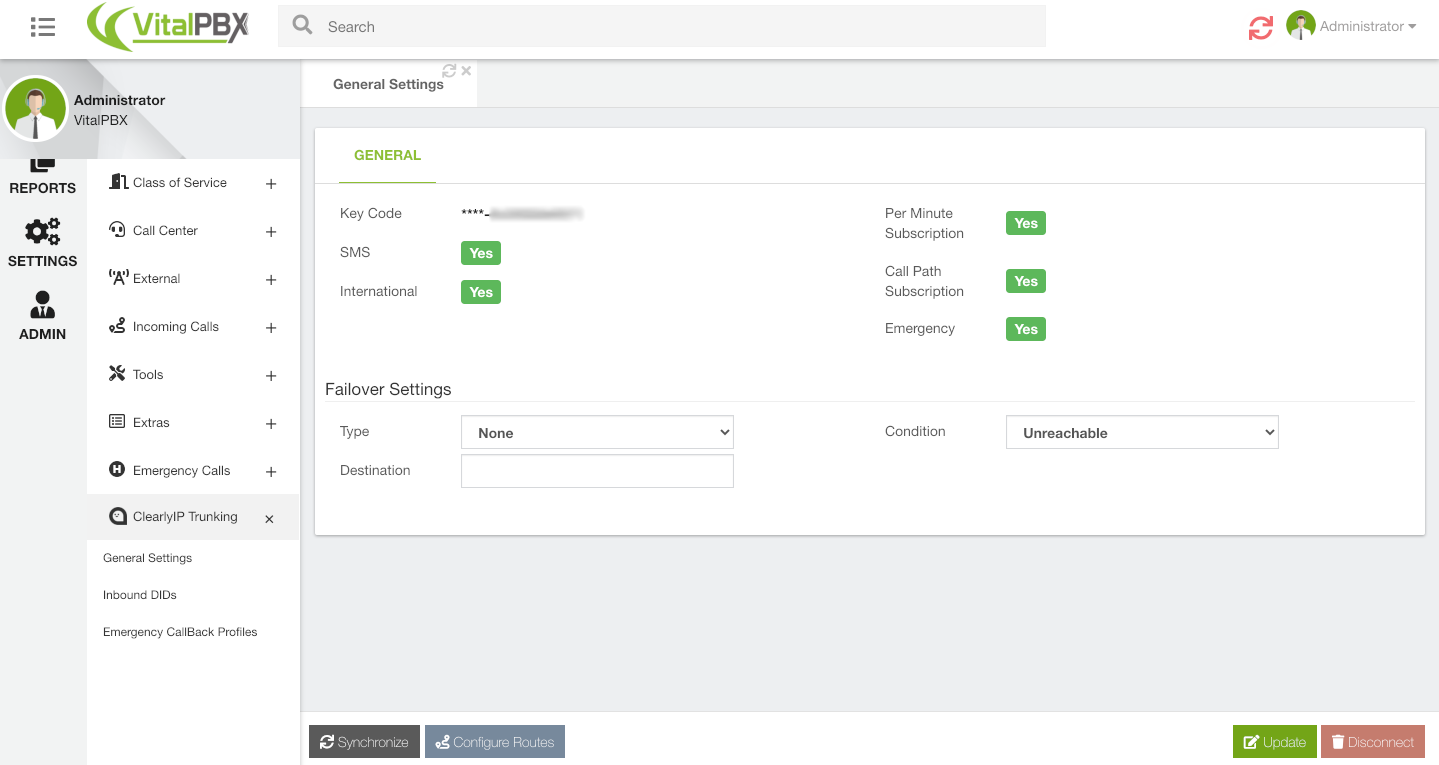
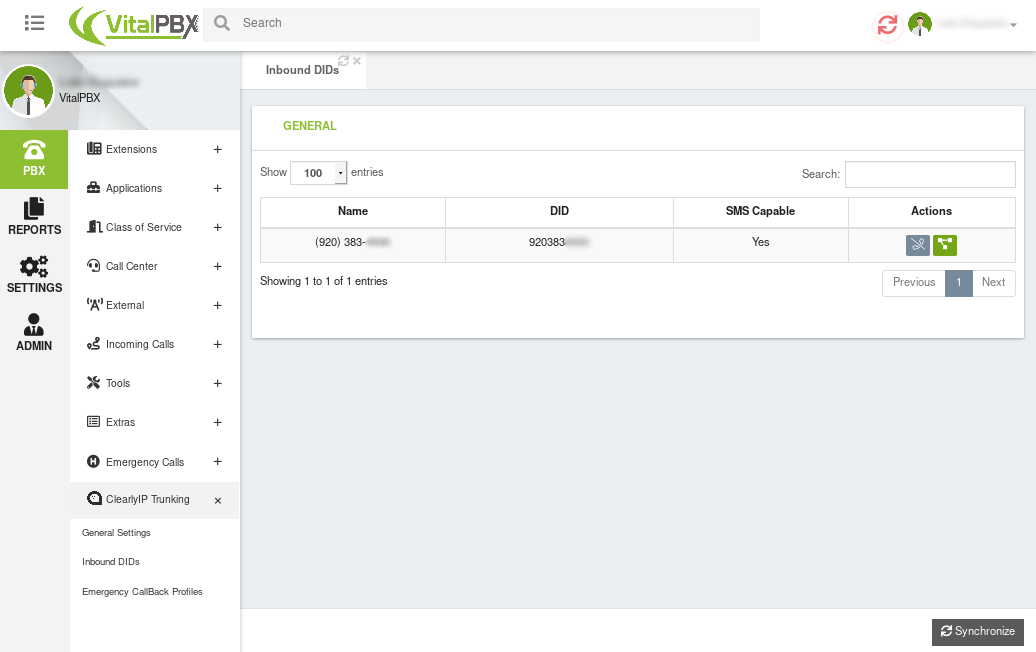
ClearlyIP Trunk Setup on VitalPBX - Add On Method (Recommended)
Configure e911
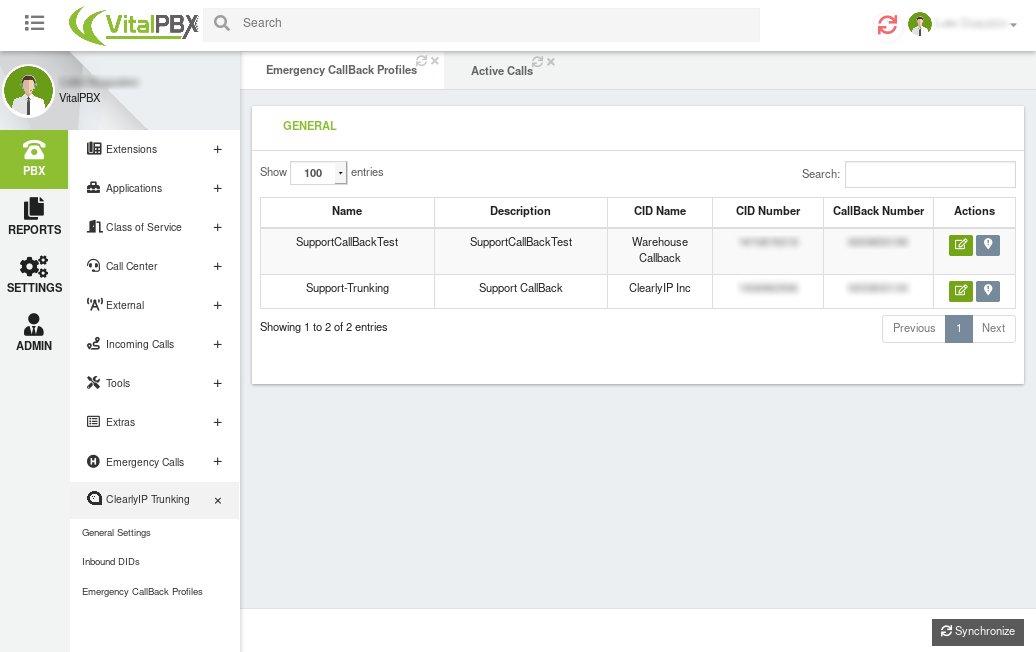
Edit Emergency CallBack Profiles
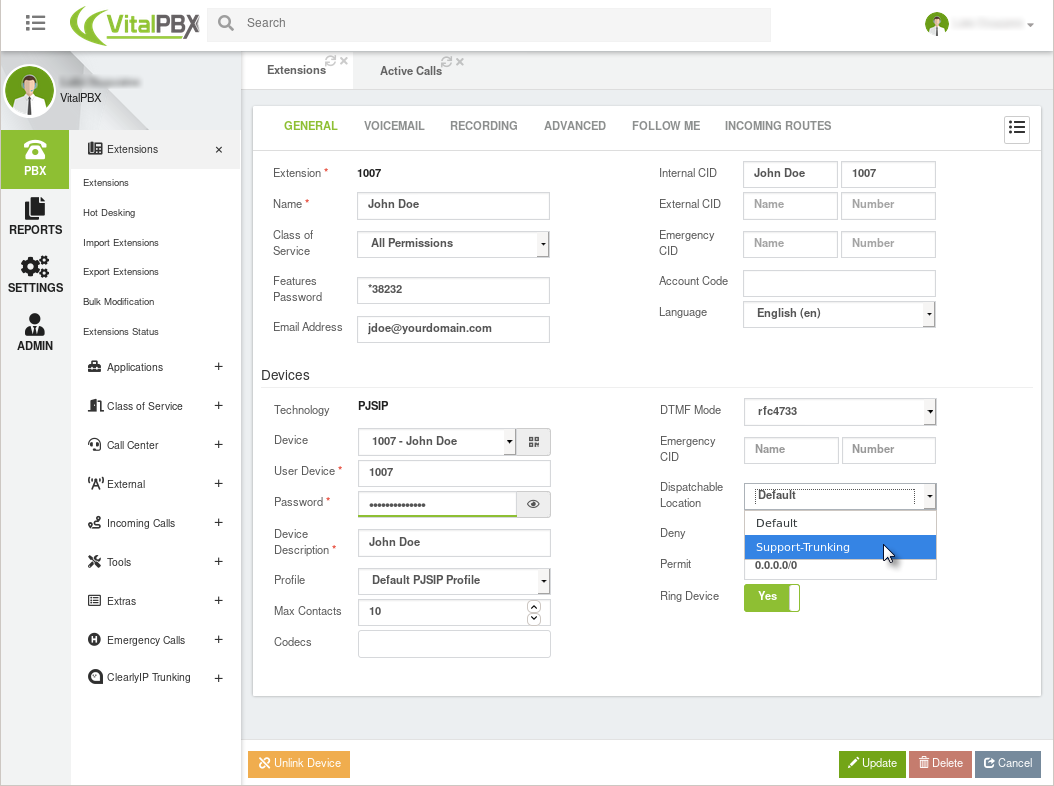
- Navigate to PBX --> Extensions --> Extensions --> Select the Menu Button
 in the top right
- Select the Extension you want to Set the Emergency Dispatchable Location on.
- Select the Desired Dispatchable Location from the drop down, and Click Update and Reload to save you Changes.
ClearlyIP Trunk Setup on VitalPBX - Manual Method
Finding ClearlyIP Trunk Info
- All the SIP Credentials and account information you'll need can be found on your ClearlyIP Trunking Dashboard
- See the Locating ClearlyIP Trunk Details Wiki for details on finding that info.
Create Trunks
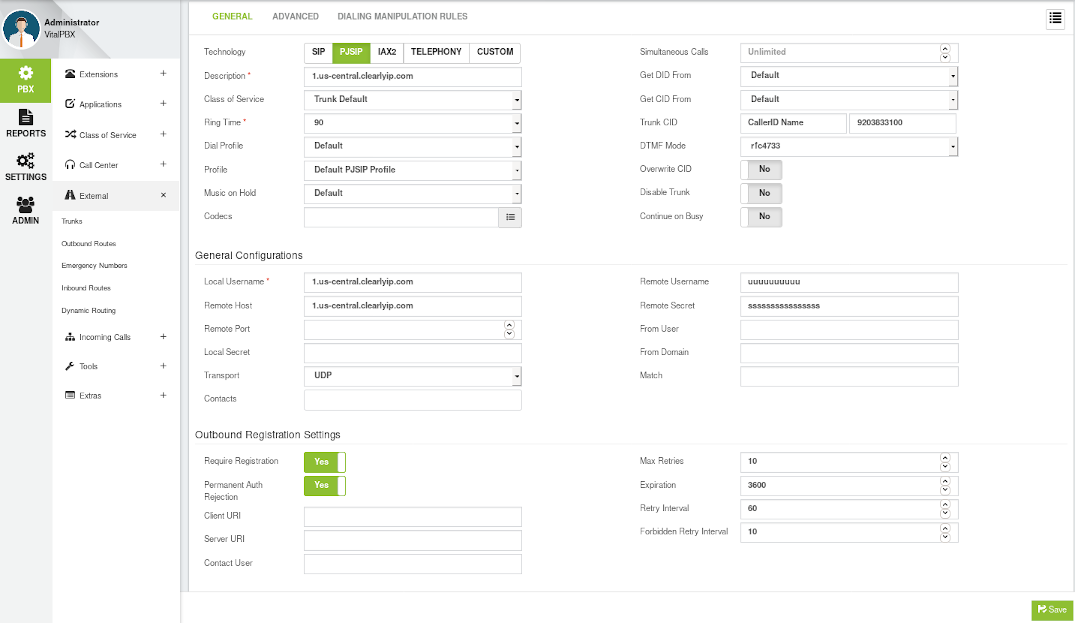
- Navigate to PBX --> External --> Trunks
- Select PJSIP
- Set Description, Local Username, and Remote Host to be the first Trunk Server's FQDN Address.
- Set the Remote Username to your Clearly Trunk's SIP Username and the Remote Secret to the Clearly Trunks SIP Password.
- Set the Trunk CID to be the your Default CallerID.
- Make sure Require Registration is set to Yes.
- Set Permanent Auth Rejection to No.
- If you wish to use 7 Digit Dialing, you'll need to set a Dialing Manipulation Rule to Prepend your Default Area Code

- Save and Apply your changes
- You can repeat the above steps to create the second trunk registration with the second Trunk Server found on your ClearlyIP Trunking Dashboard
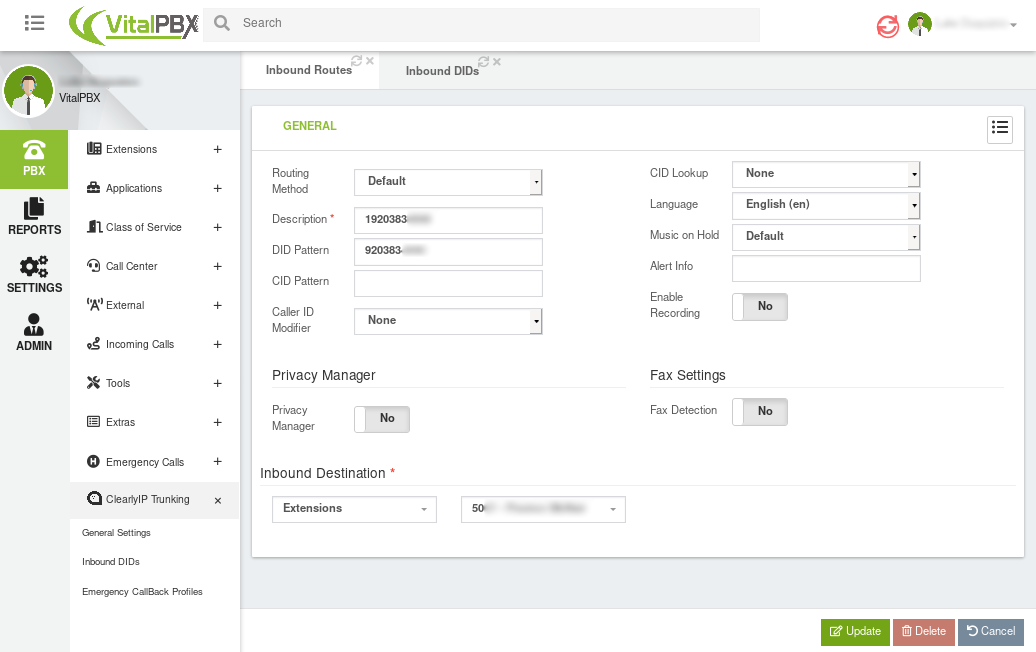
Create Inbound Routes
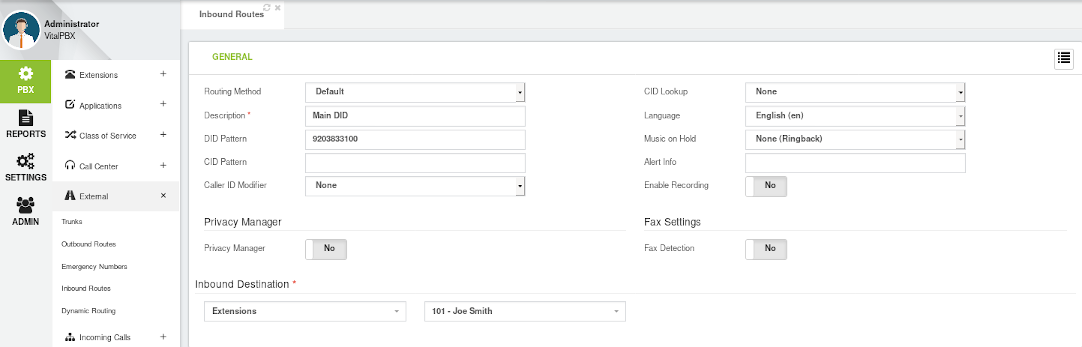
- Navigate to PBX --> External --> Inbound Routes
- Set the Description
- Set the DID Pattern to be your 10 Digit DID from ClearlyIP
- Set the Inbound Destination to be what/where ever you want the Calls Routed to.
- Save and Apply your changes
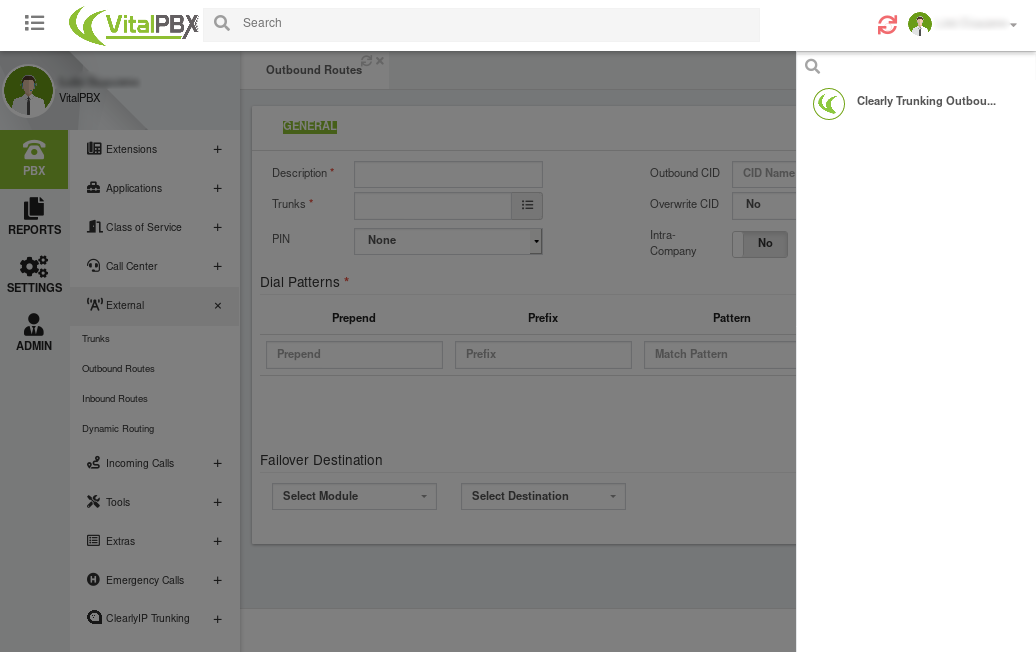
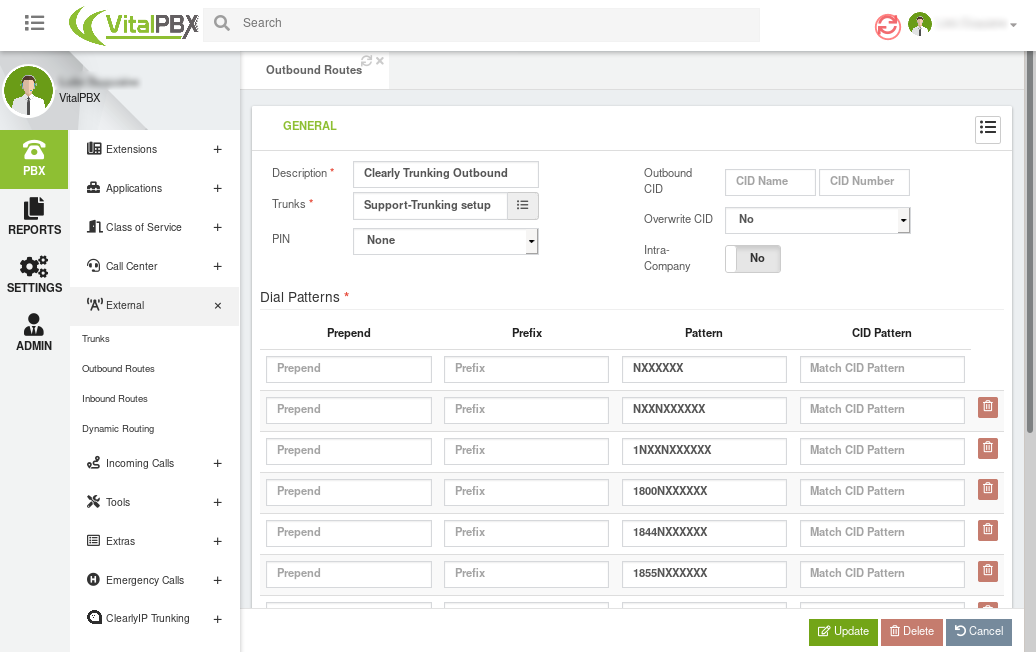
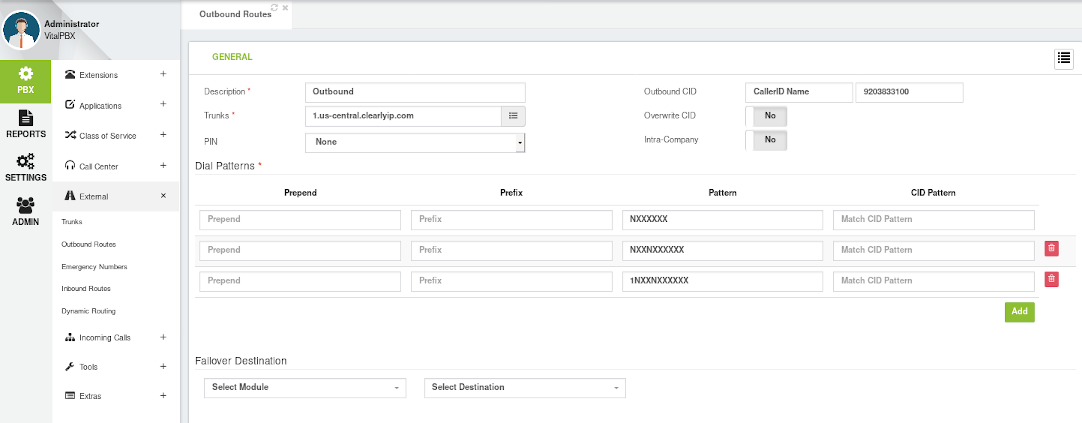
Create The Outbound Routes
- Navigate to PBX --> External --> Outbound Routes
- Set the Description
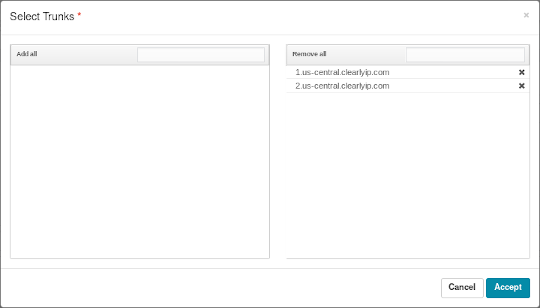
- Add Both of your ClearlyIP Trunks
- Set the Caller ID for this Route
- Define the Patterns this route should match and route
- In the US this will be, 7, 10, and 11 Digit dialing
- NXXXXXX (Optional if you want to allow 7 Digit Dialing Note: you will need to prepend the default Area Code on the trunks)
- NXXNXXXXXX
- 1NXXNXXXXXX
- Save and Apply your changes
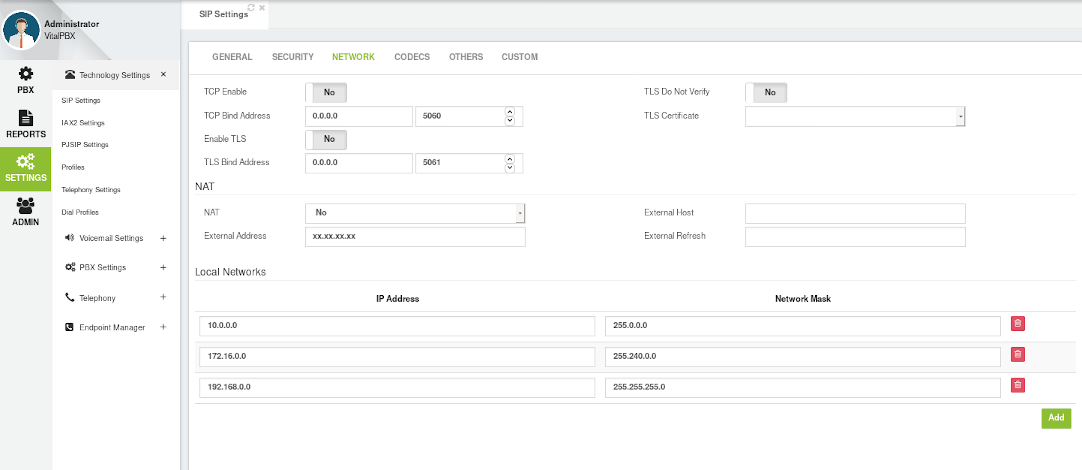
Set SIP Settings
- Navigate to Settings --> Technology Settings --> SIP Settings
- Select the Network Tab
- If your PBX is NAT'd you may need to the NAT option, which one will depend on your network. "Force, Comedia" will work in most cases.
- Make sure the PBX's External IP Address and/or External Host Address are defined properly.
- Make sure your Local Networks (Including any VPN or MPLS networks that might have phones) are defined properly
Note: You can typically just define the RFC-1918 Local Network Ranges.
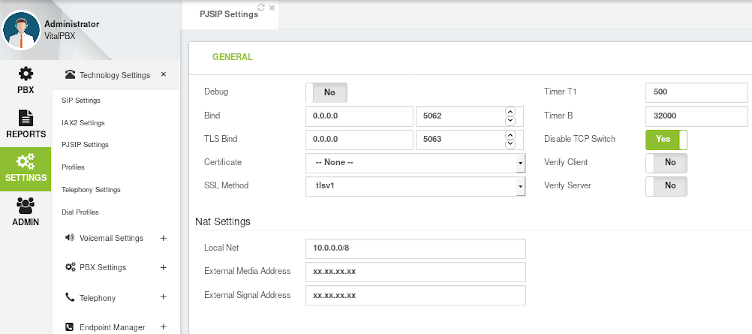
Set PJSIP Settings
- Navigate to Settings --> Technology Settings --> PJSIP Settings
- Make sure your Local Net is defined properly for your internal network.
- Make sure the PBX's External Media Address and External Signal Address are defined properly.
Configure e911
Define Emergency Numbers
- PBX --> External --> Emergency Numbers
- Set the Description
- On the Trunks Pop out, enable both ClearlyIP Trunks.
- Under List of Emergency Numbers define your emergency numbers, these are numbers that are never restricted from being called.
Note: 933 is a test number that when called reads back what we have configured as your e911 Address and Call Back. You may also want to include non-emergency numbers for your local police, etc.
- 911
- 933
Create Emergency Route
- Navigate to PBX --> External --> Outbound Routes
- Set the Route Description
- On the Trunks pop out enable both ClearlyIP Trunks
- Set the Outbound CID to be the PBX Complete Caller ID as found on your ClearlyIP Trunking Dashboard
- Make sure Overwrite CID is set to No if your are going to also set Emergency CID's on Individual Extensions.
- For the Dial Patterns set:
Note: You may want to add any other pattern your users may try in a panic. i.e. If they are a custom to dialing 9 to get out add 911 with a prefix of 9 - | Prefix | Pattern | CID Pattern |
- | | 911 | |
- | | 933 | |
- | 1 | 911 | |
- | 91 | 911 | |
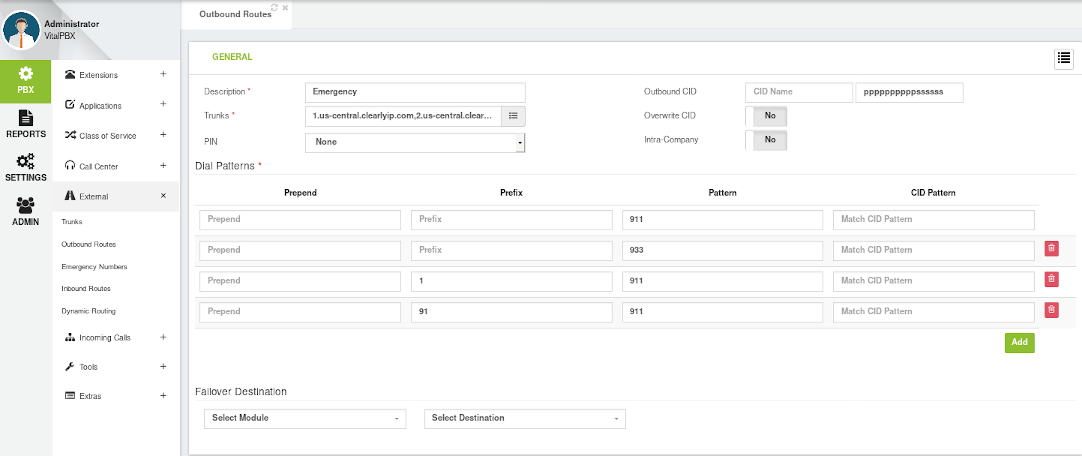
- Save your changes and reload.
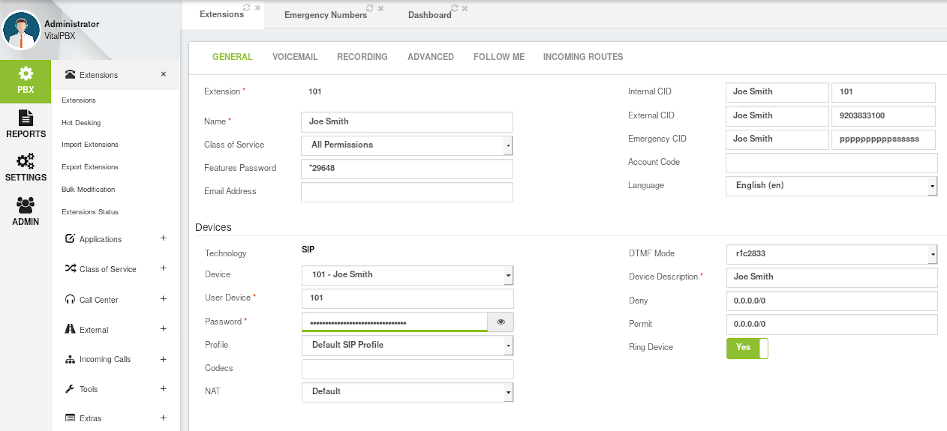
Set Emergency CID on an Extension
- Navigate to PBX --> Extensions --> Extensions
- Select the Extension your wish to edit from the Right Side Menu.
- Set the PBX Complete Caller ID for that Extensions Dispatchable Location and Call Back Profile
It is your responsibility to verify that your 911 configuration is working as intended by dialing 933, or the appropriate process for emergency address verification in your area!
 Uploading ....