Locating ClearlyIP Trunking Credentials
● Navigate to Locating ClearlyIP Trunk Details Wiki
● You will need your SIP Username, SIP Password, and Trunking Servers
Configuring ClearlyIP Trunks on Your Switchvox PBX
● Log into your Switchvox server.
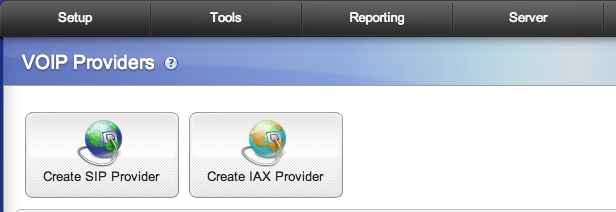
● Navigate to System Setup --> VOIP Providers.
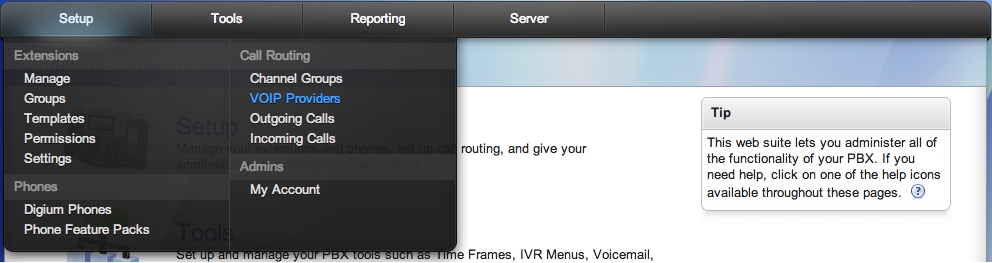
● Under "VOIP Providers" click on the Create SIP Provider button.
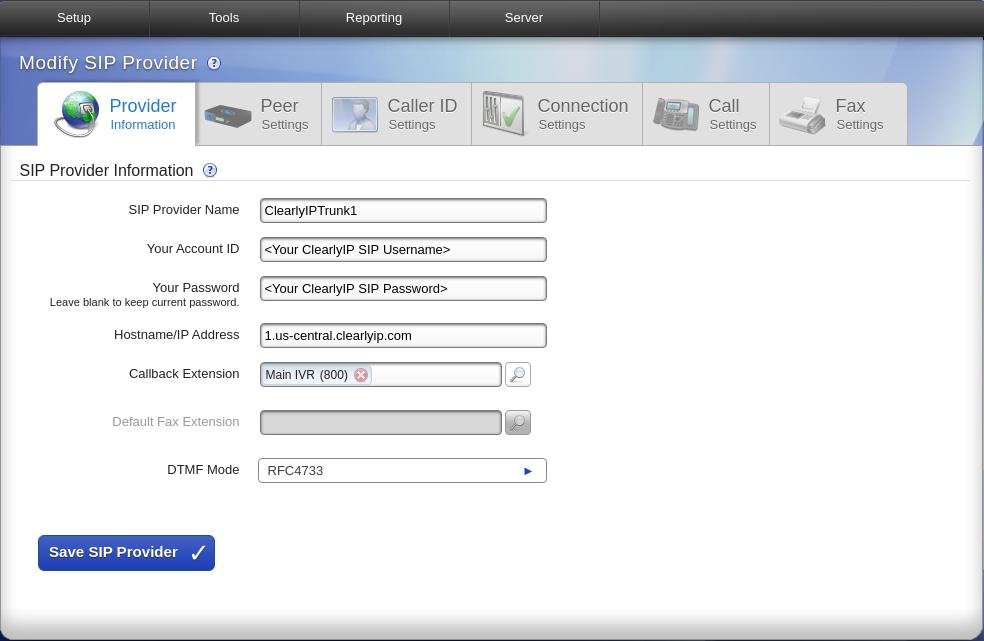
● Click on the Provider Information tab and fill out the following information:
● SIP Provider Name: ClearlyIPTrunk1
● Your Account ID: Enter your SIP Username from the ClearlyIP Trunking Store
● Your Password: Enter your SIP Password from the ClearlyIP Trunking Store
● Hostname/IP address: This should be the first server listed in the ClearlyIP Trunking Store (ex: 1.us-central.clearlyip.com)
● Callback Extension: Should be a default extension on your system as per Switchvox Requirements
● DTMF Mode: RFC4733
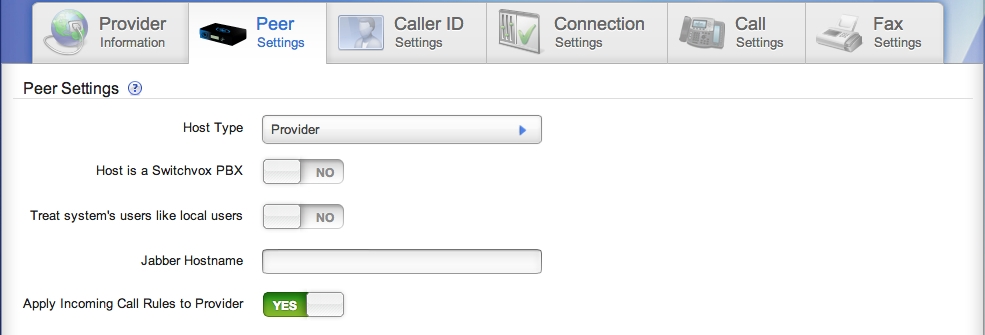
● Click on the Peer Settings tab and fill out the following information:
● Host Type: Provider
● Host is a Switchvox PBX: No
● Treat system's users like local users: No
● Apply Incoming Call Rules to Provider: Verify this is set to Yes
● Click on the Caller ID Settings tab and fill out the following information:
● Supports Changing Caller ID: Yes
● Caller-ID method: From Header

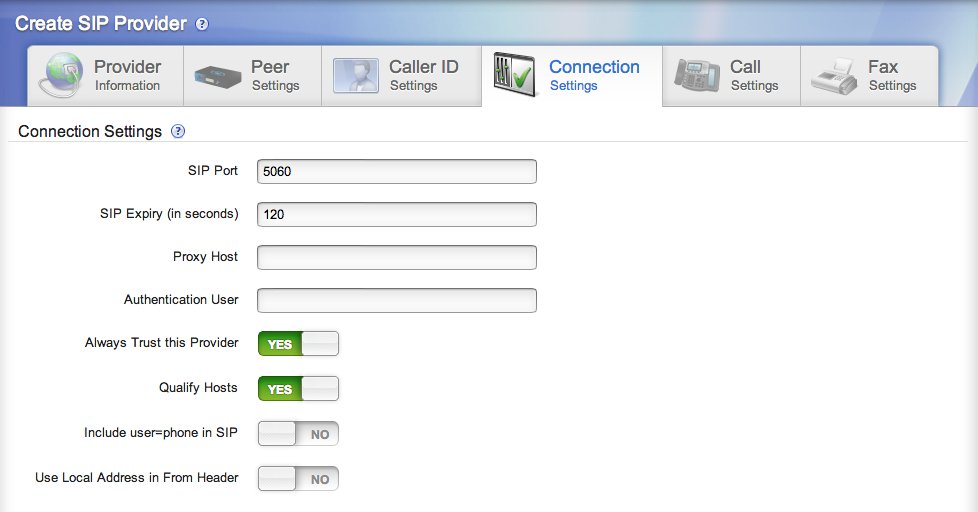
● Click on the Connections Settings tab and fill out the following information:
● SIP Port: 5060
● SIP Expiry: 120
● Always Trust this Provider: Yes
● Qualify Host: Yes
Note: You may need to allow and/or forward ports on your Router. You would need allow and forward UDP 5060 and allow UDP 10000~20000 from the outside of your network to the LAN IP of your PBX.
If you don’t have any remote clients on Dynamic IPs you can (and should) also lock down 5060 to be accepted from only trusted IPs.
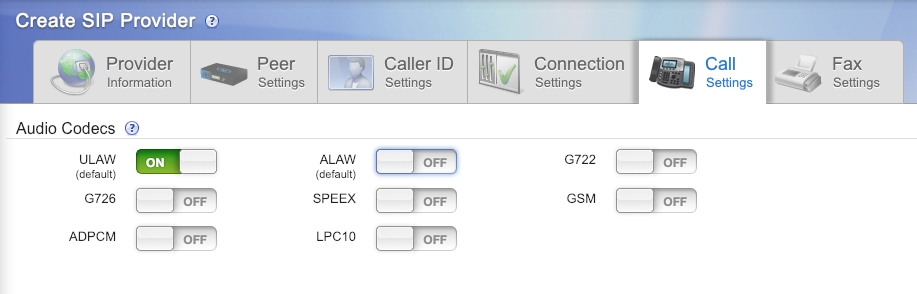
● Click on the Call Settings tab and fill out the following information:
● ULAW: Yes
● When done, click the Save SIP Provider button at the bottom of the page to save all your settings.

Note: Setup is not yet complete. You will need to register to at least one more trunk server for redundancy. Follow the Steps above for each redundant server
● ClearlyIP’s trunking service uses multiple redundant SIP Servers, you will want to register to at least the first 2 servers listed on your ClearlyIP Trunking Dashboard.
(ex: 1.us-central.clearlyip.com and 1.us-eastern.clearlyip.com)
● Inbound calls can come from either server at any time, and you can send outbound calls to either server.
● Once you have set up the primary trunk server by following the steps above, please set up a second trunk to your secondary trunk server.
● Use the same information as before, except name the trunk "ClearlyIPTrunk2" and enter the FQDN for the Secondary Trunk Server as the Hostname under the Provider Information section.
● After you have set up the second trunk, you can continue to the steps below.
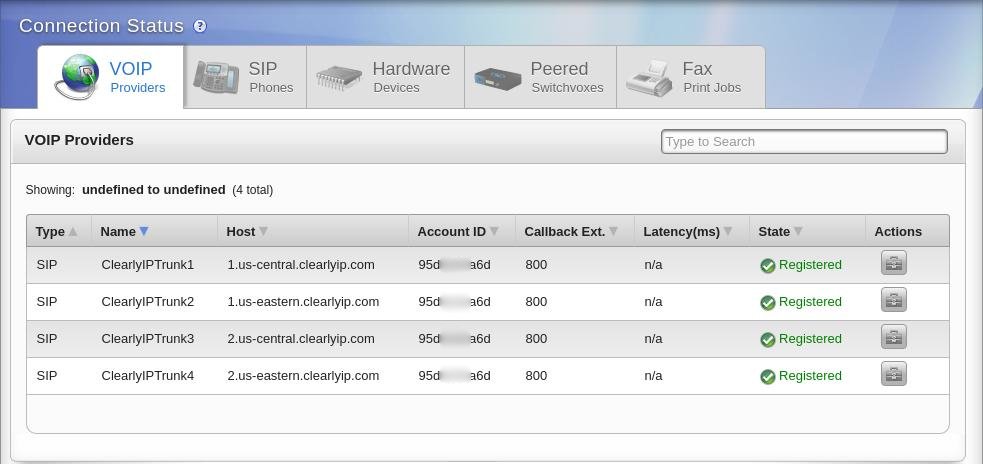
Verifying the Trunks are Registered in the Switchvox GUI
● In the Switchvox GUI, navigate to Server → Connection Status
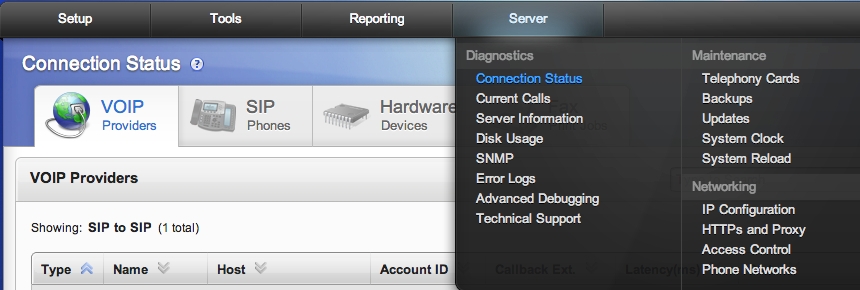
● Verify both of your newly created trunks are registered.
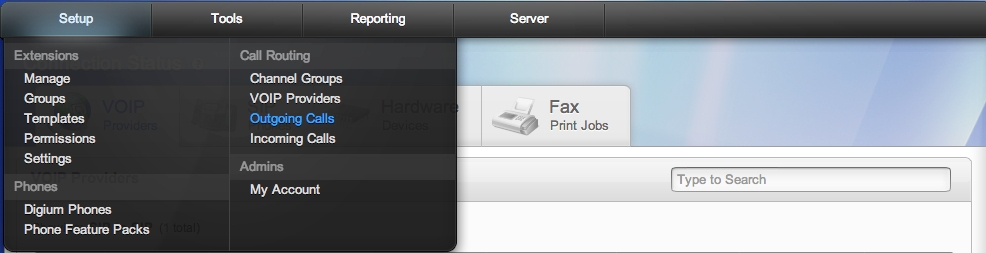
Creating Outgoing Call Rules in Switchvox
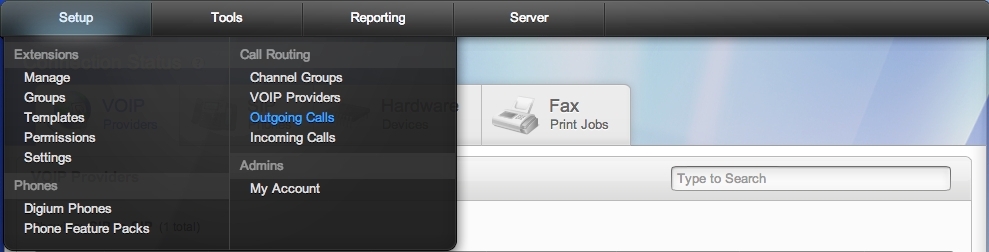
● Navigate to Setup → Call Routing → Outgoing Calls
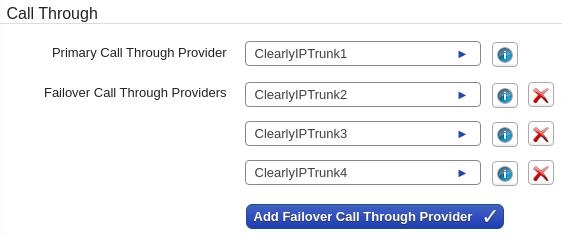
● Create dial pattern rules. Make sure any of the routes that you want to use with ClearlyIP are setup to use both of your ClearlyIP trunks, as shown in the next step below.
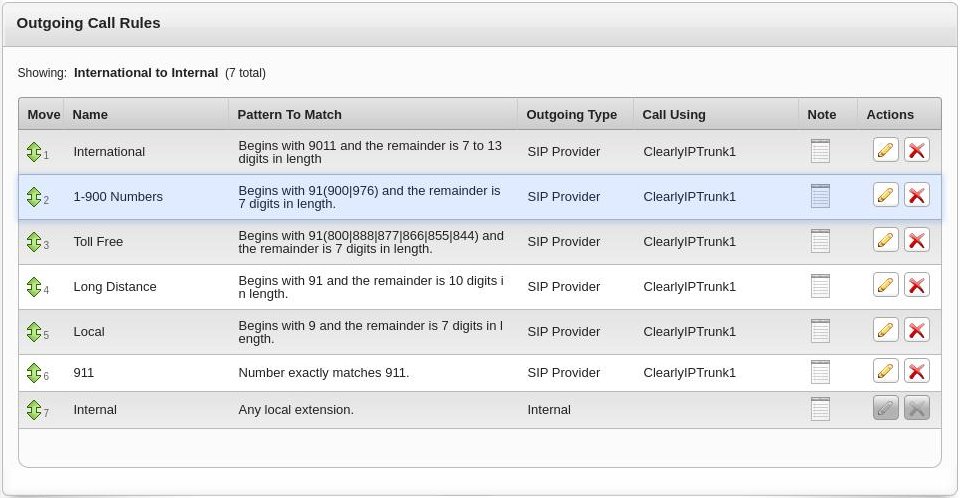
● Configure your routes to use all of your ClearlyIP trunks. Set the First ClearlyIP trunk Server listed on your Dashboard as the primary and the others as failovers.
Creating Incoming Call Rules in Switchvox
● Navigate to Setup → Call Routing → Incoming Calls
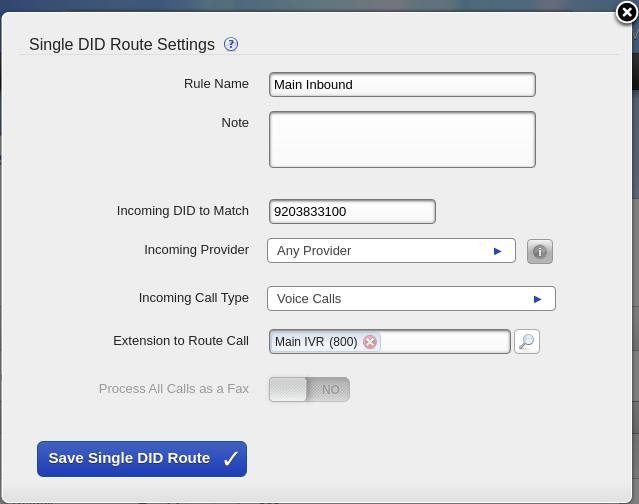
● Set up inbound rules for any of the DIDs you have purchased Through ClearlyIP or Plan to Port over. Since calls can be delivered from both trunks, make sure the Incoming Provider rule is set to match Any Provider.
Creating Outgoing Call Rules in Switchvox for e911 Locations
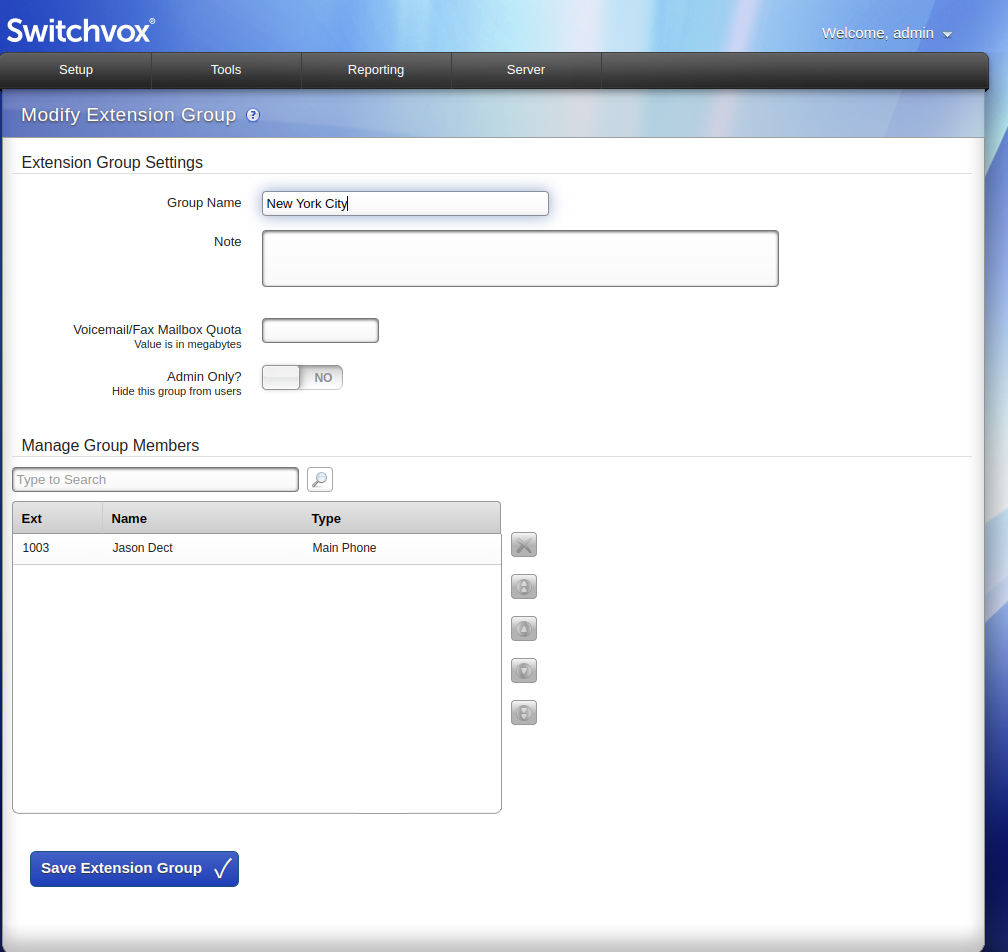
- In the Switchvox GUI, navigate to Setup → Groups. You want to create a Group for each e911 Location you are going to need and add the extensions that go with that location.
![]()
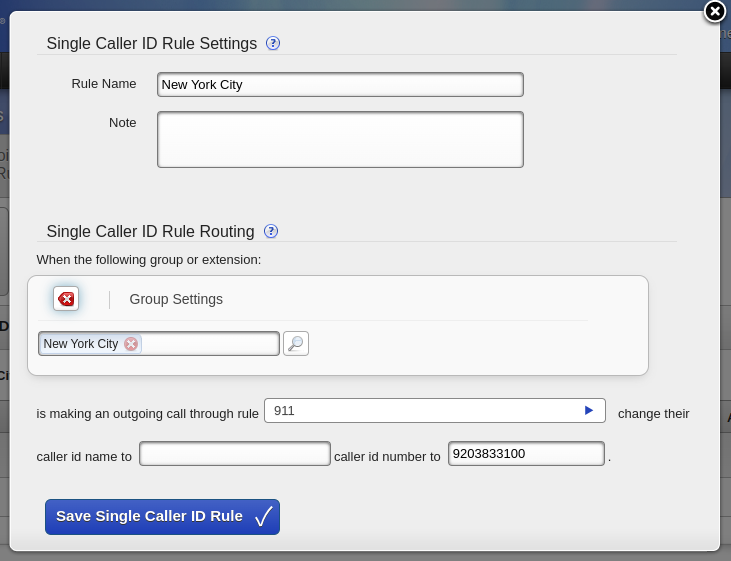
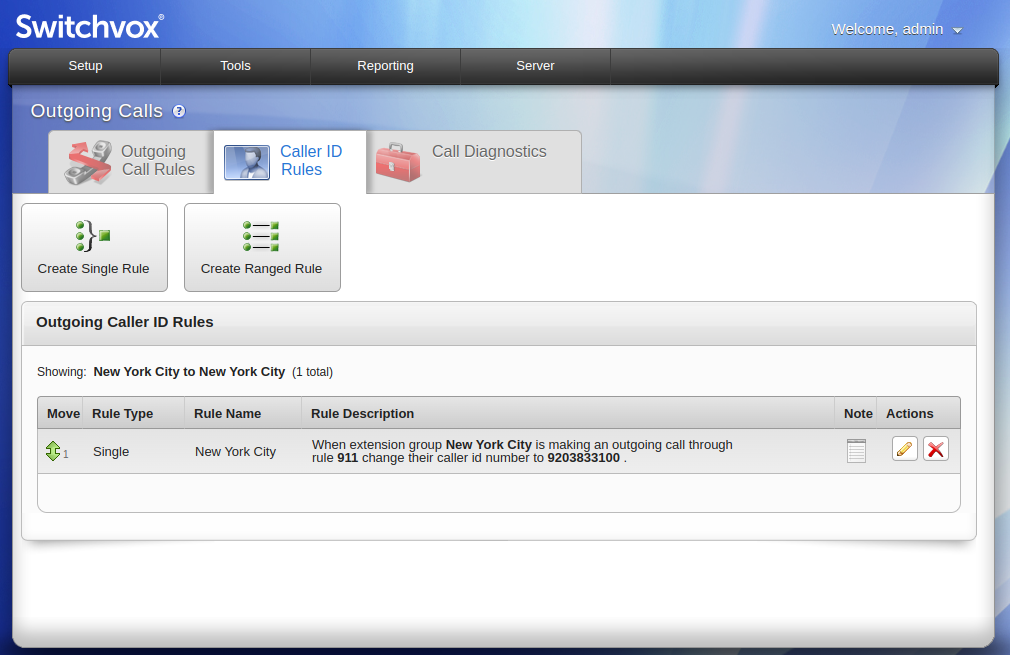
● Now Navigate to Setup → Call Routing → Outgoing Calls. You want to go to the Caller ID Rules tab.
● From here click the Create Single Rule. Name the new rule, select the Group you created, the outgoing call rule (911) and the caller ID number that goes with that location.
![]()
● Going forward, extensions from this group will show this caller ID number when calling out using the 911 Rule.
It is your responsibility to verify that your 911 configuration is working as intended by dialing 933, or the appropriate process for emergency address verification in your area!
![]()
 Uploading ....