Configuring ClearlyIP Trunks with Avaya IP Office
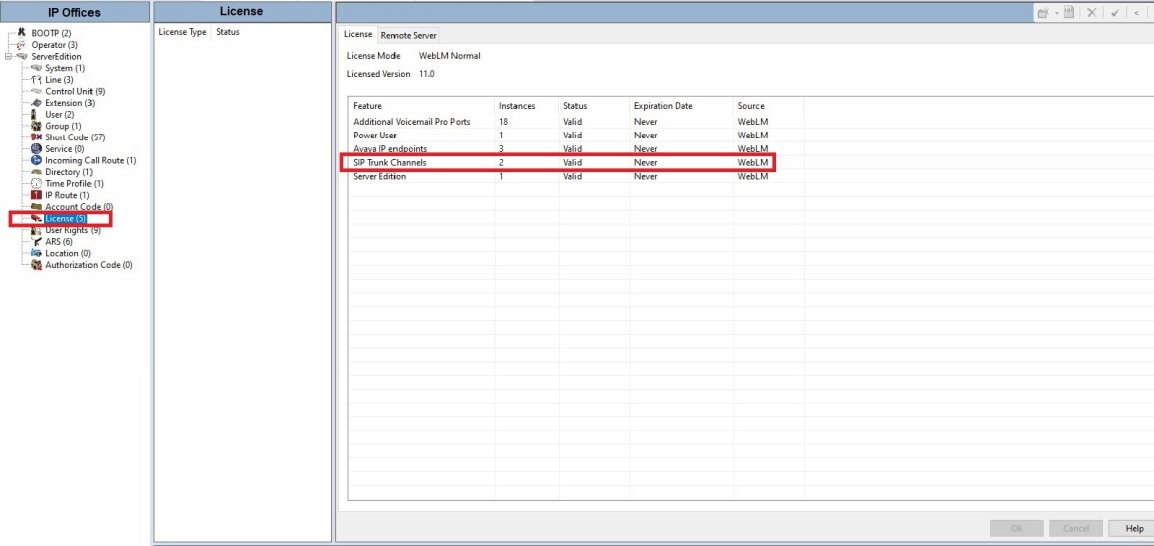
Licensing
● Verify you have the correct licensing.
You should have the same number of SIP Trunk Channel licenses as you want simultaneous calls made with all your SIP trunks.
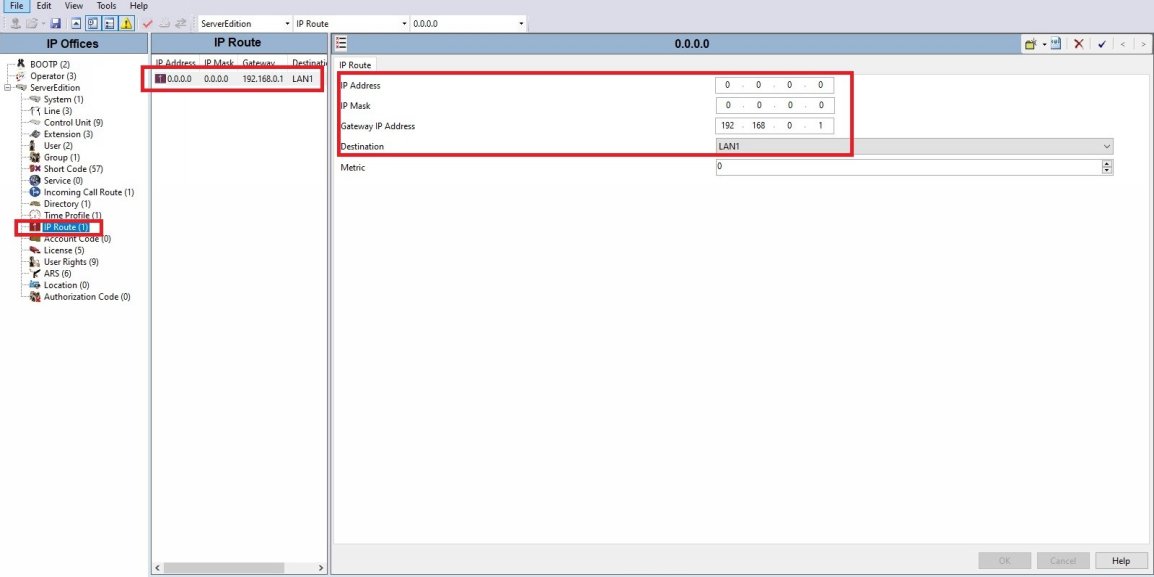
Network Routing
● Verify that you have an IP Route in place telling the IP Office PBX how it can reach the internet.
In this example we have a "default route" sending all data to our internet gateway.
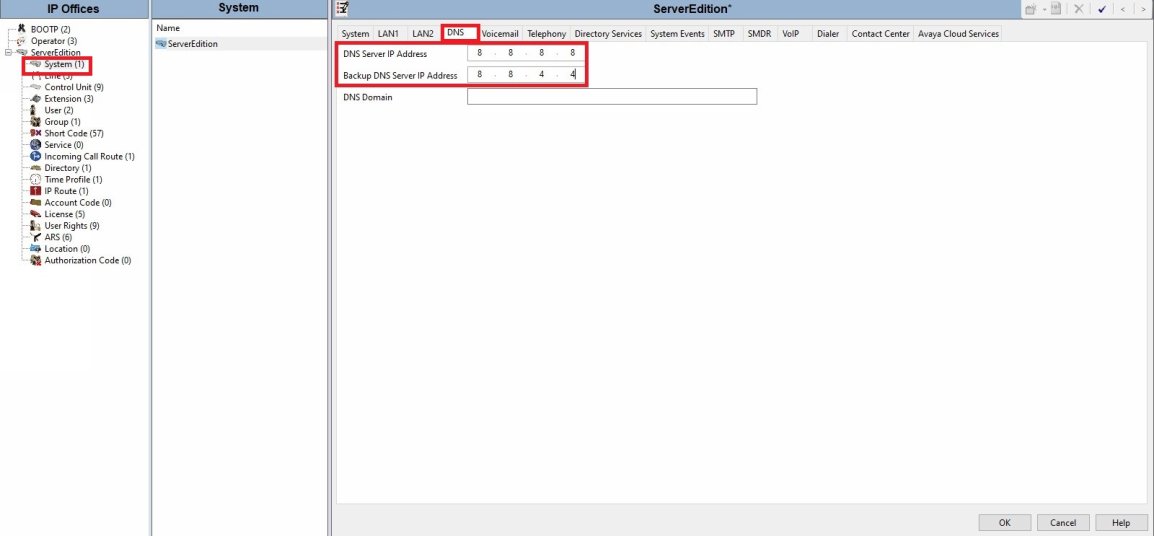
DNS Configuration
● Verify your DNS servers are defined.
If you are unsure of what DNS servers to use (Usually provided by your ISP) you can always use Cloudflare’s (1.1.1.1 & 1.0.0.1) or Google's DNS (8.8.8.8 & 8.8.4.4)
Note: You may want to use servers from different providers so you are not dependent on a single provider.
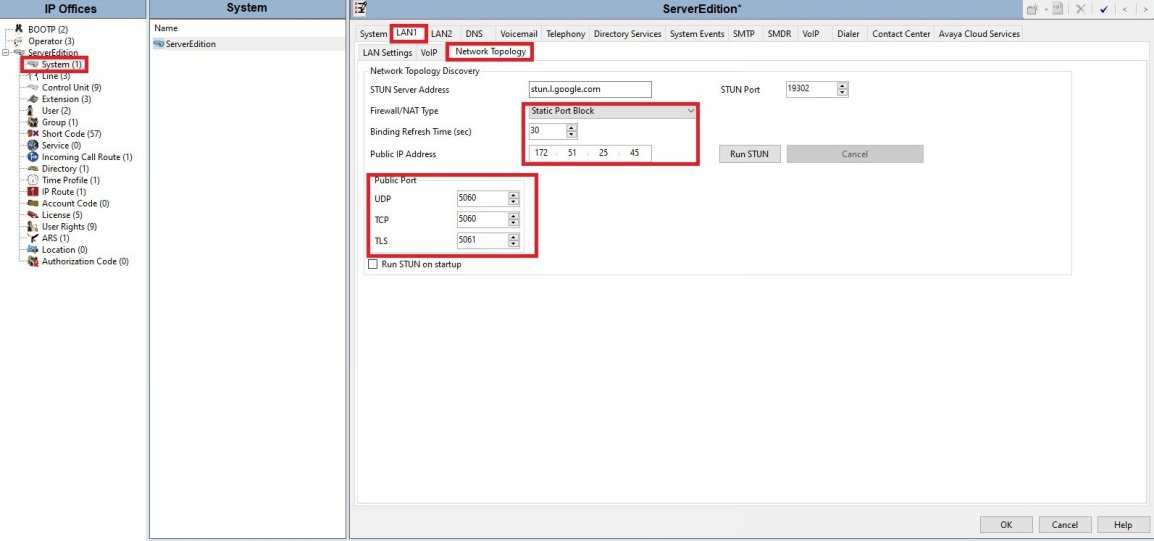
NAT Configuration
● Verify your are advertising the correct External IP address for your IP Office SIP server.
Note: Some Routers and Firewalls try to automatically account for this via SIP ALG, however they usually make things worse.
It’s best to disable any SIP ALG settings on your Router/Firewall and configure your PBX correctly.
● Your SIP Port (5060 UDP by default) should be allowed in your firewall.
● If you are unsure of your NAT Type you can try to use a STUN server such as Google's seen in this screenshot.
Note: Some STUN providers such as Google use rate limiting that can affect busier systems, if you start noticing random delays in connecting calls this might be the issue.
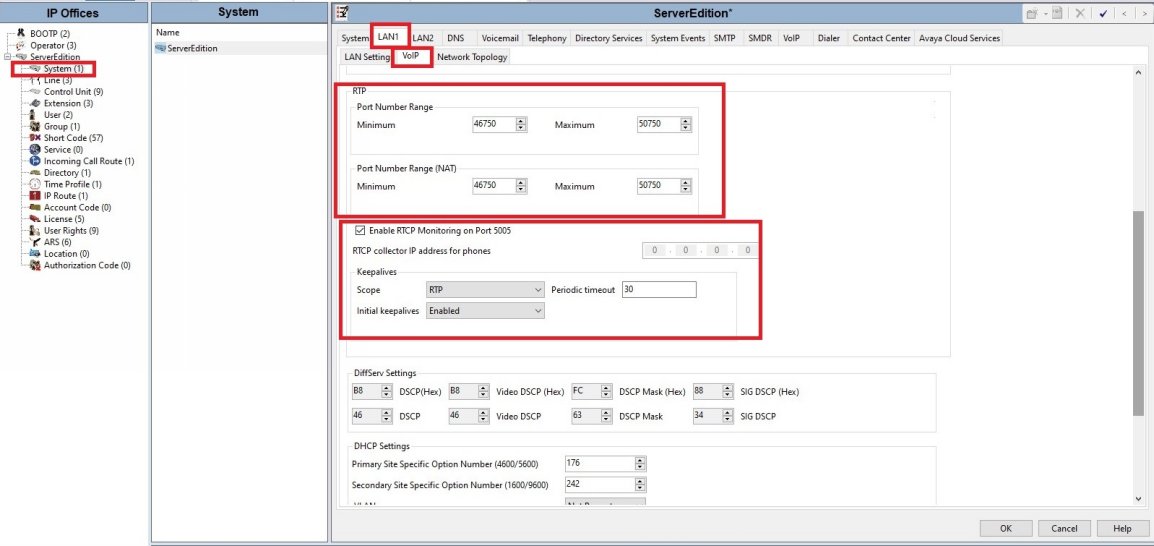
Network Configuration
● Configure the network topology setup for LAN1 (or LAN2) VOIP tab. You can set the RTP ports however the default IP Office RTP ports should work fine.
● Enable keep alives as illustrated.
● Most Firewalls will automatically allow the RTP as a Related/Established connection, however you may need to allow the RTP port range in your firewall to allow the voice traffic to pass through.
If you are getting one way or no audio this could be why.
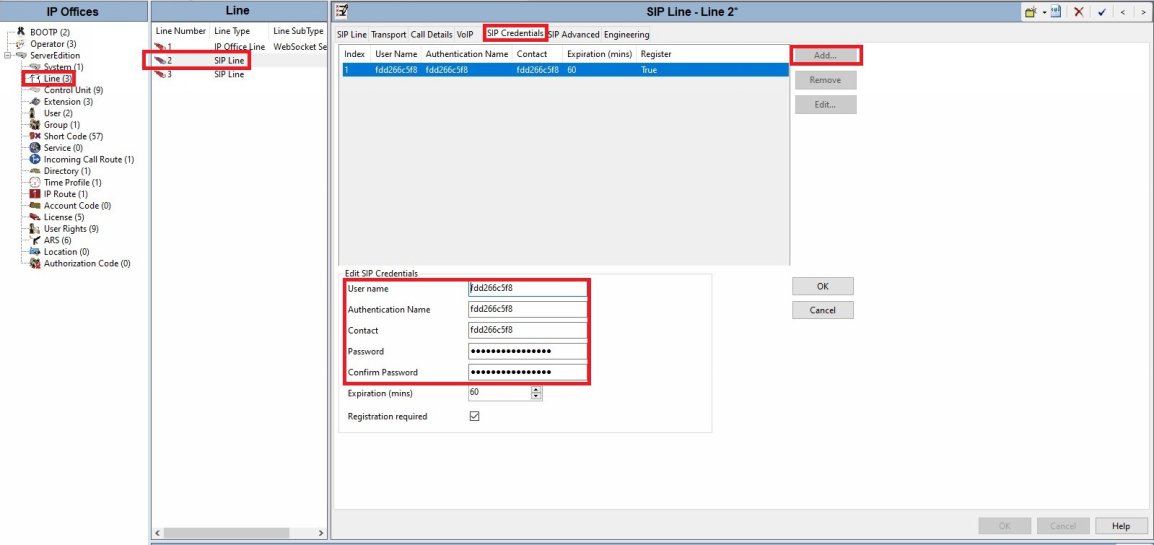
SIP Line Configuration
● You will want to configure two different lines, one for each ClearlyIP registration server.
● See the "Locating ClearlyIP Trunk Details" wiki to locate your ClearlyIP SIP Credentials from the store.
● Use the ClearlyIP Username for the User name, Authentication Name, and Contact.
● Use the ClearlyIP Password for the password and confirm password.
● The keycode will not be used.
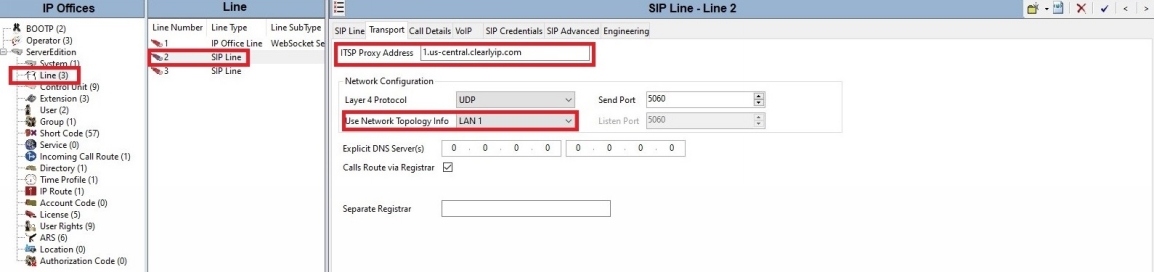
● For the Second Line, everything is the same except the “ITSP Proxy Address” on the transport tab.
● The SIP line tab can be left default
● No changes should be required on the Engineering tab.
SIP Line1
SIP Line2

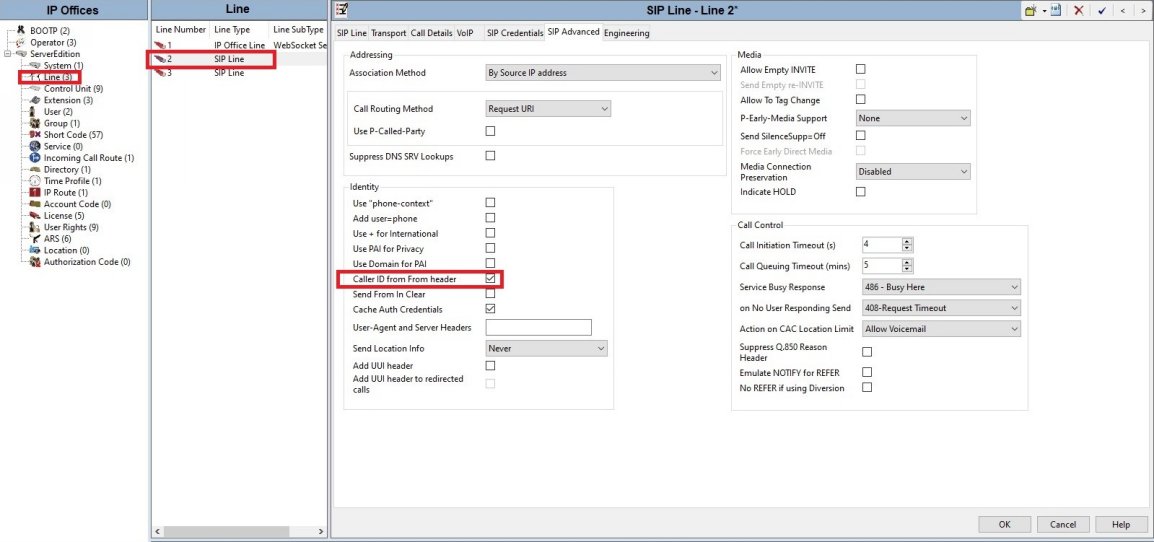
● On the SIP Advanced tab Under each SIP Line, you need to check the “Caller ID from From header” to properly present the CallerID.
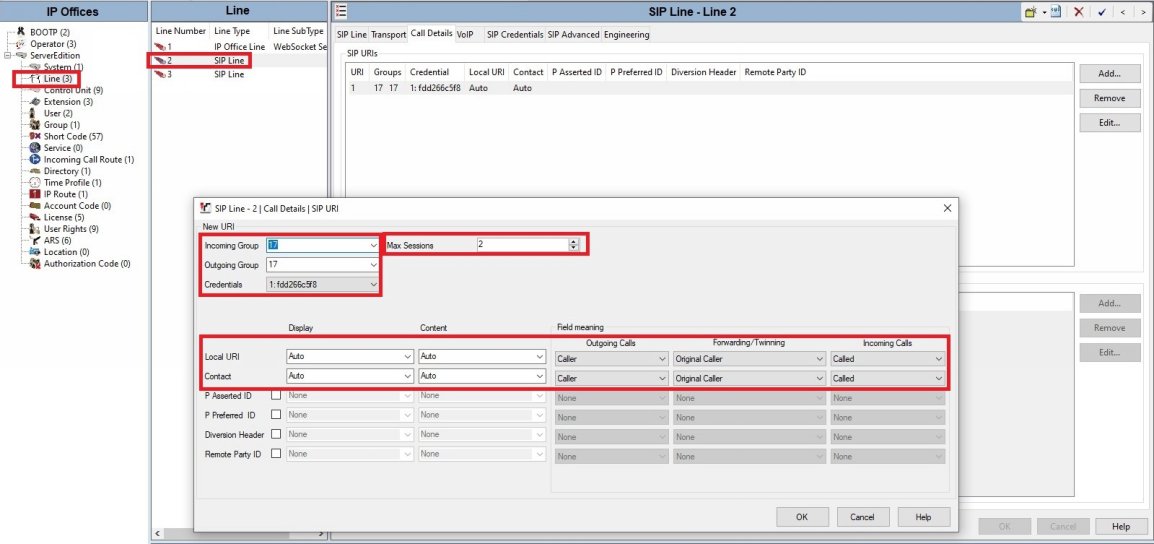
● The SIP Line Call Details, also referred to as the SIP URI, is setup with the default Auto configuration as seen below.
This allows you to pass the CallerID through a shortcode allowing each user to send a different CallerID for E911 purposes and for their own personal DID if needed.
● Incoming and Outgoing Group IDs need to be unique and referenced in the Incoming Call Route for incoming calls and Outgoing Calls.
● Credentials, select the credentials you created earlier.
● Max Sessions is the SIP Channels you have licensed. This should be done on both SIP lines.
E911 Configuration
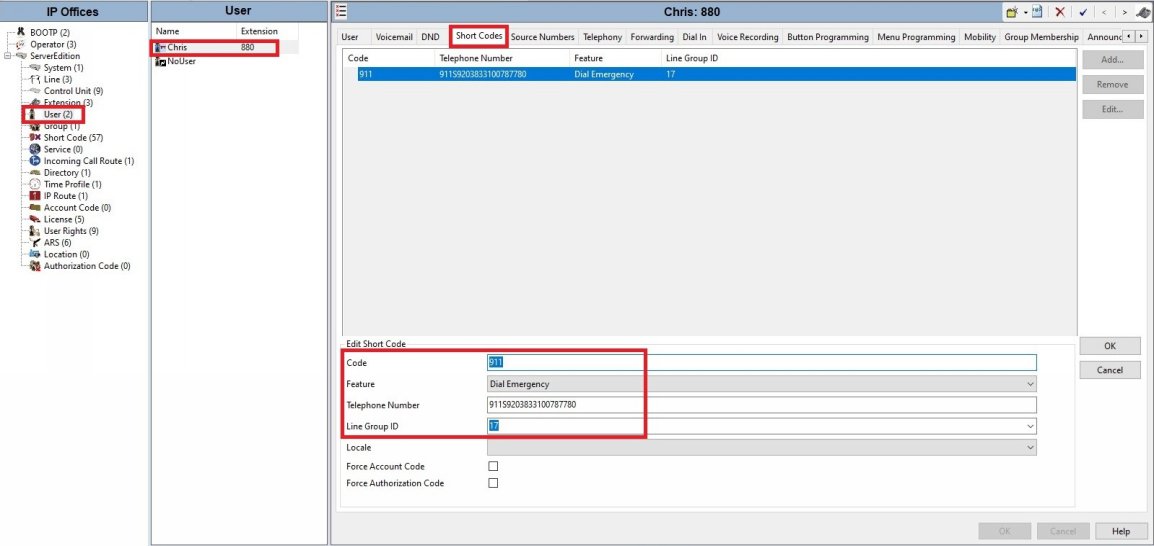
● For Dispatchable location, setting up User Shortcodes will allow each user to send out their own specific CallerID.
This allows you to take advantage of ClearlyIPs PBX CallerID Suffix referencing a specific dispatachable location needed for Ray Baum's act.
● The shortcode is 911, feature Dial Emergency, with Line Group ID 17 (You Defined Earlier).
● The long part is the Telephone number explained here 911S9203833100787780
● First 911 is the number dialed
● S9203833100787780 is the CallerID passed with the 787780 part being the PBX Suffix which is stripped and translated to a dispatchable location by ClearlyIP
It is your responsibility to verify that your 911 configuration is working as intended by dialing 933, or the appropriate process for emergency address verification in your area!
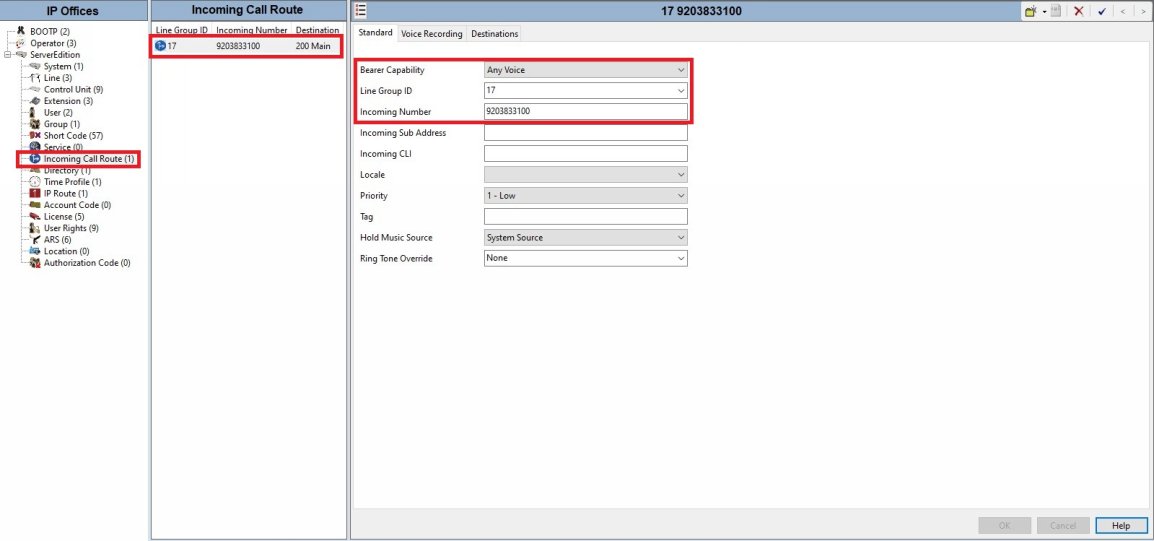
● For the Incoming Call Route you need to setup an individual call route for each DID you want to route with the DID in the Incoming Number.
● The GroupID should be what was setup in the Call Details/SIP URI above.
● The Bearer Capability needs to be Any Voice.
● The destination is where you want to route the call too.
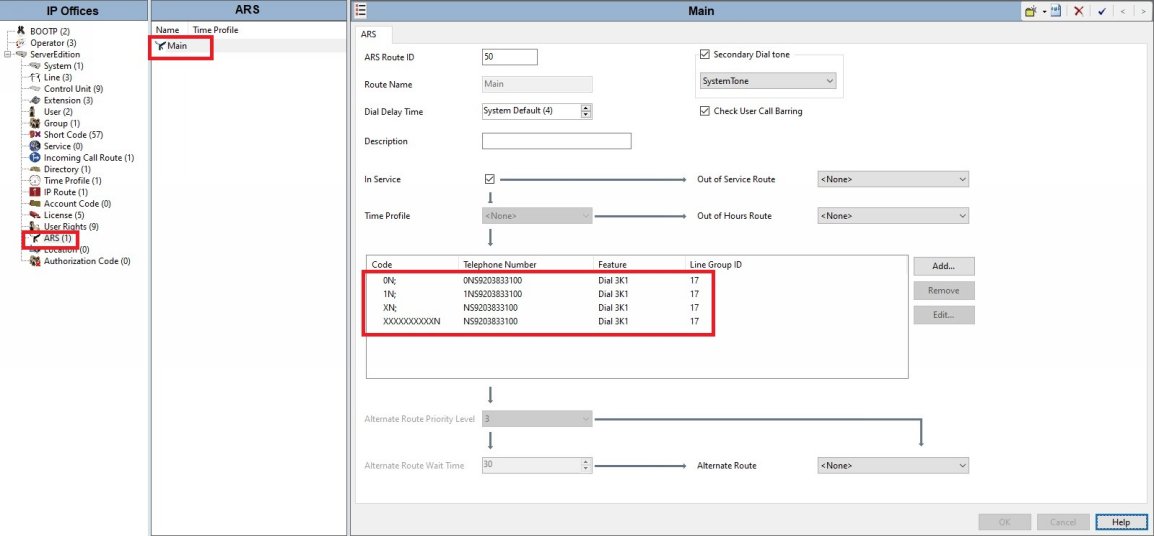
● Lastly is the ARS table. This is a default ARS table in IPO except the 911 and 11 shortcodes are removed and the callerID is added for the main CallerID and GroupID was changed to 17 to match the Call Details/SIP URI.
You could allow each individual user to pass his or her own DID as CallerID with user shortcodes as well.
● *The 911 and 11 shortcodes should be removed IF you change the default 9N shortcode to dial out OR you have a User Shortcode for all users, as shown above, to allow for dispatchable location.
Otherwise do NOT remove the 11 shortcode or you can not dial 911!
 Uploading ....