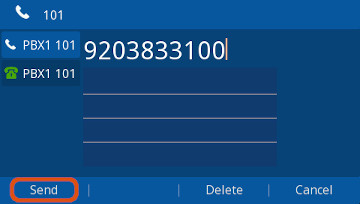
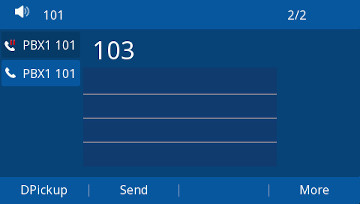
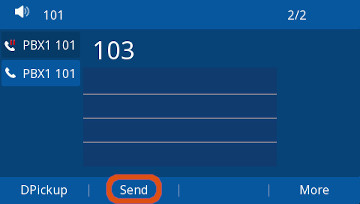
Making A Call
You can make a call using the Headset, Speaker Phone, or Handset; each method is described below.
- Pickup the handset
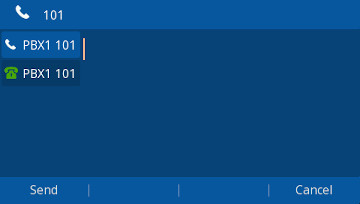
- Enter the number you want to call
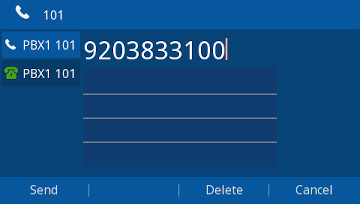
- Press the Send Softkey or press #
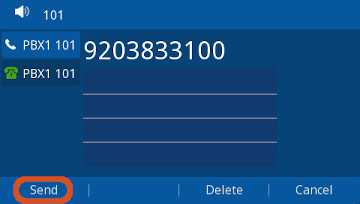
Speakerphone
- Press the
 (Speaker) or a Line Key
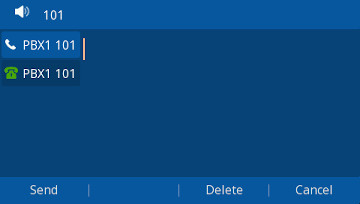
- Enter the number you want to call

- Press the Send Softkey or press #
Headset
- Press the
 (Headset) button.

- Enter the number you want to call
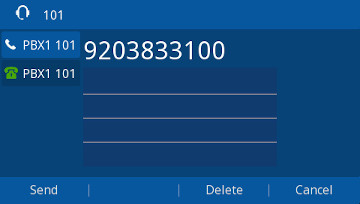
- Press the Send Softkey or press #

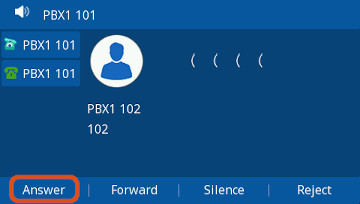
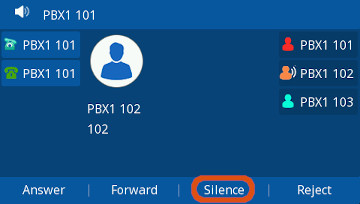
When the Phone is actively ringing, you can answer the call via the Handset, Speaker Phone, or Headset
- Pickup the handset on your phone and you can start talking with the inbound caller.
Speakerphone
- Press the
 (Speaker Phone) Button
If the phone is not in headset mode: Press the  (headset) Button.
 If the phone is in headset mode: Either press the  (headset) Button on the phone or the answer button on your headset.
- Pressing the Answer softkey while the phone is ringing will answer the call via the Handset, Speaker Phone or Headset depending on what mode the phone is.
- If the handset is already off hook when a call comes in (Rare situation), pressing Answer will answer to the Handset.
- Otherwise it will answer to the Speaker Phone and Headset depending on what mode the phone is in.
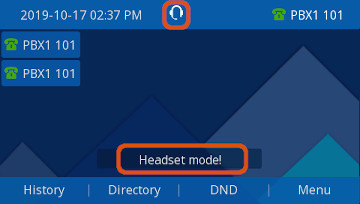
How to tell what answer mode the phone is in?
Headset mode is Toggled on and off by pressing the (Headset Button) If the phone is in headset mode it will display a Headset Icon at the top of the screen and a text alert at the bottom.
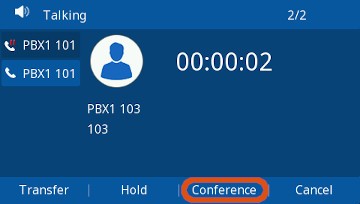
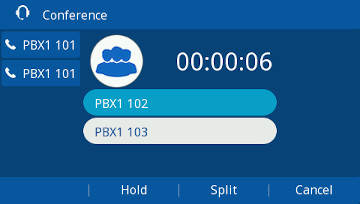
- While on an active Conference call Press the Split Softkey to end the Conference and place each Individual Caller on Hold
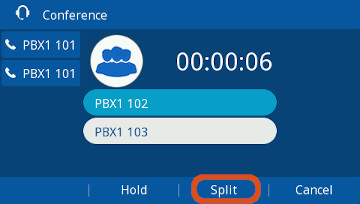
- You can then press either Line Key to pick up the Holding Callers and speak to them individually
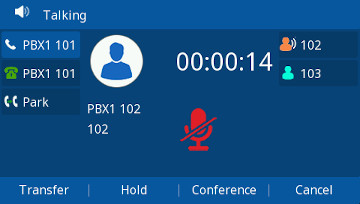
Muting
To Mute the Microphone
- During a Call, press the
 (Mute) Button. The Button will illuminate Red, and a Mute Icon will show up on the Phone's Screen
To Un-Mute the Microphone
- Press the
 (Mute) Button Again. The Button will no longer illuminate Red, and a Mute Icon will disappear from the Phone's Screen
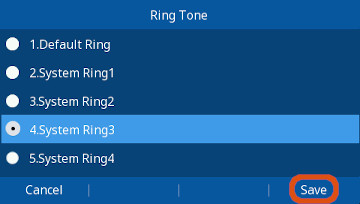
Ring Volume
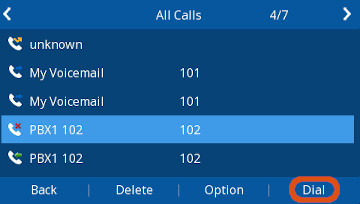
Viewing Call History
- Use
 &
&  (Up & Down) Arrow Buttons to select a call from the list, and Press the Dial Softkey.
Call Completed Elsewhere explanation
How to Know You Have a New Message
- Status Message - If you have a new Voicemail in your Inbox the phone will display a Voicemail Icon at the top and Voicemail Message at the Bottom.
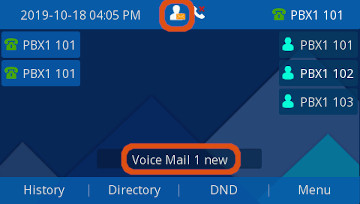
- Message Waiting Indicator (MWI) - The
 Message Waiting Indicator (MWI) at the Bottom Right of the Screen will Flash Red or Green (Depending on the Phone Model) .
- Note: On the ClearlyIP CIP-270, and CIP-250 Phones the
 (Voicemail) button will also flash Green.
How to Check your Voicemail Messages
- You can use the
 (Voicemail) button on your phone to check your voicemails,
 - Depending on how your PBX is setup you may be prompted for a Voicemail Password or you may not be.
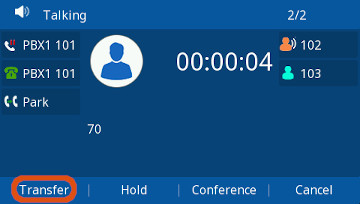
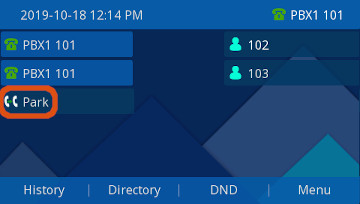
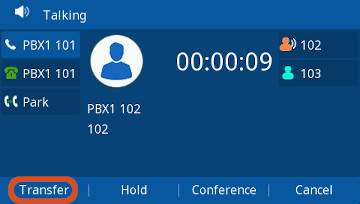
Call Park
- Call Parking allows you to park a caller so that another extension can retrieve the caller held in the parking lot based on how your PBX is setup.
Parking a Call
If you already have a Park Softkey on your phone.
Retrieving Parked Calls
- Dial the Parking Slot number the call was parked (That was read to you when parked) press Send or "#"

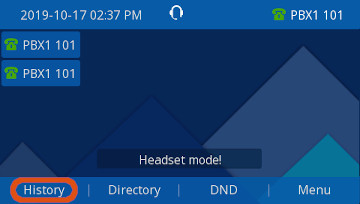
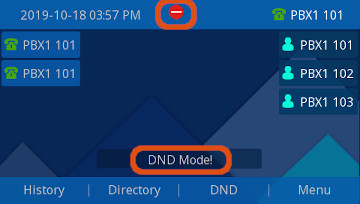
What is Headset Mode?
- Headset mode allows you to make and receive calls through a Headset instead of the phone's Handset or Speaker Phone as the default audio source.
- You can switch to and from Headset mode at any time, even during an active call.
Enabling / Disabling Headset Mode
- Press the
 (headset) button to toggle headset mode on and off.
 - If the phone is in headset mode it will display a Headset Icon at the top of the screen and a text alert at the bottom (the bottom alert may cycle through several other alerts).
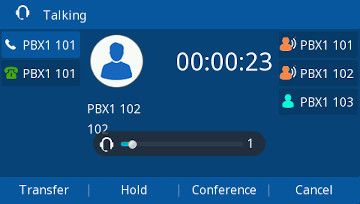
Adjusting the Headset Volume
- Headset volume is affected by Headset's own volume setting as well as the Phone's volume setting.
- If you adjust the volume on the Headset that does not effect the levels on the Handset or Speaker Phones. You may have to adjust both to get both at the desired levels.
- While the phone is use (on a call) press the
 (- and +) buttons on the phone to decrease or increase the phone's volume.
Switching from Headset Mode to Another Mode During a Call
- From Headset to Handset: Pick the Handset.
- From Handset to Headset: Press the
 (headset) button.
- Note: When using headset, Pressing the
 (headset) button will send the call to Speaker phone if the Handset is On-Hook, or to the Handset if it's already Off-Hook.
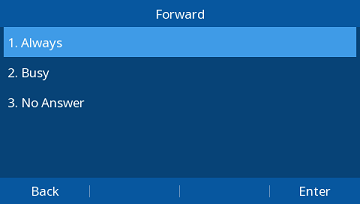
Call Forward
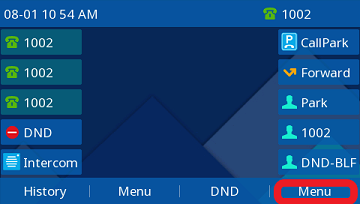
- To setup Call Forwarding press the Menu button.
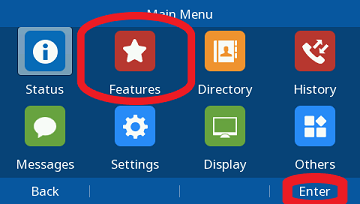
- Select the Features menu by pressing Enter.
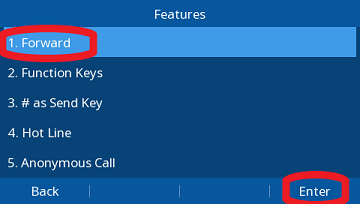
- Select Forward by pressing Enter.
- You will notice there are 3 types of Call Forward:
- Always
- Busy: The incoming call will be forwarded when the extension is busy (on a call)
- No Answer: The incoming call will be forwarded when the user doesn't answer the call.
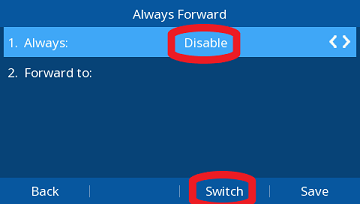
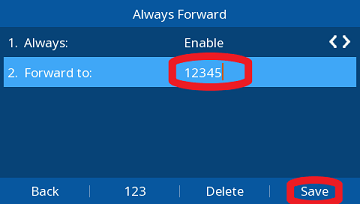
Always
- By default the Always Call Forward is disabled.
- Use the Switch button to enable or disable this feature.
- Use the arrow keys from the keypad to navigate down and enter the destination number to forward the calls to.
- Press Save
- You can disable the Always option by navigating back to this menu and use the Switch button.
Busy
- By default the Busy Call Forward is disabled.
- Use the Switch button to enable or disable this feature.
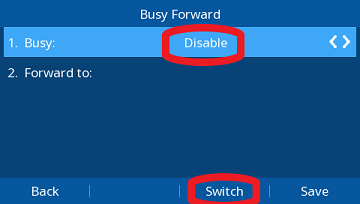
- Use the arrow keys from the keypad to navigate down and enter the destination number to forward the calls to.
- Press Save.
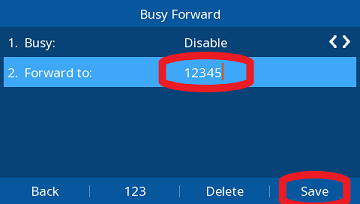
- You can disable the Busy option by navigating back to this menu and use the Switch button.
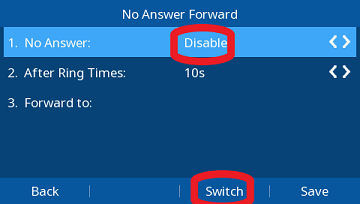
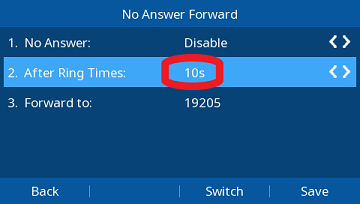
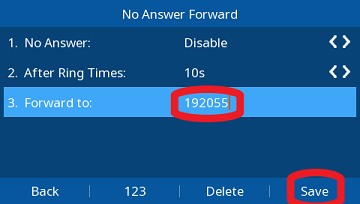
No Answer
- By default the No Answer Call Forward is disabled.
- Use the Switch button to enable or disable this feature
- Use the arrow keys from the keypad to navigate down and use again the arrow keys to select the time in seconds to wait before sending the call to the target number (After Ring Times option).
- Use the arrow keys from the keypad to navigate down and enter the destination number to forward the calls to.
- Press Save
- You can disable the No Answer option by navigating back to this menu and use the Switch button.
 Uploading ....
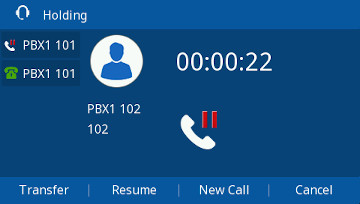
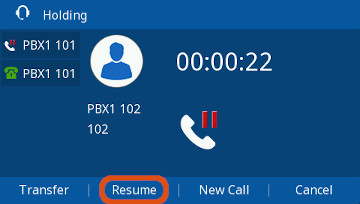
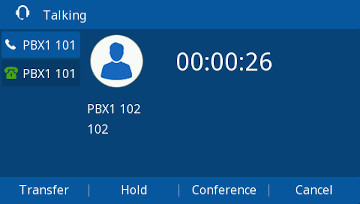
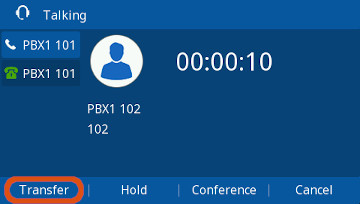
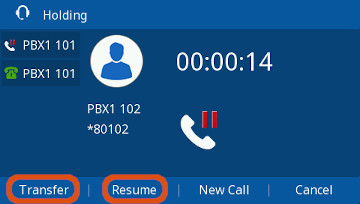
 (Hold) button,
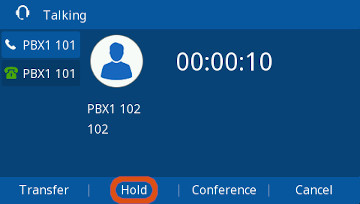
 (
(
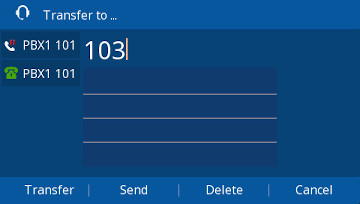
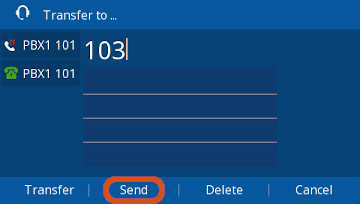
 (Transfer) Button or the

 (Transfer) Button or the
 (Transfer) Button or the

 ("-" and "+") buttons on the phone repeatedly to change the volume between 0 and 14.
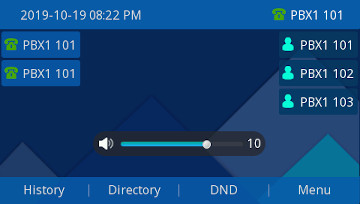
 (
(


 = Missed/Rejected
 = Received (Answered)
 = Dialed
 = Forwarded
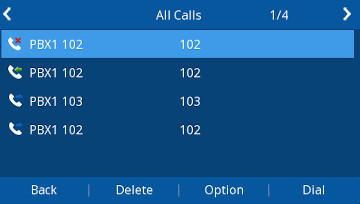
 &
&  (
( &
&  (Up & Down) Arrow Buttons to select a call from the list.

 Arrow Buttons on your phone to switch to the Filter By Call Type:
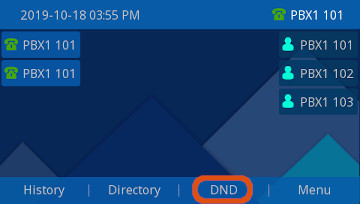
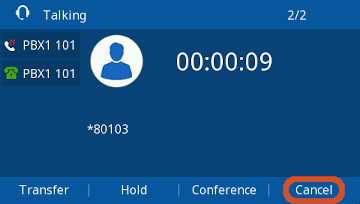
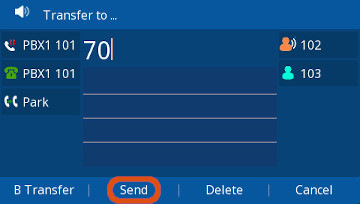
 (Transfer Button) or Softkey again to complete the transfer to parking.

 (Transfer Button) or Softkey again to complete the transfer to parking.