Incredible PBX 2020 Appliance Setup Guide
Determine the IP address of the PBX. We recommend checking your DHCP server to find the IP or connect a Monitor and Mouse to your PBX ports and login as shown below. We setup all appliances to have DHCP enabled by default on LAN Port 1 (eth0) of your appliance.
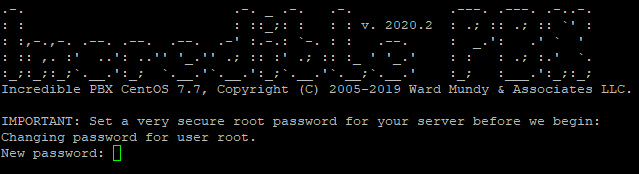
SSH to the PBX. This can be done using any SSH program, such as Putty.The default root password is set to “password2020”. Be sure you log in with SSH from a desktop PC that will be used to manage your PBX. This IP address will automatically be whitelisted in the Linux firewall so that you aren't locked out.
Once logged in, you will be asked to change the root password. Please change the password to something more secure..
Your server must have a reliable Internet connection before proceeding. If you have no Internet access or if you didn't log in from a desktop PC, press Ctrl-C now. Otherwise, press ENTER key to proceed with initial setup. Server is VERY INSECURE until this initial setup has been completed.
At the prompt, enter the password you would like to use to access the GUI of the PBX and press Enter..

Confirm the password and press Enter.
Enter a secure password for web applications and press Enter.

Press Enter to reboot the system.

SSH to the PBX once rebooted to complete the setup.
We can now login to Web GUI using the IP address we found in step 1. Type the IP address of your FreePBX system into a web browser on the same network as your FreePBX system (e.g. http://192.168.1.1 replacing 192.168.1.1 with your IP address).
 Uploading ....