Note: Older Sipura, Linksys and some Cisco models are no longer able to be auto-provisioned. Cisco has disabled this on models such as SPA8000, SPA941, SPA942, SPA962, PAP2T, PAP2, SPA2102, SPA2100, SPA1001. Newer models such as SPA5xx, SPA303, ATA191, ATA192, SPA122, SPA112 are able to auto provision using the instructions provided below.
Factory resetEdit
To perform a factory reset on a SPA525G, follow these steps:
- Press the phone's "Setup" button.
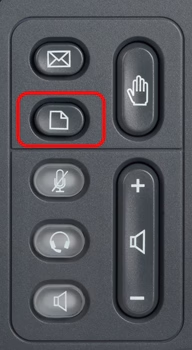
This is the button with the icon of a sheet of paper with a folded corner. - Use the navigation keys to scroll to "Device Administration" and press "Select".
- In "Device Administration", scroll to "Factory Reset" and press "Select".
- Press the "OK" softkey to confirm the factory reset.
- The phone will reboot and return to its factory default settings.
Determine IP addressEdit
Detailed Steps:
- Access the Menu: Press the "Setup" button on the SPA525G IP phone.
This is the button with the icon of a sheet of paper with a folded corner. - Navigate to Status: Use the navigation keys (up/down) to select the "Status" option.
- Select Network Status: Use the navigation keys again to choose "Network Status."
- Find the IP Address: The phone’s IP address will be displayed in the "IP Address" field.
- Access the Web Interface (optional): Once you have the IP address, you can open a web browser and enter the IP in the address bar to access the phone’s configuration interface.
Configuring for Auto ProvisioningEdit
- Phone should be reset to factory settings first to avoid configuration issues.
- Enter IP Address in a browser from a computer on the same IP address range (Network)
- Click "admin" (user name is admin and the default password is set to "admin" or not set at all (blank))
- Click "Advanced" if needed or go directly to Voice tab.
- Change the following settings:
Under the Voice/Provisioning tab
Provision Enable: Yes
Profile Rule: http://vernon.siptalk.com/linksys/auto.cfg?mac=$MA&sn=$SN
Click the "Submit All Changes" button at the bottom of the page.
To reset the ATA device to the factory defaults, perform the following steps:
- Connect an analog phone to the ATA device and access the IVR by pressing the asterisk key four times: ****
- Press 73738# (RESET#) to perform a full reset of unit to the factory default settings. The Admin account password will be reset to the default of blank.
- Press 1 to confirm the operation. Press * to cancel the operation.
- Log in to the unit using the User or Admin account without a password and reconfigure the unit as necessary.
Initial Setup
All Cisco/Linksys SPA ATAs, IP Phones and Gateways
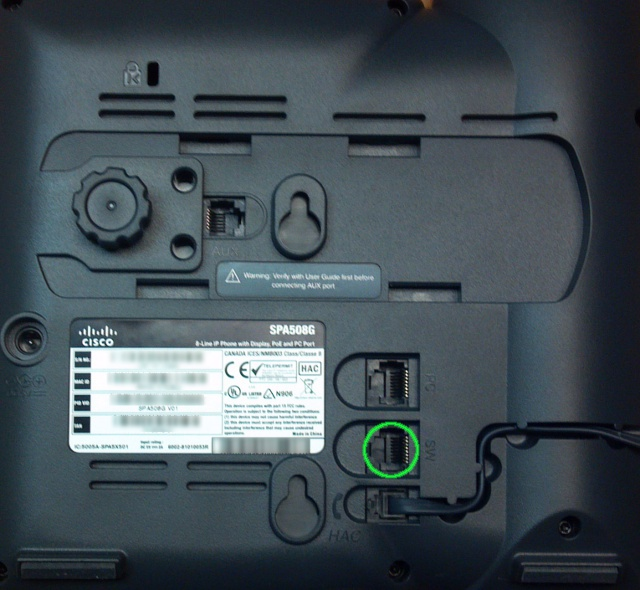
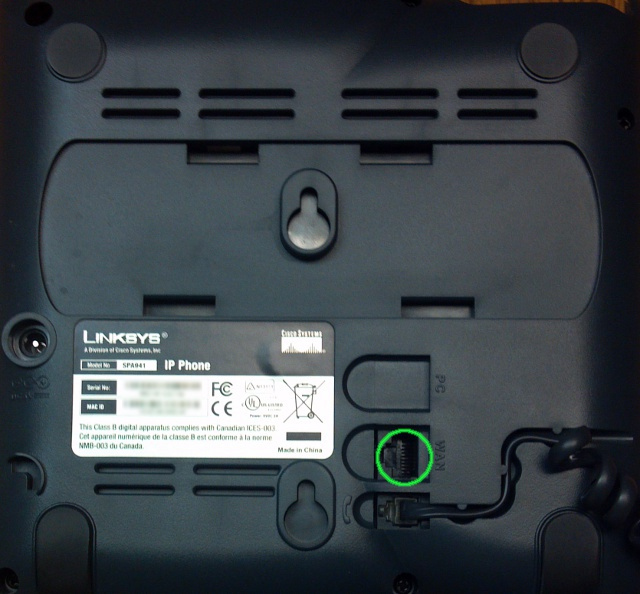
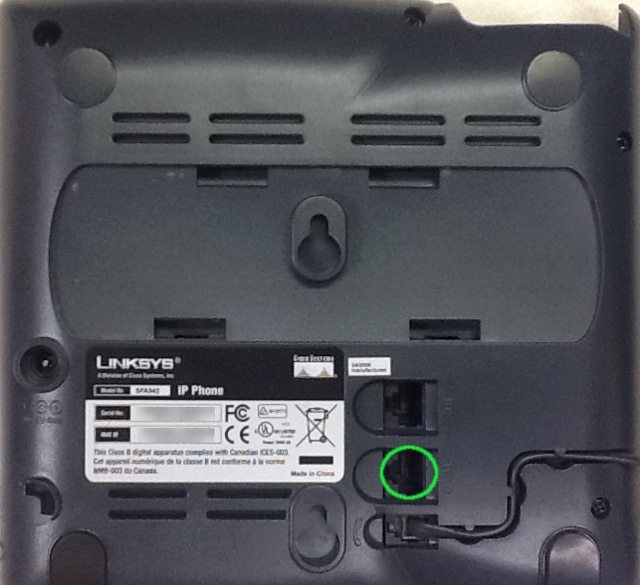
- Plug the Network/LAN/Ethernet cable into the SW port of the Linksys and wait several moments for the device to acquire an IP Address (see images below)
Get the device's IP Address
All Cisco/Linksys SPA ATAs and Gateways
- Plug a telephone (simple handset) into FXS port 1 and access the IVR by pressing the asterisk key four times
- Dial **110#. it will then read out the devices IP address
- To enable WAN access on the ATA, dial ** 7932# 1# 1
NOTE some devices like the SPA122 will not allow you to enable this with the default password. In this case you will need to connect another computer (laptop) into the ethernet port and use devices LAN IP address to log into the web configuration.
For Cisco/Linksys SPA desk Phones
- Press Settings key (the button below the Message key)
- Use arrow keys to select Network and press Select, it will display the devices IP address
Configuring for Auto Provisioning
- Phone should be reset to factory settings first to avoid configuration issues.
- Enter IP Address in a browser from a computer on the same IP address range (Network)
- Click "admin" (user name is admin and the default password is set to "admin" or not set at all (blank))
- Click "Advanced" if needed or go directly to Voice tab
- Change the following settings:
Under the Voice/Provisioning tab
Provision Enable: Yes
Profile Rule: http://vernon.siptalk.com/linksys/auto.cfg?mac=$MA&sn=$SN Click the "Submit All Changes" button at the bottom of the page.
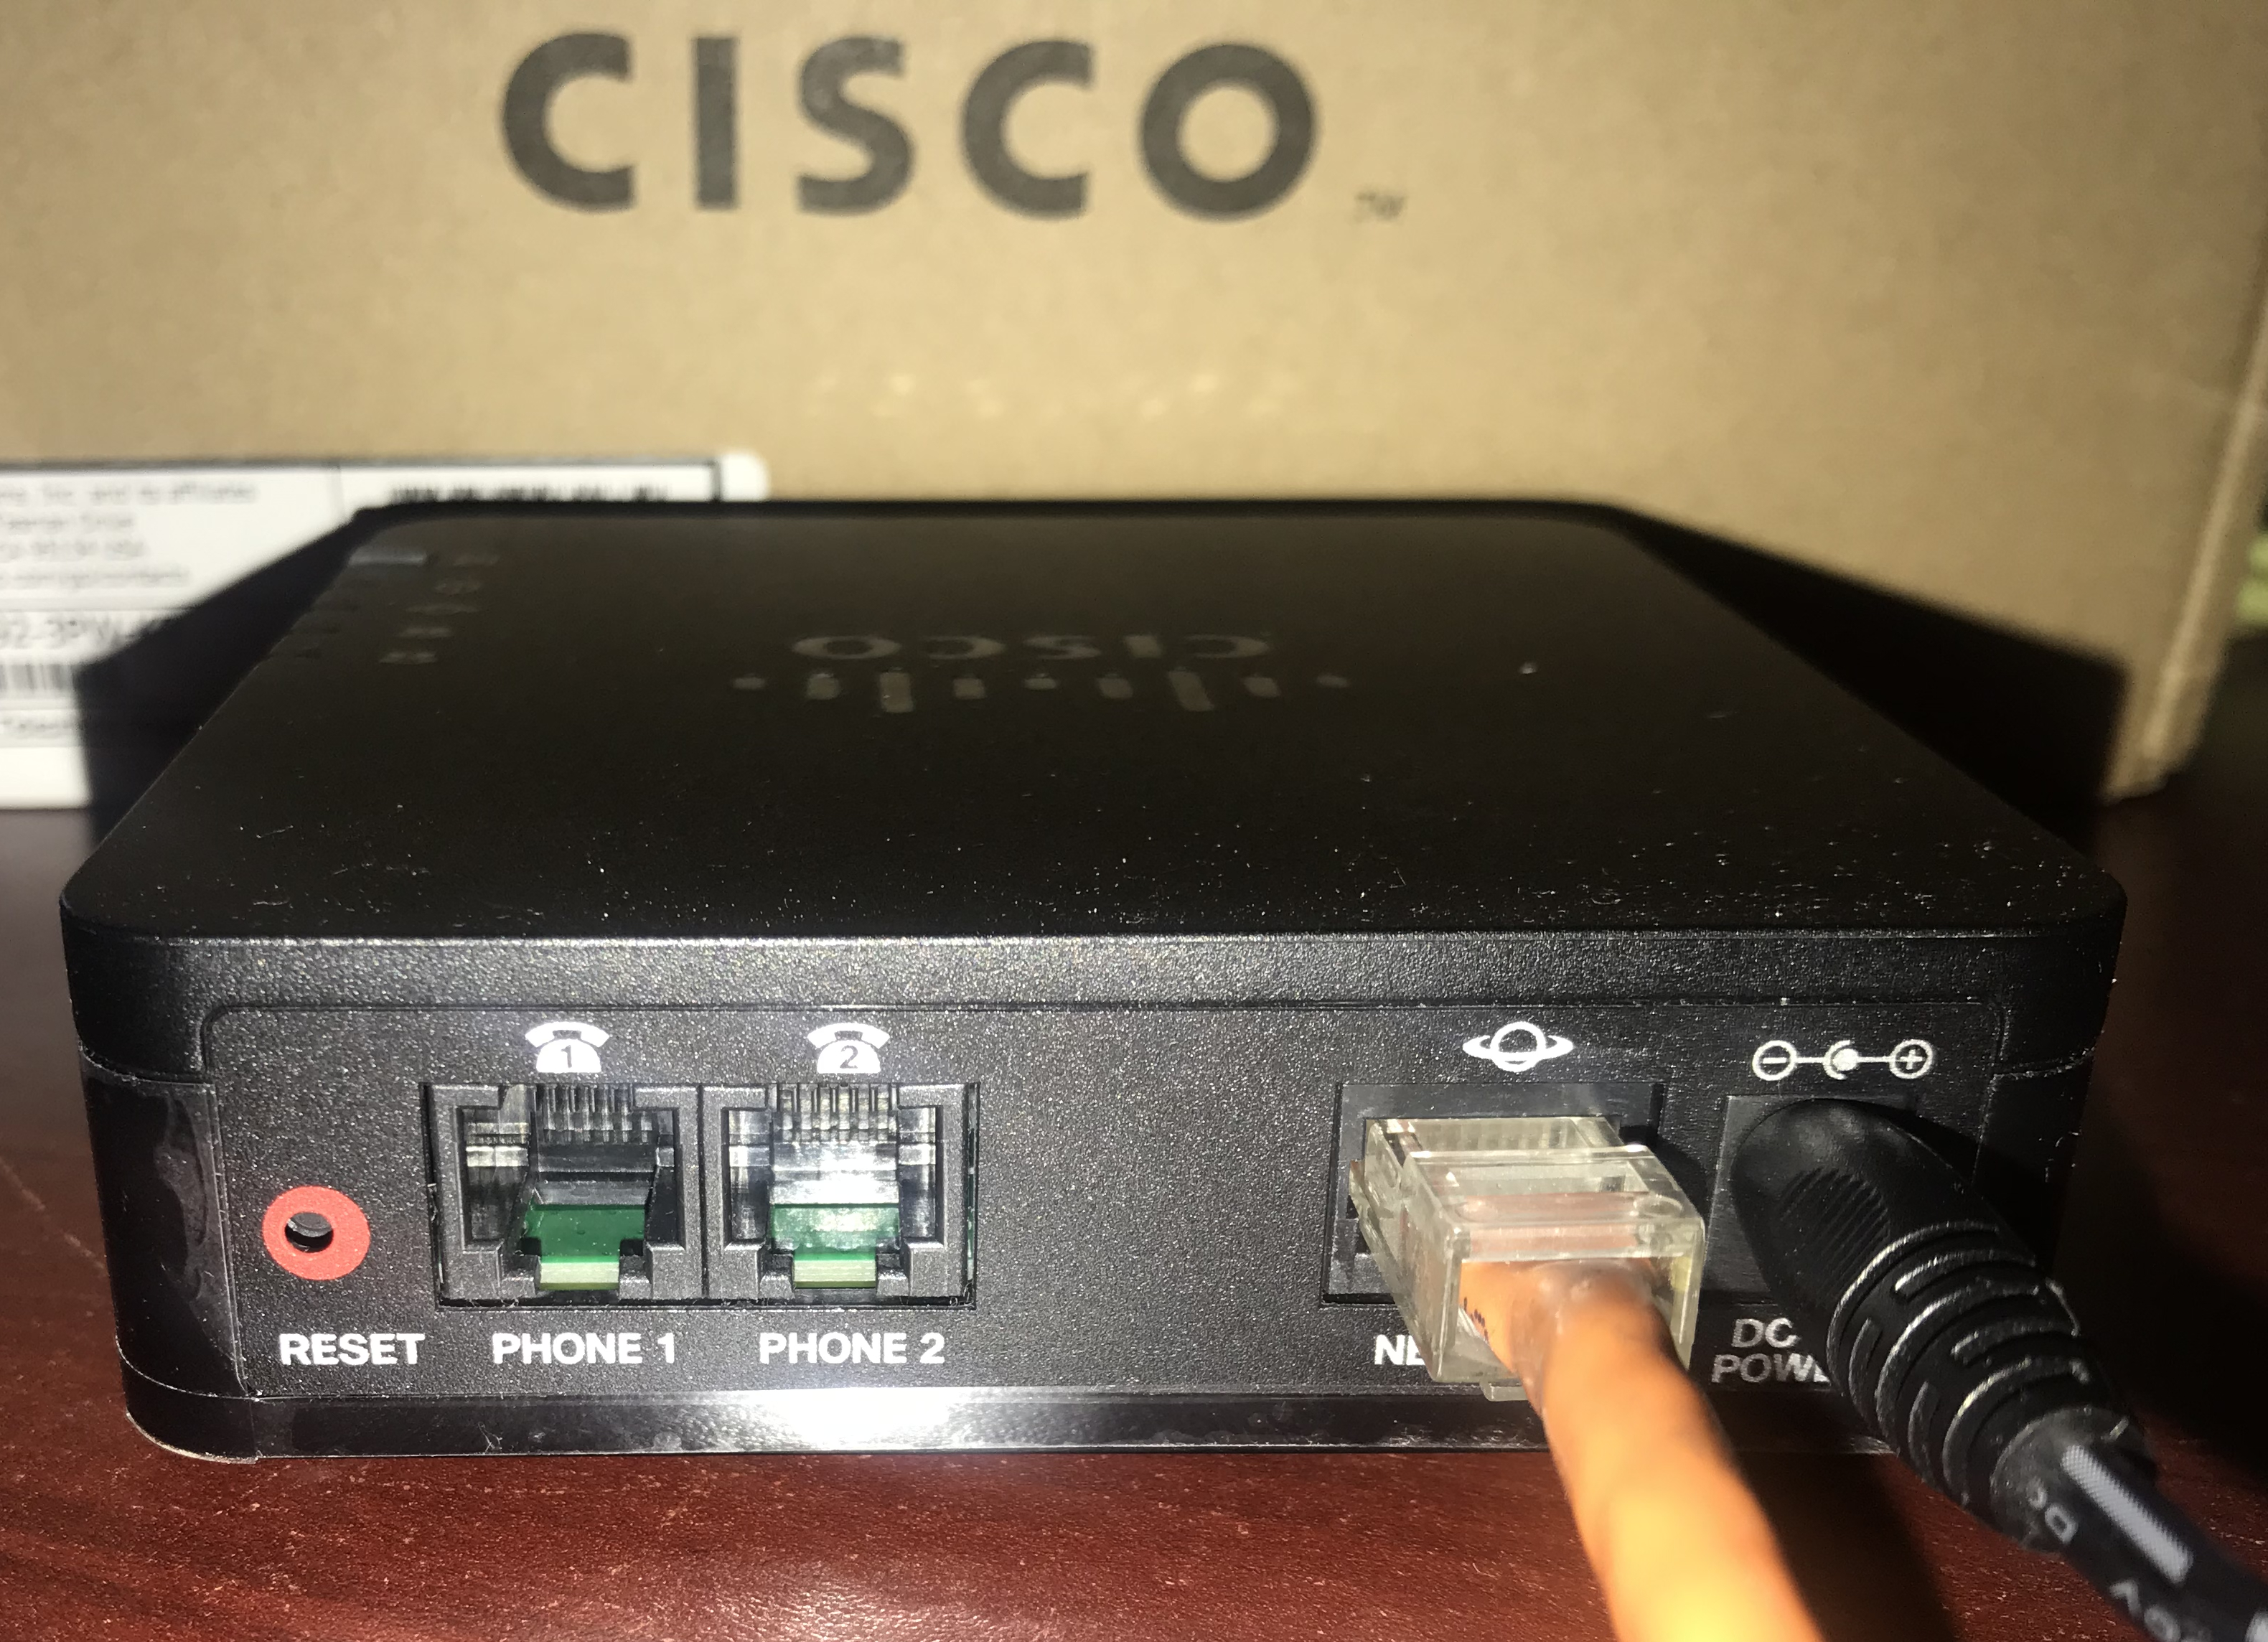
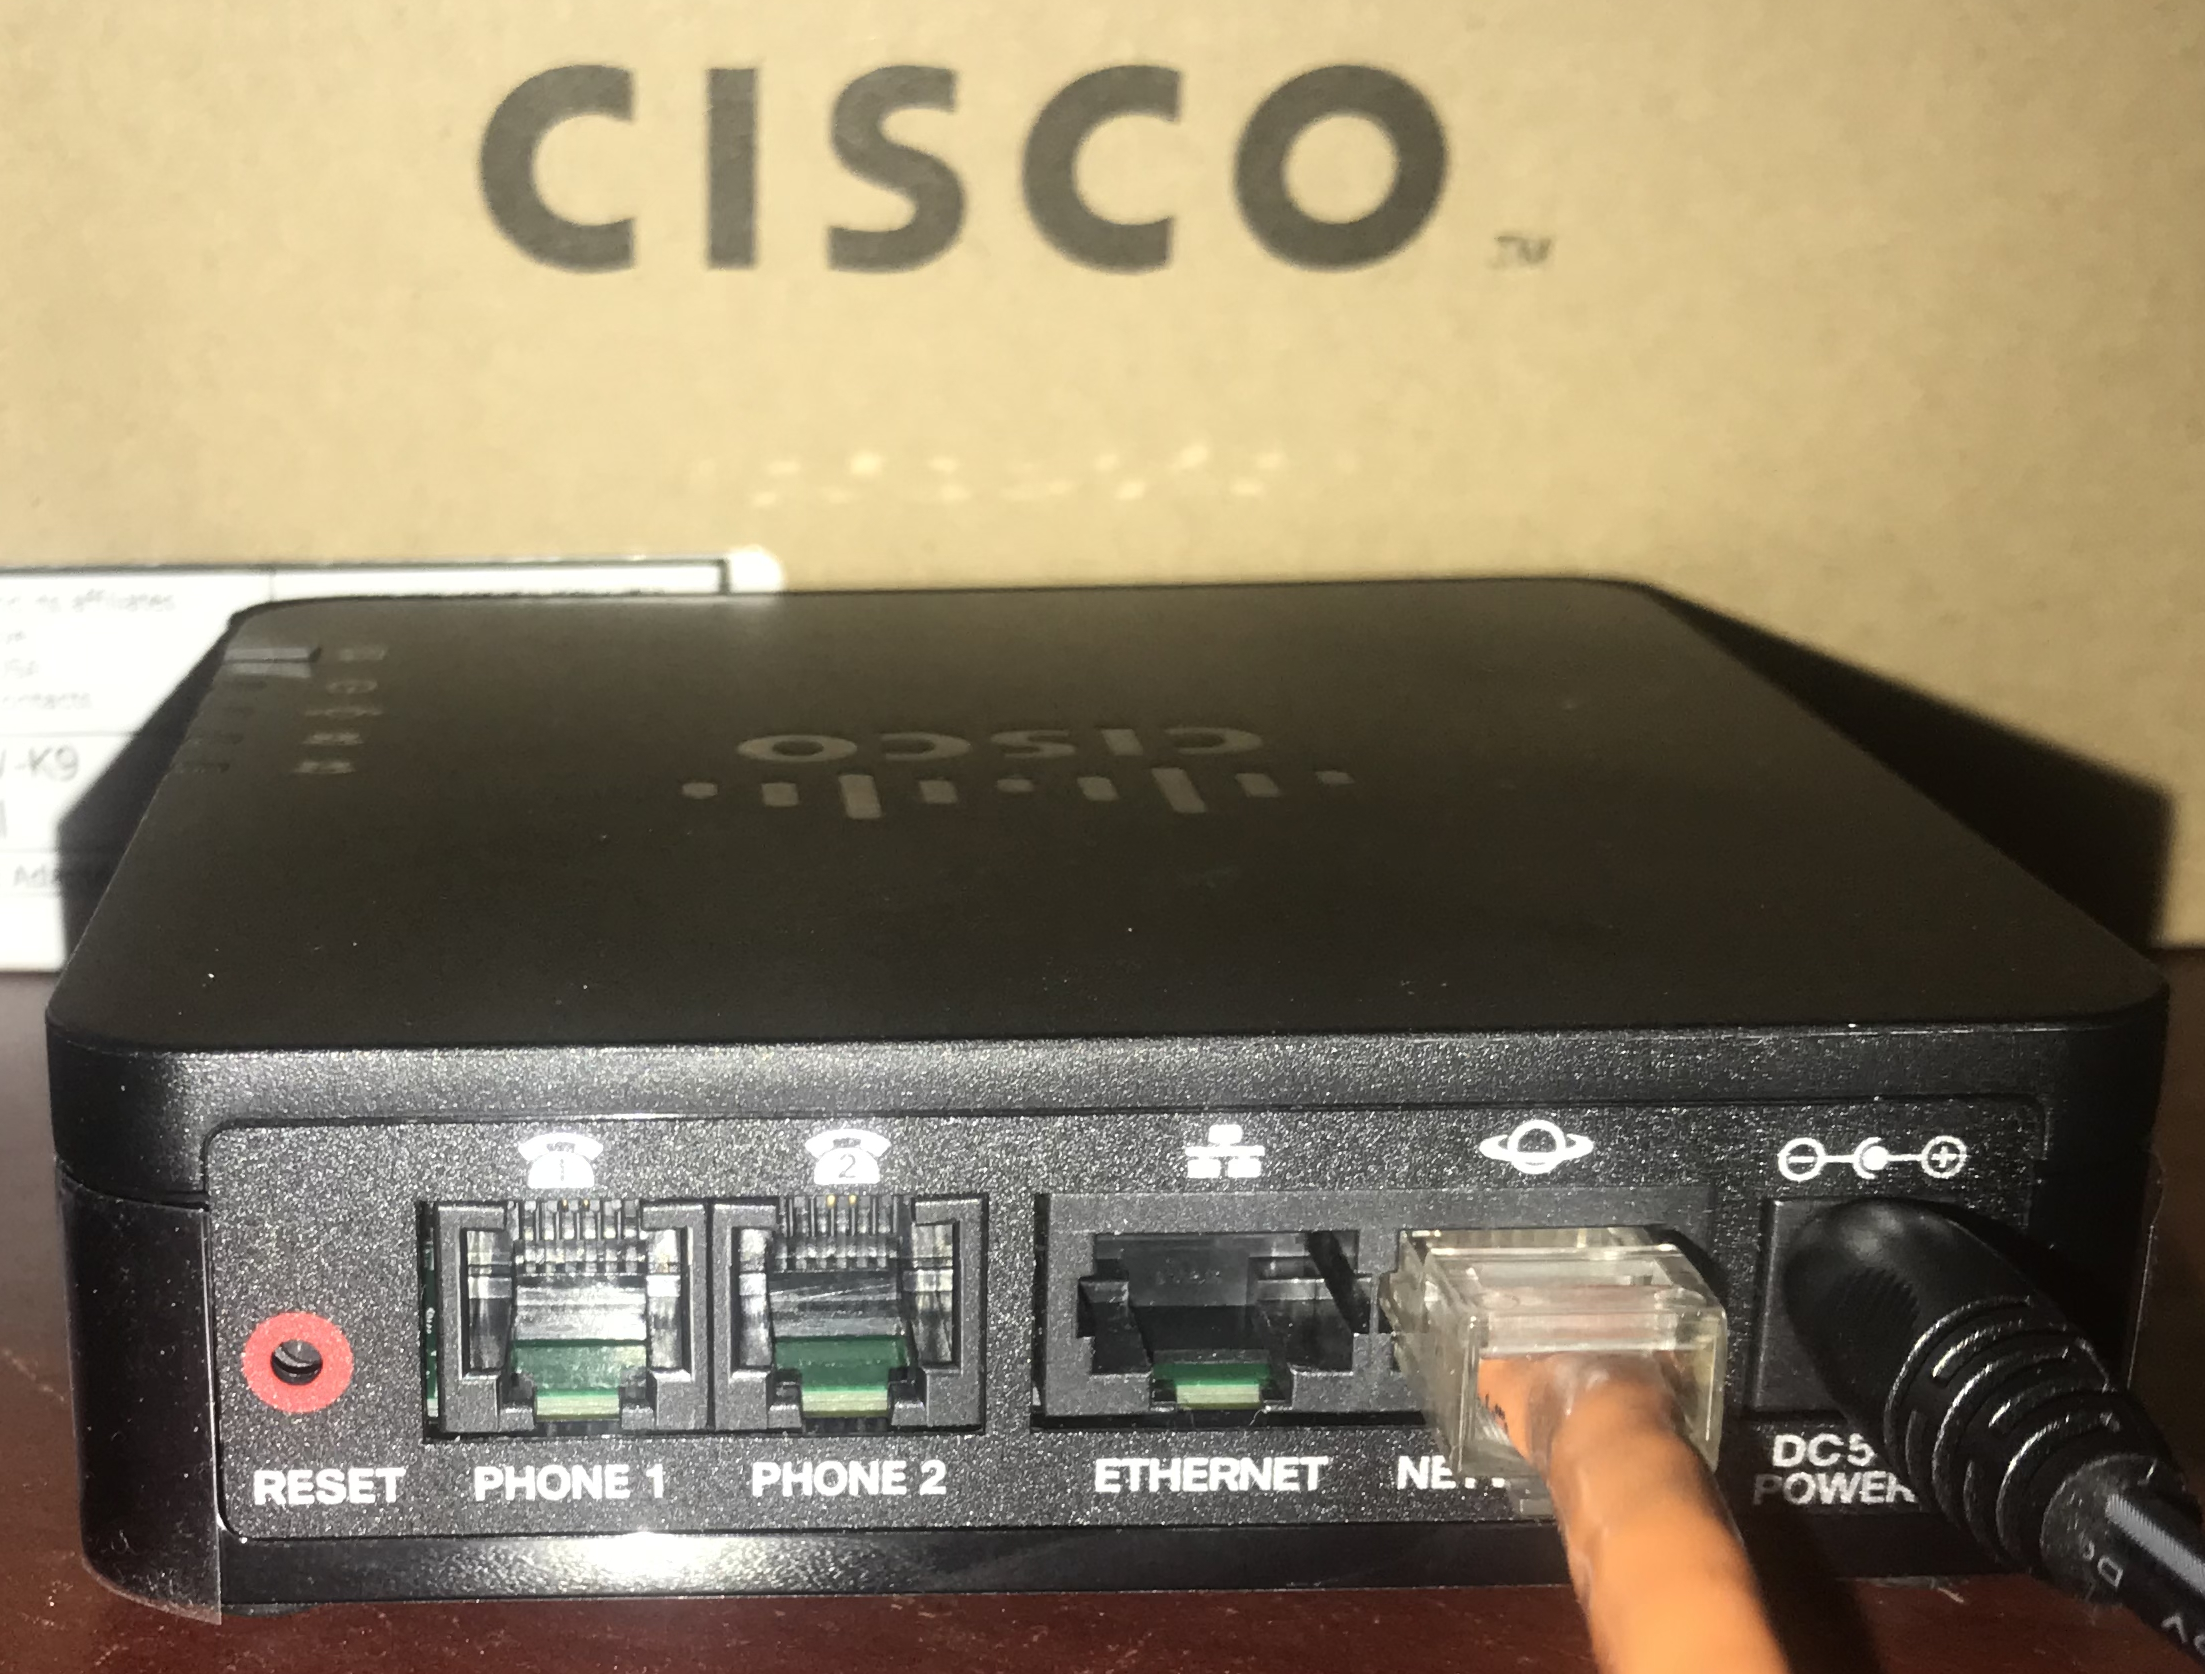
Images of devices showing the network Internet jack for various models
Linksys SPA8000 (labeled Ethernet)

Cisco 79x0 IP Phone (labeled 10/100SW)

Cisco SPA122 ATA (labeled Internet)
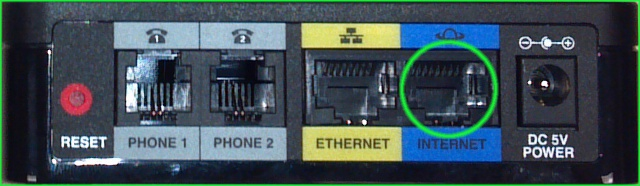
Cisco SPA191/192 ATA (labeled Network)
Cisco SPA50xG (labeled SW)
Linksys SPA941 (labeled WAN)
Linksys SPA942 (labeled WAN)
 Uploading ....