Using the Clearly Anywhere Desktop Application
Note: Use and functionality of the Desktop Add-on is predicated by active licensing of a 'base' Clearly Anywhere system (mobile users) and the Desktop Add-on.
Once you have established the necessary Clearly Anywhere licensing, and downloaded the Clearly Anywhere Desktop application, the following information will outline and detail the setup process to enable Clearly Anywhere Desktop for existing licensed users
Logging In
Once you have installed Clearly Anywhere Desktop, the application will pop up to the log in screen.
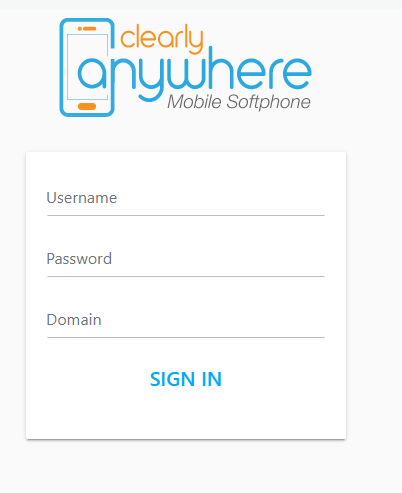
Use your UCP credentials to log into the app:
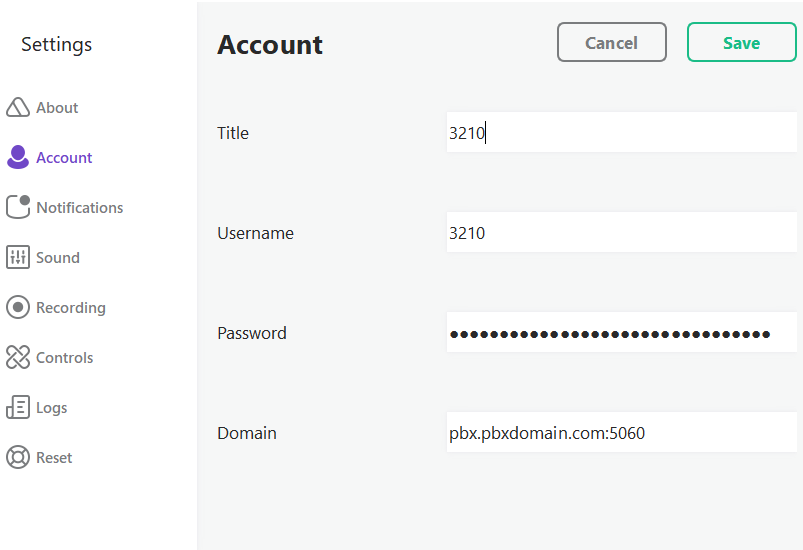
· Username: Your Extension number
· Password: Your UCP login password (set in user management)
· Domain: PBX Domain Name

Once filled in, hit Sign In.
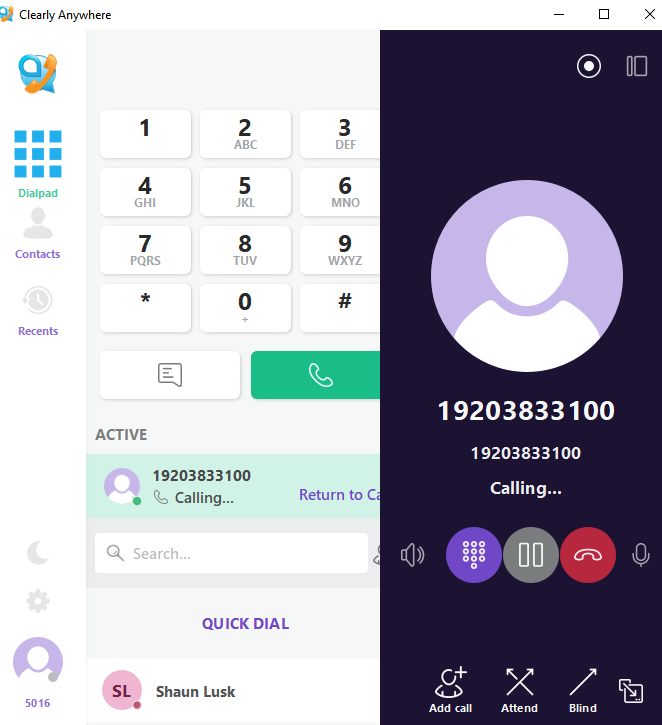
Main Screen:
The app will open to the main screen. On the left hand side you will see your options.

Dialpad:
 Click on the Dialpad option to toggle the Dialpad on and off the main screen.
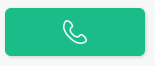
 To make a call using the Dial pad, dial the number and click on the green phone icon.
This will start the call and open the In Call Screen.
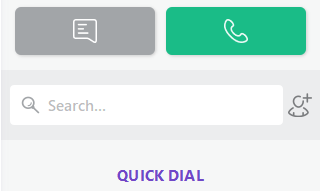
Contacts:
- Clearly Anywhere for Desktop has 2 menu options when viewing Contacts.
- Quick Dials tab are all BLF buttons you have setup below.
- Server Contacts tab you will see all contacts that you user in PBX has access to in the Contact Manager of your PBX.
Setting Up Quick Dial:
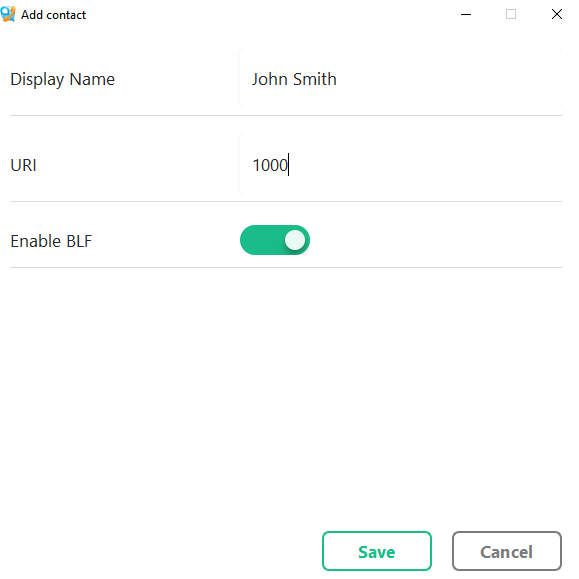
To add a contact in the app, click the person with the + icon.
This opens the Add Contact Screen.
· Display Name: Contact name that will be displayed
· URI: Extension Number
· Enable BLF Toggle: Toggle the BLF of this contact on and off
Click save to add your new contact.
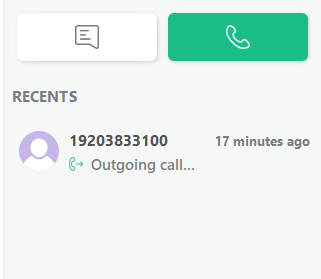
Recents:
 Click on the Recents icon to toggle your recent calls list on and off the main screen.
Recent calls will be listed below the Dialpad.
Make a Call and in Call Options:
To make a call, use the dialpad to dial a number and click the green phone icon.
Or use your contact list to click on a contact and use the green phone icon in the contact screen.
 Add call: Click on this to add another call to the current call.
 Attended Transfer: Click this to perform an attended transfer.
 Blind Transfer: Click to perform a blind transfer.
 Open Call Window: Click to make the call a separate window from the main screen.
 Hang up: Click to hang up the current call.
 Dialpad in call: Click to bring the dialpad up in the call.
 Audio Devices: Click to choose what audio device output to use.
 Mute Button: Click to mute yourself in call.
 Record: Click to record a call. When it is white, it is not recording.
 When circle is red, it is recording.
 Expand Call Toggle: Click to toggle expand the call in the main screen.
Messaging:
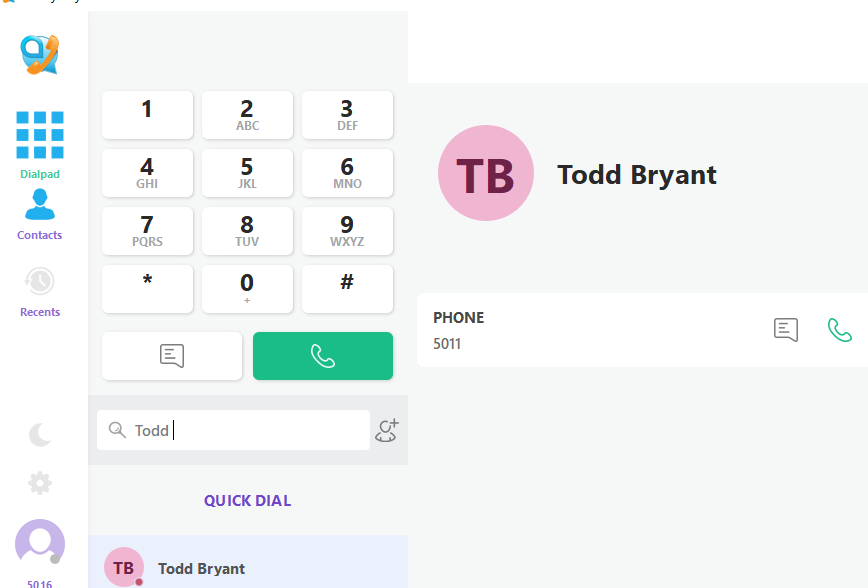
To send a message, use the dial pad to enter a number and click the message icon on the dialpad, or use your search bar to find contact on your contacts list, click on their name, then click the message icon in the next window.

This will open the Message Page where you will see all call and message history with that contact.
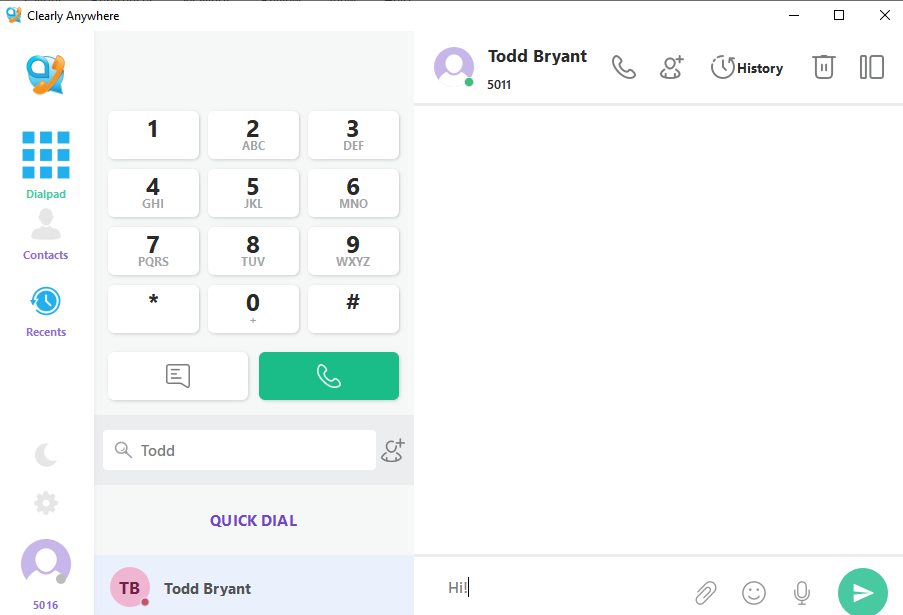
 Call Contact: Click the phone icon to call the contact you are viewing.
 Add Participant: Click the person with the + next to them to add another contact to the chat.
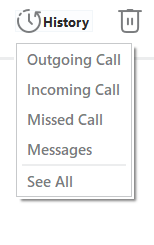
History: Click the history icon to view message and call history.
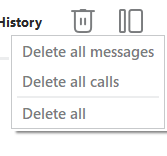
Delete History: Click the trashcan icon to delete messages and call history.
 Sidebar Toggle: Click the two rectangles icon to toggle the dialpad side bar.
 Attachments: Click the paperclip icon to add and attachment.
 Emoticons: Click the smile face icon to use an emoticon.
 Voice Message: To record and send a voice message, click on the microphone icon and the recording bar will pop up and start recording.
When you are done recording and wish to send, click the green paper airplane icon. To delete that recording, click the white square icon.

 Send Icon: To send a message, click the paper airplane icon (or hit enter on the keyboard).
Do Not Disturb:
Click on the moon to toggle Do Not Disturb on and off.
 When the moon is grey, it is off.
 When the moon is blue, it is on.
Settings:
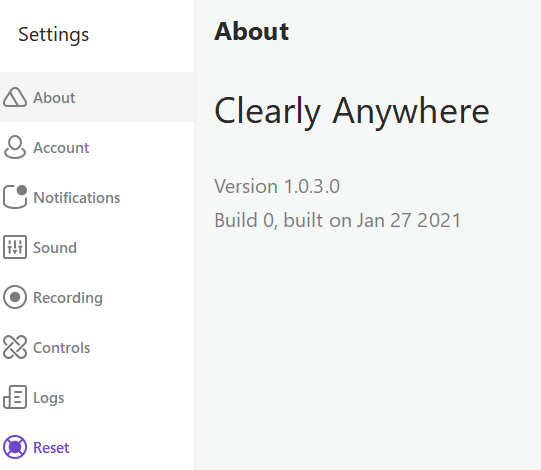
About: Find the version and build of the application
Account: Here you can see and edit your account credentials.
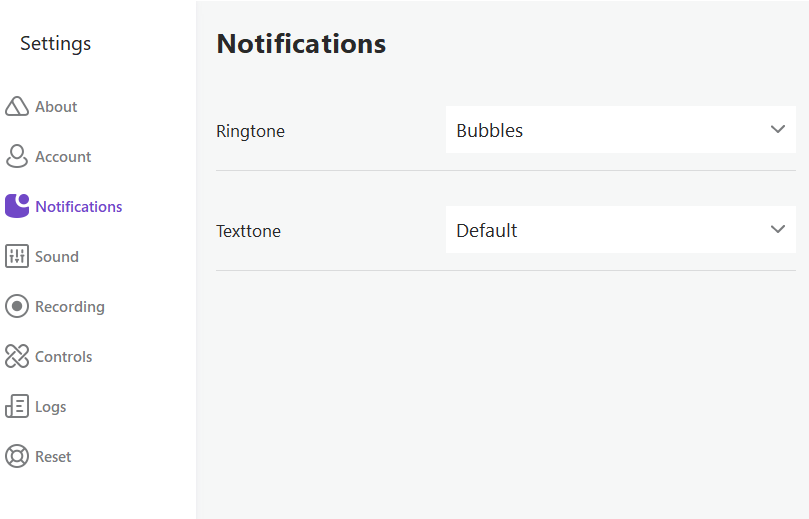
Notifications: Here you can choose your ringtones for calls and text tone.
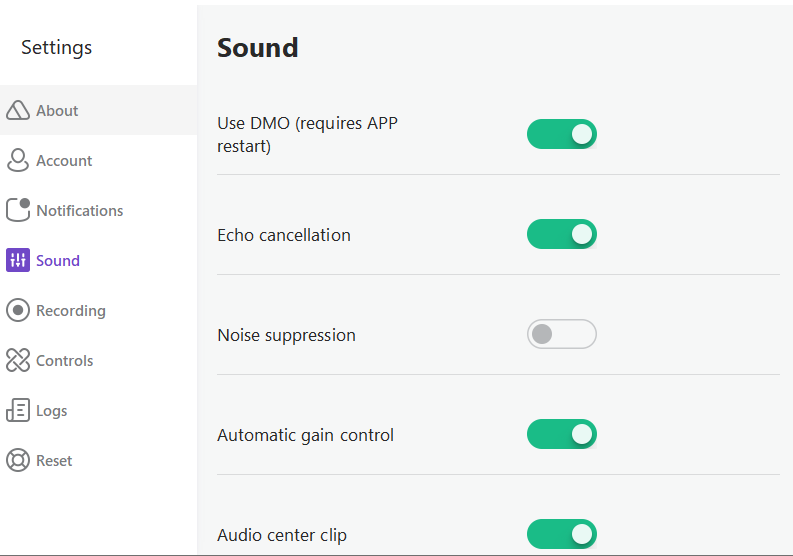
Sound: Here you can set your microphone and audio settings.
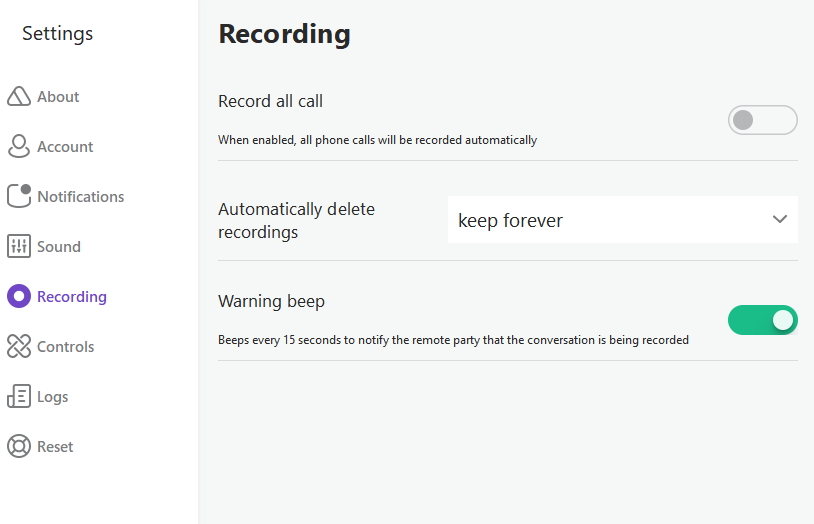
Recording: Here you can set your recording options.
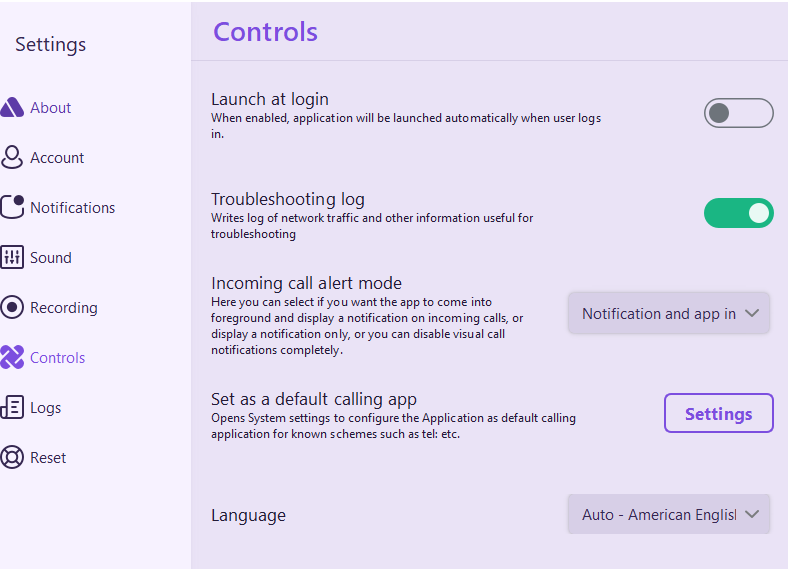
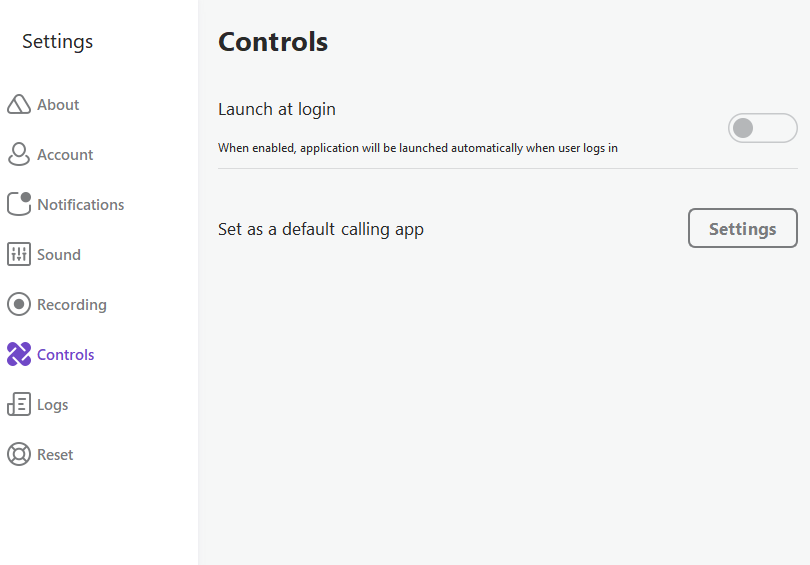
Controls: Here you can set if the app will be launched automatically (toggle) and set the app as your default calling application.
Enable Logs to troubleshoot issues: Uploading ....