This is a quick step by step guide for being able to record all the audio and video streams of a Clearly Live video conference session into a single video file (a .webm video file to be stored in the local Hard Drive of the user clicking to record the video conference).
Procedure
In the Clearly Cloud Management Portal (MGM) at Admin Client level:
NOTE: It is assumed that at least one user has already been created in the system (users are created under the Users page section).
- Go to Video Conferences

- If a video room has been created already double-click on it to Edit it; otherwise just click on the + Add a Video Room button at the top in order to create one
- The following window will popup:
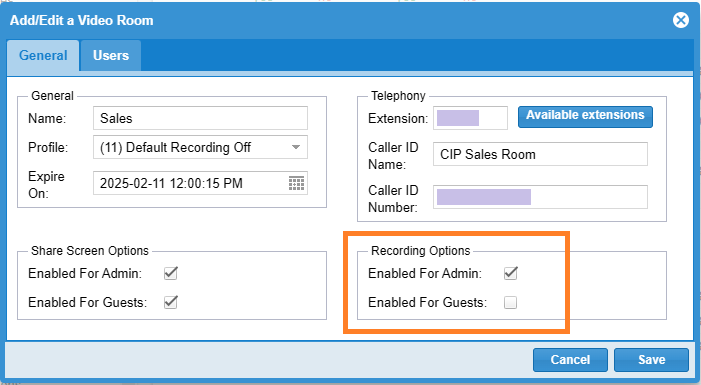
The important settings are the Recording Options: here you can define wether the Admin user (the owner/moderator of the video conference session) and/or regular Guest users will be able (or not) to start and stop recording the vide conference session during it. Basically, these two checkboxes make it so that the Start recording option is shown (or not) inside the More actions menu in the video conference window once inside it, for either type of user (Admin or Guest).
- Click on the Save button to save the configurations
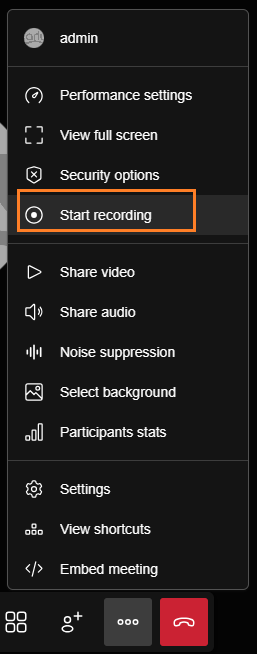
At this point, whenever and Admin user and/or a Guest user (depending on what was configured in step 3 here above) is inside that conference room, he/she will be able to start recording, in a single video file, all the audio and video streams of that video conferencing session by clicking on the Start recording option inside the More actions ('three dots') menu:

Once clicked on Start recording, just make sure that only the "Save recording file locally (Beta)" toogle is enabled and then click on the Start recording button:
IMPORTANT NOTES:
Make sure to keep present all of the following four important considerations:
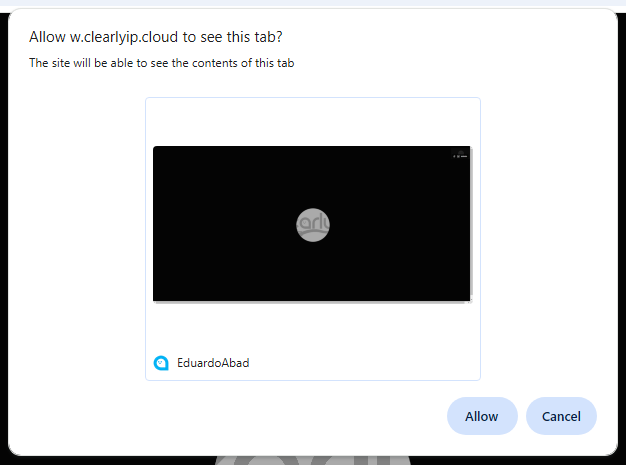
A) Right after clicking the Start recordng blue button make sure to select the correct Clearly Live video conferencing tab (select it and then click on Allow)
B) It will not be announced to other participants that the session has started being recorded, you will need to expressly let them know
C) The size limit for the recording file is 1GB which is around ~100 minutes of recording
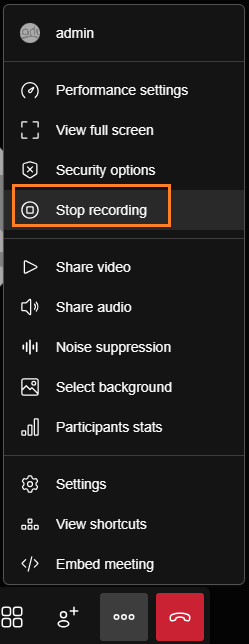
D) Make sure you stop the recording before exiting the meeting in order to save it, otherwise the recording file will not be stored. To Stop the recording just click to show the More actions ('three dots') menu and then click on Stop recording
That's it! The resulting file containing the recording will be a .webm video file to be stored in the local Hard Drive of the user that clicked to record the video conference.
 Uploading ....