Introduction
Clearly Live is a Web Browser plugin for handling Video Conferences. Currently only available for Chrome Web Browser.
Installation
To install, you need to navigate to the Extensions section of the Chrome Web Store. Here are some options:
Go Directly to the Extension URL
https://chromewebstore.google.com/detail/clearly-live/hlgiblolpcicgichgoahaikblddfjhfp
Or, Navigate to the Extension Store:
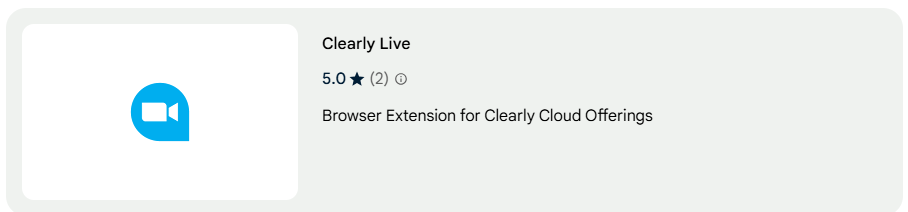
and search for Clearly Live, the following should show up as search result:
Installing:
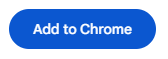
Just click to open the extension page and then clik on the "Add to Chrome" button on the top right corner of the page
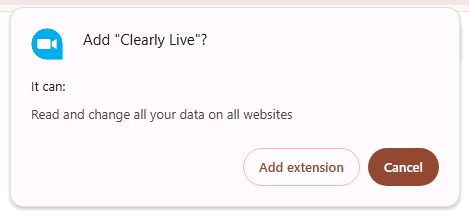
and on the popup that will open just click on the "Add extension" button:
After added, you can Pin the extension in Chrome to have the extension icon be always visible there to the right of the address/URL bar of Google Chrome.
Now just click on the extension's icon:

- A new window will pop-up allowing you enter the Server (Clearly Cloud Domain), your Username and Password. You can ask your Clearly Cloud Administrator to provide you this information.
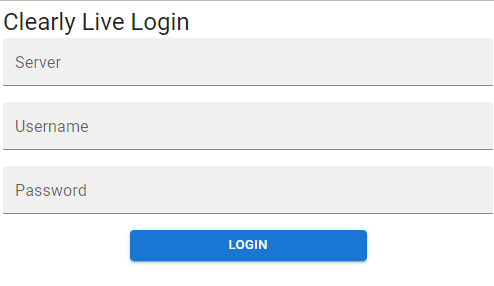
- Server: w.clearlyip.com or cloudpbx.com
- Username: call panel username
- Password: call panel password
- Since this is a Web Browser Plugin, the login information will be kept by the Browser until you delete it or uninstall the extension.
Using the Plugin
Starting a Video Conference
- Once you are logged in, click on the plugin icon

- You will see all the Videoconference you are allowed to login.
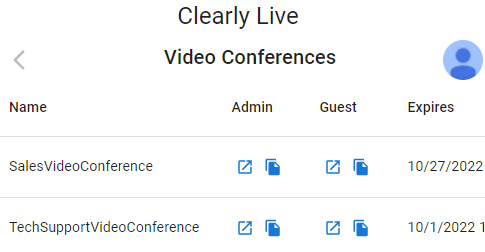
- As you can see, the information displayed is the Name of the video conference room, the type of login you can perform (Administrator or Guest) and the Expiration Date.
- Clicking on the launcher button
 , a new tab will be opened in the browser allowing you enter the videoconference.
- Clicking on the copy button
 , the URL link of the videoconference will be copied on memory so you can paste it wherever you want.
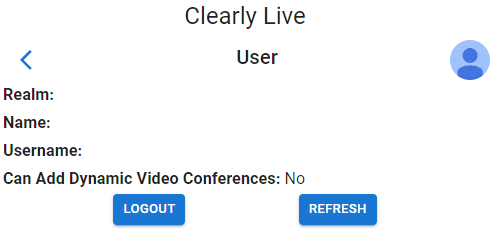
- If you click on the user's icon
 you will retrieve the user's information, although the Domain, Username, and Password are hidden.
 - You can also Logout and Refresh the user's information.
Scheduling a Video Conference Within Google Calendar
- Create a new Event
- Link a CloudPBX meetings
![]()
- Select the Conference Room
- Voila!
![]()
 Uploading ....