| | | |
 Uploading .... Uploading ....
OverviewThe following guide should work for all Clearly IP FXO Gateways below;- CX-GW8FXO-G2 - 8 Port Gateway
- CX-GW4S4O-G2 - 4 Port FXS and 4 Port FXO Gateway
IMPORTANT NOTE: These gateways will only accept LOOP START lines, if you use GROUND START on the lines, you may have incoming calls but when placing calls out, you may get a 503 SERVICE UNAVAILABLE response from the gateway. To test this, connect a standard analog phone and confirm if you receive a dialing tone when you take the phone off hook, it you hear silence, it is very likely that you have a GROUND START type of line.
Power up the ATA on your local network- 1.For a device with FXS ports, you can dial ## by using an analog telephone connected to the FXS port 1 after the equipment is powered on.
- 2.For a device without FXS ports, you can use device IP address obtaining tool called 'Finder' or any network scanner to obtain the IP address.
ConfigurationLogging in
Navigate through your web browser to the IP address of the device on the same network where the ATA is connected.- Log into the web GUI. Default Username is "Admin" and the initial password is in a sticker in the bottom of the device for older devices. If the sticker does not list a Password the device will have a default password of "clearly".
- Enter the captcha letters and numbers to access. These are case insensitive

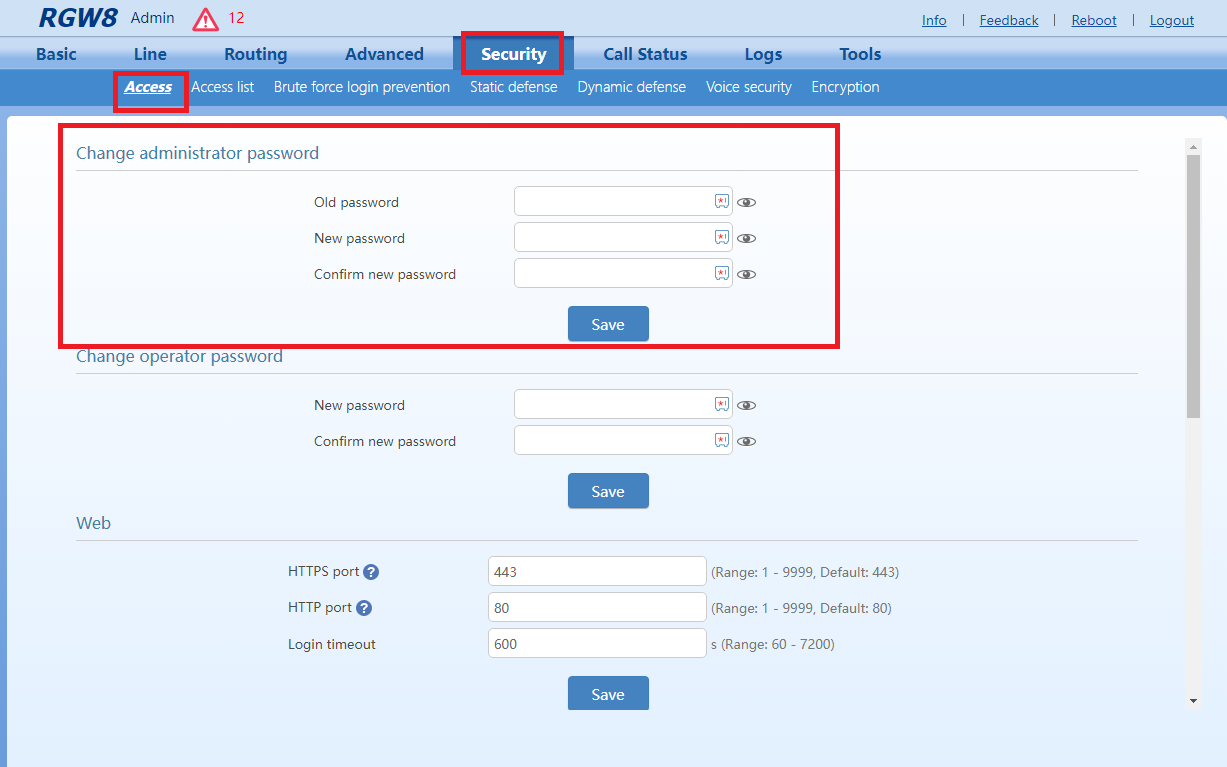
Changing the default password- Navigate to Security > Access
- Enter the current default password and the new password with its confirmation.
- The new password must be from 8 to 16 characters in length, a combination of letters, numbers, and symbols excluding the '&' or the '=' or the '"' symbols.
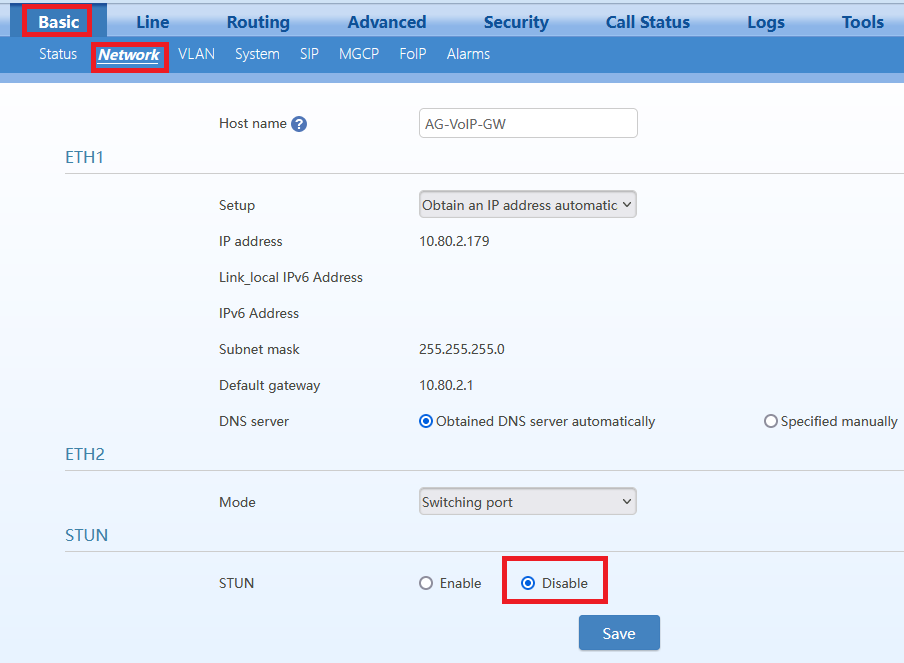
 NetworkIn the menu Basic > Network you can set the following parameters: - Hostname
- IP assignment (Setup): Obtain an IP address automatically or set an static IP.
- Set ETH2 as a switching port or redundant port to ETH1
- STUN (Keep STUN disabled)
Codecs- Navigate to Basic > System
- Under the Codec section move the codecs using the arrows from the Enabled codecs box to the Disabled codecs box so that we just have G.711U/20 picked

- Click on the Save button to have this setting applied.

Entering the FreePBX trunk information- The first step to take is to enter the FreePBX information what will be used by each port
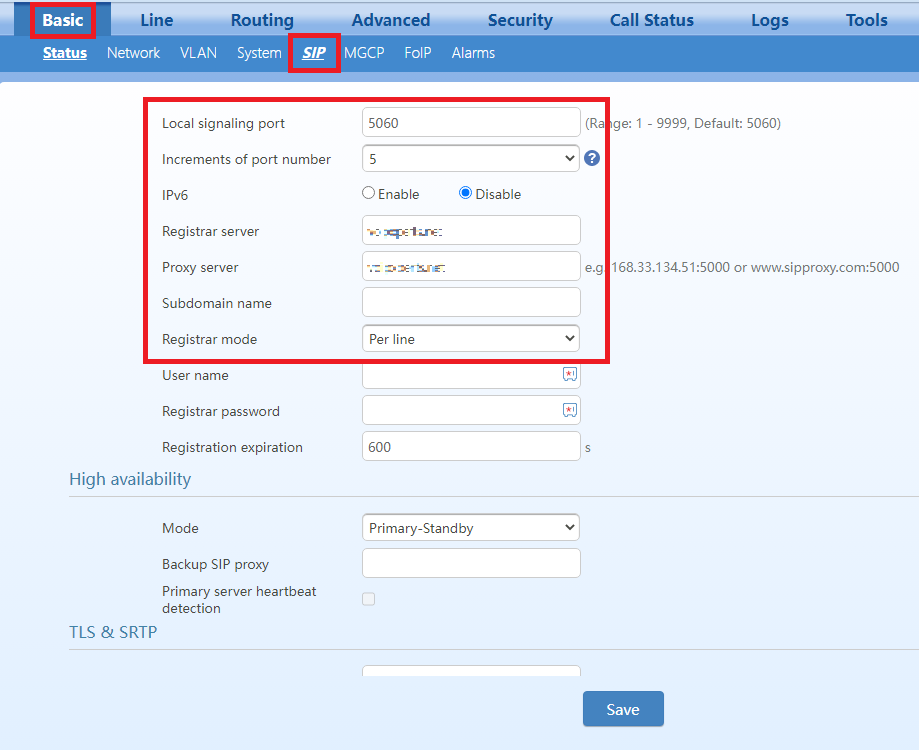
- Navigate to Basic > SIP
- You can change or keep the default value of 5060
- Leave the Increments of port number field to its default value. This value is the increment on the SIP port used when assigning a SIP port to each registration.
- Enter in the Registrar Server field the IP or FQDN of your FreePBX system.
- In the Proxy Server field enter the IP or FQDN of your FreePBX system.
- In the Registrar Mode section select 'Per line' from the drop down menu.
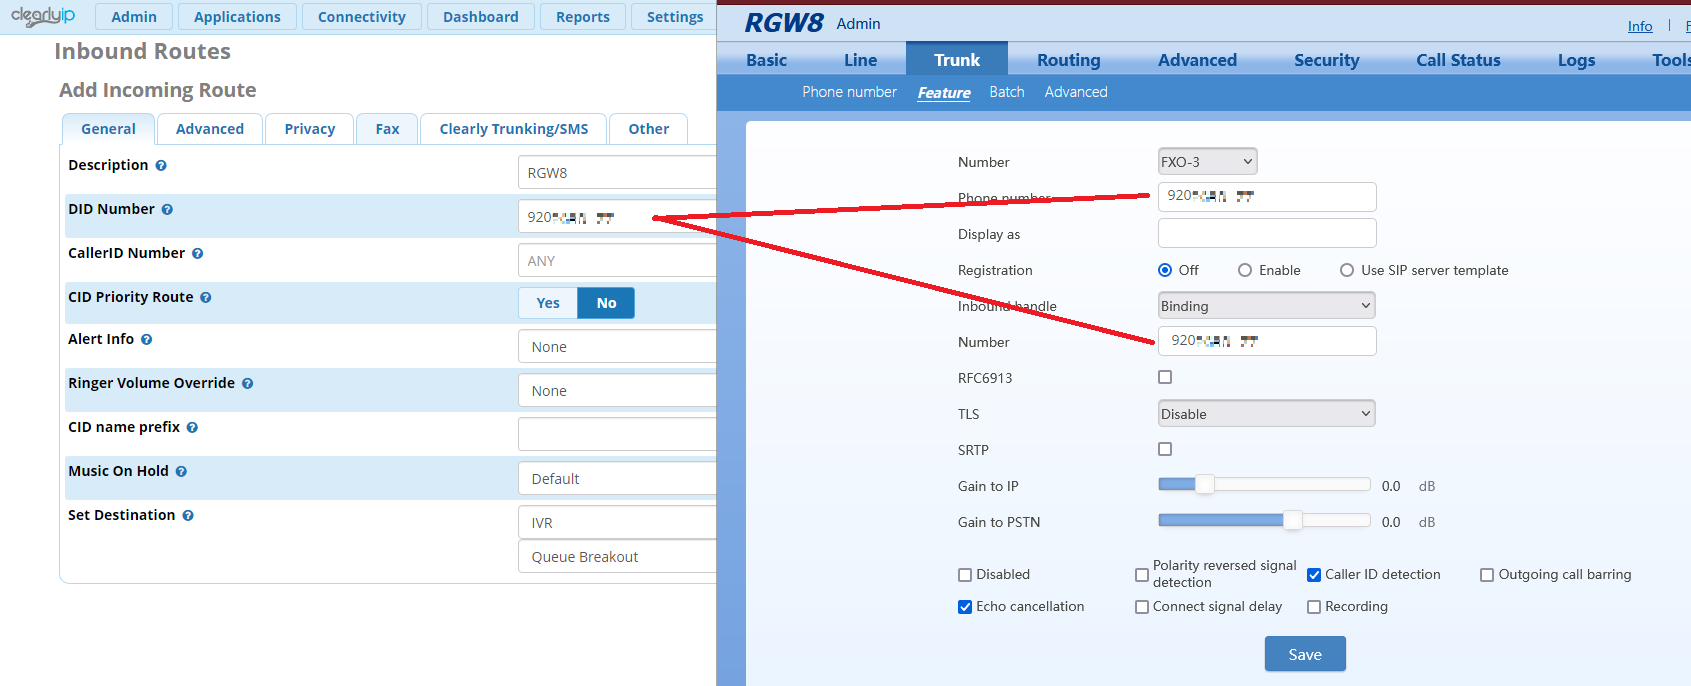
Inbound calls sent to FreePBX In this section we will setup our Gateway to receive calls from the PSTN and send them to FreePBX - On Trunk > Feature page fill in Phone number, and Number sections with the DID or the POTS phone number.
- Set Registration to 'Off'.
- Set the option Inbound handle as Binding.
- Make sure TLS and SRTP are disabled.
- Keep the rest of the options on their default values.
Note: You have to do this for every FXO port you would like to use in your deployment. To select a FXO port just use the drop-down menu next to the Number section.
 Outbound calls from FreePBX In this section we will setup our Gateway to send to the PSTN the outbound calls coming from FreePBX - Navigate to Routing > Routing table.
- In the routing table enter the following information:
- IP X ROUTE FXO 3-4/R
- This means that any call coming from the IP side (SIP signaling) will be routed to ports 3 and 4 using the 'round robin' distribution method.
- If we remove '/R', the calls will be sent to the ports using the 'hunt' method.
- Both of these methods are helpful as the Gateway will route the call to the first available port. If port 3 is busy, the call will be sent to port 4.
Creating the SIP trunk in FreePBX- In FreePBX go to Connectivity > Trunks
- Click on Add Trunk (chan_pjsip)
- Enter a name for the trunk.
- Enter the Outbound Caller ID
- Leave the rest of the parameters on their default values
- In the PJSIP Settings tab, set the 'Authentication' to 'Both' and 'Registration' to 'None'.
- In the SIP Server field enter the IP Address of the gateway.
Outbound calls from FreePBX - Go to Connectivity > Outbound Routes and add an outbound route as follows.
- In our example the name of the Outbound route will be ToRWG8 and it is going to use the PJSIP trunk we just created for dialing out to the Gateway.
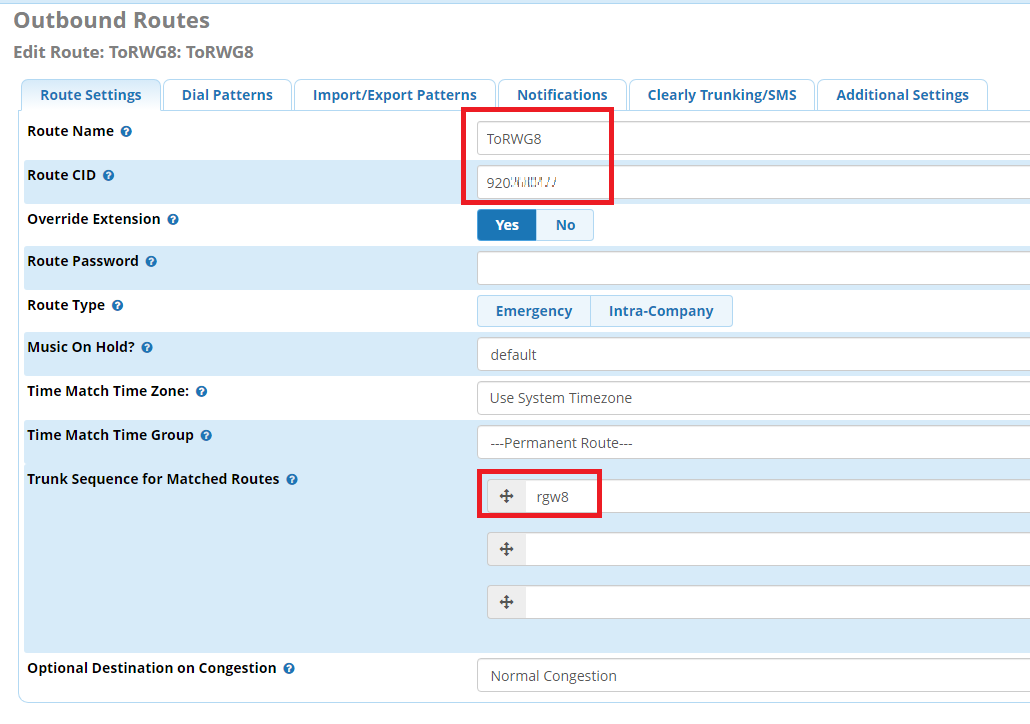
- Adjust your dial patterns according to your needs. In our case we will use the prefix 7 to send calls to the Gateway.

Note: You can use the following Routing Table example as an alternative to have the gateway remove all calls starting with a leading 9, this means remove the 9 as a prefix. Inbound calls in FreePBX - For calls coming from the Gateway, create an Inbound Route in Connectivity > Inbound routes making sure that DID number matches the Number and Phone Number entries entered in the Gateway.
|
|
|
| | | |
|