Overview
ComXchange FXS Gateways can be configured using the ComXchange Autoprovisioning tool that is available in the ComXchange Web Gui. The gateway provisioning tool is used to create a configuration file for a ComXchange 24, 48, 72, or 96 port FXS Gateway. The file is associated to a gateway’s mac address and stored in the ComXchange servers tftp root folder. The FXS gateway can download the configuration file via dhcp allowing for zero touch configuration.
The following guide should work for all Clearly IP FXS Gateways below:
- CX-GW1U24FXS - 24 Port 1U Gateway
- CX-GW1U48FXS - 48 Port 1U Gateway
- CX-GW2U72FXS - 72 Port 2U Gateway
- CX-GW2U96FXS - 96 Port 2U Gateway
Gateway Provisioning Module
Auto provisioning for the ComXchange FXS Gateways is done using the Provision Gateways Module in the ComXchange GUI
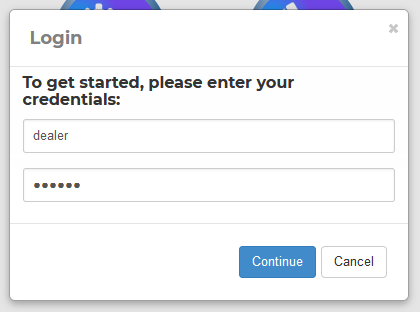
- Connect and log into the Web Gui of the ComXchange server
- Default ip address is 192.168.101.2
- username:password (please refer to onboarding material or contact support for login information)
- Verify the Guest SIP password in Guest Management > General Settings is less than 24 characters
- Should be less than 24 by default
Set Gateway Defaults
Before adding any gateways make changes to the default settings of the gateway type you are adding.
Note: When making changes to a field, use the hint button to copy and paste the possible options into the field
Navigate to Core Configuration > Provision Gateways
- Click on the Edit Defaults tabs
- Choose the Gateway you are changing the defaults for
- Note: The ComXchange 24, 48, 72, and 96 FXS Gateways will have a -nr on the end
Below is an example of configuring a 48 port gateway
- Click Submit to open the default template form for editing.
- In this form you will make any changes that would be needed on all gateways of this type
- this will usually concern the Clock Settings or interdigit timeout in the Advanced Tab, the Digit Map Patterns, and Voip Trunks
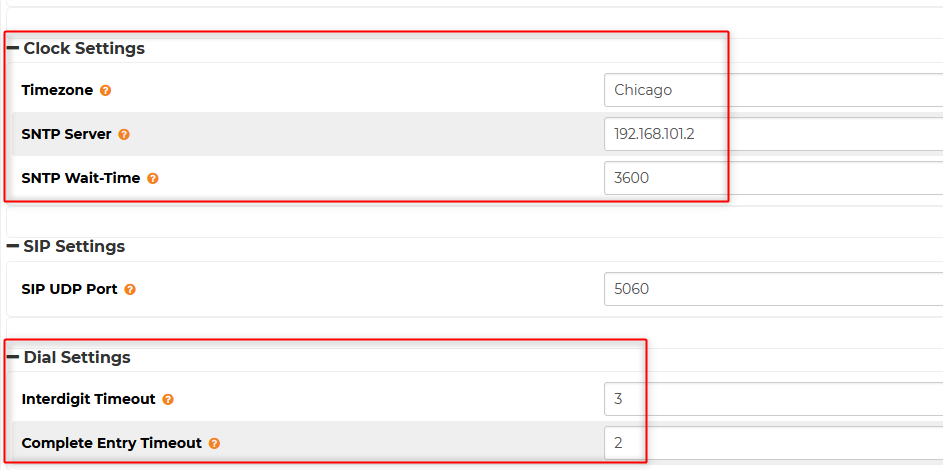
Advanced Tab
- Make any changes to the Clock Settings or Interdigit Timeout
- You can also set a new admin password
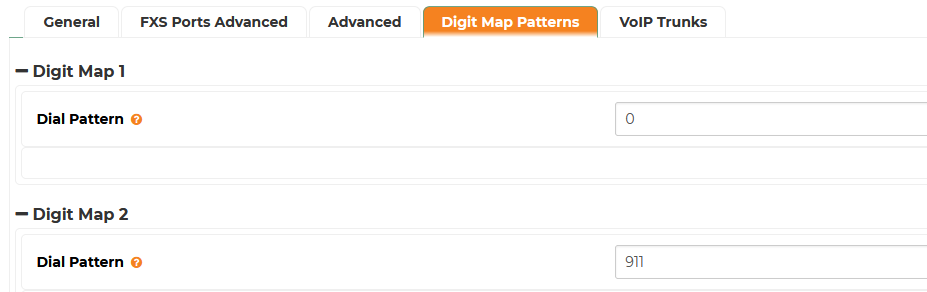
Digit Map Patterns Tab
- Make any changes to the digit map for the gateway
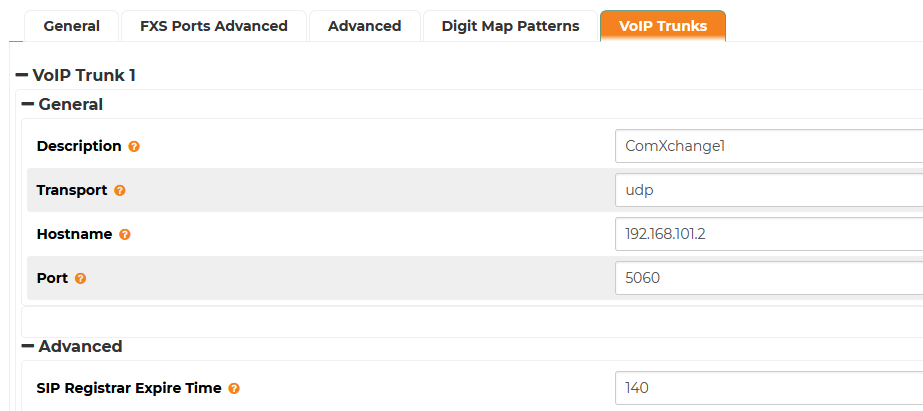
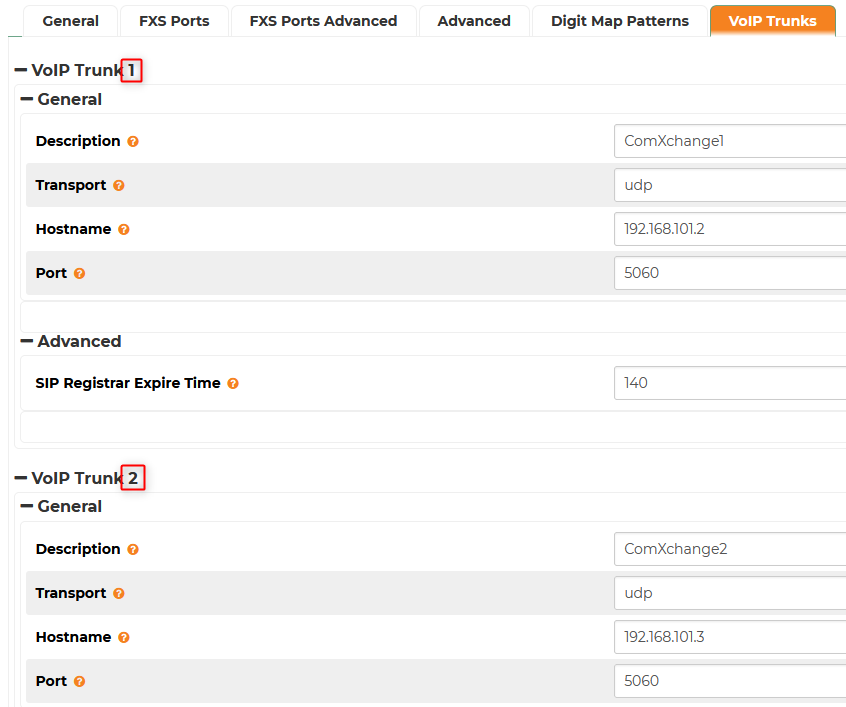
VoIP Trunks Tab
Note: if you are using a failover option you will set up Voip Trunk 2 with the secondary PBX information
Add a Gateway Configuration
After setting defaults you can add a gateway. This can be done using the Add Gateway Wizard or the Add Gateway button.
Which you choose will depend on the range of extensions you are adding to the gateway.
If your Ports are all or mostly in order and all either guest or staff extensions using the gateway wizard will work well.
If you have a mix of staff and guest extensions or extensions that are not in order you may want to consider using the Add Gateway option.
Add Gateway Wizard
In the Provision Gateway module use the Add Gateway Wizard Button to quickly provision all or a portion of the ports of a ComXchange FXS gateway.
Navigate to Core Configuration > Provision Gateways
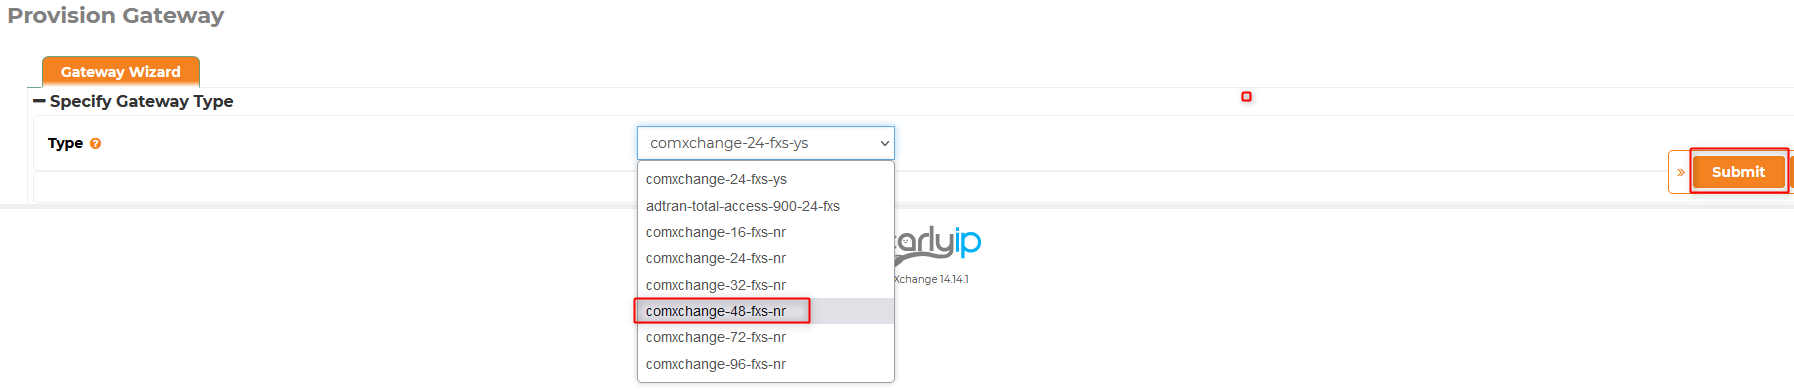
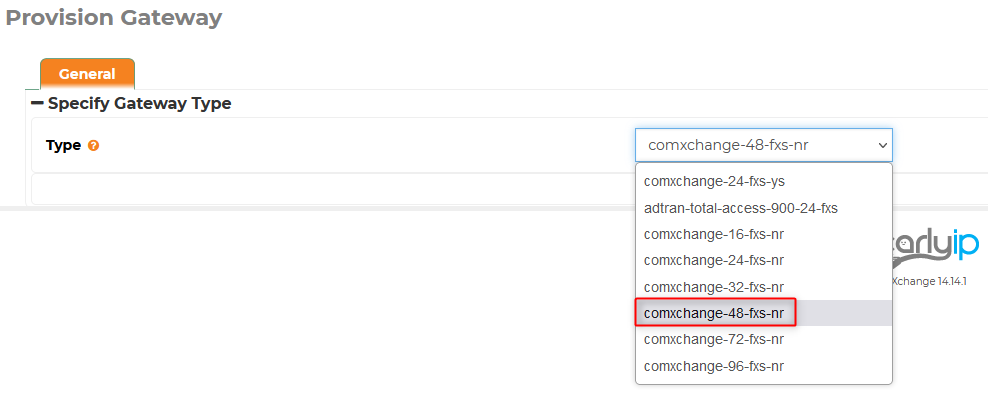
- Click on the Add Gateway Wizard button
- Choose the Gateway Type
- Click Submit
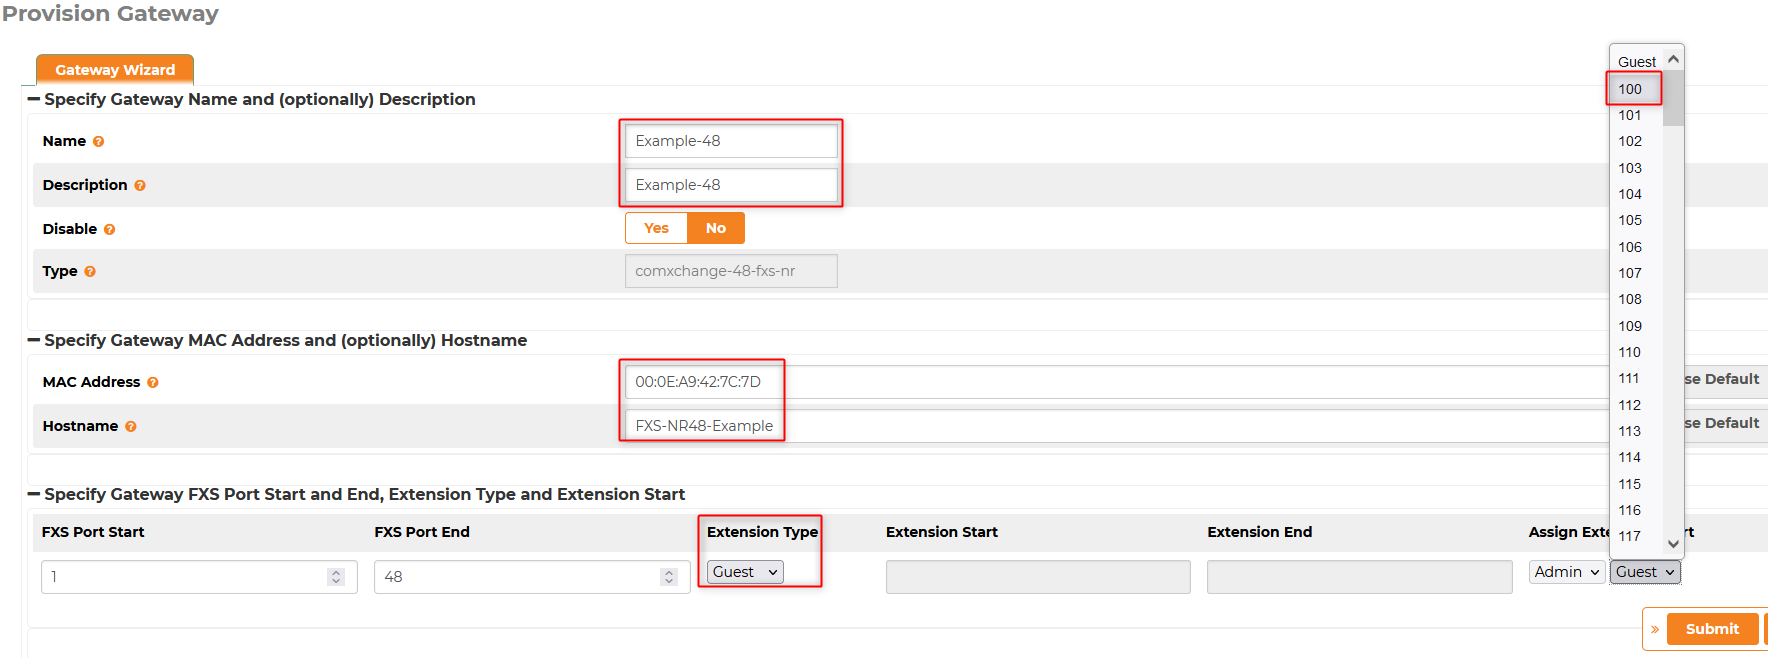
In the Wizard Fill in the following fields, choose the ports, and the starting extension
- Choose a unique Name for the configuration
- Add a Description (optional), will default to the name of the Gateway
- You can disable the gateway configuration on creation
- Disabling a configuration on creation will not create a tftp file for the gateway to download
- Disabling a configuration after creation will remove the tftp file for the gateway
- Fill in the gateways MAC Address (must be unique for each configuration)
- Choose a hostname for the gateway configuration
- Choose the beginning port and the ending port and the Extension type
- Choose the starting extension from the assign extension dropdown
Your gateway will now appear in the list of gateways and you will be able to edit individual ports, etc
Add Gateway
You can create a configuration using the Add Gateway button. This will open a form where you can add port information individually as well as make other changes to an individual gateway .
Navigate to Core Configuration > Provision Gateways
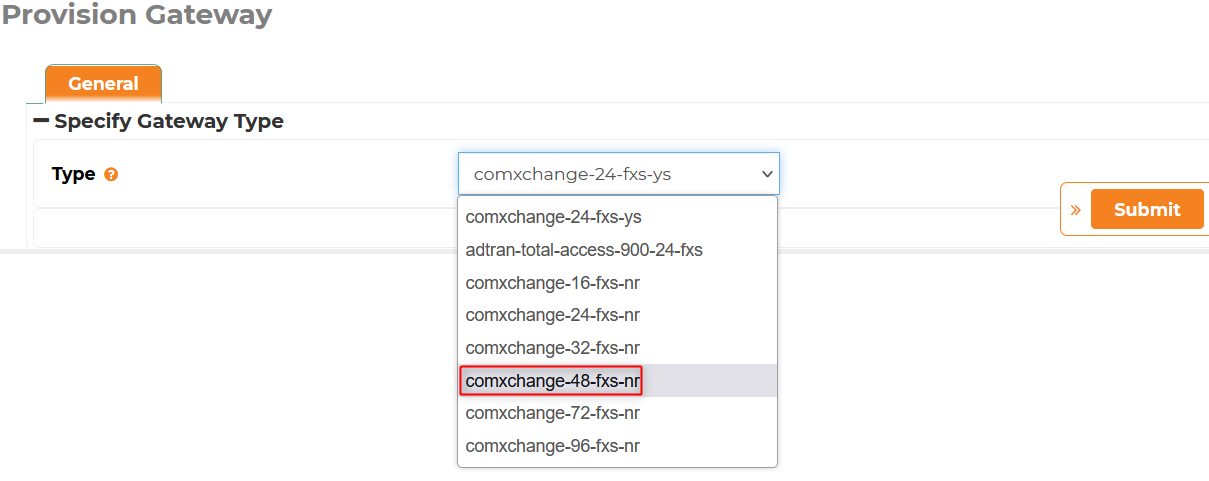
- Click on the + Add Gateway button
- Choose the Gateway Type
- Click Submit
General Tab
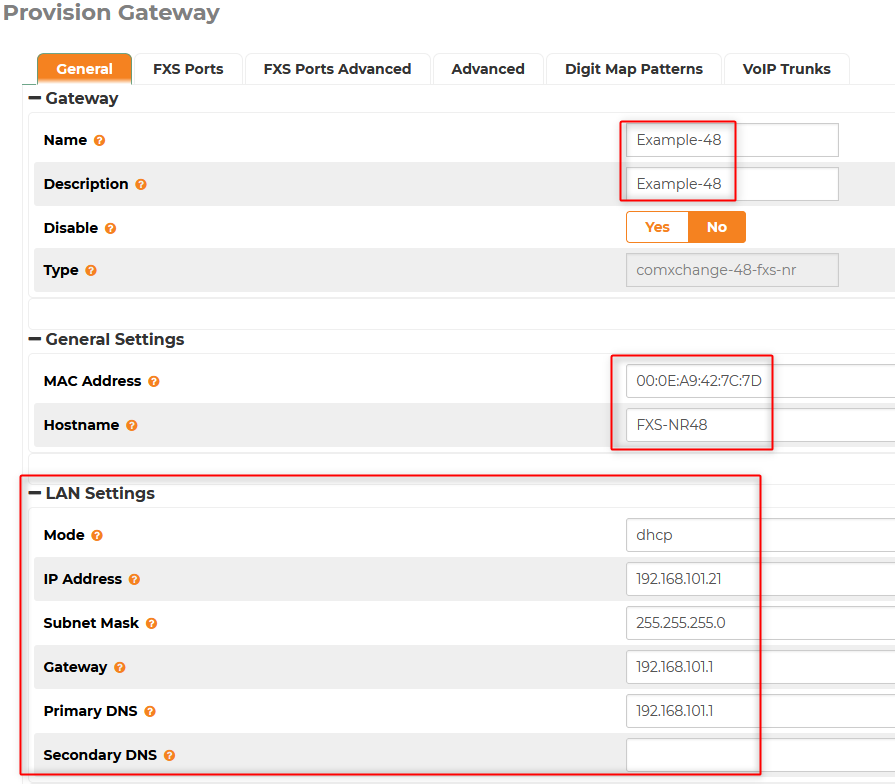
- Choose a unique Name for the configuration
- Add a Description (optional), will default to the name of the Gateway
- You can disable the gateway configuration on creation
- Fill in the gateways MAC Address (must be unique for each configuration)
- Choose a hostname for the gateway configuration
- Make any changes to the network settings (optional)
Note: If the choice is made to use a static IP you will need to change the Provision Method to server in the Advanced tab so the gateway or the gateway will not download configuration updates
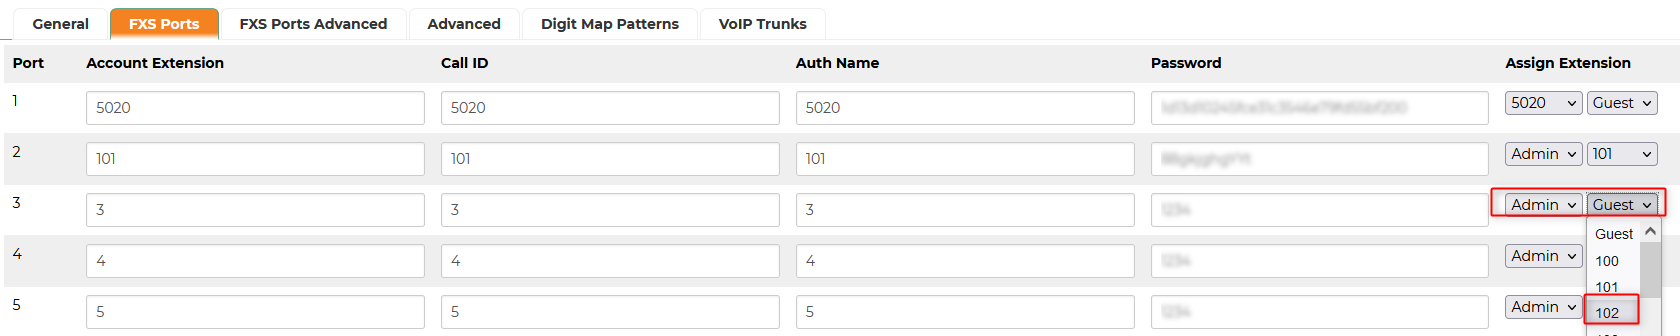
FXS Ports Tab
- Choose the extension from the Admin or Guest drop down for each port
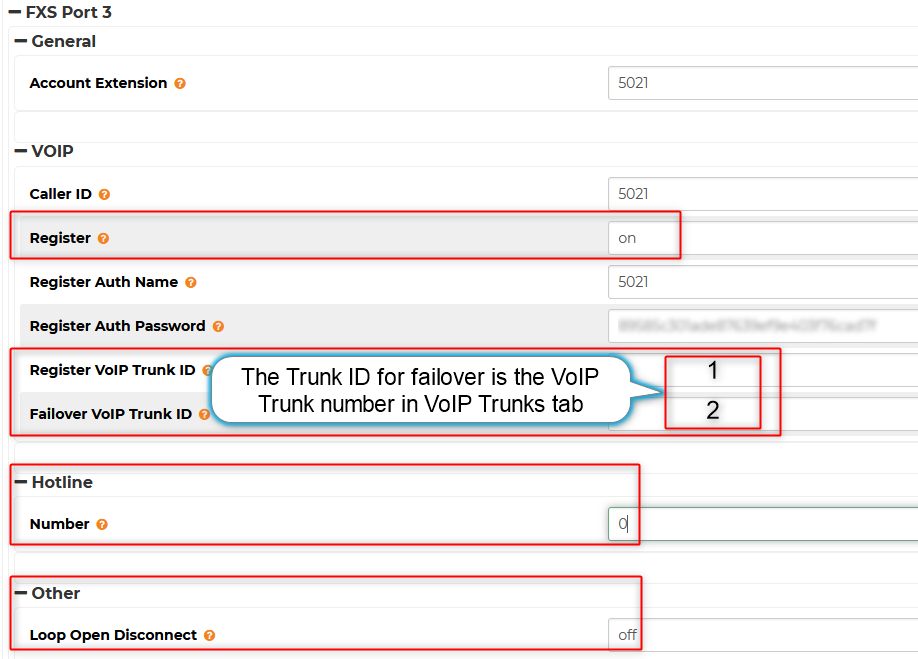
FXS Ports Advanced Tab
- Use this tab to make changes to an individual port, turn off registration, add a hotline number and turn on Loop Open Disconnect
- The advanced tab is where you can set the gateway failover configuration for each port
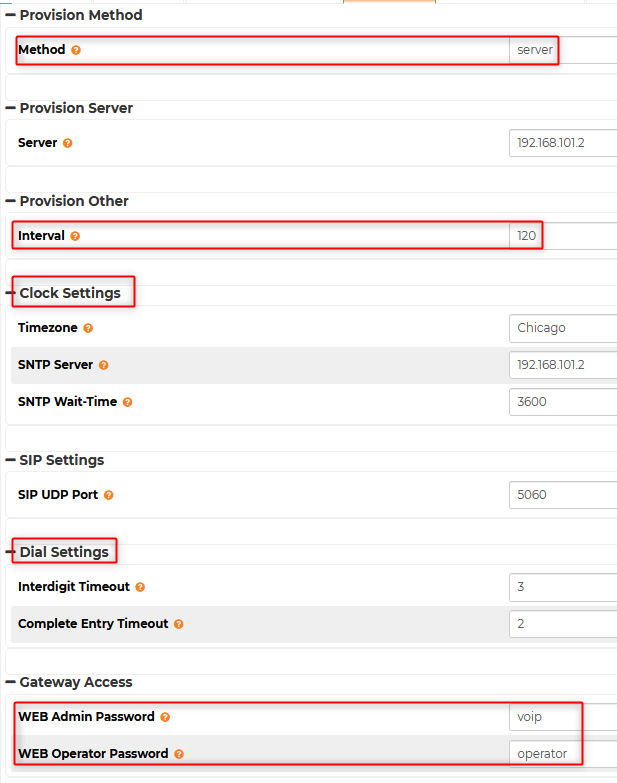
Advanced Tab
In the Advanced tab you can make setting changes for the individual gateway that would include Clock Settings, Interdigit Timeout, and the Interval the gateway looks for configuration changes.
- Provisioning Method - dhcp by default but change to server if using a static IP address
- Interval - is how often the gateway looks for the configuration in seconds. (120 by default)
- You can change this to a longer interval like 600 after initial configuration is complete so the gateway looks for configuration changes less often
- Clock settings – usually set in the defaults but can be changed per gateway
- Dial Settings - usually set in the defaults but can be changed per gateway
- Gateway Access Passwords - change the default password for the Admin and Operator passwords
Digit Map Patterns Tab
The digit map patterns can be set in the gateway defaults before creating a configuration however they can be added or changed here when using the Add Gateway option.

VoIP Trunks Tab
VoIP Trunk settings can be changed here for individual gateways when using the Add Gateway option. This is where you will set the secondary server if using a failover system.
Editing the Configuration
Once the Configuration has been created it will appear in the list of gateways where you can edit individual ports which will have the same functionality to make changes as the Add Gateway section above.
- Click on the edit action icon

- You can then make changes to the system settings or port settings using the appropriate tab and save the changes. The gateway will be updated the next time the gateway reads the configuration file.

Trouble Shooting
Below are some of the tools you can use to troubleshoot issues with gateways not auto provisioning
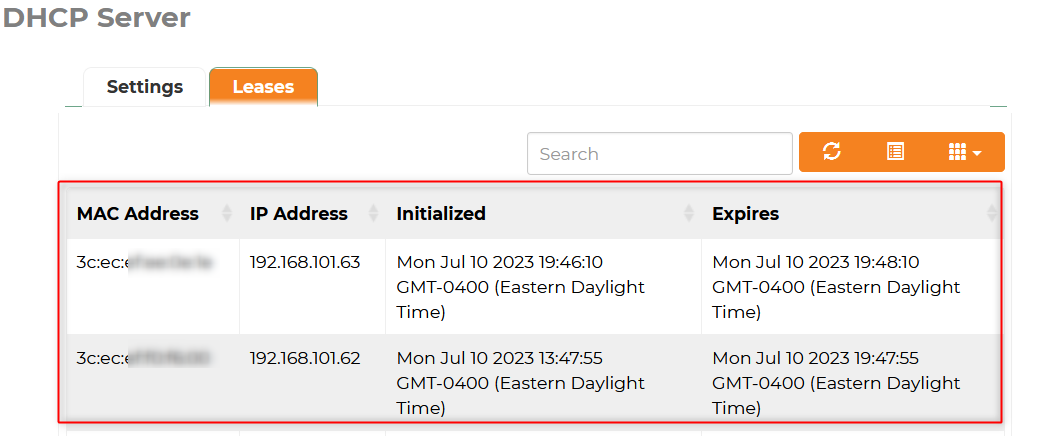
ComXchange DHCP Logs
Navigate to Admin > System Settings - DHCP
View the leases tab to see if the gateway is getting an IP address (if set to DHCP)
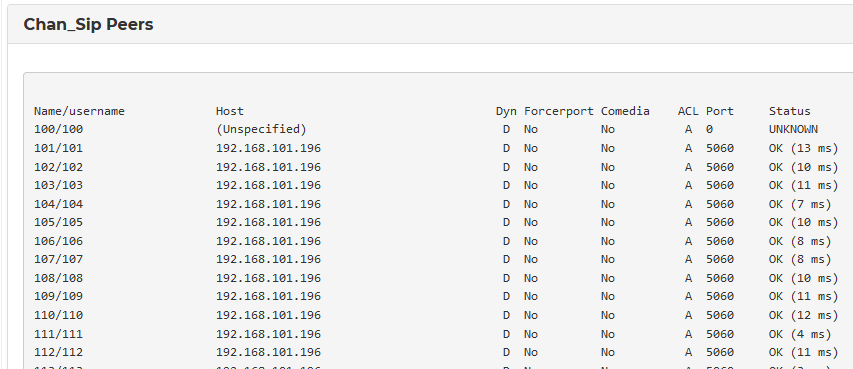
Asterisk Peers
Navigate to Reports > Asterisk Info - Peers
Look for the guest extensions that are assigned to the gateway to see if they are registered. Note they will be registered to the same IP address
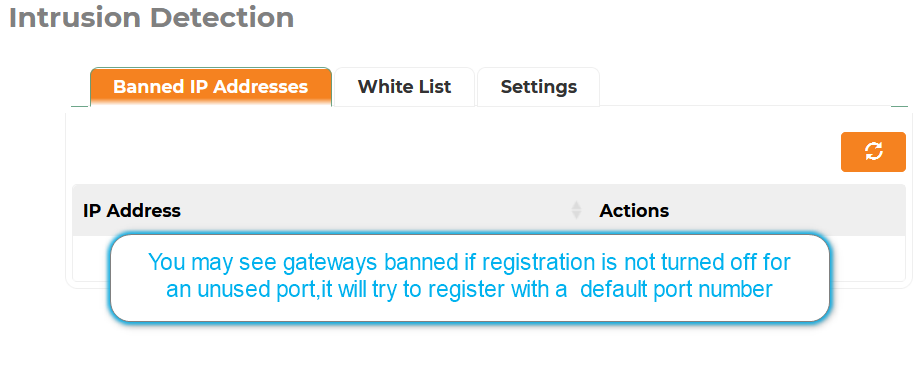
Intrusion Detection
Navigate to Admin > System Settings - Intrusion Detection
- You may find a gateway has been banned if the registration is not turned off a port that is not used as it will try to register with a default port number and password
- You can turn off the registration for these ports or add a whitelist for the gateways IP address
Gateway Tools for Troubleshooting
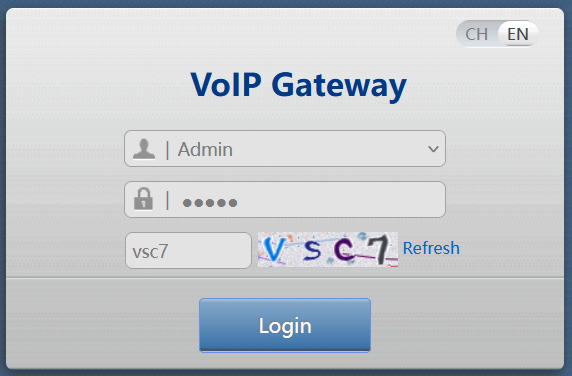
If necessary you can verify that the gateway is pulling a configuration by logging directly into the gateway web GUI
Logging In to the gateway
Note:You can find the IP address by looking for the Mac Address in the ComXchange DHCP Leases or you can dial ## from a connected phone to obtain the current IP address of the gateway
- Manually set a static IP on your computer in the 192.168.102.0/24 network range
- For example, IP: 192.168.2.205 Subnet Mask:255.255.0.0
- Open a web browser and enter the IP address of the gateway in the address bar
- Log into the web GUI. Default Username is "Admin" and the initial password is in a sticker in the bottom of the device for older devices. If the sticker does not list a Password the device will have a default password of "clearly".
- You can also log in with a restricted username operator with the password of operator or the password set in the provisioning tool
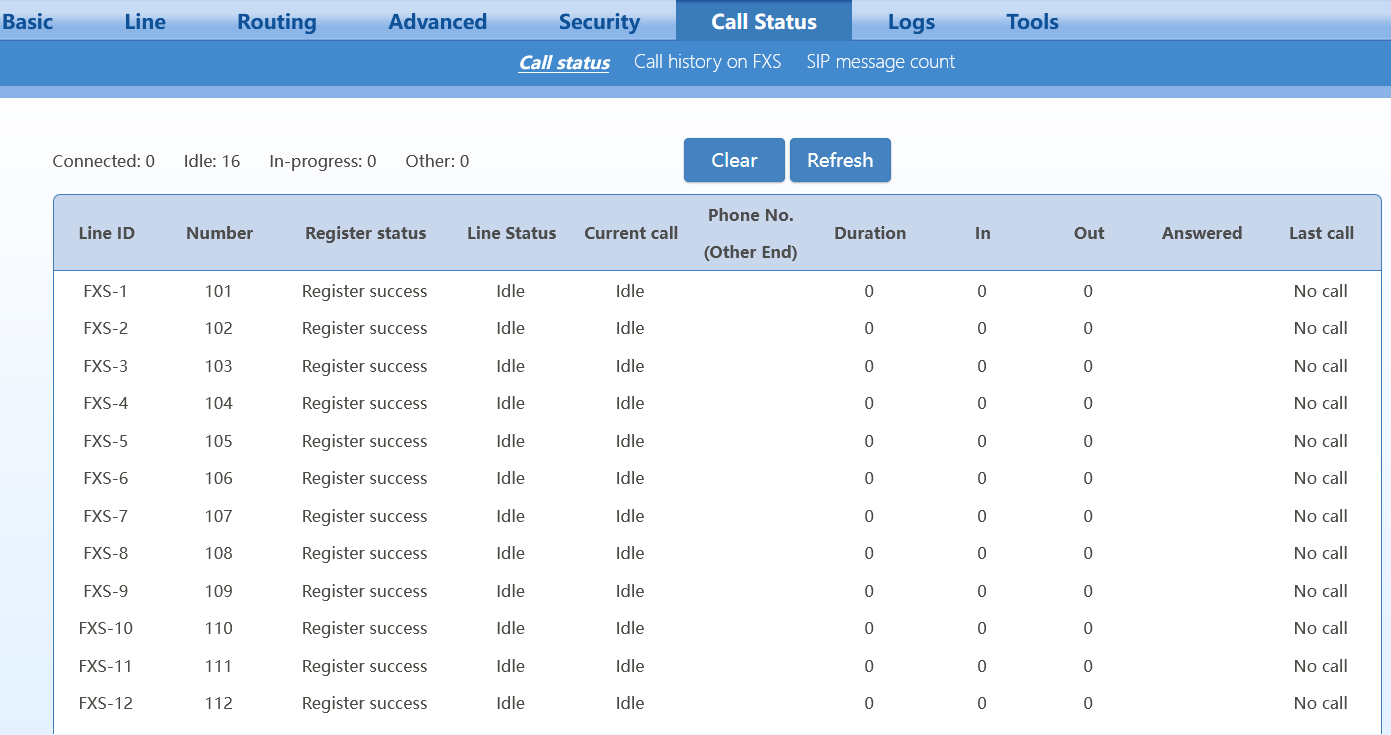
Call Status
Click on Call Status > Call status
- Shows Line status and stats since last reboot.
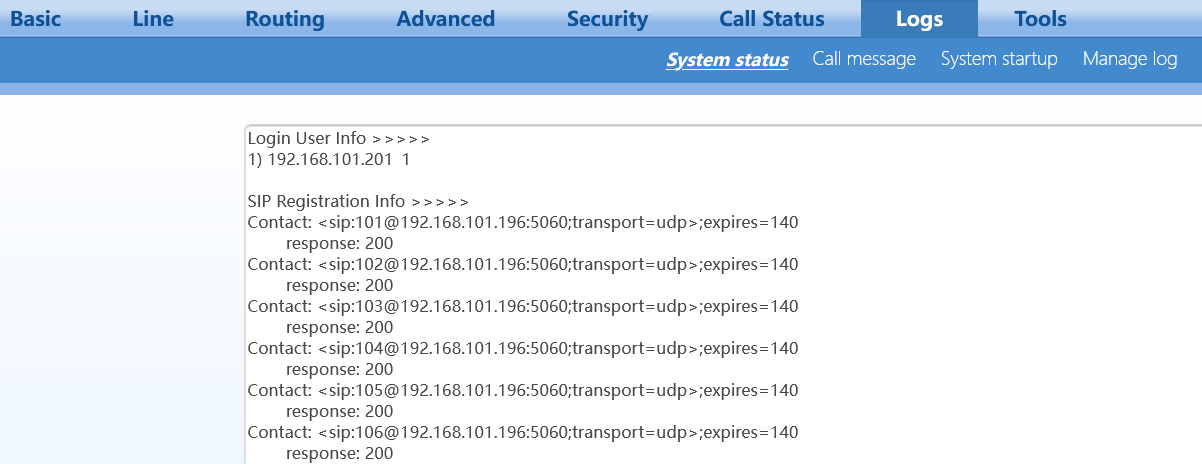
System Status
- Click on Logs > System status
- Shows Login information, SIP registration and current calling information
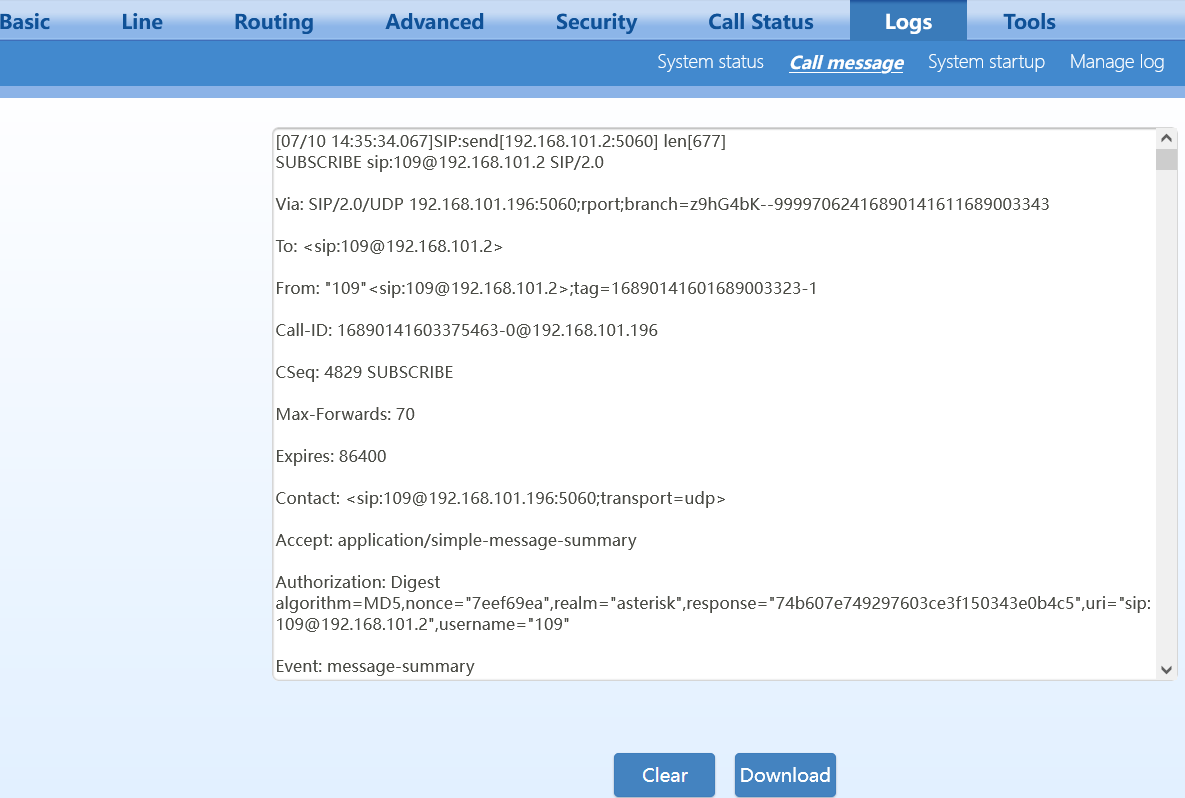
Call Messages
- Click on Logs > Call messages
- ComXchange ATA Quick Start Guide
- Shows Call information including SIP messages
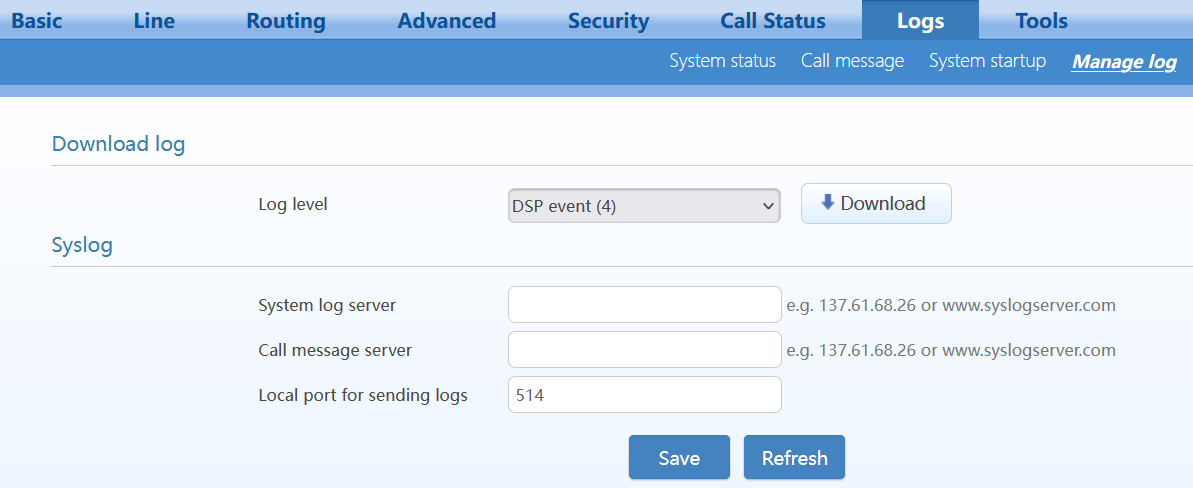
- Click on Logs > Manage logs
- Logs can be downloaded or be configured to be sent to a syslog server.
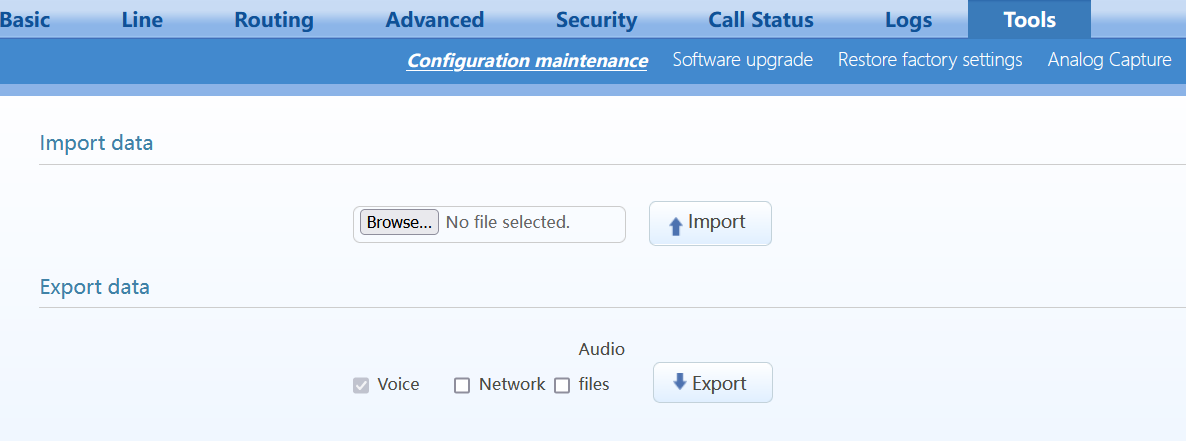
Configuration Maintenance
- Click on Tools > Configuration Maintenance
- Configurations Can be Exported and downloaded.
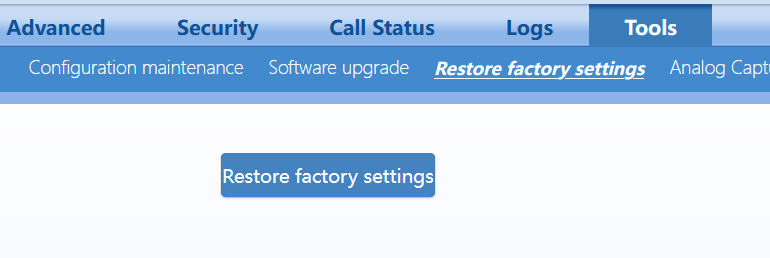
Restore Factory Settings
- Click on Tools > Restore factory settings
- You can use this option to restore the gateway to factory settings. Restoration takes effect after the system is restarted
TO RESET to factory default without logging into the gateway: Press and hold the RST button on the back panel for at least 10 seconds then release. Wait at least a minute or two for lights to stabilize after releasing the RST button, then briefly remove power cord to restart the gateway.
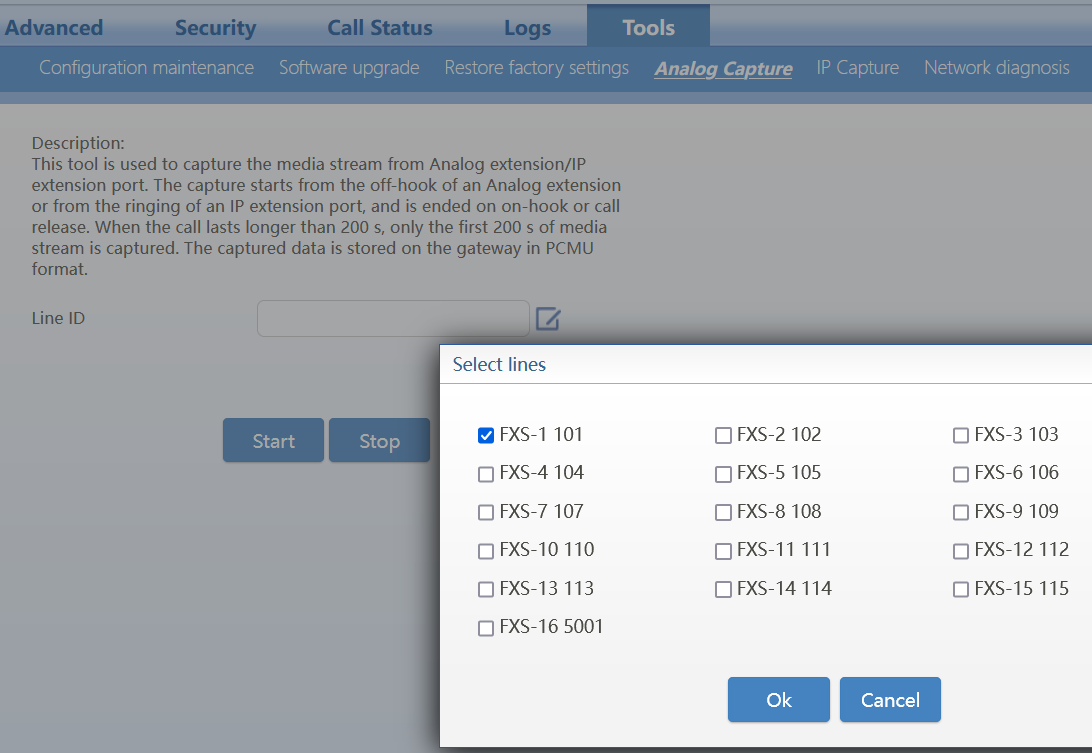
Analog Capture
Click on Tools > Analog Capture
You can choose the port(s) you want to capture and download
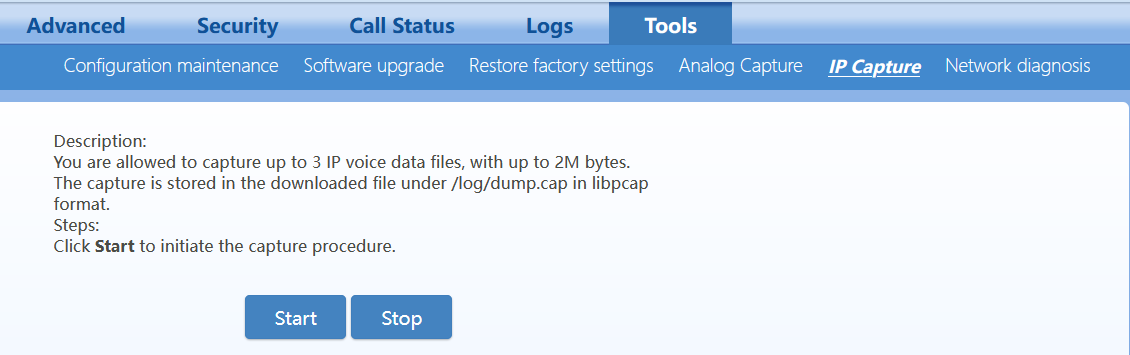
IP Capture
- Click on Tools > IP capture
- You can capture up to three IP voice data files up to 2Mb each. The capture is stored in the downloaded file under /log/dump.cap in libpcap format
Network Diagnosis
- Click on Tools > Network diagnosis
- Enter an IP address and Click on start to run a ping test from the gateway.
 Uploading ....